
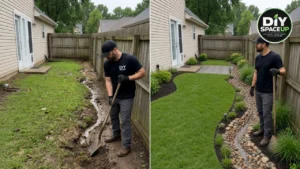

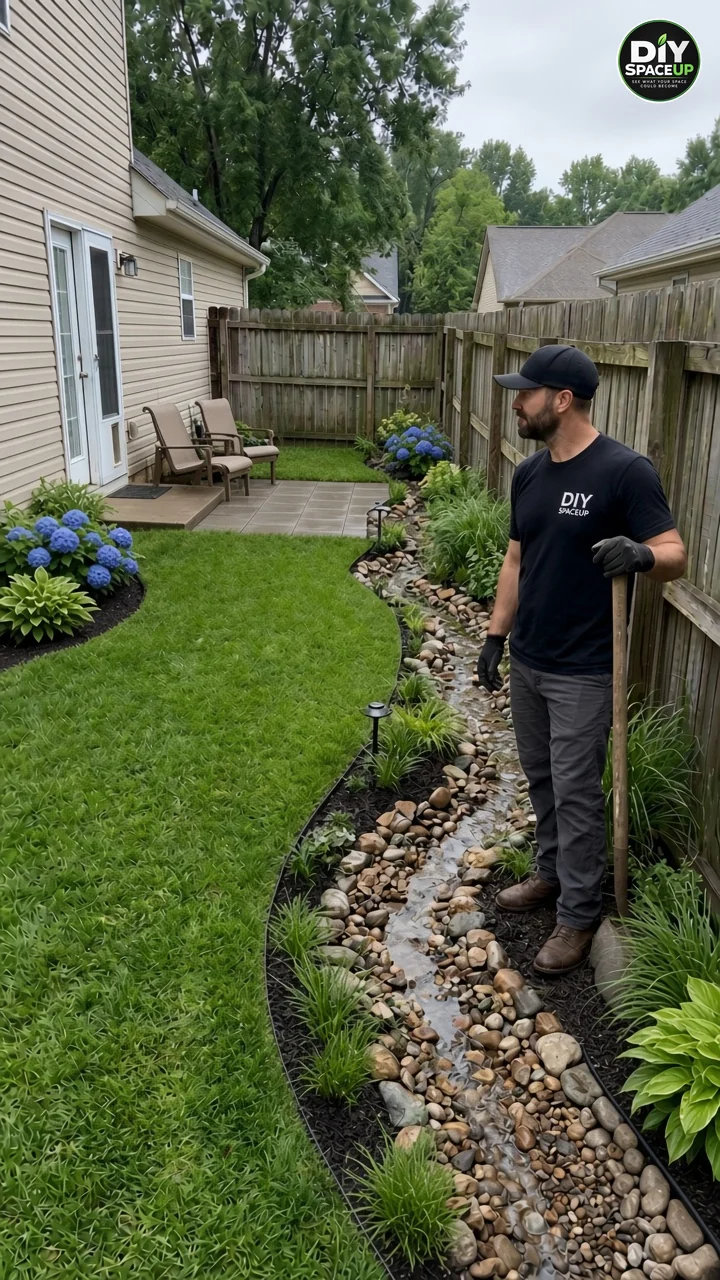
For years, every heavy rain told the same story in this narrow side yard. Roof water and runoff from the lawn ran straight to the fence line, cut a muddy rut beside the boards and carried soil and grass seed with it. Watching that little river form after each storm showed where the water actually wanted to go. It needed a planned path, not more patching. This guide shows how to turn a fence-line erosion channel into a side yard dry creek bed: a shallow, stone-lined swale that collects roof water, carries it at a gentle slope to a safe outlet on your own lot and stays good-looking between storms, with garden beds, a repaired lawn, a small paver seating pad and path lights around it.
Important: The original social post is an AI-generated renovation concept, and the images in this article are AI illustrations too. They show the look and a realistic build order, not a tested installation. We corrected the reel’s shortcuts using university extension, conservation district and building-code guidance, which is linked throughout. Real drainage depends on your soil, slope, utilities, local rules and neighbors. The dimensions below are planning ranges and the costs are estimates, not quotes.
Affiliate Disclosure: As an Amazon Associate I earn from qualifying purchases. Product links in this article may earn a commission at no additional cost to you. Use tools you already own when they suit the work.
Contents
- Side Yard Dry Creek Bed Overview
- What the Reel Skipped and How We Fixed It
- Before You Dig: 811, Neighbors and Setbacks
- Where the Water Goes: Outlet Options
- Materials and Tools
- Step-by-Step: Build It in the Right Order
- Weed Fabric, Mats and Liners: The Honest Answer
- Estimated Cost and Time
- Safety Checklist
- Common Mistakes to Avoid
- Maintenance After Storms
- Frequently Asked Questions
Side Yard Dry Creek Bed Overview
A dry creek bed, also called a rock-lined swale, is a shallow channel that stays dry most of the time and carries water only during and after rain. The Santa Cruz County water-wise garden guide describes it as a swale that uses rounded rock instead of grass to convey and infiltrate runoff, and it calls for non-woven geotextile under the rock. In this side yard the channel follows the old erosion path along the fence, but it is reshaped, graded and lined so the water moves calmly instead of carving a new rut.
| Component | What it does | Key detail |
|---|---|---|
| Downspout inlet | Brings roof water into the head of the creek | Solid pipe or extension, splash stones at the discharge point |
| Shallow dish channel | Carries runoff along the fence line | Wider than deep; typical fall about 1–2% |
| Non-woven geotextile | Separates soil from stone | Permeable filter fabric, not plastic sheeting |
| Mixed river rock and boulders | Armors the bed and looks natural | Small stone in the low line, boulders on banks and bends |
| Safe outlet | Releases water where it can soak in or drain away | On your own lot, lower than and away from the house |
| Landscape edging | Keeps stone out of the lawn and grass out of the stone | Staked along the lawn side |
| Paver seating pad | Small, dry spot for two chairs | Compacted base, bedding sand, pitched away from the house |
| Plants, mulch, solar lights | Hold the banks and finish the space | Mulch and lights set back from the flow line |
What the Reel Skipped and How We Fixed It
The video goes from mud to a finished creek in a few seconds. In it, river stones go straight onto wet soil. There is no visible inlet from the downspout, no outlet, no edging and no base under the patio. Commenters spotted it right away and asked where the water goes and whether there is a weed membrane. Here is what we changed.
| In the reel | Professional correction |
|---|---|
| Digging starts with no layout | Call 811, confirm property lines and mark a sloped route with stakes and string |
| Downspout lies loose at the corner | Connect it through an adapter and solid pipe to the creek head |
| No visible outlet | Daylight to a lower spot, a pop-up emitter, a rain garden, or a dry well where a perc test allows it |
| Narrow rut, depth unknown | Shallow dish, wider than deep, graded to a steady fall |
| Stone dumped on mud | Non-woven geotextile first, then mixed stone sizes |
| Gravel spills into the lawn | Landscape edging between stone and turf |
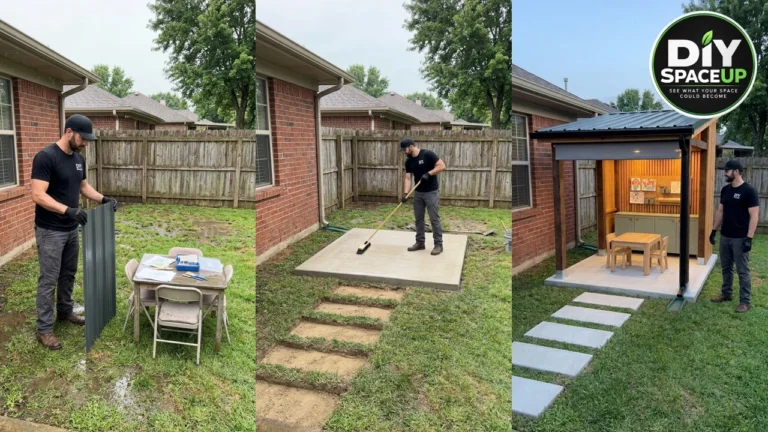
| Pavers appear on soil | Compacted aggregate base, bedding sand and a 2% pitch away from the house |
| Mulch and lights crowd the stream | Buffer of about a foot from the flow line |
Before You Dig: 811, Neighbors and Setbacks
Contact 811 a few business days before you dig (state lead times vary) so the utility owners mark buried lines. Side yards often hide gas, electric, cable and irrigation runs. Hand-dig carefully near the flags. Virginia Tech’s homeowner swale fact sheet also says to check local setback, right-of-way and easement rules along property lines. Its general guidance is about 10 feet from foundations, 50 feet from septic fields and 100 feet from wells. It flags slopes steeper than about 4% as erosion-prone.
Two rules are non-negotiable. First, the water must stay on your property and end at your own outlet. Never aim a swale at a neighbor’s yard or under the shared fence. Many places treat redirecting concentrated runoff onto another lot as a legal problem, not just a courtesy issue. Second, keep the ground sloping away from the house. The International Residential Code (section R401.3, summarized in this ICC code basics sheet) calls for a 6-inch fall within the first 10 feet. Where a lot line or fence makes that impossible, the code allows water to be directed to swales or drains instead. Swales within 10 feet of the foundation are sloped at least 2%. Local amendments vary, so confirm with your building department.
In a narrow side yard the fence is often on or near the property line. Keep the channel a short buffer away from the fence posts so you do not undermine their footings. Don’t pile soil or stone against the fence boards. If your HOA or town requires a permit or approval for grading changes, get it before excavation.
Where the Water Goes: Outlet Options
A dry creek bed is only as good as its outlet. Pick the outlet for your side yard dry creek bed before you dig, because it sets the low point and the whole grade works backward from it.
| Outlet | Best when | Watch out for |
|---|---|---|
| Daylight to a lower spot | Your lot falls toward the front yard, a street-side swale or another approved collection point | Must stay on your property and not erode the landing area; armor it with stone |
| Pop-up emitter | Roof water travels in solid pipe and needs a tidy, flush release in the lawn | Needs a lower discharge point than the inlet; keep the lid clear of grass and debris |
| Rain garden | Soil drains reasonably well and you want water to soak in near the outlet | Size it to the roof or lawn area feeding it, and give it an overflow route |
| Dry well | Soil passes a perc test and there is no lower spot to daylight to | Never over fill soils or septic areas; keep it away from foundations |
Does it just leach into the soil? Only if the soil drains. A stone swale lets some water soak in along the way. The Santa Cruz Resource Conservation District’s dry creek bed brochure notes that soils infiltrating less than about 2 inches per hour may need an underdrain. It also says any section holding water longer than 24 hours needs an overflow to a safe location. A dry well is a buried stone or chamber reservoir that should only go where a test proves the soil can absorb the water. New Hampshire’s homeowner dry well guide gives a simple test. Dig a 12-inch hole, fill it, let it drain, then refill it. Measure the drop over 15 minutes and multiply by four to get inches per hour. Look for at least about 1/2 inch per hour and complete drainage within 24 hours. If the hole fills with groundwater or still holds water the next day, choose a different outlet. Many towns also regulate dry wells, often with setbacks of about 10 feet from foundations and 5 feet from property lines, so check yours.
Moving roof water underground first? Our guide to underground downspout drainage covers pipe sizing and burial. If the whole yard is wet, a muddy backyard rain garden can serve as the outlet basin.
Materials and Tools
Quantities depend on your creek’s length, width and depth. Measure the route and order stone by the ton from a local landscape yard. That is usually cheaper than bags.
- Layout: wooden stakes, mason’s string, marking paint, a tape measure and a Stanley Aluminum Line Level (3-Pack) to read the fall on a taut string.
- Digging: flat spade, round-point shovel, tarp for spoil, wheelbarrow, a long straight 2×4 and a 4-foot level.
- Inlet: downspout adapter, solid (non-perforated) 3- or 4-inch drain pipe and fittings, flat splash stones.
- Outlet: an NDS 430 Pop-Up Drainage Emitter with Elbow and Adapter if your outlet is piped, or extra stone for a daylight splash pad or rain garden.
- Separation: Super Geotextile 4 oz Non-Woven Geotextile Fabric. The listing comes in 3-, 4- and 6-foot widths, so choose one that covers your channel’s full curved width plus about 6 inches per side. Pin it with Growers Solution 6-Inch 11-Gauge Galvanized Landscape Staples.
- Stone: washed 3/4- to 1-1/2-inch gravel for the low line, 2- to 6-inch river rock for the bed, and 12- to 24-inch boulders for banks and bends.
- Edging: EasyFlex No-Dig Landscape Edging Kit (100 ft) or steel or aluminum edging from a local supplier. Buy extra spikes, which reviewers say the kit runs short on.
- Paver pad: crushed-stone base aggregate, concrete sand, pavers, paver edge restraint and a hand tamper or rented plate compactor.
- Finish: plants suited to wet–dry swings, shredded hardwood mulch, grass seed or sod, and lights such as the BITPOTT Solar Pathway Lights (8-Pack, Warm White).
- Protection: work gloves, safety glasses, sturdy boots, and help for lifting boulders.
Step-by-Step: Build It in the Right Order
Step 1: Watch a Storm, Then Lay Out the Route
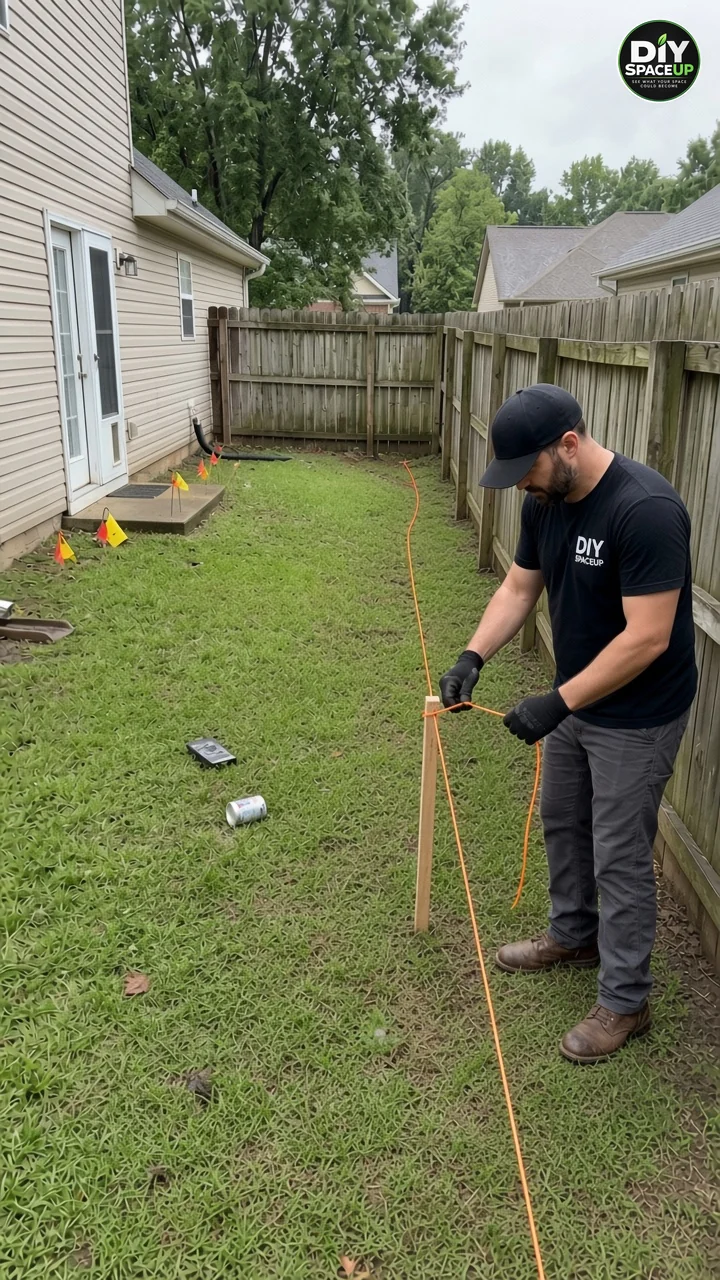
During a rain, note where water enters the side yard, where it pools and where it naturally wants to exit. The old rut is a useful clue, not the final design. Set stakes every 6 to 10 feet along a gentle curve, a little in from the fence posts, and pull a taut string. With the line level, set the string to the target fall. For a 40-foot run at 1%, that is about 5 inches of total drop. At 2% it is about 10 inches. Extension and stormwater guides commonly recommend 1–2% for swales and caution against going much steeper than 3–4% without check dams. Measure down from the string to set your depths.
Step 2: Dig a Shallow Dish, Not a Ditch
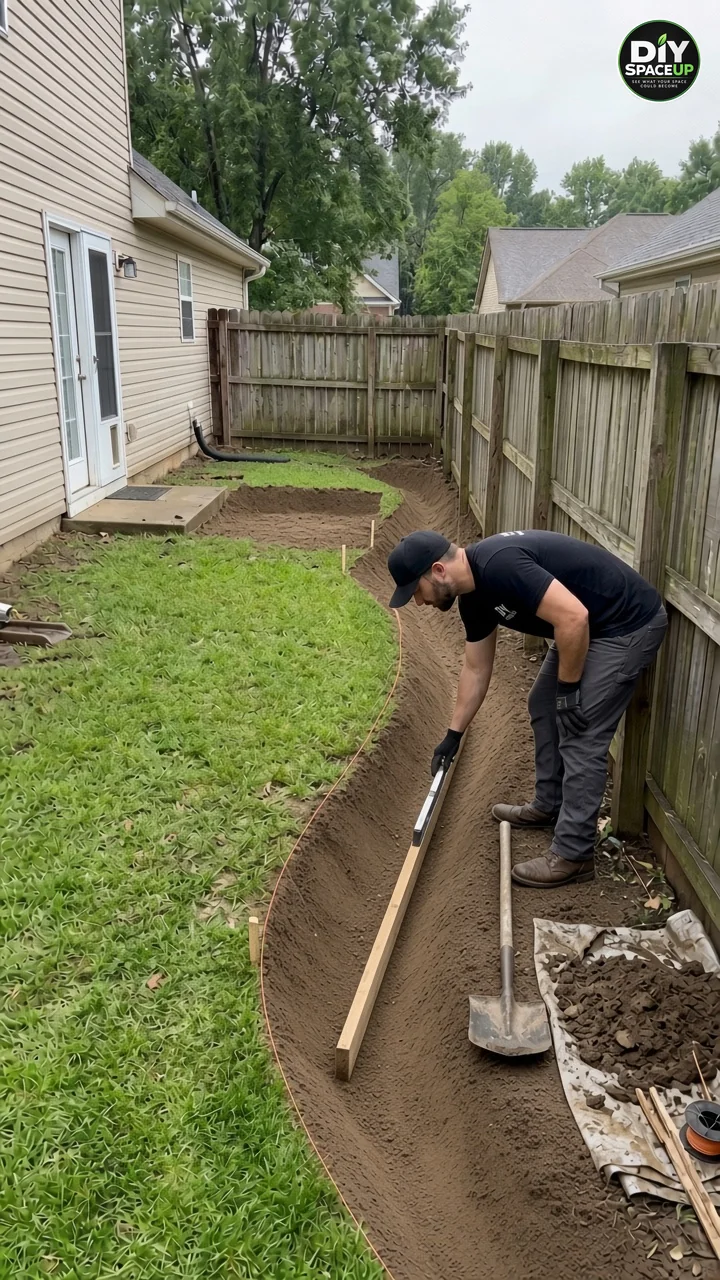
Cut the sod cleanly and set it aside for patching. Dig the channel as a wide, shallow dish. In a narrow side yard, plan on something like 2 to 3 feet wide and roughly 6 to 10 inches deep at the center, with gently sloping sides. Wide and shallow spreads and slows the water, while narrow and deep speeds it up and scours. Keep the bottom smooth and keep the fall steady using your string and a level on a long 2×4. Avoid compacting the native soil in the bed if you want some infiltration. Keep spoil on a tarp, never against the house or fence.
Step 3: Connect the Downspout Inlet
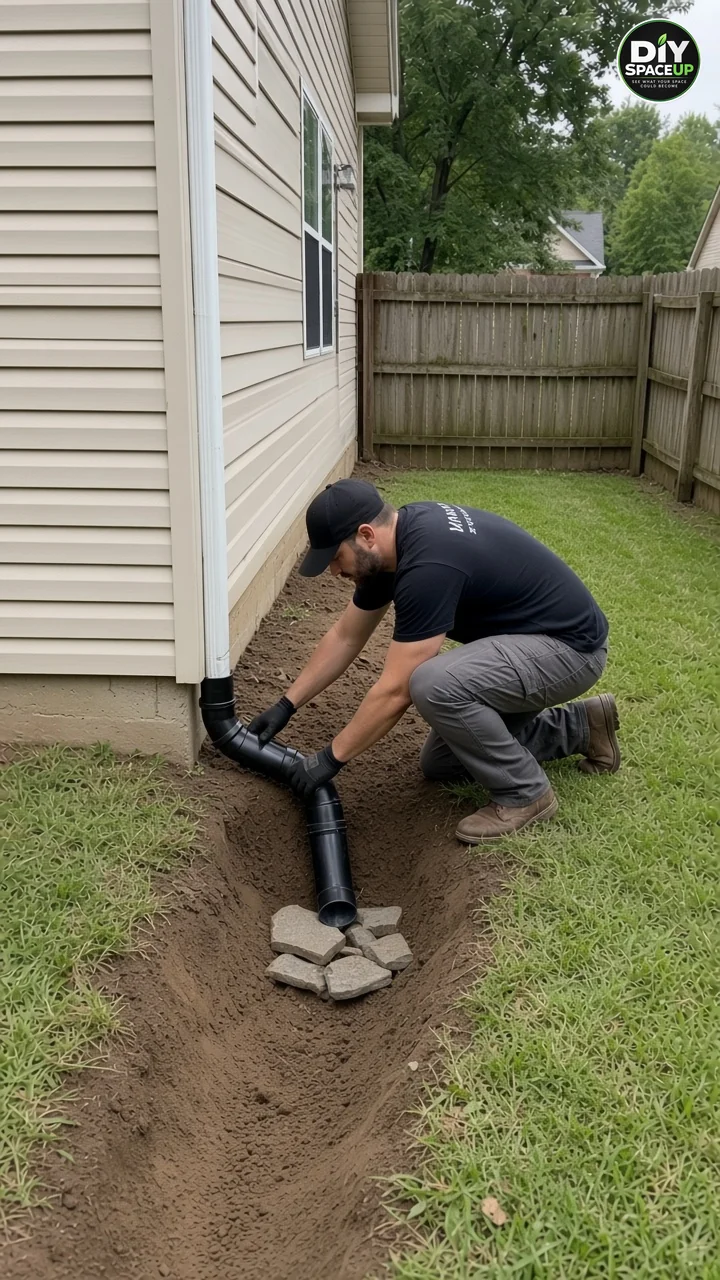
In the reel, the black corrugated extension just lies at the corner. Connect the downspout through an adapter to solid pipe, not perforated pipe, so the roof water arrives at the creek head instead of soaking in beside the foundation. Slope the pipe trench downhill away from the house. About 1/8 to 1/4 inch per foot is a common minimum, but follow your pipe maker’s guidance. Where the pipe empties into the creek, set flat stones as a splash apron so the discharge cannot dig a hole. If you can’t pipe it, a well-anchored above-ground extension or a stone-lined catch area at the downspout also works, as long as the discharge lands well away from the foundation.
Step 4: Build the Outlet Before the Stone
Finish the low end now, while it is easy to adjust grade. For a daylight outlet, widen the end into a stone-armored splash basin on your own lot. For a pop-up emitter, run solid pipe from a catch point to a spot lower than the inlet, set the emitter flush with the lawn and leave its lid free to rise. For a rain garden or dry well, build it to the size and perc-test results you worked out earlier. Then run a hose into the creek head and watch. Water should travel the whole length and leave at the outlet without pooling mid-channel.
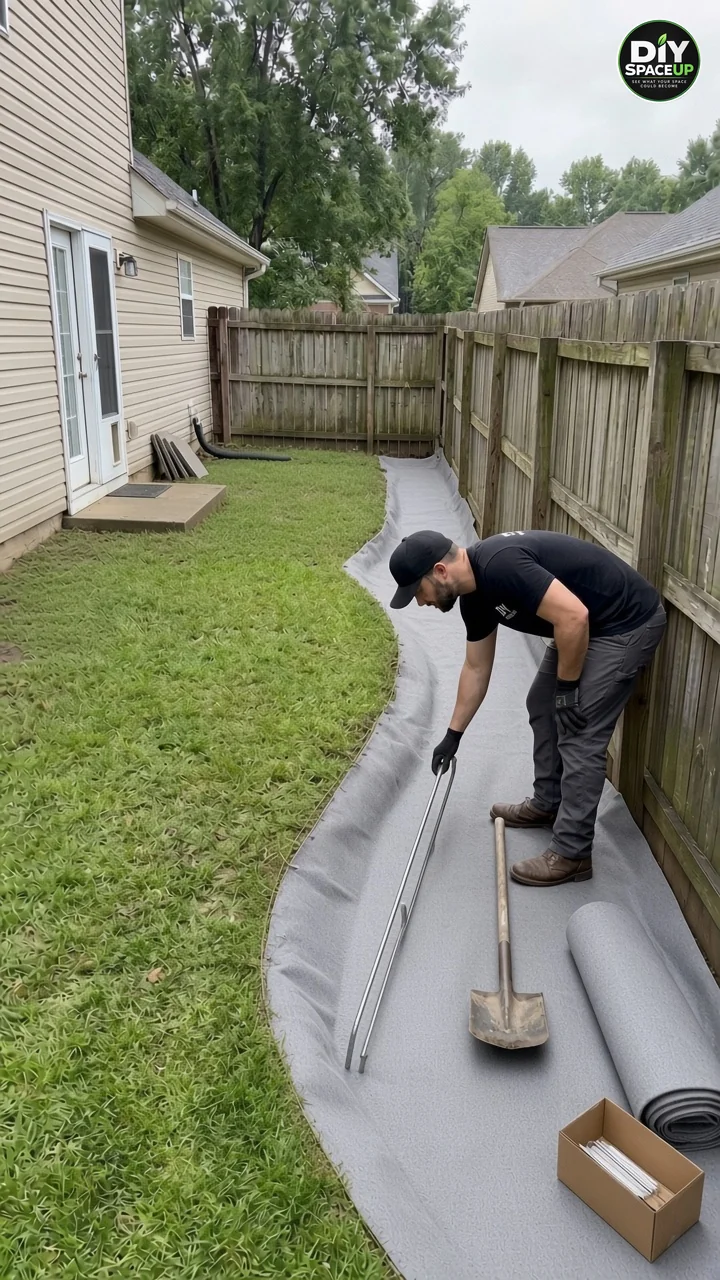
Step 5: Line the Dish with Non-Woven Geotextile
Roll non-woven geotextile (filter fabric) over the bottom and up both sides, extending a few inches past the edges so it tucks under the sod line and edging. Overlap seams about 12 inches with the upstream piece on top, like shingles, so flowing water slides over the laps instead of lifting them. Pin the edges, seams and curves every few feet with landscape staples. This permeable felt-like fabric lets water pass while keeping soil from mixing into the stone and helping limit settling, which is why conservation districts specify it under rock. Plastic sheeting is a different material: it traps water, can create a bathtub effect and is not a substitute.
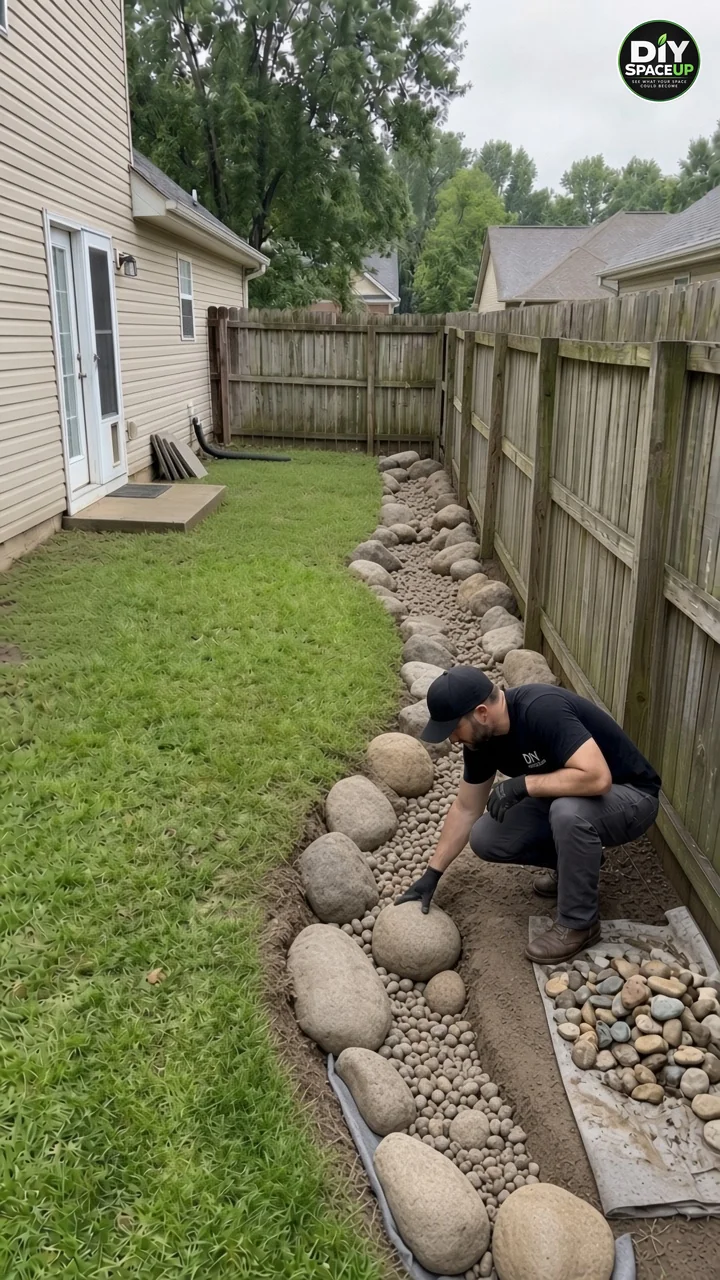
Step 6: Place Mixed Stone, Big Rocks First
Set the boulders first. Place them on the banks and at the outside of each bend, where moving water pushes hardest, and bury each one about a third of its height so it looks settled rather than perched. Next, spread washed gravel in the low line, then fill the bed with 2- to 6-inch river rock in random sizes, nesting stones together so fabric doesn’t show. Mixed sizes lock together and resist washing; a single uniform size rolls. Wear gloves, lift with your legs, and get help or use a dolly for anything heavy.
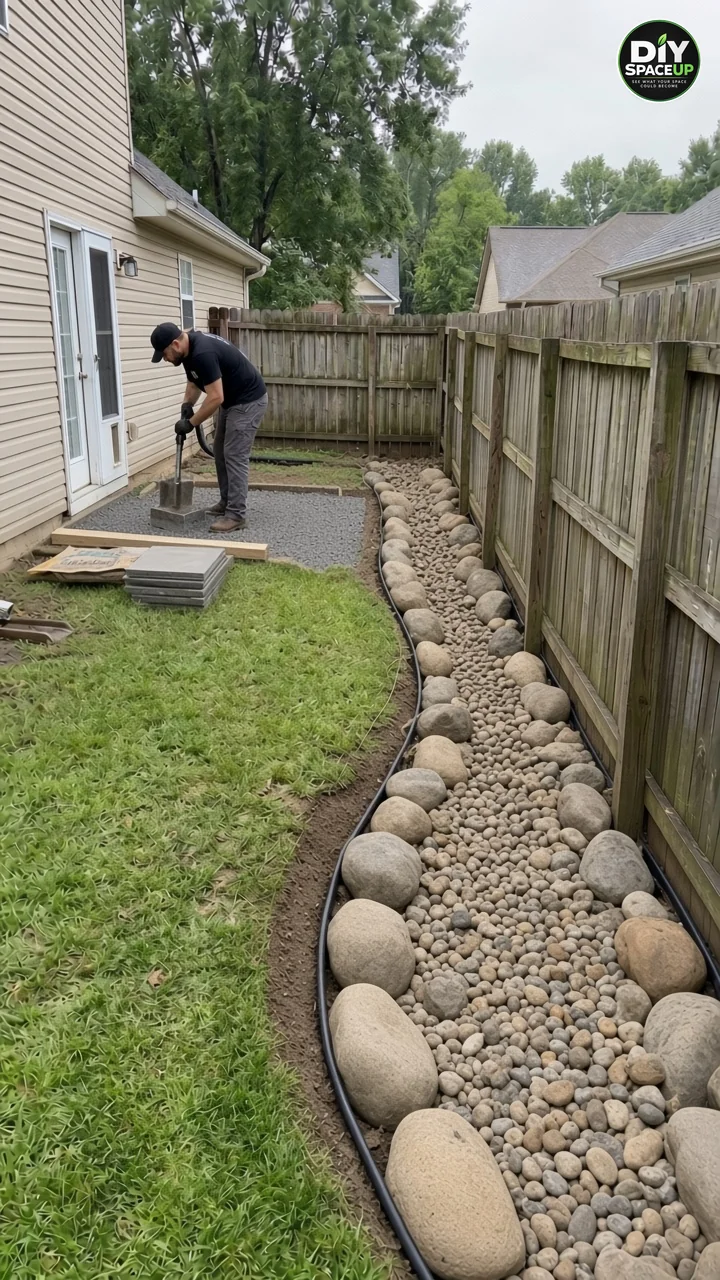
Step 7: Install Edging and Build the Paver Pad
Stake landscape edging along the lawn side, slipping the fabric edge under the edging tabs. It keeps gravel out of the mower path and slows grass creeping into the stone. For the seating pad, excavate, compact the subgrade, then build up crushed-stone base in thin, well-compacted lifts. The concrete paver industry guide from CMHA (formerly ICPI) recommends a minimum 4-inch compacted base for patios and walkways. Wet, weak or freeze–thaw soils typically need more. On top goes an even layer of bedding sand, roughly 3/4 to 1-1/2 inches, screeded flat. Pitch the pad at least 2%, about 1/4 inch per foot, away from the house. Set the pavers, add edge restraint and fill the joints. Our full paver patio and walkway guide covers each layer in detail.
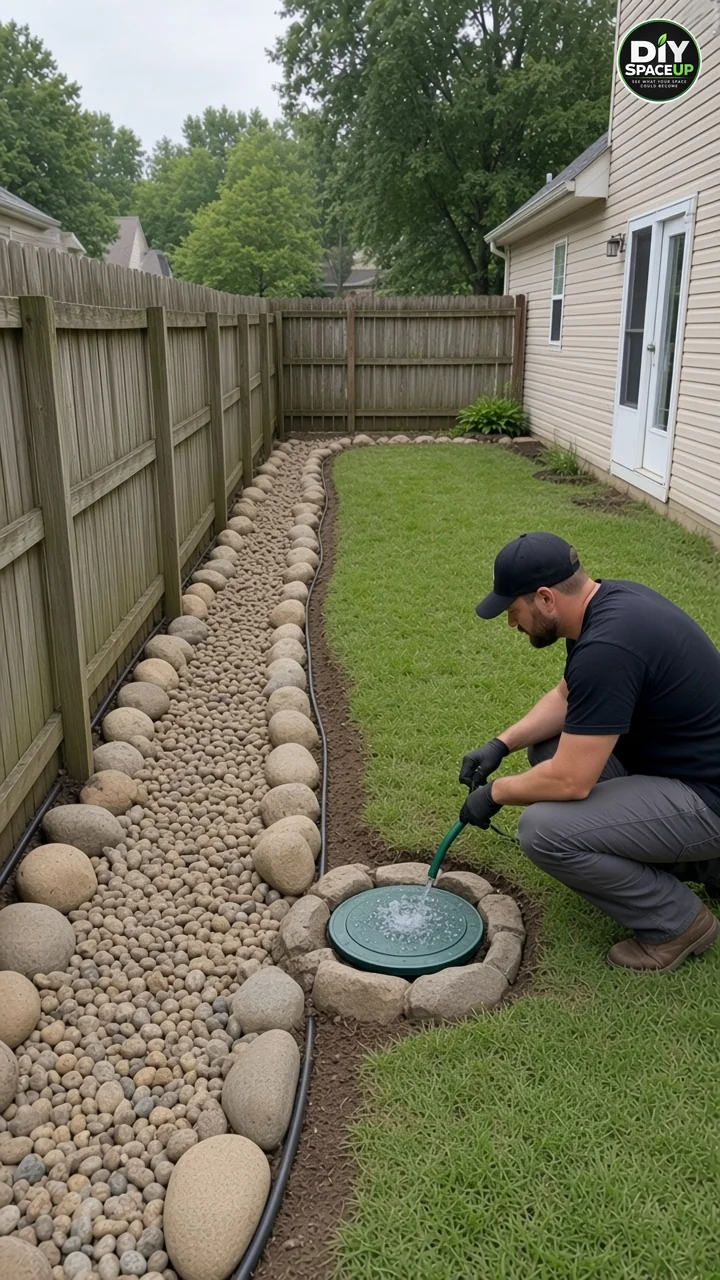
Step 8: Test the Outlet with a Hose
Before planting, run a hose at the creek head for several minutes. Watch for stones that shift, low spots that pond and any water escaping under the edging or toward the house. If you’re using a pop-up emitter, confirm the lid lifts and closes freely. Fix any problems now. Adding a stone, adjusting grade or reseating an emitter is much easier before plants and mulch go in.
Step 9: Plant, Mulch and Light
Choose plants that tolerate both soggy spells and dry weeks. Depending on your region, sun and native-plant lists, that might mean sedges (Carex), soft rush, liriope, switchgrass, Louisiana or blue flag iris, hostas in shade, and a hydrangea set back on higher ground. Your local extension office can suggest regional natives. Keep mulch about a foot back from the stones, or use rock mulch at the edge, so it doesn’t float into and clog the flow line, as the Santa Cruz RCD recommends. Place solar stake lights on the lawn side, set back from the channel. If you choose low-voltage lighting, follow the fixture maker’s burial and GFCI instructions, and keep cable out of the creek bed.
Step 10: Repair the Lawn and Watch the First Real Storm
Regrade any lawn low spots so they feed the creek, then patch with the saved sod or seed. Keep foot traffic off new turf until it roots. During the first real storm, walk the new side yard dry creek bed in a rain jacket and watch the water. It should enter at the splash stones, move steadily down the center and leave at the outlet. If water bypasses the creek or ponds near the foundation, adjust the grade now.
Weed Fabric, Mats and Liners: The Honest Answer
Several commenters asked about the missing weed membrane, landscape mat or rubberized mat. Here is the straight answer. Non-woven geotextile belongs under the stone. Its main job is separation: it keeps soil from pumping up into the rock and keeps rock from sinking into mud. It also blocks some weeds from below. It does not make a creek weed-free. Wind-blown seeds, leaves and silt settle on top of the stone, form a thin layer of soil, and weeds root there, sometimes right into the fabric. Plan on pulling weeds by hand and clearing debris a few times a year.
A rubber pond liner or other impermeable sheet is a different tool. It makes sense only when you deliberately want no infiltration. Examples are a channel running close to a basement wall, over expansive clay, or on a slope where soaking water would cause trouble. In those cases a designer may specify a liner with geotextile padding above it. For most dry creek beds that should let water soak in, a liner just builds a long bathtub that holds water against your soil and can overflow its edges. Skip the woven plastic weed barrier from the garden aisle as well: it passes water far more slowly and tears under rock.
Estimated Cost and Time
Ranges below assume a DIY side yard dry creek bed with a roughly 30- to 50-foot channel, plus a small pad of about 6 by 6 feet. Prices vary widely by region and delivery distance. Tools you already own, labor and furniture are excluded.
| Category | Typical DIY range |
|---|---|
| River rock, gravel and boulders (bulk, delivered) | $300–$1,000 |
| Geotextile and staples | $50–$250 |
| Downspout adapter, solid pipe and fittings | $40–$150 |
| Outlet (pop-up emitter, splash stone, or dry well materials) | $30–$400 |
| Edging and spikes | $45–$150 |
| Paver pad (base, sand, pavers, restraint) | $150–$500 |
| Plants, mulch, sod or seed | $150–$600 |
| Solar path lights | $40–$120 |
| Plate compactor rental (optional) | $75–$150 per day |
| Estimated total | About $800–$3,300 |
Time: Allow a few business days for the 811 locate, a perc test if needed, and two to three weekends of work for two people. Stone moving is the slowest part. Difficulty is moderate. The work is simple, but it involves heavy lifting, careful grading and decisions about where the water goes. Bring in a landscape contractor or civil engineer for large roof areas, steep lots, or any site where water problems involve neighbors or the foundation.
Safety Checklist
- Wait for 811 marks, then hand-dig near them.
- Keep water on your lot and away from the foundation, the neighbor’s yard, septic fields and wells.
- Do not undermine fence posts or stack material against fence boards.
- Lift boulders with help, a dolly or a pry bar; wear gloves, boots and eye protection.
- Use hearing and eye protection with a plate compactor; follow the rental instructions.
- Keep low-voltage wiring and transformers out of the flow path; use GFCI-protected outlets.
- Fill or fence any open dry well or test hole so kids and pets cannot fall in.
- Water standing more than a couple of days invites mosquitoes; fix the grade or the outlet.
Common Mistakes to Avoid
| Mistake | Better approach |
|---|---|
| Digging without knowing the outlet | Choose the outlet first and grade backward from it |
| Following the old rut exactly | Use it as a clue, then lay out a smooth, sloped curve |
| Deep, narrow trench | Shallow dish, wider than deep |
| Too steep or no fall at all | Aim for about 1–2%; add check dams beyond 3–4% |
| Plastic sheeting under the rock | Non-woven geotextile with shingled seams |
| All one stone size | Mix gravel, river rock and boulders |
| Mulch right up to the flow line | Leave about a foot of buffer or use rock mulch |
| Pavers set on soil | Compacted base, bedding sand and a 2% pitch away from the house |
| Sending water to the neighbor | End at your own approved outlet |
Maintenance After Storms
After each big storm, walk your side yard dry creek bed. Reset stones that moved, especially at bends and the inlet apron. Rake out leaves and sediment, clear the downspout and gutter, and check that the pop-up emitter lid still lifts. Pull weeds while they are small. Top up gravel where fabric peeks through, and replace mulch that drifted toward the channel. Once or twice a year, at the start and end of your rainy season, do a hose test and confirm that nothing ponds longer than about a day. If you’re planning a bigger creek with a crossing, see our dry creek bed with bridge build. For heavy groundwater, our French drain and dry creek bed guide adds a perforated underdrain.
Frequently Asked Questions
Is there a dry well, or does a side yard dry creek bed just leach into the soil?
Either can work, but only if the soil allows it. Some water soaks in along a stone swale when soil drains well. A dry well should only be built where a perc test shows reasonable infiltration and drainage within about 24 hours. Otherwise, daylight the water to a lower spot on your lot, use a pop-up emitter or feed a rain garden with an overflow.
Where’s the weed membrane? Will I get weeds?
Use non-woven geotextile under the stone. It separates soil from rock and reduces sinking. Weeds can still sprout in debris that collects on top, so plan on light hand-weeding and debris removal.
Do I need a rubber liner?
Usually not. A liner prevents infiltration, and it makes sense only where soaking water would cause harm, such as next to a basement wall or over expansive clay. In those cases, follow a designer’s detail.
How much slope does a dry creek bed need?
Homeowner swale guides commonly cite about 1% minimum and 1–2% as typical. Some local guides call for at least 2%, and the IRC uses 2% for swales within 10 feet of a foundation. Above roughly 3–4%, add check dams or larger stone to slow the water.
How close to the house and fence can it be?
Many extension and conservation guides suggest about 10 feet from foundations, and about 5 feet from property lines where space allows. In a tight side yard, keep the ground falling away from the house, keep the channel off fence footings and check local rules.
Can I build it without connecting the downspout?
You can, but in many side yards the downspout is the main water source. Leaving it loose dumps roof water next to the foundation. Connect it, or at least extend it to a splash area that drains into the creek.
Sources: Virginia Cooperative Extension, Grass Swales fact sheet; Resource Conservation District of Santa Cruz County, Tips for Installing a Dry Creek Bed; U.S. EPA, Grassed Swales BMP; NH DES Soak Up the Rain, Dry Well; ICC, IRC storm drainage basics; CMHA homeowner paver guide.
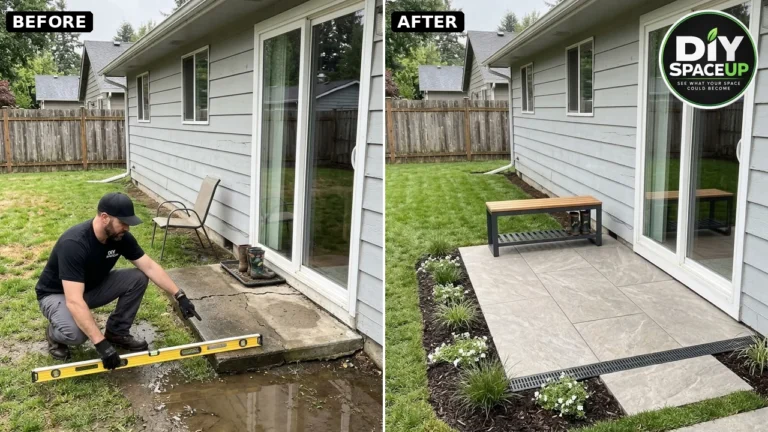
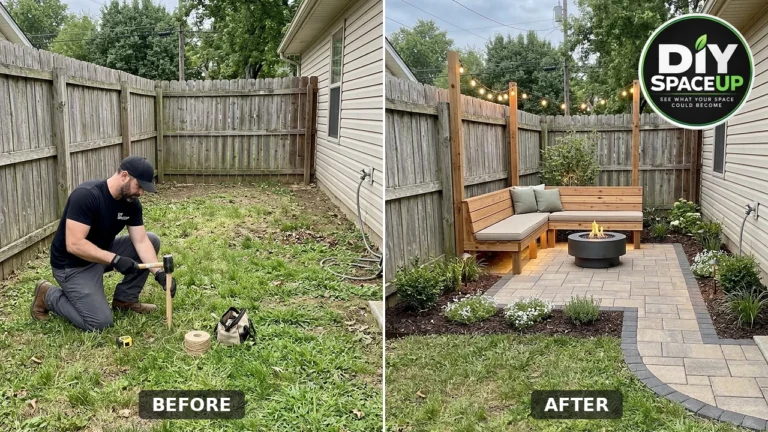
[…] safe outlet. A river-rock channel along the left bank can finish that edge, in the same spirit as a side-yard dry creek bed. Do not aim the outlet at a neighbor, and do not dump it against the house […]