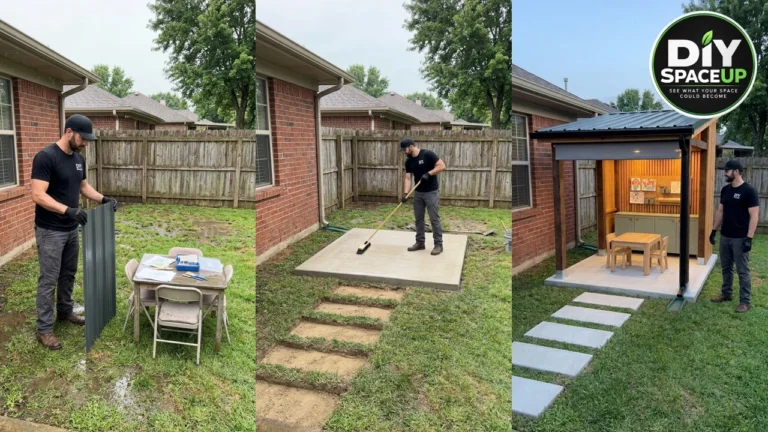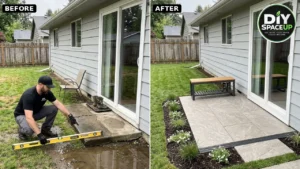

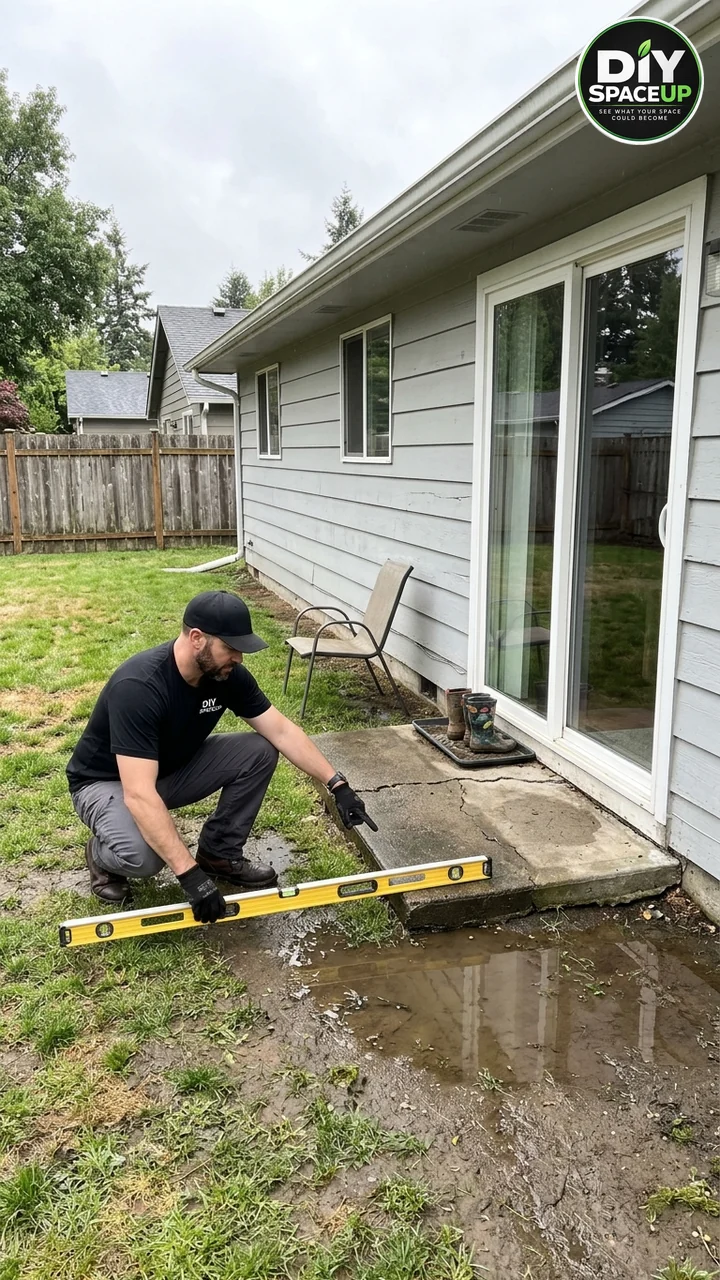
Every time it rained, the back door turned into a mud pit. The old concrete step had cracked and tipped toward the house, a pair of rubber boots lived on a soggy mat beside the sliding door, and a wide brown puddle sat right where you step out onto the lawn. Nobody wanted to use that door from October to April.
This guide is our backyard doorway drainage fix, done the way the drain and paver makers say to build it: a small porcelain paver landing that sheds water away from the house, a trench drain that actually has somewhere to send the water, a short clean walkway, a bench for muddy boots and a fresh planting bed. It is a compact project (about 40 to 60 square feet of paving), but at a doorway the details matter more than the size: slope, threshold height, siding clearance and the drain outlet.
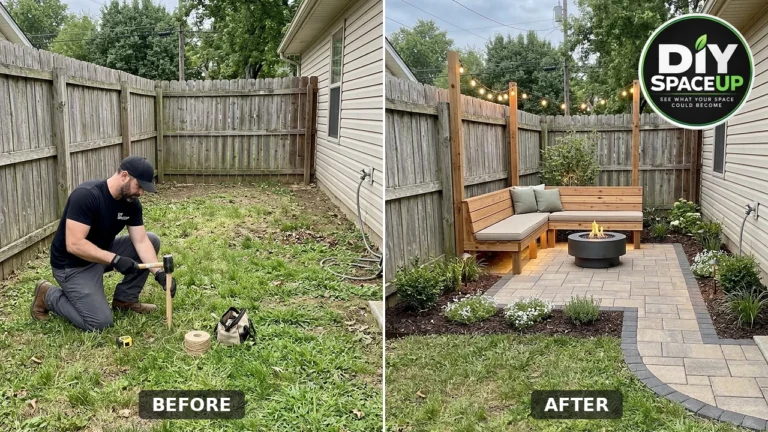
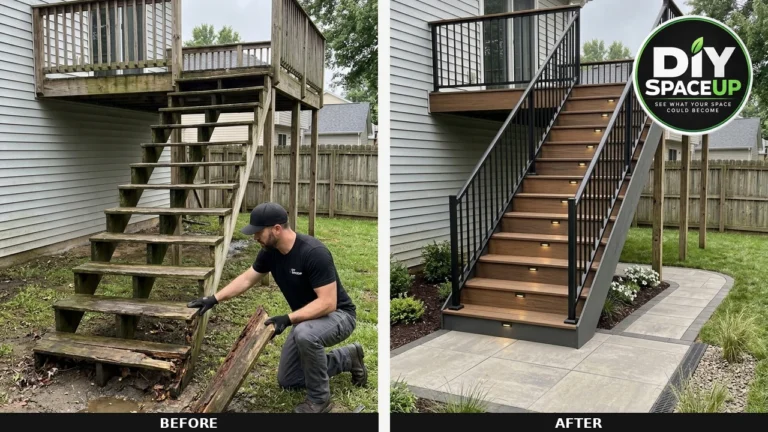
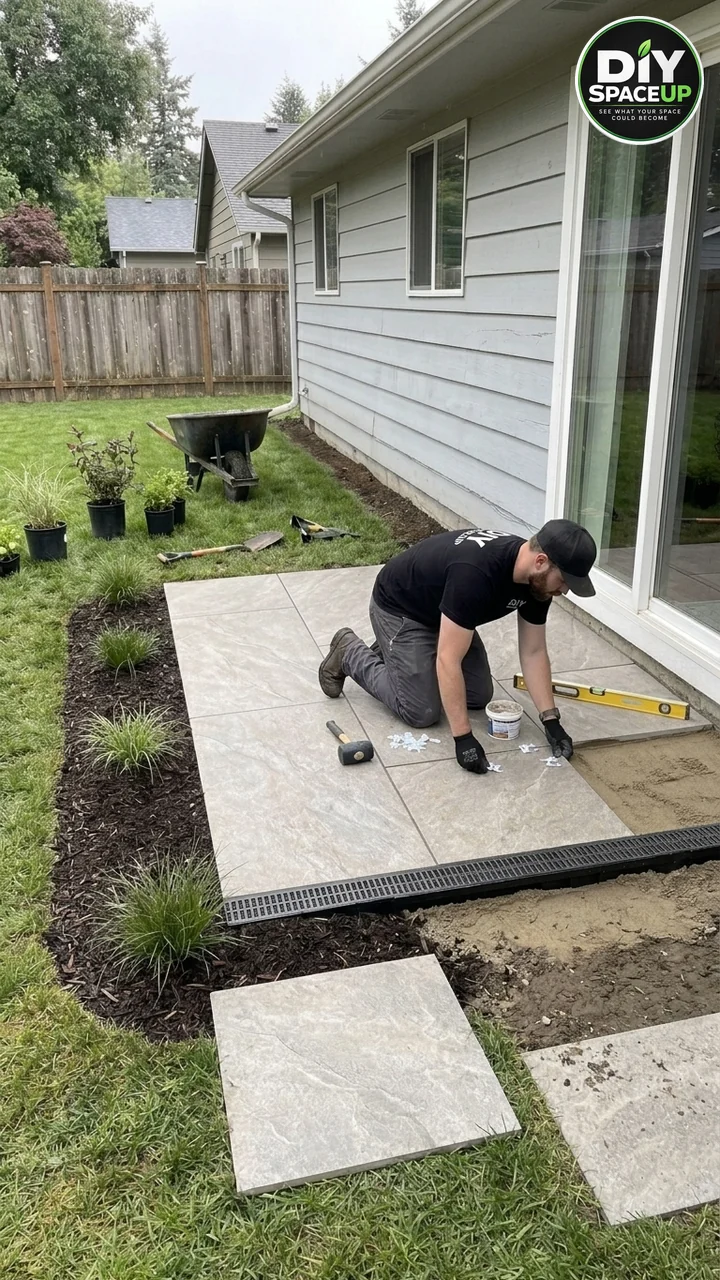
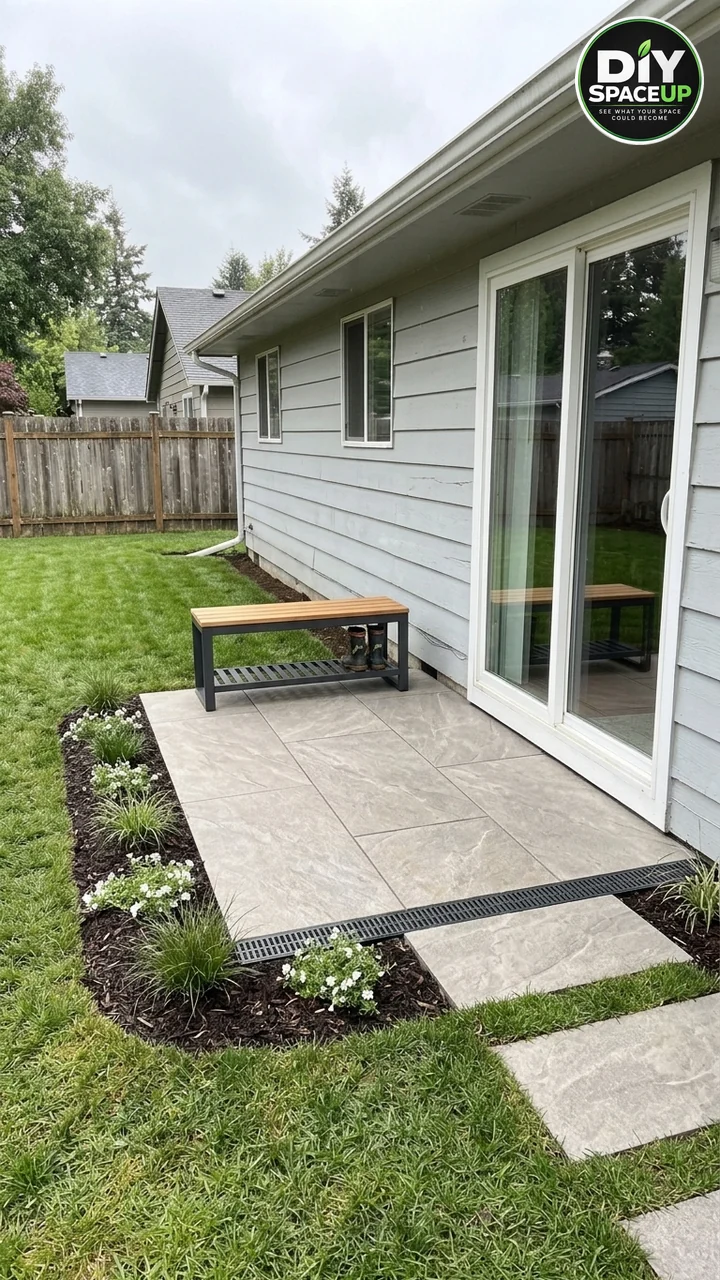
Important: The social post that inspired this was an AI-generated design concept, and the photos here are AI illustrations of the same yard, step by step. They show the sequence, not a tested installation. The original video also got a few things wrong, most importantly a drain pipe that just disappears into the grass with no slope and no outlet. We correct each one in the steps and list them all in What the Video Got Wrong. Numbers below come from the residential code, the drain manufacturer, porcelain paver makers and the siding maker, linked where they are used. Your soil, frost depth, door type and local rules decide the final numbers, so treat them as a starting point to confirm, not a guarantee.
Affiliate Disclosure: As an Amazon Associate I earn from qualifying purchases. Product links in this article may earn a commission at no additional cost to you.
In this guide
- Backyard Doorway Drainage Makeover: What We’re Building
- Read Your Site Before You Dig
- The Numbers That Matter at a Doorway
- Where Will the Water Go?
- Materials and Tools
- Step-by-Step: Build It in the Right Order
- What the Video Got Wrong
- Estimated Cost, Time and Difficulty
- Common Mistakes to Avoid
- Safety Checklist
- When to Call a Pro
- Maintenance
- Frequently Asked Questions
Backyard Doorway Drainage Makeover: What We’re Building
The house, the sliding door, the window, the fence and the trees all stay exactly as they are. What changes is the ground outside the door and where the water goes when it rains.
| Component | What it does | Key detail |
|---|---|---|
| Porcelain paver landing | A firm, dry spot to step out onto | At least as wide as the door and 36 in. deep in the direction of travel; sloped 2% away from the house |
| Linear trench drain | Catches water at the low edge of the landing before it reaches the lawn | Set in a concrete surround, pitched toward its outlet, grate a hair below the pavers |
| Solid outlet pipe | Carries the drain water away from the house | Continuous fall in a bedded trench to a pop-up emitter, daylight outlet or approved dry well |
| Compacted gravel base | The structural layer that keeps the landing flat for years | Dense-graded crushed stone, compacted in thin lifts over geotextile |
| Bedding sand | An even setting bed for the slabs | About 1 in. of moist concrete sand, pre-compacted, then screeded on rails |
| Plastic paver spacers | Keep 4 mm joints so porcelain edges never touch | Placed at every slab corner and left in |
| Edge restraint | Stops the landing from creeping into the bed and lawn | On the compacted base, along every edge not held by the house or the drain |
| Stepping stones | A clean path from the landing to the lawn | Each one on its own small compacted base |
| Boot bench and planting bed | The everyday payoff: a place to kick off muddy boots | Bench on the landing; mulch bed along the outer edge with low plants |
One note on the layout in our photos: the trench drain runs along the near side of the landing, and the mulch bed wraps the outer edge. A drain only works on the edge the paving actually falls toward, so in Step 1 we show how to decide where yours goes. On many doorways that turns out to be the outer edge, parallel to the house.
Read Your Site Before You Dig
A muddy doorway is a symptom. Before buying anything, spend one rainy afternoon (or one long hose test) figuring out where the water comes from and where the ground wants to send it. That tells you whether a landing and trench drain is the right fix at all.
- Where does the water come from? Roof drip off the eave above the door, a nearby downspout, runoff from the yard uphill, or water rising through soggy soil each need a different answer. A trench drain catches surface water; it does nothing for groundwater.
- Where is the low point? Run a string line with a line level (or use a long level and a straight board) from the house outward. If the yard falls toward the house, the grading has to be fixed first, not just paved over.
- Where can the water legally and safely go? You need a spot lower than the drain, ideally at least 10 ft from the foundation, not toward a neighbor and not across a public walk. If no such spot exists, plan for a pro-designed dry well or a different approach.
- What soil do you have? Squeeze a handful of damp soil. If it forms a sticky ribbon, it is clay and will hold water; expect a thicker base and geotextile. Sandy soil drains on its own and is more forgiving.
- How deep does your ground freeze? Ask your local building department. A sand-set landing can move a little with frost; that is fine on open lawn but not if it lifts into the bottom of a door.
- What is the siding and where is the door sill? Measure from the bottom of the sliding door sill and from the bottom of the siding down to the existing ground. Those two numbers cap how high the finished landing can be.
The Numbers That Matter at a Doorway
Slope: exactly 2%, away from the house
Two code sections meet right outside the door. IRC R401.3 (where adopted) asks for impervious surfaces within 10 ft of the house to slope at least 2% away from the building. IRC R311.3 (UpCodes) says an exterior landing may slope no more than 2% (1/4 in. per foot). So at a doorway the sweet spot is a single plane falling 2% straight away from the wall. On a 6-ft-deep landing that is a 1-1/2 in. drop from the house edge to the outer edge.
That is also why the drain goes on the low edge. Tilt the landing sideways toward a drain as well as away from the house and the combined slope climbs past 2%. If you really need the drain on a side edge (for example to intercept water running along the house from uphill), keep the landing itself at 2% away from the wall and let the side drain catch the water arriving from the yard, not water that has to cross the landing.
Height: below the door sill and clear of the siding
- Below the threshold. Under R311.3.1, at a required egress door the landing may be no more than 1-1/2 in. below the top of the threshold, or up to 7-3/4 in. below where the door does not swing over the landing, such as a sliding door. Other exterior doors also allow up to 7-3/4 in. In practice, keep the paving low enough that water can never run back under the door sill and never block the door’s weep holes.
- Clear of the siding. The James Hardie HZ5 best-practice guide calls for 2 in. of clearance between the siding and paths, steps or slabs (1 in. for its HZ10 product) and 6 in. to soil. Vinyl, wood and engineered siding have their own specs, so check yours. If the landing would be too high to keep that gap, dig deeper rather than burying the siding.
- Size. The landing has to be at least as wide as the door and at least 36 in. deep in the direction of travel. A 6 x 6 ft landing like ours leaves room for a bench without crowding the door.
Layers: how deep to dig
| Layer | Typical thickness | Notes |
|---|---|---|
| Porcelain paver | 3/4 in. (2 cm) | Outdoor-rated 2 cm porcelain; check the maker allows sand-set |
| Bedding sand | About 1 in. | ASTM C33 concrete sand, moist; not stone dust or play sand |
| Compacted base | 4 to 6 in. for foot traffic | More on clay, wet ground or in frost country; compacted in 2-in. lifts |
| Geotextile | Thin | Non-woven fabric between soil and base, seams overlapped about 12 in. |
| Trench drain zone | Channel height + about 4 in. concrete below | Deeper than the landing; dig it as a separate trench |
Those base and sand numbers follow the Belgard Porcelain Pavers Installation Guide for pedestrian porcelain over an aggregate base. Add them up and the landing excavation is roughly 6 to 8 in. below the finished surface, deeper where soils are poor. The ICPI/CMHA Tech Spec 2 for interlocking pavements says the same thing about bedding sand that applies here: it is a setting bed, never a way to fix a lumpy base.
Slab size: why the big slabs in the video need a second look
The slabs in the reel look close to 2 x 3 ft. Sand-set approval for 2 cm porcelain is size-specific. In the Belgard Porcelain Pavers Installation Guide, most collections list 24 x 24 in. (plus a few specific formats) for sand-set over a compacted base, while many larger formats are listed for mortar-bed or adhesive installation over concrete. Before you buy, find the sand-set column for your exact slab, or choose a 24 x 24 in. slab for a DIY landing.
Where Will the Water Go?
A trench drain is only a funnel. The part that decides whether your doorway stays dry is the pipe after it. The NDS channel drain installation guide calls for the channel to be pitched toward its outlet (they describe 1% as a minimum and more as better), with the outlet at the deep end and an end cap at the shallow end. From that outlet, run solid pipe with continuous fall to one of these:
| Outlet option | When it fits | Watch out for |
|---|---|---|
| Pop-up emitter in the lawn | Yard falls away from the house; a spot at least 10 ft out that is lower than the drain | Must be downhill, flush with the lawn and away from neighbors (see NDS pop-up emitter guidance) |
| Daylight outlet | A slope, swale or ditch where the pipe can simply exit | Protect the outlet with rock so it does not erode |
| Dry well | Flat lot with soil that drains | Needs a percolation check; may be regulated locally; not for clay |
| Storm connection | Only where your city allows it | Usually needs a permit; never into a sanitary sewer |
Keep the outlet away from the foundation and the property line and follow local rules, which vary a lot. The DOE Building America: gutters and downspouts page gives at least 10 ft from the foundation for underground systems as a benchmark.
What about the downspout?
In our yard the nearest downspout is at the far corner of the house, not at the door, and it already ends in an elbow on the lawn. Do not tie a downspout into a small trench drain: a roof can dump far more water in a storm than a 5-in. channel and its pipe are sized for, and it will back up onto the landing. If the downspout is part of your mud problem, give it its own solid pipe and its own outlet. Our underground downspout drainage guide walks through that, and we did exactly that on the patio in how we fixed a sinking paver patio.
Materials and Tools
Amazon links are for items that ship well and that we checked on Amazon.com on the day this was written; prices and stock change. Heavy or regional materials are marked Local supplier, and big machines are marked Rent locally.
| Item | What it is for | Where to get it |
|---|---|---|
| Porcelain pavers, 2 cm, outdoor rated | Landing surface and stepping stones | Local supplier (pick a size the maker approves for sand-set) |
| Plastic porcelain paver spacers (4 mm) | Fixed joints at every slab corner | Local supplier (paver dealer, match your paver brand) |
| Dense-graded crushed base (local road base) | Structural base | Local supplier (bulk) |
| Concrete sand (ASTM C33) | Bedding layer | Local supplier (bulk or bags) |
| Super Geotextile 6 oz Non-Woven Fabric | Separates soil from base, lines the pipe trench | Amazon |
| NDS Pro Series Channel Drain Kit (5-1/2 in. x 39-3/8 in., galvanized grates) | Trench drain with end caps and outlet | Amazon |
| Bagged concrete mix | Concrete surround (haunch) for the channel | Local supplier |
| 4-in. solid drain pipe and fittings | Outlet line from the channel | Local supplier (match the channel outlet size) |
| NDS 430 Pop-Up Drainage Emitter with Elbow | Releases water at the end of the line | Amazon |
| Paver edge restraint and spikes | Holds the landing edges | Local supplier |
| Two 1-in. steel pipes and a straight 2×4 | Screed rails and screed board | Local supplier |
| Alliance Gator G2 Polymeric Super Sand, Slate Gray | Joint fill (check the bag’s minimum joint width and your paver maker’s approval) | Amazon |
| Orange #18 Braided Mason Line, 250 ft | String lines for height and slope | Amazon |
| Johnson 48-in. Heavy-Duty I-Beam Level | Checking slope on the base, rails and slabs | Amazon |
| Estwing DH-18N 18 oz Rubber Mallet | Seating slabs gently | Amazon |
| Vibratory plate compactor | Compacting subgrade and base | Rent locally |
| Wet tile/masonry saw | Cutting porcelain without dust | Rent locally |
| Hand tamper, spade, rake, wheelbarrow | Digging and tight-spot compaction | Local supplier |
| DEWALT DPG82 Anti-Fog Safety Goggles | Eye protection for cutting and compacting | Amazon |
| Mechanix Wear Original Work Gloves | Hand protection | Amazon |
| Hearing protection and an N95 or better respirator | Compactor noise; any dry cutting dust | Local supplier |
| Mulch, plants, boot bench | Finishing | Local supplier / nursery |
Step-by-Step: Build It in the Right Order
Step 1: Diagnose the Doorway and Decide Where the Drain Goes
Lay a long level across the old step and onto the lawn. In our yard the step had cracked and tipped back toward the wall, and the lawn right in front of it was the low spot, so every rain ended in a puddle against the door. Mark three things on a sketch: the door sill height, the bottom of the siding, and the lowest point within about 10 ft of the door.
Now decide the drain edge. Draw the landing, then draw an arrow pointing straight away from the house: that is the direction the landing will fall at 2%. The drain goes along the edge the arrow points at, or wherever surface water from the yard arrives. Finally, find the outlet: a spot lower than the drain where the pipe can end. If the yard is flat or slopes toward the house, stop here and talk to a drainage contractor.
Step 2: Call 811, Check Frost Depth and Local Rules
Contact 811 a few business days before you dig (see call811.com) and wait until every utility has marked or cleared the area, including the path of the outlet pipe. Gas, power and irrigation lines often run along a house wall. At the same time, ask your building department about frost depth, permits for grading or drainage, and any rules about where drain water may be released.
Step 3: Remove the Old Step, Set String Lines and Excavate
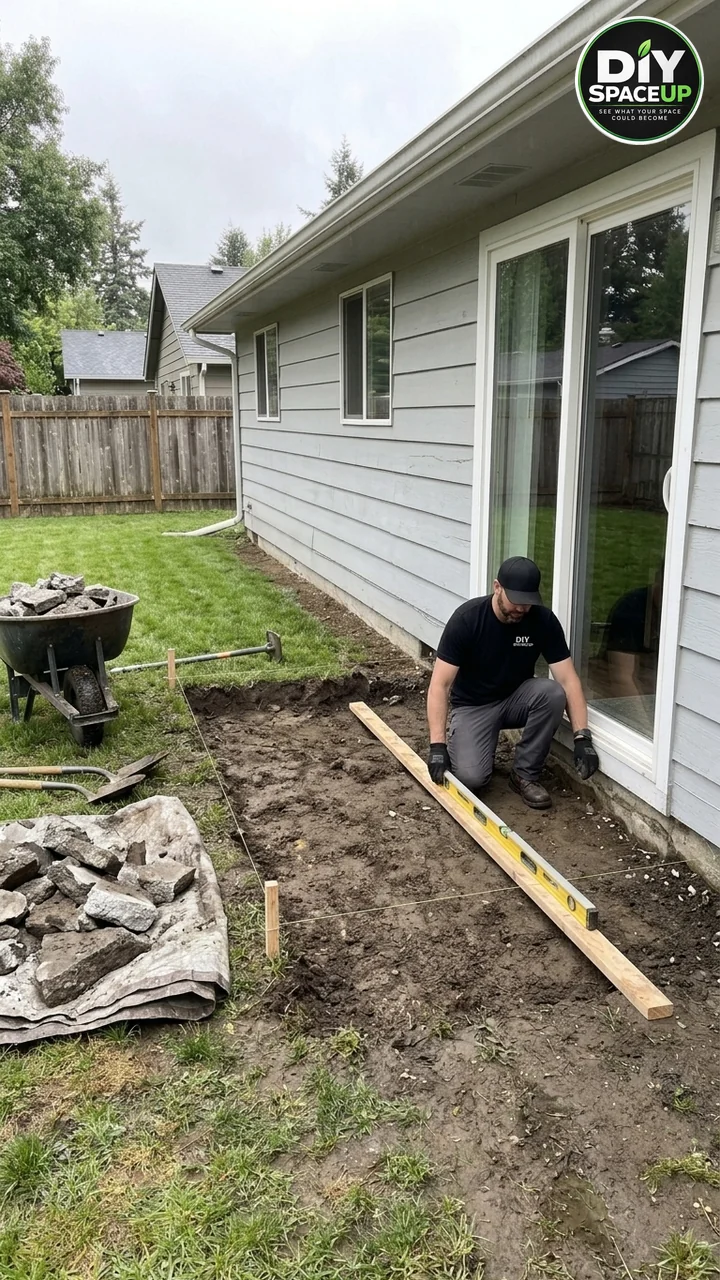
Break up the old step with a sledge or rented demo hammer and haul the pieces out on a tarp. Wear eye protection and keep the glass door covered. Drive stakes at the corners of the landing and run mason lines at the finished paver height: highest at the house (below the sill and at least the siding clearance), falling 1/4 in. per foot outward. Measure down from the lines to dig, so the excavation copies the final slope.
Dig the landing area 6 to 8 in. below the strings, plus about 6 in. beyond the edges so the base extends past the pavers. Dig the drain trench separately and deeper. Remove soft, wet or organic soil until you hit firm ground and replace it with base material rather than leaving mud under the landing.
Step 4: Compact the Subgrade, Lay Geotextile and Build the Base in Lifts
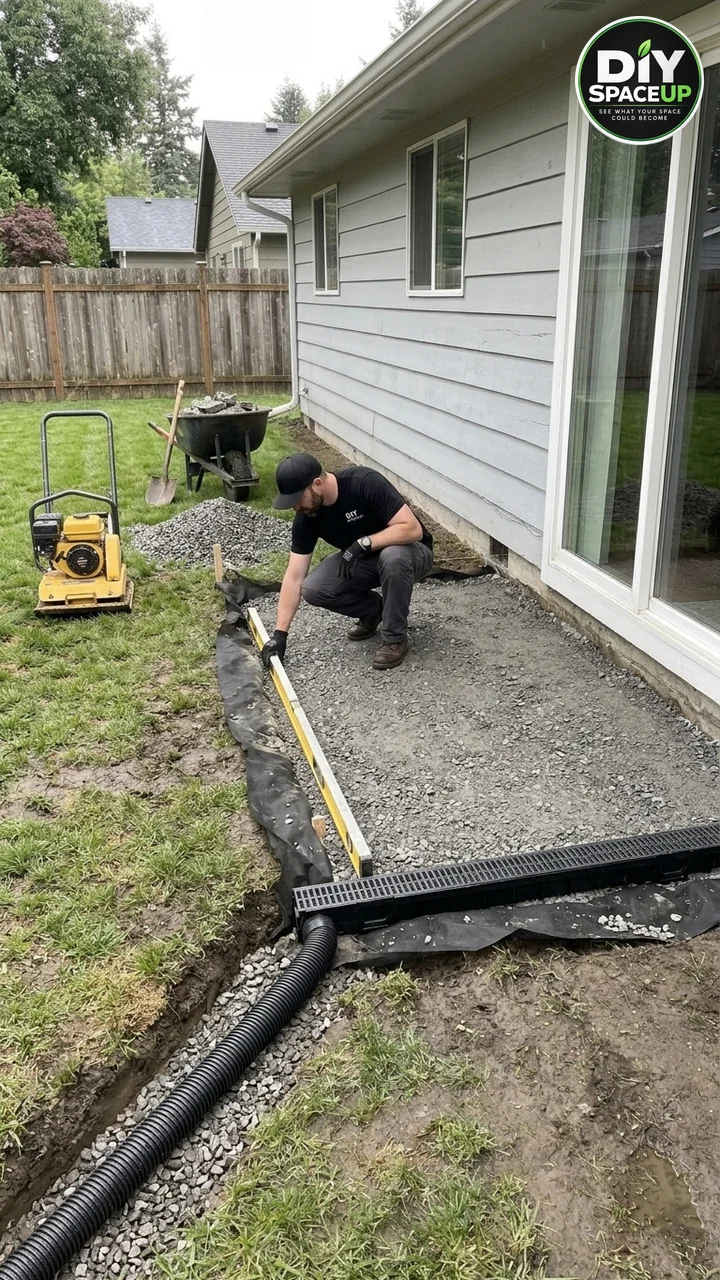
Run the plate compactor over the soil until it stops visibly moving, keeping the 2% fall. Roll out the non-woven geotextile with about 12-in. overlaps and run it up the sides of the excavation.
Spread the crushed base about 2 in. at a time. Dampen it lightly and compact each lift with several passes before adding the next. One thick dump compacted at the end stays soft in the middle, and that is how landings sink by the door. Check against the string lines as you go: the top of the base should sit about 1-3/4 in. below the strings (1 in. of sand plus the 3/4 in. slab) and follow the same 2% slope. Use a hand tamper against the foundation, where the plate cannot reach.
Step 5: Set the Trench Drain in Concrete and Run the Outlet Pipe
Snap the trench drain together on the ground first: outlet at the end nearest your discharge point, end cap at the other end. Following the NDS channel drain installation guide, set the channel in a concrete surround (about 4 in. under and beside it for foot traffic), with string lines so it runs dead straight and pitched toward the outlet. The top of the grate should end up about 1/16 to 1/8 in. below the finished pavers so water drops in instead of skipping over it. Tape over the grates while you pour and leave them alone for a day while the concrete sets.
From the outlet, dig a trench that keeps falling all the way to your discharge point: at least 1/8 in. per foot, and 1/4 in. per foot is better if the yard allows. Bed solid (non-perforated) pipe on a couple of inches of gravel, check the fall every few feet with a level, and never let it rise or sag. Connect the pop-up emitter (or daylight outlet) at the low end, set it flush with the lawn, and pour a bucket of water into the channel to watch it come out before you backfill. Then backfill in layers and compact where the trench runs under paving.
Correction: In the video the corrugated pipe simply runs off into the grass with no visible slope, bedding or outlet. Water in a level, unbedded pipe just sits there, freezes or backs up into the channel.
Step 6: Sort Out the Roof Water Separately
Look up at the eave above the door and at the nearest downspout. If roof water drips straight onto the landing, a gutter over the door (or the covered back door porch approach) helps more than a bigger drain. If the downspout discharges toward the doorway, extend it or bury a separate solid pipe to its own outlet, as shown in our underground downspout drainage guide. Do this now, before the paving, if the pipe has to cross the landing area.
Step 7: Install the Edge Restraint and Screed the Sand on Rails
Spike the edge restraint on the compacted base along every edge not held by the house or the drain. Leave the slab edge just inside it. Dampen the concrete sand until it holds a shape when squeezed (Belgard describes 5 to 6% moisture), spread it, and lightly pre-compact it.
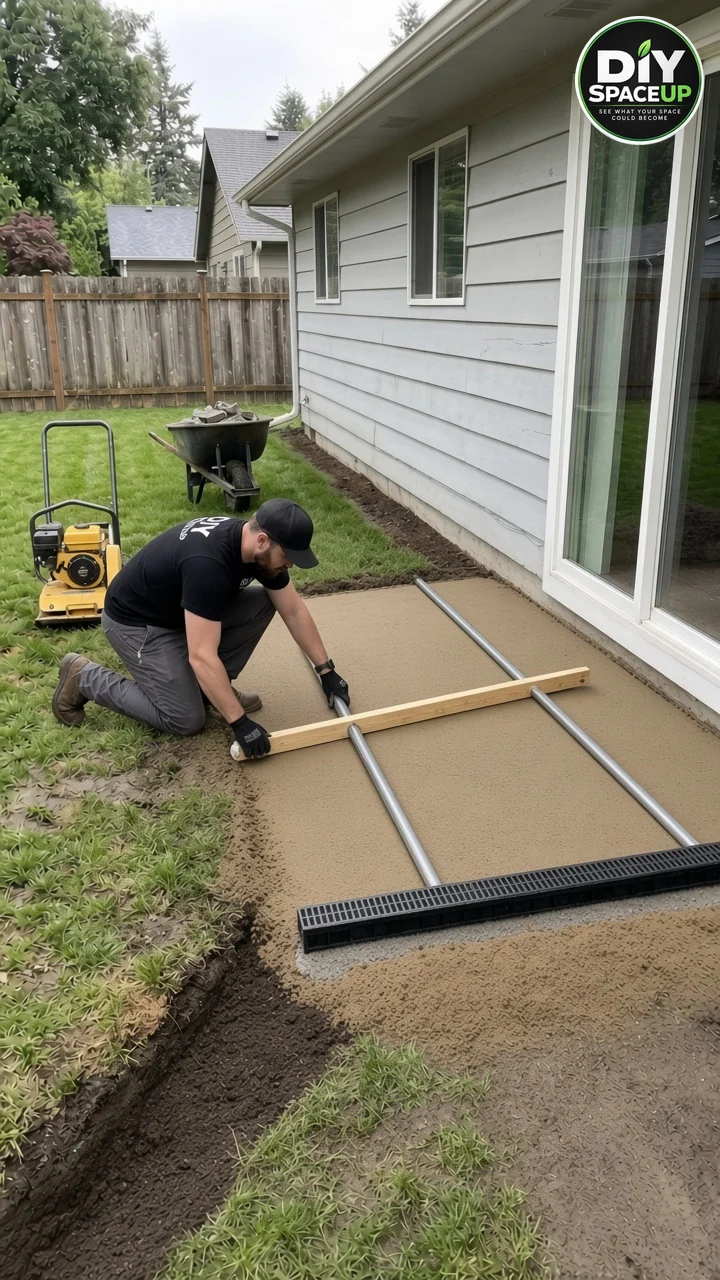
Then lay two 1-in. steel pipes on the base as screed rails, running away from the house so they follow the 2% fall. Pull a straight 2×4 across them toward you to strike off a perfectly even 1-in. bed. Lift the pipes out, fill the grooves with sand and smooth them with a trowel. Do not walk on the screeded sand; work from the slabs you have already laid or from a board.
Correction: The video skips this. The sand just appears smooth. Without rails you get dips under the slabs, and large porcelain slabs rock on any dip.
Step 8: Lay the Porcelain Slabs With Permanent Spacers
Start at the house side next to the door and work outward so you always kneel on finished slabs. Set each slab straight down onto the sand (do not slide it), put a plastic spacer at every corner so the joints stay at the maker’s spacing (4 mm in Belgard’s guide), and tap it level with a rubber mallet on a scrap of wood. Check the slope every row against the strings: it should still read 2% away from the house. Per the Belgard Porcelain Pavers Installation Guide, porcelain should never touch porcelain at the edges, and you never run a plate compactor over porcelain; it can crack the slabs.
Make cuts with a wet saw, outdoors, with eye and hearing protection. Cut edges go against the restraint, not along the door or the drain.
Correction: In the reel, spacers lie loose on top of the slabs. Spacers only work when they sit in the joints at the corners, under or between the slabs, and stay there.
Step 9: Fill the Joints
With the slabs and joints completely dry, sweep in polymeric sand rated for narrow joints, compact it into the joints by hand (no plate on porcelain), blow every grain off the surface and mist it per the bag. Porcelain does not absorb anything, so leftover sand on top leaves a haze that is hard to remove. Check your paver maker’s recommendation first; some prefer a specific jointing product for porcelain, and Belgard porcelain paver tips cover their options.
Step 10: Add the Stepping Stones, Planting Bed and Boot Bench
Set the stepping stones last, each on a small pocket of compacted base and sand, so they sit flush with the lawn and do not rock or sink. Spacing of about 24 in. center to center suits an easy stride. Then plant the bed along the outer edge, keeping soil and mulch below the paver edge and below the drain grate so it cannot wash onto the landing or clog the channel. Add the bench where it will not block the door.
Order note: In our photos the planting bed is already in while the slabs are being laid. It works, but planting last keeps the plants out of the way of the wheelbarrow and saw.
Step 11: Water-Test It
Run a hose at the house edge of the landing for ten minutes. Water should sheet away from the door, drop into the drain without pooling, and appear at the outlet. Check that nothing ponds against the sill or the siding. Repeat after the first real storm and after the first winter.
What the Video Got Wrong
| What the video showed | The problem | What to do instead |
|---|---|---|
| Corrugated pipe laid on the surface into the grass | No slope, no bedding, no outlet: water sits in the pipe and backs up | Solid pipe in a gravel-bedded trench falling at least 1/8 in./ft to a pop-up emitter, daylight outlet or approved dry well, away from the house and neighbors |
| Drain set flush with the yard with no visible outlet | A channel with nowhere to go is a puddle with a grate on it | Outlet at the deep end, end cap at the shallow end, channel pitched toward the outlet |
| Channel dropped onto gravel | Channels shift and crack without support | Set the channel in a concrete surround, grate 1/16 to 1/8 in. below the pavers |
| Sand appears perfectly smooth | “Magic screeding”: real sand needs a reference | Pre-compact moist sand and screed with rails and a straight board |
| Spacers lying on top of the slabs | Spacers do nothing on the surface | Plastic spacers at every slab corner, in the joints, 4 mm (or your maker’s spec) |
| Slabs that look about 2 x 3 ft on sand | Many makers only approve certain sizes (often 24 x 24 in.) for sand-set 2 cm porcelain | Use a size listed for sand-set, or mortar-set larger slabs on concrete per the manufacturer |
| No slope or threshold check | Water can run back to the door or the siding | 2% away from the house, below the door sill, 1 to 2 in. or more below the siding per the siding maker |
| No base compaction shown | Thick, loose base settles at the door | Geotextile, then crushed base compacted in about 2-in. lifts |
| No utility locate | Shallow lines run along house walls | Call 811 before digging, including the pipe route |
| Downspout not addressed | Roof water can overwhelm a small trench drain | Keep the downspout on its own extension or buried line |
| Stepping stones set on bare soil | They sink and rock within a season | A small compacted base and sand pocket under each |
Estimated Cost, Time and Difficulty
These are rough 2026 DIY ranges for a landing of about 40 to 45 sq ft plus four stepping stones. Porcelain prices in particular vary widely by region and brand, so price your own list before you start.
| Item | Estimated cost |
|---|---|
| 2 cm porcelain pavers (about 55 sq ft incl. waste and stepping stones) | $330 to $900 |
| Crushed base, concrete sand, geotextile | $120 to $280 |
| Channel drain kit, concrete, solid pipe, pop-up emitter | $180 to $380 |
| Edge restraint, spacers, polymeric sand | $100 to $220 |
| Plate compactor and wet saw rental (1 day each) | $140 to $250 |
| Plants, mulch | $80 to $250 |
| Boot bench (optional) | $100 to $350 |
| Total (DIY) | About $1,050 to $2,600 |
- Time: 3 to 4 working days for two people: one for demo and excavation, one for base and drain, one for sand and slabs, plus a half day for joints and planting. Add time for the concrete to set before you lay slabs next to the channel.
- Difficulty: Moderate. The work is heavy but not complicated; getting the slope, the drain pitch and the outlet right is what takes care.
- Pro install: expect several times the DIY cost, more if the outlet line is long or the site needs regrading.
Common Mistakes to Avoid
| Mistake | Better Approach |
|---|---|
| Paving right up to the siding | Keep the clearance your siding maker requires, usually 1 to 2 in. above paving |
| Building the landing level with the door sill | Stay below the sill so water cannot run back under the door |
| Putting the drain on an edge the landing does not fall toward | Put the channel on the low edge, or where yard runoff arrives |
| Ending the drain pipe in the lawn next to the house | Run it to an outlet at least 10 ft out, downhill, legal for your area |
| Using perforated pipe as the outlet line | Use solid pipe so water leaves instead of soaking in by the foundation |
| Dumping all the base in at once | Compact in about 2-in. lifts |
| Fixing base dips with extra sand | Fix the base, keep the sand at about 1 in. |
| Running a plate compactor over porcelain | Seat slabs with a rubber mallet; never plate-compact porcelain |
| Dry-cutting porcelain | Wet-cut outdoors with eye, ear and breathing protection |
| Tying the downspout into the trench drain | Give roof water its own line |
Safety Checklist
- Call 811 and wait for marks before any digging, including the outlet trench.
- Wear safety goggles, gloves and boots for demolition; add hearing protection for the compactor and saw.
- Wet-cut porcelain and concrete. Cutting releases crystalline silica dust; wear a respirator for any dry work.
- Lift slabs with a helper and bend your knees; large porcelain is heavy and can snap if carried flat.
- Protect the glass door from flying concrete chips during demolition.
- Keep the plate compactor away from the foundation and do not run it on wet clay or porcelain.
- Read the rental instructions and keep kids and pets away from the work area.
When to Call a Pro
- The yard slopes toward the house and there is no lower spot for an outlet.
- Water seeps into the basement or crawl space, or comes up through the soil (a groundwater problem, not surface water).
- The landing would have to be higher than the door sill or would bury the siding.
- You want slabs larger than your paver maker allows for sand-set, or a mortar-set or pedestal system.
- Your area has deep frost, expansive clay or a high water table.
- Local rules require a permit for grading, drains or connecting to storm systems, or you are considering a dry well.
Maintenance
- Lift the grates and rinse the channel each spring and fall; check that the pop-up emitter opens and is not buried by turf.
- Keep mulch and soil below the paver edge and away from the grate.
- Top up polymeric sand where joints open, following the product instructions.
- Watch for a rocking slab. Lift it, re-screed the sand and reset it before the base is damaged.
- Clear snow with a plastic shovel; avoid rock salt on fresh polymeric sand per the product instructions.
If you like this kind of project, our curved paver walkway with drainage and deck stairs with a paved landing use the same channel-drain idea in a walkway and at the bottom of a stair, and the muddy backyard drainage channel explains the basics of moving yard water. For a bigger patio rebuild, see our paver patio and walkway build.
Frequently Asked Questions
How do I fix drainage at a backyard door?
Find where the water comes from, then rebuild the doorway so it sheds water away from the house: a firm landing sloped 2% away from the wall, a drain at its low edge, and a solid pipe that carries the water to an outlet well away from the foundation. Fixing the slope and the outlet matters more than the paving you choose.
How much slope should a landing outside a door have?
Aim for 2% (1/4 in. per foot) away from the house. The residential code generally requires at least 2% fall away from the building for paving near the foundation and allows no more than 2% on a door landing, so 2% satisfies both where those sections are adopted.
How far below the door threshold should pavers be?
Low enough that water can never flow back under the door. Code allows up to 1-1/2 in. below the threshold at a required egress door the door swings over, and up to 7-3/4 in. where it does not swing over the landing, such as a sliding door. Check your local code and your door maker’s instructions.
Does a trench drain need an outlet?
Yes. The channel only collects water. It needs an outlet at its deep end connected to solid pipe that keeps falling to a pop-up emitter, daylight outlet, dry well or approved storm connection.
Can I connect my downspout to the trench drain?
It is not a good idea with a small residential channel. A roof can deliver far more water than the channel and its pipe can carry in a storm, and it will back up onto the landing. Give the downspout its own line.
Can porcelain pavers be laid on sand?
Many 2 cm porcelain pavers can be sand-set over a compacted aggregate base, using plastic spacers, edge restraint and moist pre-compacted bedding sand. Makers approve specific slab sizes for this method (often 24 x 24 in.) and say never to run a plate compactor on porcelain.
What size gap should porcelain pavers have?
Belgard specifies 4 mm (about 3/16 in.) for sand-set porcelain, held by plastic spacers at every corner, and says porcelain should never touch porcelain. Follow your own paver maker’s spec.
How deep do I dig for a paver landing?
Usually 6 to 8 in. below the finished surface for foot traffic: 4 to 6 in. of compacted base, about 1 in. of sand and the slab. Dig deeper on clay, wet soils or in frost country, and deeper again under the trench drain.
Do I need a permit for a backyard doorway landing and drain?
Often not for a small ground-level landing, but some cities regulate grading, drain discharge and dry wells. A quick call to the building department settles it.
Will this stop water coming into my basement?
Not by itself. It handles surface water at the door. Basement leaks can involve groundwater, foundation cracks or failed foundation drains, which need a different diagnosis.
A doorway that stays dry is one of those upgrades you notice every single day. Get the slope, the threshold and the outlet right, and the rest of this backyard doorway drainage project is just careful, satisfying work.