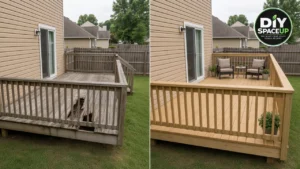

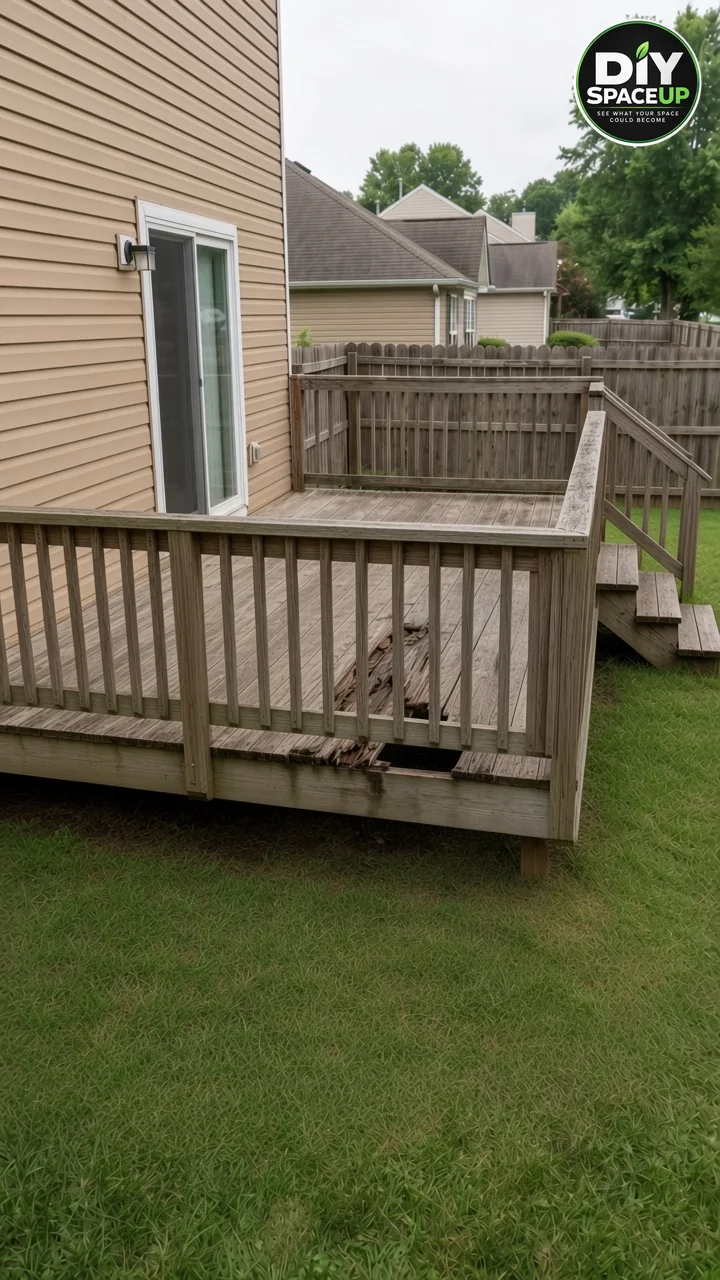
Would you trust this deck with your family? The boards are gray and soft, there’s a jagged hole right in the middle, and the railing wobbles when you lean on it. Deciding whether to repair or replace a deck like this is not about how it looks. It’s about what’s hiding underneath: the joists, the posts, the footings and the board that ties the whole thing to your house.
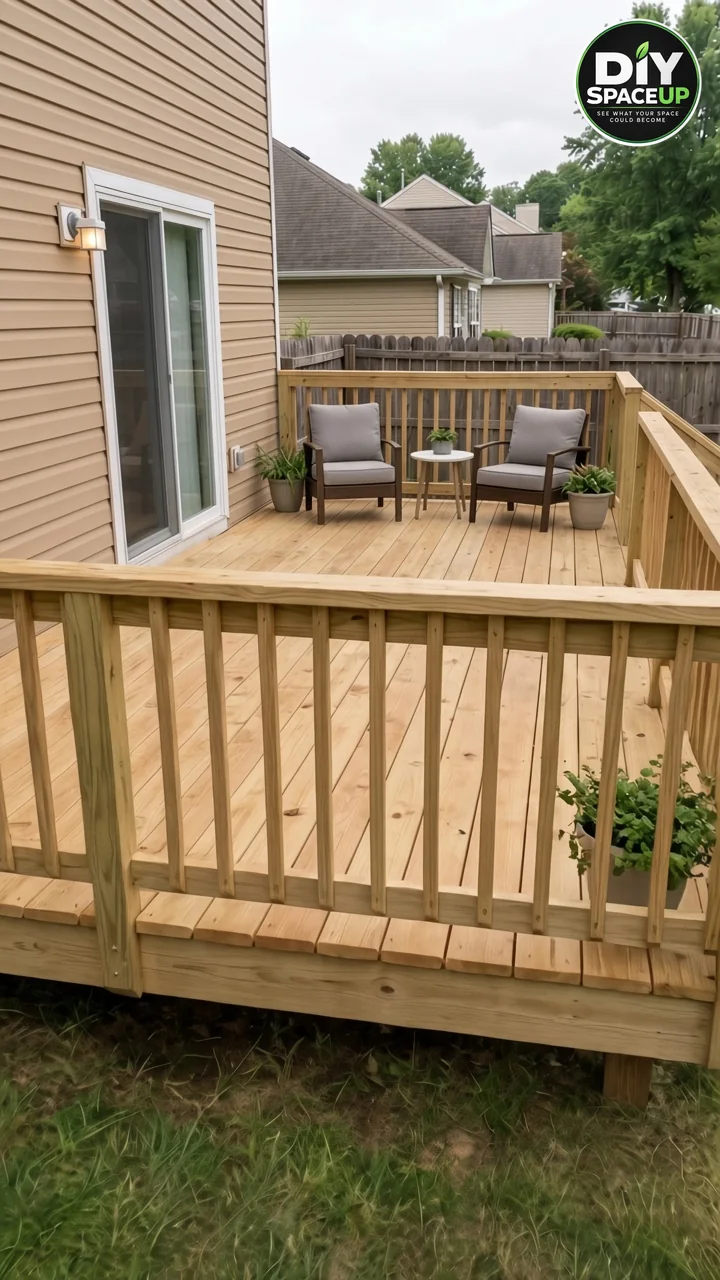
This project follows the idea in our recent DIY SpaceUp post. A small attached backyard deck with rotten boards, a dangerous hole and a tired railing gets new decking, a rebuilt railing and a cozy spot for two by the sliding door. Two brown-framed armchairs with gray cushions, a little round side table, a wall light and a couple of potted plants turn it into a calm place for morning coffee.
A quick, honest note: the images in this article are an AI-assisted DIY design visualization, not a record of a real, inspected build. We did not inspect this deck. The steps below are based on published guidance from the model building code, the American Wood Council, the deck industry, wood and hardware makers, and the EPA.
Every size in this article is a planning example, not a measurement taken from the images. Real deck repairs need a proper structural and safety check, and your local building department has the final word.
Affiliate Disclosure: As an Amazon Associate I earn from qualifying purchases. Product links in this article may earn a commission at no additional cost to you.
Table of Contents
What We’re Building
Here is every part of the makeover, and what each one does. Nothing else is added.
| Component | What it does |
|---|---|
| Existing deck frame (kept) | The gray joists, rim, beam, posts and ledger stay in place, but only if they pass inspection. |
| New deck boards | Light treated pine boards running parallel to the house replace the rotten, broken surface. |
| Rebuilt railing | New posts, a top rail, a bottom rail and square balusters on three sides. |
| Spot for two | Two armchairs with brown frames and gray cushions, plus a small round side table with a white top. |
| Wall light | A white wall sconce beside the sliding door. |
| Potted plants | Two planters that soften the corners. |
One thing we can’t confirm from the images is the condition of the hidden framing. In the visualization, the old gray joists stay in place and only the boards and railing are new. That only works if the frame, posts, footings and ledger pass inspection. If they don’t, you are looking at a rebuild, and we cover both paths below.
Repair or Replace a Deck? Start With the Structure
The surface is the easy part. Deck boards and railings are replaceable. The real question is whether the structure under them can still carry people safely for years to come.
Here is a simple way to sort what you find. It is a starting point for a conversation with your building department or a pro, not a safety rating.
| What you find | Leans toward | Why |
|---|---|---|
| Soft or cracked boards, but solid joists | REPAIR (re-deck) | The surface is worn, but the structure is fine. |
| Loose railing with solid posts and rim | REPAIR | Guards can be rebuilt with tested connections. |
| Rot in one or two joists in a small area | Get a pro opinion | Some framing repairs are possible, but the details matter. |
| Rot in many joists, beams or posts | REBUILD | The structure can no longer be trusted. |
| Ledger nailed only, rotten or with no flashing | Pro evaluation; often REBUILD | The ledger connection is a common failure point. |
| Posts with no footings, or footings that moved | REBUILD or major repair | The deck has nothing solid to stand on. |
| Heavy rust on hangers, bolts or connectors | Pro evaluation | Hidden corrosion can weaken connections. |
| Deck sways, sags or pulls away from the house | Stay off it; REBUILD | These are signs of structural trouble. |
A deck that only needs new boards and a new railing is often called a “re-deck” or “resurface.” It can save a lot of money. But the North American Deck and Railing Association (NADRA) is clear that a homeowner checklist does not make a deck code compliant. If anything looks wrong, have a professional evaluate it.
How to Inspect Your Deck Before You Decide
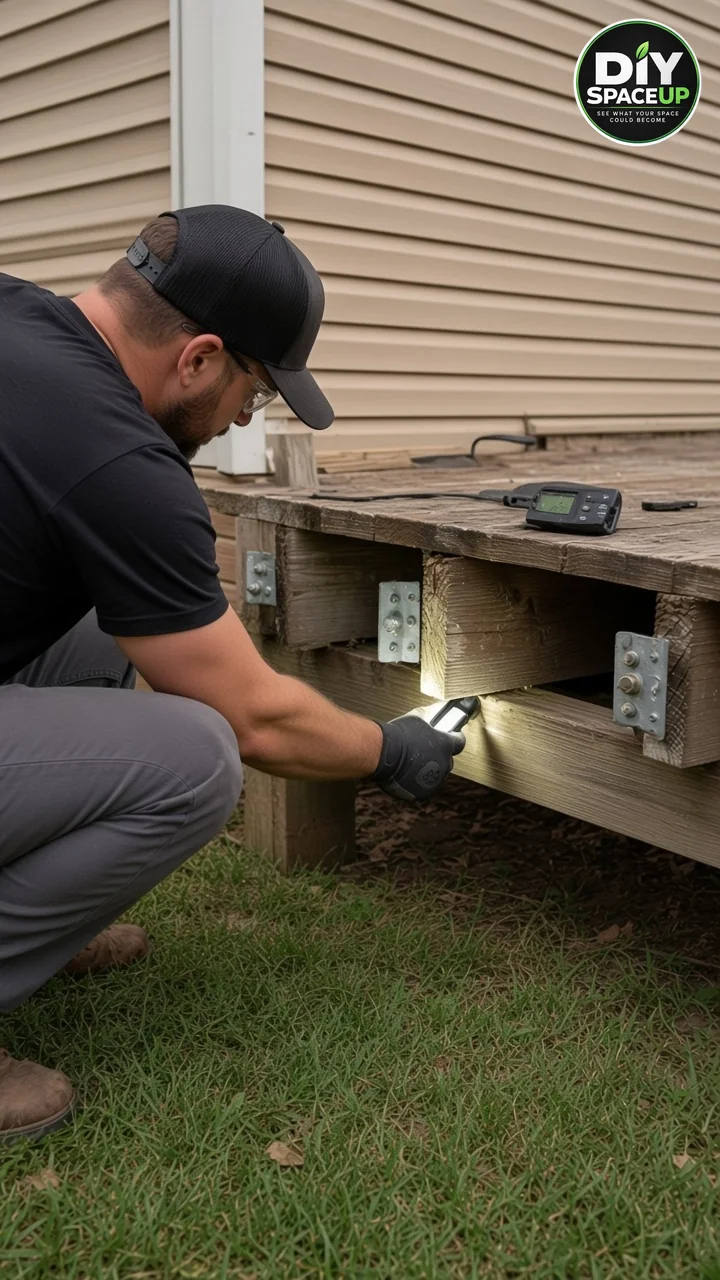
Start underneath, not on top. Home inspector training from InterNACHI recommends looking at the deck from below first, and staying off a deck that looks unsafe from underneath.
Bring a flashlight, an awl or a flat screwdriver, a notepad and your phone for photos. Work through each area below.
- Joists and beams. Look for dark, soft, crumbly or crushed wood, especially at the tops of joists, at the ends and anywhere water sits.
- Posts and footings. Check that posts sit on footings, not on bare soil, and that they’re straight. Look for rot at the base, posts that have sunk or lifted, and missing post-to-beam connectors.
- The ledger. This is the board bolted to the house. Check for rot, water stains, missing flashing and nails used instead of bolts or lag screws. NADRA calls the ledger a common failure point.
- Flashing and siding. Look for water damage on the house rim joist behind the ledger, from inside the basement or crawlspace if you can.
- Fasteners and hangers. Look for rusted nails, screws, bolts and joist hangers. Corrosion can eat a connector away from the back side where you can’t see it.
- Railing posts. Push on each post. Movement, split wood or rot at the bolts is a red flag.
How to probe for rot. NADRA’s checklist suggests using an ice pick or screwdriver. If the tip sinks in a quarter to half an inch with little effort, if a sliver breaks off short without splintering, or if the wood feels soft or spongy, decay may be present. A pin-type General Tools MMD4E Moisture Meter can help you find the wet areas worth probing. It does not tell you how strong the wood is.
When to Call a Licensed Contractor, Engineer or Inspector
Stop and get help if you find any of the following:
- Rot in joists, beams, posts or the ledger, or more than one or two bad spots in the frame
- A ledger that’s nailed only, has no visible bolts or lags, or is attached to brick, stone veneer or a cantilevered floor
- Posts without footings, or footings that have moved
- A deck that sways, sags or pulls away from the house
- Heavy rust on hangers, bolts or connectors
- Any plan to change the size, height or layout of the deck
A licensed deck contractor can price the repair. A structural engineer can design a fix. Your local building department can tell you what needs a permit and an inspection.
Permits, Code and Guards: What Applies to Your Deck
In the US, most towns base their rules on the International Residential Code (IRC). Deck rules live in section R507 of the 2024 IRC. Many building departments also use the American Wood Council’s Prescriptive Residential Wood Deck Construction Guide, DCA 6, as a handout. DCA 6 is based on the 2015 IRC and says that where it differs from the code, the code applies. Local adoption and amendments vary, so always confirm with your building department.
Permits. The model code’s permit exemption for decks in IRC section R105.2 covers only small decks that are 30 inches or less above grade, 200 square feet or less, not attached to the house and not serving the required exit door. A deck like this one is attached and serves a sliding door, so plan to ask about a permit. Replacing only boards may be treated differently where you live, so call and ask.
Guards (railings). The 2024 IRC requires guards where a walking surface is more than 30 inches above the grade below, measured within 36 inches of the edge. Where required, guards must be at least 36 inches high, and openings must not let a 4-inch sphere pass through.
This deck looks about 2 feet high, so the model code may not require a guard here. Local rules can be stricter, and grade can drop away at one corner. Many families keep a sturdy railing anyway, especially with kids or older visitors.
Loads. The same code sets a design load for decks of 40 pounds per square foot. Guards must resist a 200-pound concentrated load at the top. That’s why railing posts need real connections, not just a couple of screws.
| Item | Planning example | Where it comes from |
|---|---|---|
| Deck size | About 10×12 to 12×14 ft (estimated from the images) | Measure your own deck |
| Deck height | About 2 ft (estimated from the images) | Measure from grade within 36 in. of the edge |
| When guards are required | More than 30 in. above grade | 2024 IRC (check local rules) |
| Guard height and openings | At least 36 in.; no 4 in. sphere passes | 2024 IRC |
| Guard post connection | At least a 4×4 post, 2×8 joists and 1,800 lb hold-downs for a 36 in. guard | DCA 6 (or the railing maker’s tested system) |
| Max joist spacing, 5/4 (1¼ in.) wood boards | Across the joists: 16 in. on center if each board spans 3 or more joists, 12 in. if it rests on only 2. Diagonal (up to 45°): 12 in. or 8 in. | 2024 IRC Table R507.7 |
| Max joist spacing, 2×6 boards | 24 in. on center, boards across the joists | 2024 IRC Table R507.7 |
| Decking fasteners | At least 2 per joist (8d threaded nails or No. 8 screws) | 2024 IRC Table R507.7 |
| Board gaps | About 1/8 to 1/4 in. for 5-1/2 in. boards; follow the maker | Southern Pine guide |
| Fasteners and connectors | Hot-dip galvanized or stainless; stainless near salt water | 2024 IRC R507.2.3 |
| Ledger | At least a 2×8, with 1/2 in. bolts or lags and flashing; never nails only | 2024 IRC R507.9 |
| Footings | At least 12 in. below undisturbed soil, deeper for frost where required | 2024 IRC R507.3 |
Materials and Tools
Buy structural lumber, hardware and fasteners locally once your inspection and plan are done. The links below are for tools and supplies that are handy to have.
Inspection and demolition:
- A Stanley 6-1/16-Inch Scratch Awl for probing wood
- A pin-type General Tools MMD4E Moisture Meter
- A Estwing 30-Inch Gooseneck Wrecking Bar for lifting boards
- Wells Lamont Cowhide Leather Work Gloves
- DEWALT Concealer Anti-Fog Safety Goggles
- A half-face 3M 6291 Half Facepiece Respirator Kit with particulate filters for sawing and dust
- 3M PELTOR X4 Earmuffs
Deck boards and deck railing build:
- A DEWALT 20V MAX Drill and Impact Driver Kit for pilot holes, screws and lags
- A DEWALT 20V MAX 7-1/4-Inch Cordless Circular Saw
- A Empire 48-Inch True Blue Box Level
- A Swanson 7-Inch Speed Square
- Deck Plus #10 x 3-Inch Exterior Wood Screws, or screws listed by their maker for your lumber’s treatment
- Butyl Joist Tape for Decking (optional)
- Woodlife CopperCoat Green Wood Preservative for cut ends of treated lumber
- Simpson Strong-Tie DTT2Z Deck Tension Ties for guard posts, where your plan or DCA 6 calls for them
- Treated decking, 4×4 posts, rails and balusters (buy locally)
Finish and the cozy corner:
- Deck and Wood Cleaner and Brightener Combo
- Ready Seal Exterior Wood Stain and Sealer
- Tangkula 3-Piece Patio Chair Set With Side Table
- Worth 20-Inch Tall Planters, Set of 2
- Dusk-to-Dawn Outdoor Wall Lights, 2-Pack (hire a licensed electrician for new wiring)
How Much Does It Cost to Repair or Replace a Deck?
These are rough estimates for a small deck about 12 by 12 feet, using treated pine and reusing a sound frame. Lumber prices swing a lot by region and season. Get local quotes before you commit.
| Item (about 12×12 ft, sound frame) | Rough DIY estimate |
|---|---|
| Treated deck boards | $400 to $1,000 |
| Railing posts, rails and balusters (about 36 linear ft) | $300 to $800 |
| Screws, hangers, hold-downs and post hardware | $150 to $400 |
| Joist tape (optional) and cut-end preservative | $50 to $150 |
| Framing repairs, if your inspection allows them | $0 to $500 or more |
| PPE, blades and small tools | $50 to $200 |
| Deck cleaner and stain or sealer | $50 to $200 |
| Disposal of old wood | $50 to $500 |
| Permit, where required | Varies by town |
| Estimated total, without furniture | About $1,050 to $3,750 |
| Optional: 2 chairs, side table, planters and a light | About $200 to $800 |
For comparison, Angi’s 2026 deck repair cost guide puts the national average for professional deck repair at about $2,248. It also lists about $8,000 as a budget for a full replacement, $40 to $60 per linear foot for a new wood railing, and $5 to $15 per square foot for demolition and removal. Those are national figures, and your local prices can be very different.
How Long Does a Re-Deck Take?
Plan on a few weekends for two people with basic carpentry skills. The biggest unknown when you repair or replace a deck is what you find under the old boards. Waiting for a permit or a pro can add weeks, so start there.
| Phase | Estimated time |
|---|---|
| Inspection, decision and permit questions | 1 day, plus any wait for a pro or permit |
| Railing and board removal | 1 day |
| Framing fixes and joist prep | Half a day to 2 days |
| New deck boards | 1 to 2 days |
| Guard posts, rails and balusters | 1 to 2 days |
| Cleanup | Half a day |
| Stain or sealer | Half a day to 1 day, after the wood is dry enough |
Step-by-Step: Repair the Deck and Rebuild the Railing
These steps assume your inspection, and a pro if needed, confirmed that the frame, posts, footings and ledger are sound or can be repaired. If not, switch to a rebuild plan with a permit.
Step 1: Clear the Deck and Block Off Weak Spots
Move furniture, grills and planters off the deck. Mark or cover any holes and soft areas, and keep kids and pets away. Lock or block the sliding door from the inside so nobody steps out onto an open frame.
Step 2: Inspect From Below, Then Probe
Work through the inspection list above. Photograph every problem. Probe the tops of joists, joist ends, the rim, the ledger and the post bases. Mark bad areas with tape or chalk.
Step 3: Make the Call and Check Permits
Now it’s time to decide whether to repair or replace a deck. Use your notes and the decision table to choose. Call your building department with your plan. If a pro is needed, get the evaluation and any written repair details before you buy lumber.
Step 4: Check Old Wood and Paint, Then Set Up Safely
Older treated decks may be built with CCA (chromated copper arsenate). The EPA says CCA wood was phased out of most home uses by the end of 2003. Wear gloves and goggles, wear a dust mask or respirator when you saw, and wash your hands before eating. Never burn treated wood, and don’t use the sawdust as mulch.
If your home was built before 1978 and the deck or trim has old paint, test it before you sand or scrape. The EPA’s lead-safe guidance for DIYers recommends containing the work area, keeping children and pregnant women away, misting surfaces, and cleaning up with a HEPA vacuum.
Step 5: Remove the Old Railing
Take the railing off before the boards so you aren’t leaning on something loose. Back out screws or cut fasteners, and lower each section with a helper. Check the rim joist where each post was bolted. Rot at old bolt holes is common.
Step 6: Pull Up the Old Deck Boards
Work from one end. Slide the pry bar under each board at a joist and lever it up, or cut boards between joists and pull the short pieces. Pull or cut every old nail and screw flush with the joist tops. Stack old boards on a tarp, nails turned down, and keep the area clean.

Step 7: Fix the Framing You Found
With the boards off, you can see the whole frame. Re-check every joist top, hanger and connection. Replace rusted hangers with new connectors installed with the fasteners their maker specifies.
How you fix a damaged joist, beam, post or ledger should come from your building department, DCA 6 or an engineer. Don’t just screw a new board to a rotten one and hope. If the ledger connection can’t be verified, the IRC says the deck must be designed to stand on its own, without relying on the house.
Step 8: Protect the Joists and Treat Cut Ends
Once the frame is sound and dry, joist tape on the tops of joists and beams is an optional extra. It’s not a code requirement. It can help shed water around screw holes. Follow the tape maker’s instructions for temperature and surface prep.
DCA 6 calls for field-treating cuts in treated lumber with an approved preservative, such as copper naphthenate. Brush it on the cut ends of new boards, posts and rails.
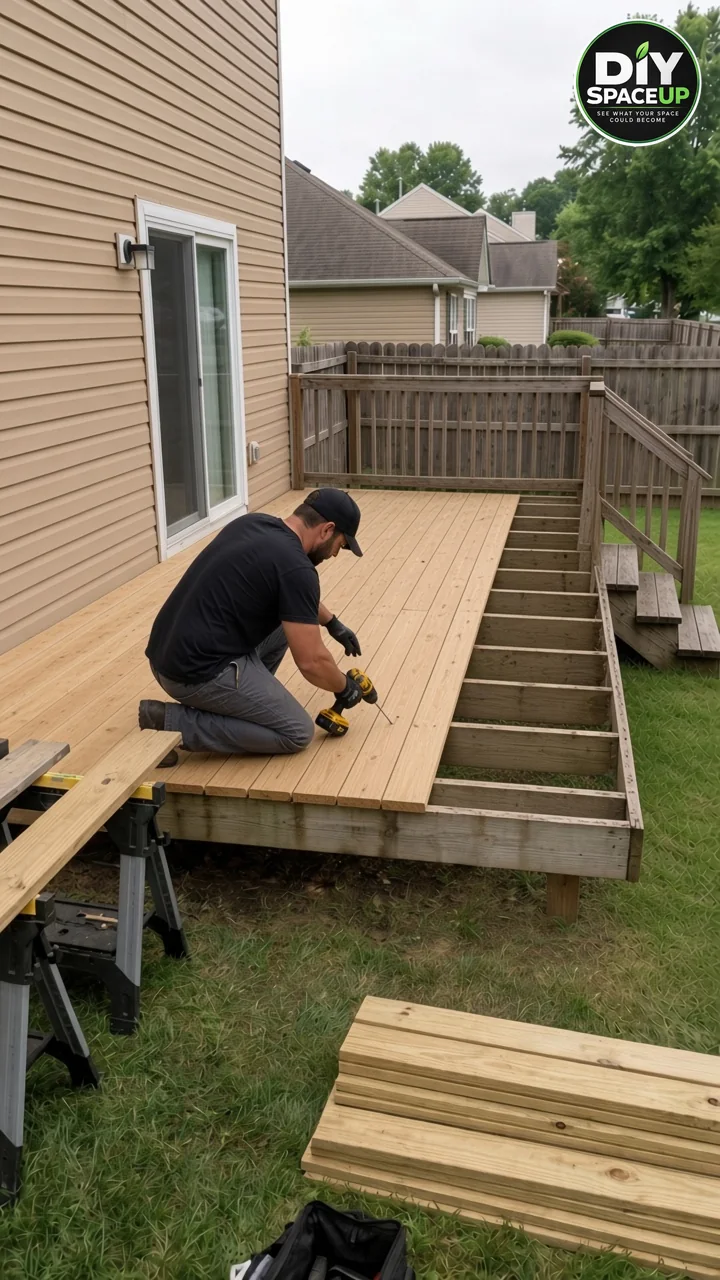
Step 9: Install the New Deck Boards
Check the joist spacing first. Under 2024 IRC Table R507.7, the limit for 5/4 (1¼-inch-thick) wood decking depends on how many joists each board crosses and on its direction. Boards running straight across the joists allow up to 16 inches on center when each board spans three or more joists (multiple span), but only 12 inches when a board rests on just two joists (single span). Diagonal boards, laid at up to 45 degrees, need joists no more than 12 inches apart for multiple spans and 8 inches for single spans. Two-inch decking running across the joists allows up to 24 inches, and many pros still keep spacing at 16 inches for a stiffer feel.
Use at least two fasteners into every joist. The IRC lists two 8d threaded nails or two No. 8 screws per support as the minimum. Choose screws rated for your lumber’s treatment. Hot-dip galvanized or stainless steel are the code-listed options, and stainless steel is required within 300 feet of salt water. Pre-drill near board ends to prevent splits.
Gaps between boards depend on how wet the lumber is. The Southern Pine decks guide suggests about 1/8 to 1/4 inch for boards that measure 5-1/2 inches wide, and no gap for very wet boards that measure 5-3/4 inches, since they shrink as they dry. Follow the decking maker’s chart if it has one.
Start at the house with a straight board, leave a small gap at the wall so water can drain, and work outward. Check every few rows that the gaps stay even. Trim the ends in one straight line at the end.
Step 10: Set the Guard Posts With a Tested Connection
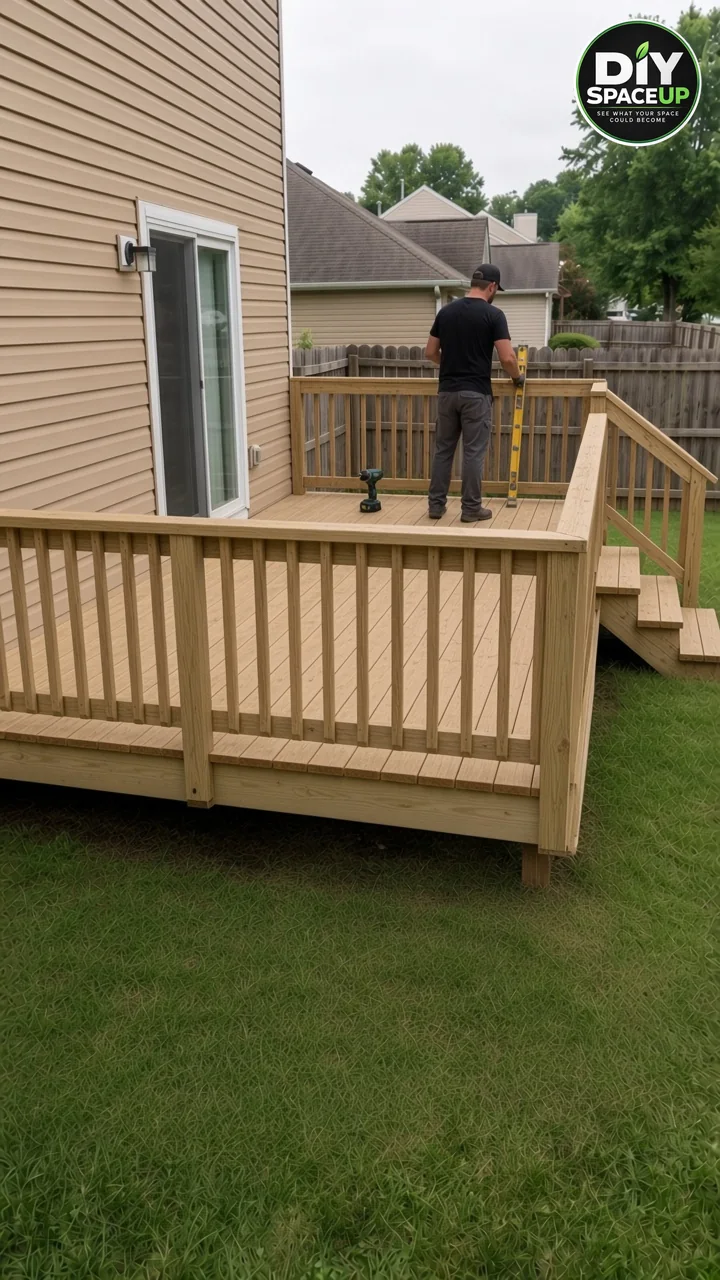
A new deck railing is only as strong as its posts, so this is the step that makes or breaks the job. A railing post that’s just lag-screwed through the rim can pull loose, because the rim board can twist and the screws can pull out of the end grain of the joists.
DCA 6 shows tested details for guard posts. For a 36-inch guard, it calls for at least 4×4 posts, joists of at least 2×8 and hold-down devices with an allowable tension load of at least 1,800 pounds. The 2024 IRC also says side-mounted posts must be tied back to the adjoining joists so the rim can’t rotate, and that 4×4 guard posts must not be notched. A pre-made or post-mount system must follow its maker’s tested instructions.
Install posts plumb, check them with a level on two faces, and space them per your plan or the railing maker’s chart.
Step 11: Add Rails and Balusters
Fasten the top and bottom rails between the posts, then add the balusters. Use a scrap block as a spacer to keep the gaps even. Test the openings with a 4-inch ball or a block cut to 4 inches. It should not pass through anywhere. Cap the post tops or cut them at an angle to shed water.
Step 12: Clean Up and Dispose of Old Wood Properly
Pull leftover nails out of the lawn with a magnet sweeper or a rake. Bag the sawdust and offcuts. The EPA says treated wood can usually go out with ordinary trash, but your town may have stricter rules. Never burn it in a fire pit or fireplace.
Step 13: Finish When the Wood Is Ready, Then Furnish
New treated lumber often needs time to dry before stain or sealer. Southern Pine guidance says waiting periods can run from a week to two months unless the wood was kiln-dried after treatment.
Try the splash test: sprinkle water on the boards. If it beads up, the wood isn’t ready yet. If it soaks in, it’s time to finish. Always follow the stain maker’s label, and skip solid-color stain on walking surfaces, since it tends to peel.
Then bring in the cozy part: two armchairs, a small side table, a couple of plants and a soft wall light by the slider.
Deck Safety Checklist
| Risk | What to do |
|---|---|
| Falling through rotten boards | Stay off soft areas. Inspect from below first. Cover holes. |
| Hidden structural failure | Have a pro check the ledger, posts and footings if anything looks wrong. |
| CCA-treated wood dust | Wear gloves, goggles and a respirator. Wash hands. Never burn treated wood. |
| Lead paint (homes built before 1978) | Test first. Contain dust, mist surfaces and clean with a HEPA vacuum. |
| Nails and splinters | Wear leather gloves and sturdy boots. Pull or bend over every nail. |
| Power tools | Wear eye and hearing protection. Keep blade guards working. Unplug or remove batteries when changing blades. |
| Weak railing | Use tested post connections. Push-test every post before anyone leans on it. |
| Electrical work | Hire a licensed electrician for any new wiring for the wall light. |
| Kids and pets | Keep them away from the work area and the open frame. |
Common Mistakes to Avoid
| Mistake | Better approach |
|---|---|
| Replacing boards without checking the frame | Inspect joists, posts, footings and the ledger first. |
| Trusting a nailed-only ledger | Have it evaluated. Ledgers need bolts or lags and flashing. |
| Lag-screwing railing posts through the rim only | Use DCA 6 details or the railing maker’s tested system. |
| Using the wrong screws | Use fasteners rated for treated lumber, and don’t mix metals. |
| Gapping wet boards like dry ones | Follow the gap guidance for the board’s moisture. |
| Burning old treated wood | Dispose of it as your town allows. Never burn it. |
| Staining too soon | Wait until the splash test shows the wood is ready. |
| Skipping the permit question | Call your building department before you start. |
How to Maintain Your New Deck
Whether you repair or replace a deck, a little yearly care keeps the new boards and railing safe for longer.
- Inspect once a year. Southern Pine and NADRA guidance both suggest a yearly look at decay, connections and guard railings.
- Keep it clean. Sweep leaves and debris out of board gaps so water can drain.
- Watch the water. Make sure downspouts and sprinklers don’t soak the deck or the ledger area.
- Refinish when water soaks in. Use the splash test every season.
- Check fasteners. Re-drive popped screws and replace any rusted ones.
- Push on the posts. If a railing post moves, fix it before someone leans on it.
- Lift planters. Use pot feet or a tray so pots don’t trap water on the boards.
REPAIR or REBUILD? Our Take on This Deck
Looking only at the images, this deck reads like a REPAIR job: the frame stays, and the boards and railing are new. That would be a smart, budget-friendly call if the joists, posts, footings and ledger check out.
But a hole in the boards often means water has been sitting there for a long time. If probing finds rot in the joists below it, rust on the hangers or a ledger that’s only nailed, the answer flips to REBUILD, or at least a much bigger repair designed by a pro.
So which would you choose? Tell us in the comments on our post: REPAIR or REBUILD!
FAQ
Is it cheaper to repair or replace a deck?
Usually, repair is cheaper, as long as the structure is sound. Angi’s 2026 data puts average professional repairs at about $2,248, with a full replacement around $8,000. Hidden framing damage can quickly close that gap.
How do I know if my deck joists are rotten?
Probe them with an awl or screwdriver. If the tip sinks in easily, the wood breaks off in short pieces, or it feels soft or spongy, decay may be present. Dark stains, mushrooms and crushed wood at hangers are also warning signs. Have a pro confirm.
Can I put new boards on an old deck frame?
Yes, if the frame, posts, footings and ledger are sound and the joist spacing suits the new boards. If you can’t verify the ledger connection, or the frame shows rot, talk to your building department or an engineer first.
Does a 2-foot-high deck need a railing?
The 2024 IRC requires guards where the surface is more than 30 inches above grade within 36 inches of the edge. A 2-foot deck may not need one under the model code, but local rules vary. Many families add one anyway.
Do I need a permit to repair or replace a deck?
Often, yes. The model code only exempts small, low decks that are not attached to the house and don’t serve the exit door. Simple board replacement may be treated differently. Call your local building department before you start.
What screws should I use with pressure-treated lumber?
Use hot-dip galvanized or stainless steel fasteners and connectors, or other types the maker lists for your treatment. Simpson Strong-Tie recommends stainless when the treatment is unknown. Don’t mix galvanized and stainless together on the same connection.
Why This Deck Makeover Works
The smartest way to repair or replace a deck starts with the boring part: checking the structure before spending money on the surface. Fresh boards and a solid railing then make a big visual change for a fraction of the cost of a new deck. A simple seating spot for two makes the space feel finished and calm.
If you’re planning more outdoor projects, take a look at our gravel patio makeover, our covered patio roof, the covered back door porch, our backyard grill station and the dry creek bed with bridge. You’ll find more ideas in our Outdoor Spaces section.
Sources
- International Residential Code 2024, Chapter 5, Section R507 Decks (UpCodes)
- International Residential Code 2024, Chapter 3, guards and design loads (UpCodes)
- International Residential Code 2024, Chapter 1, R105.2 permit exemptions (UpCodes)
- American Wood Council, DCA 6 Prescriptive Residential Wood Deck Construction Guide (PDF)
- NADRA, Check Your Deck consumer checklist (PDF)
- InterNACHI, How to Perform Deck Inspections (PDF)
- Southern Forest Products Association, Southern Pine Decks and Porches (PDF)
- Simpson Strong-Tie, Pressure-Treated Wood FAQ
- US EPA, Chromated Arsenicals (CCA)
- US EPA, Lead-Safe Renovations for DIYers
- Angi, How Much Does Deck Replacement or Repair Cost? (2026 data)