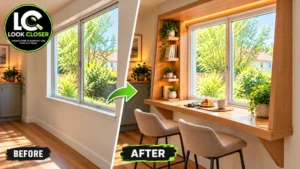
An underused window wall becomes a space-saving breakfast bar with a natural wood counter, built-in side shelves and warm LED lighting.
DIY Window Breakfast Bar With Built-In Side Shelves and LED Lighting
See how an overlooked window wall can become a functional breakfast and work area with a custom wood counter, compact side storage and integrated warm lighting.
That wide window was already doing the hardest part: bringing beautiful natural light into the room. But the wall underneath it wasn’t doing much at all.
Instead of adding another freestanding table that would consume floor space, this project turns the window itself into a compact breakfast and work zone. A long wood counter spans beneath the window, full-height wood side panels frame the opening, a header ties the composition together, three small shelves use the left-side cavity, and a warm LED strip provides soft evening light.
The finished result looks simple, but the construction sequence matters. The counter needs real structural support, the window must remain fully operable, and the decorative frame should never be mistaken for the load-bearing system.
The dimensions below are planning examples, not measurements taken from the reference images. Measure your actual window, wall framing, trim and seating requirements before cutting anything.
Affiliate disclosure: As an Amazon Associate, DIY SpaceUp earns from qualifying purchases. Some links below are affiliate links, which means we may earn a commission at no extra cost to you.
Table of Contents
What We’re Building
The reference project consists of a continuous wood structure surrounding an existing window without replacing or modifying the window itself.
Component
Function
Long wood counter
Breakfast, coffee or work surface
Left vertical panel
Frames window and houses three shelves
Right vertical panel
Completes the surround
Top header
Connects the visual frame
3 left-side shelves
Small display/storage area
2 triangular braces
Support the projecting counter
Warm LED strip
Task/accent lighting below the header
2 counter-height stools
Seating
The important detail visible in the construction photos is that the counter goes in first, followed by the side framing, upper header, shelves/braces and lighting.
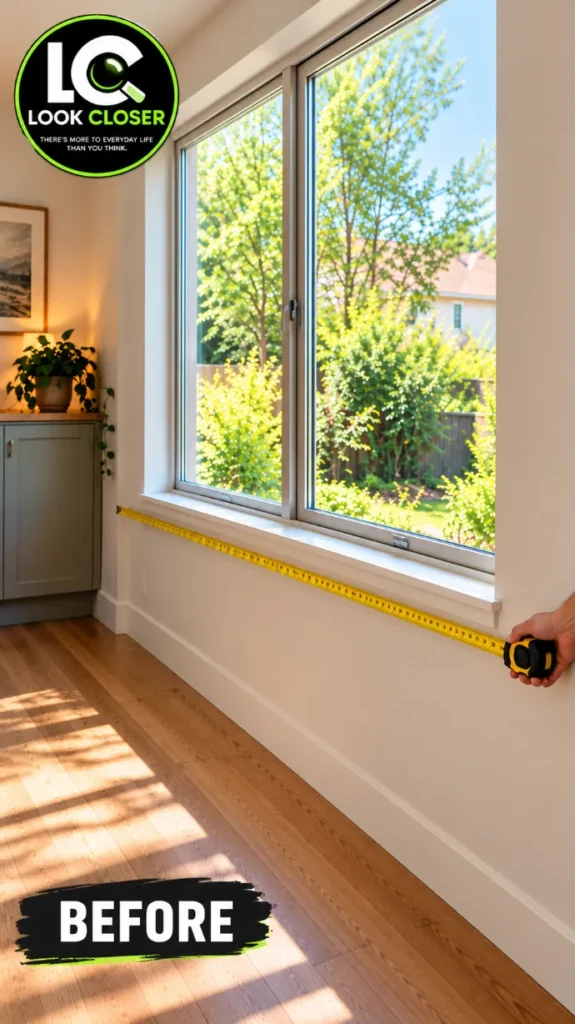
The project starts by measuring the full window wall so the counter, side panels and upper frame can be sized without interfering with the existing window.
Step 1: Measure the Window and Surrounding Wall
Don’t measure only the glass.
Record the complete opening and the available wall around it:
Also check for electrical wiring, plumbing and other hidden services before drilling.
Step 2: Decide the Counter Height and Depth
The reference design functions more like a breakfast bar than a conventional desk.
A useful planning starting point is:
Feature
Typical Planning Range
Counter height
36–42 in
Counter depth
16–20 in
Wood thickness
About 1–1½ in
Stool seat height
About 24–30 in, matched to counter
Knee clearance
Approximately 10–12+ in horizontally
Shelf depth
About 6–9 in
These are starting ranges only.
The most comfortable relationship is determined by the actual counter and stool combination. Don’t buy stools until you know the finished counter height.
Step 3: Choose Straight, Stable Wood
The visual character of this project comes from the continuous natural wood grain.
Use straight, dry lumber or furniture-grade panels that are stable enough for interior cabinetry and counter construction. Oak, maple, birch, quality plywood with matching edge treatment, or another suitable furniture-grade material can work depending on budget and desired appearance.
Inspect every long piece for bowing and twisting before purchase.
A DEWALT 20V MAX Circular Saw with a straightedge guide is useful for breaking down large panels, while a miter saw can produce clean crosscuts for the shelves and framing pieces.
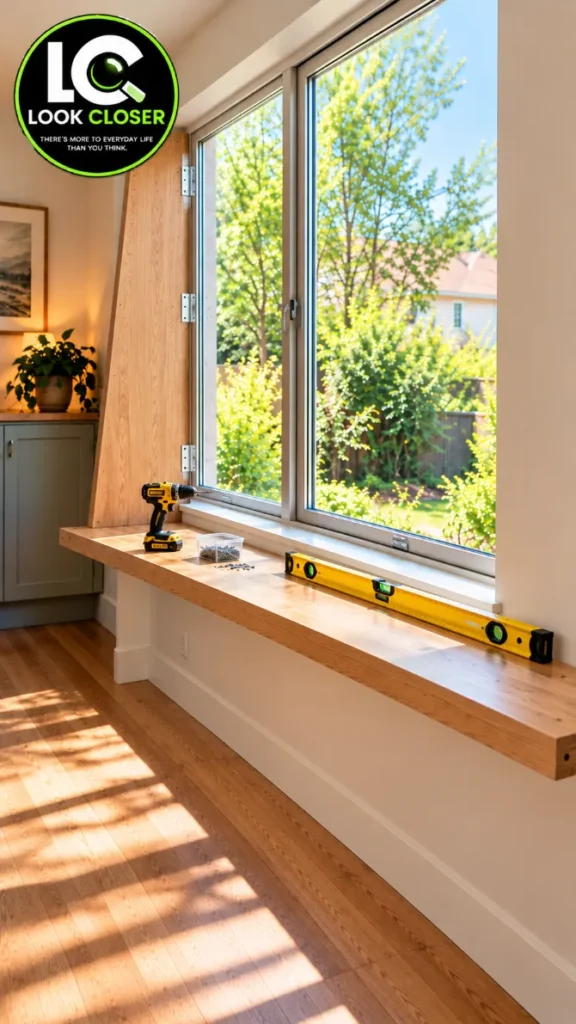
Step 4: Install the Counter First
This is exactly what the intermediate reference shows.
The long counter spans below the window before the complete surround exists.
But don’t simply screw a long board into drywall.
The counter must transfer its load into suitable structural support. Depending on the wall and design, that may involve ledger attachment to framing, properly designed brackets, structural blocking or another appropriate support system.
Use a long level to establish a perfectly horizontal reference.
A DEWALT 48-Inch Box Beam Level is useful for checking the counter before final fastening.
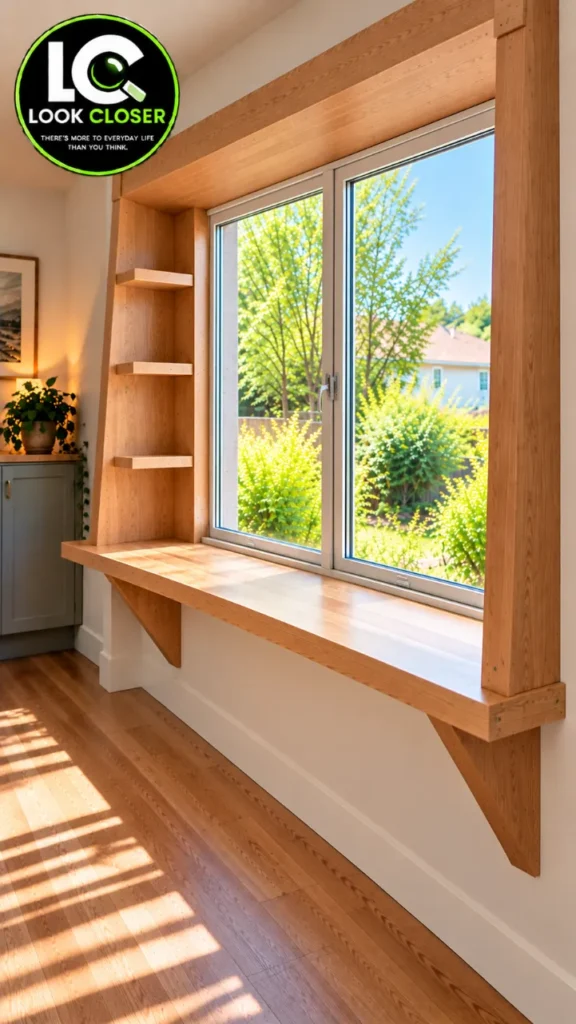
The long wood counter is installed beneath the window first, then the left vertical panel is positioned and checked before the rest of the surround is assembled.
Step 5: Add the Side Panels
With the counter established, install the tall left and right wood panels.
These pieces create the strong built-in appearance visible in the AFTER image.
Keep them plumb and maintain clearance from the window frame. The panels should frame the existing window—not force, pinch or distort it.
The reference shows the left panel being secured at several vertical locations.
If fastening into the wall, choose hardware appropriate for the actual framing and substrate. Drywall itself should not be treated as structural support for a heavily loaded counter.
Step 6: Install the Top Header
Once both sides are established, the horizontal upper member connects the surround visually.
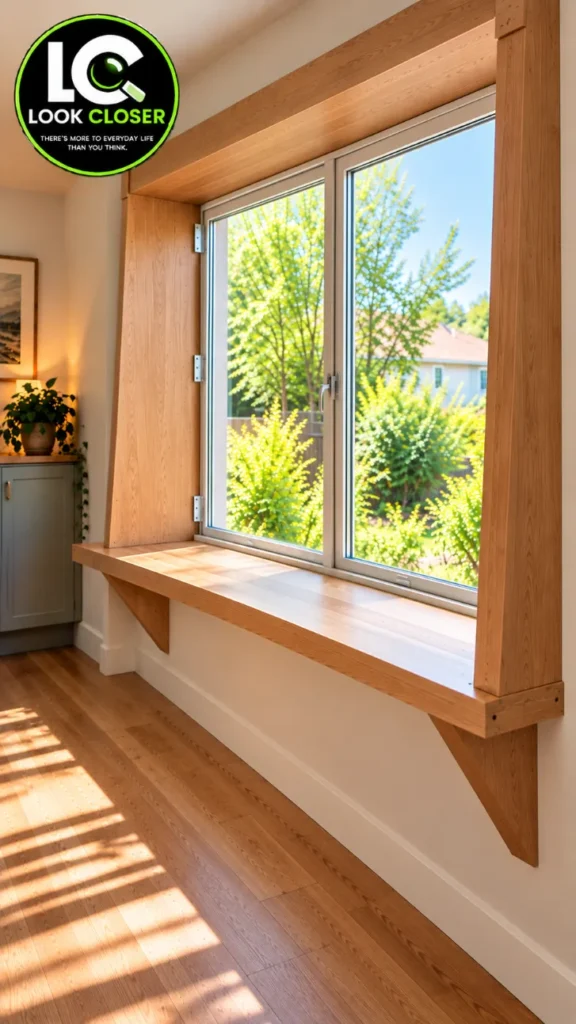
The 6.5-second reference clearly shows the top section completing the three-sided frame around the window.
Check that:
both side panels are plumb,
the header is level,
joints close cleanly,
nothing interferes with window operation,
the structure isn’t pressing against the window frame.
With the counter in place, both vertical side panels and the upper wood header complete the main frame around the existing window.
Step 7: Add the Three Left-Side Shelves
The final design uses only the narrow cavity on the left side for shelving.
That’s important: don’t add matching shelves to the right side. They don’t exist in the reference design.
Three small wood shelves create enough space for books and small plants without blocking a significant portion of the window.
Measure each opening individually before cutting. Built-in spaces are rarely perfectly identical from top to bottom.
For shelf assembly, Titebond III Ultimate Wood Glue combined with suitable mechanical joinery can help produce strong joints. Follow the adhesive manufacturer’s clamping and cure instructions.
Step 8: Install the Counter Braces
The 10.5-second reference shows triangular wood supports underneath the counter near both ends.
These are not merely decoration.
A projecting breakfast counter can experience substantial leverage when someone leans on its front edge. The support system must therefore be designed for the expected loads and connected to suitable structure.
Do not assign a universal load rating based on the photographs.
The safe capacity depends on:
counter material and thickness,
span,
projection,
brace geometry,
fasteners,
wall framing,
connection quality.
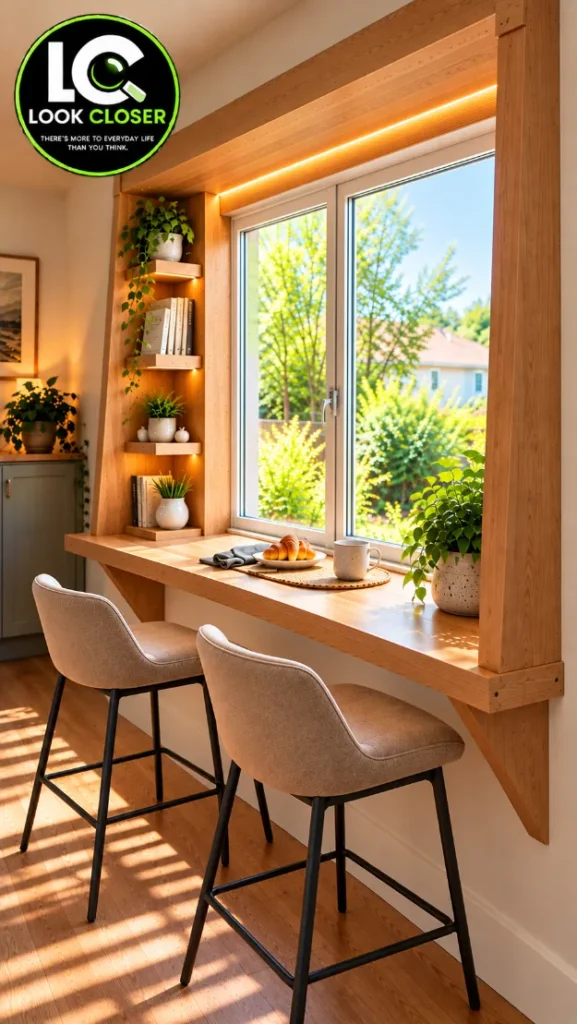
Three compact shelves complete the left-side storage while triangular wood braces provide structural support beneath the projecting breakfast counter.
Step 9: Sand and Finish the Wood
Before adding lighting and decor, sand exposed surfaces and soften sharp edges.
Progress through appropriate sanding grits rather than trying to remove everything with one aggressive grit.
Then apply an interior wood finish suitable for a frequently touched counter surface.
The reference maintains a warm natural wood appearance, so a clear or lightly tinted protective finish would preserve that character better than opaque paint.
Allow the finish to cure according to the manufacturer’s instructions before regular use.
Step 10: Add the Warm LED Strip
The final image shows a continuous warm light line beneath the upper wood header.
This is accent/task lighting—not structural lighting.
A Philips Hue Lightstrip Plus or a comparable UL/ETL-listed LED strip system can work if its dimensions, installation method and indoor rating suit the project.
Plan the power route before installing the final trim.
Avoid leaving a power cable hanging visibly across the window surround. Keep the driver accessible for future replacement and follow the lighting manufacturer’s clearance and installation requirements.
For hardwired electrical work or a new receptacle, follow local electrical requirements and use a qualified electrician where required.
Step 11: Test the Window Before Styling
This step is easy to skip.
Open, close and lock the window several times.
Check that:
handles remain accessible,
sash movement is unobstructed,
no wood component contacts moving window parts,
drainage/weep paths remain unobstructed,
curtains or blinds can still function if retained,
LED wiring doesn’t interfere with operation.
Never block required window egress. If the window serves as an emergency escape or rescue opening, the new built-in must not reduce the required clear opening or access. Requirements vary by location, so verify applicable local building rules.
Step 12: Add the Stools and Decor
Only after the structure is complete should the project start looking like the final photograph.
Add the two stools, then lightly style the three left shelves with books and plants.
The counter itself doesn’t need much—a plant, mug and breakfast setting are enough to demonstrate its purpose without turning the workspace into a display shelf.
Three compact shelves use the narrow space beside the window while the warm LED strip adds integrated lighting above the finished breakfast bar.
How Much Weight Can the Counter Hold?
There is no responsible universal number for this design.
The safe load is determined by the weakest part of the support system, not simply by how thick the wood looks.
Variable
Why It Matters
Wall framing
Transfers load into the building
Fastener type
Determines connection strength
Counter span
Longer spans increase bending
Counter projection
Greater depth increases leverage
Wood thickness/material
Affects stiffness
Braces
Help support the projecting counter
Joinery
Weak connections can fail before the wood
Design it as a real counter, not a decorative floating shelf.
And regardless of capacity, it should never be used as a seat or climbing surface.
Tools and Materials
You don’t need an enormous workshop, but accurate measuring and straight cuts matter.
Affiliate disclosure: As an Amazon Associate, DIY SpaceUp earns from qualifying purchases. Some links below are affiliate links, which means we may earn a commission at no extra cost to you.
Estimated Project Cost
Cost varies substantially with wood species and whether you already own tools.
Category
Planning Budget
Wood/panels
$150–$400+
Structural hardware
$25–$75
Glue & finishing supplies
$30–$80
LED lighting
$25–$100+
Misc. hardware
$20–$50
Approx. project materials
$250–$705+
Stools are excluded because their price varies widely.
Premium hardwood can push the total considerably higher, while quality veneered plywood can reduce material cost.
Safety Checklist
Before calling the project finished, check every item.
Check
Requirement
Wall attachment
Connected to suitable structure
Counter
Level and rigid
Braces
Securely attached
Side panels
Plumb and stable
Header
Secure with no sagging
Shelves
Properly joined and appropriate for intended load
Window
Opens, closes and locks normally
Egress
Not compromised where applicable
Electrical
LED installation follows manufacturer/local requirements
Edges
Sanded smooth
Finish
Fully cured
Stools
Correct height and stable
Common Mistakes to Avoid
Mistake
Better Approach
Building from the photo’s proportions
Measure your actual window
Attaching a heavy counter only to drywall
Transfer loads to suitable structure
Installing shelves on both sides
Preserve the reference design: shelves only on the left
Building everything before checking the window
Test operation throughout construction
Treating braces as decorative
Design the support system for real counter loads
Hiding an inaccessible LED driver
Keep serviceable components accessible
Adding lighting after everything is finished
Plan cable routing before final assembly
Buying stools first
Match stools to the finished counter height
Blocking window drainage or egress
Preserve all required window functions
Why This Transformation Works
The project doesn’t add a new piece of furniture in front of the window. It makes the existing wall and window zone perform another job.
During the day, natural light makes it a breakfast or work spot. At night, the concealed warm LED changes the same structure into a cozy built-in feature. The three shelves use a narrow side cavity that would otherwise remain empty, while the long counter provides useful surface area without four table legs occupying the room.
Most importantly, the build has a logical sequence:
measure → locate structure → install counter → add side panels → install header → add shelves and braces → sand/finish → install lighting → test the window → add stools and decor.
The transformation looks dramatic, but the idea behind it is simple: before adding more furniture to a room, look closer at the space that’s already there.
[…] you like the look of our DIY window breakfast bar? Or the built-in seating in our gravel patio and wood bench project? If so, a curved breakfast nook […]
We use cookies and similar technologies to help our website function properly, understand how visitors use the site, and improve your experience. You can accept or manage your preferences at any time. Some features may not work as intended if certain cookies are disabled.
Functional
Always active
The technical storage or access is strictly necessary for the legitimate purpose of enabling the use of a specific service explicitly requested by the subscriber or user, or for the sole purpose of carrying out the transmission of a communication over an electronic communications network.
Preferences
The technical storage or access is necessary for the legitimate purpose of storing preferences that are not requested by the subscriber or user.
Statistics
The technical storage or access that is used exclusively for statistical purposes.The technical storage or access that is used exclusively for anonymous statistical purposes. Without a subpoena, voluntary compliance on the part of your Internet Service Provider, or additional records from a third party, information stored or retrieved for this purpose alone cannot usually be used to identify you.
Marketing
The technical storage or access is required to create user profiles to send advertising, or to track the user on a website or across several websites for similar marketing purposes.


[…] you like the look of our DIY window breakfast bar? Or the built-in seating in our gravel patio and wood bench project? If so, a curved breakfast nook […]