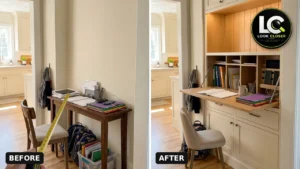

Every afternoon, the same corner fills up. Backpacks land on the floor. Homework spreads across the nearest surface. Charging cables snake toward the only outlet. A DIY homework station gives that corner one clear job: hold the papers, supplies and devices, and give your kid a place to work.
This DIY homework station plan is simple. Run a short line of cabinets along one wall. Add a shallow hutch above with a fold-down desk front, an oak slat back panel, a cubby organizer and a charging spot. When the flap is closed, the clutter is out of sight. When it is open, you have a desk.
A quick note on the images: the photos in this article come from an AI-assisted visualization. They are illustrative, not a record of a real, inspected build. The steps below are based on standard cabinet installation methods, manufacturer guidance and published safety advice. Every dimension is a planning example. Measure your own room and follow the instructions that come with your cabinets and hardware.
Affiliate Disclosure: As an Amazon Associate I earn from qualifying purchases. Product links in this article may earn a commission at no additional cost to you.
In This Guide
- What This DIY Homework Station Includes
- Step 1: Measure and Plan Your DIY Homework Station
- Materials and Tools
- Step 2: Remove the Baseboard and Prep the Wall
- Step 3: Set the Base Cabinets Level and Secure Them to Studs
- Step 4: Install the Hutch Above the Desk Top
- Step 5: Build the Fold-Down Desk for Your DIY Homework Station
- Step 6: Drawers, Doors and Hardware
- Step 7: Add the Oak Slat Panel and Cubby Organizer
- Step 8: Set Up a Safe Charging Spot
- Step 9: Add LED Lighting
- Step 10: Paint, Finish and Caulk
- Step 11: Do a Final Anchoring and Safety Check
- Step 12: Style It for Real Life
- Safety Tips for Building With Kids in the House
- Cost Estimate
- Common Mistakes to Avoid
- FAQ
- Final Thoughts
What This DIY Homework Station Includes
This family homework station is a built-in, not a freestanding desk. It uses parts you can buy or build:
- Base cabinets with drawers and doors for supplies.
- A desk-height top as the writing surface.
- A shallow hutch of wall cabinets, screwed to the studs.
- A drop-front flap that opens down onto the desk top.
- An oak slat panel and cubby insert behind the flap.
- A charging spot in an open, ventilated cubby.
- Plug-in LED lighting under the hutch shelf.
Here is the key idea. The hutch is shallower than the base, so the open flap lands flat on the desk top. The cabinet top, not the hinge hardware, carries elbows, books and laptops.
Step 1: Measure and Plan Your DIY Homework Station
Start with the wall. Measure its width, the ceiling height and the distance to nearby doors and windows. Note where outlets, switches, vents and the baseboard sit. Then sketch the station on paper at scale.
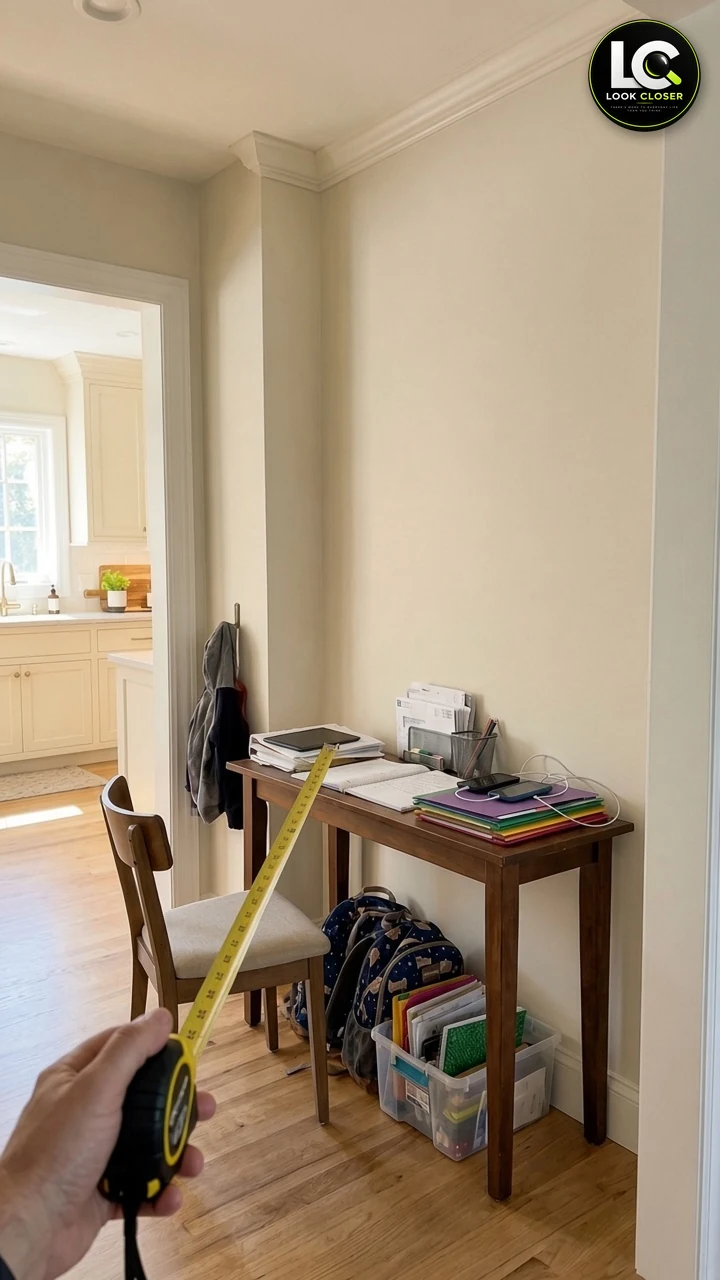
Use these numbers as planning examples, not rules:
| Planning item | Planning example | Notes |
|---|---|---|
| Seated work surface height | 28–34 in | ADA 902.3 range for work surfaces; common desk heights sit near 28–30 in |
| Work surface for kids | 26–30 in | ADA 902.4.2 children’s reference; an adjustable chair helps |
| Knee space under the desk | At least 27 in high and 30 in wide | ADA 306 reference for seated knee clearance |
| Open floor behind the chair | About 36 in | Rule of thumb to pull a chair out; verify for your room |
| Hutch depth | About 12 in | Common wall cabinet depth; verify with your cabinet line |
| Desk top depth | About 24 in | Common base cabinet depth; verify with your cabinet line |
The accessibility figures above come from the U.S. Access Board’s ADA Standards. They are written for public buildings, not homes, but they give useful targets for seated work. An adjustable chair helps the desk fit a growing kid.
A standard base cabinet is about 34-1/2 in tall before the top goes on, so it ends near counter height. That suits standing work or a tall stool. For seated homework, plan a lower desk section or a knee-space opening between two drawer bases.
Check What’s Behind the Wall
Mark every stud along the wall with a stud finder. Use light pencil lines above and below the cabinet area.
Next, think about wires and pipes. Wires often run sideways from outlets and switches. Plumbing may sit behind a wall shared with a bathroom or kitchen. Keep screws away from the area directly above, below and beside outlets and switches. If you are unsure, turn off the circuit and ask a licensed electrician before you drill.
Materials and Tools
Cabinets and Panels
For most DIYers, stock or ready-to-assemble cabinets are the easiest base for a DIY homework station. They are square, sized and come with install instructions. Custom doors, a drop-front flap and trim make them look built-in.
Buying plywood or MDF? Look for the label “TSCA Title VI compliant.” Since 2019, the EPA formaldehyde standard has required this label on hardwood plywood, MDF and particleboard sold in the U.S. For the slat panel and cubbies, solid white oak or oak plywood both work well.
Essential Tools
These are the tools you will use on almost every step.
- STANLEY FATMAX 25-ft Tape Measure, a pencil and a 4 ft level for layout.
- Franklin Sensors M210 Stud Finder to locate framing. This multi-sensor model shows several studs at once.
- DEWALT 20V MAX Drill/Driver Kit for pilot holes and driving screws.
- IRWIN QUICK-GRIP Mini Bar Clamps to hold cabinets flush while you join them.
- A flat pry bar and a utility knife to remove the baseboard.
- DEWALT DPG82 Safety Goggles for drilling, cutting and overhead work.
- 3M 8511 N95 Respirators for sanding dust. Add hearing protection when you run a saw.
Optional Equipment
These make the job faster, but you can borrow, rent or skip them.
- BOSCH GLL50-20G Cross-Line Laser to project one level line across the whole wall.
- DEWALT 20V MAX XR Impact Driver to drive long cabinet screws with less effort.
- DEWALT 20V MAX Circular Saw for cutting plywood and slats. Many stores will also cut sheets for you.
- DEWALT 5-in Random Orbit Sander for prep work on the flap, slats and cubbies.
- Kreg Pocket-Hole Jig 720PRO if you build the cubby insert or face frames yourself.
Many hardware stores rent saws, sanders and lasers by the day.
Materials and Hardware
- Base cabinets, wall cabinets and a desk top (see above).
- 3/4 in plywood or MDF for the flap and center box, plus thin white oak strips for the slats.
- GRK #8 x 2-1/2 in Cabinet Screws, a washer-head screw made for cabinet installs.
- Nelson Wood Shims (120 pack) for leveling the base cabinets.
- Titebond III Ultimate Wood Glue for the slat panel and cubby joints.
- Sugatsune Soft Down Drop Front Support, usually used in pairs (sizing is covered in Step 5).
- LONTAN 18-in Soft-Close Drawer Slides if your drawers don’t come with slides. Match the length to the cabinet’s inside depth.
- Amerock Edona Bronze Knobs for doors, plus matching pulls for drawers if you like.
- Belkin 12-Outlet Surge Protector with USB for the charging bay (see Step 8).
Finishing Supplies
- A stain-blocking primer for knots and raw wood.
- INSL-X Cabinet Coat Enamel, a cabinet enamel for the painted parts.
- Minwax Polycrylic (Clear Satin) for the oak slats and cubbies.
- Paintable acrylic latex caulk and fine sandpaper.
Step 2: Remove the Baseboard and Prep the Wall
Cabinets must sit tight to the wall, so the baseboard there comes off. Score the caulk line with a utility knife. Work the trim loose with the pry bar, using a thin scrap of wood behind it to protect the drywall.
Live in a home built before 1978? Assume old paint on the trim may contain lead. Follow the EPA’s lead-safe steps for DIYers. Cover the floor and keep kids and pets out. Mist surfaces instead of dry sanding. Clean up with a HEPA vacuum and wet wipes.
Patch nail holes and damaged drywall. If a cabinet back will cover an outlet, plan a clean cutout so the outlet stays reachable.
Step 3: Set the Base Cabinets Level and Secure Them to Studs
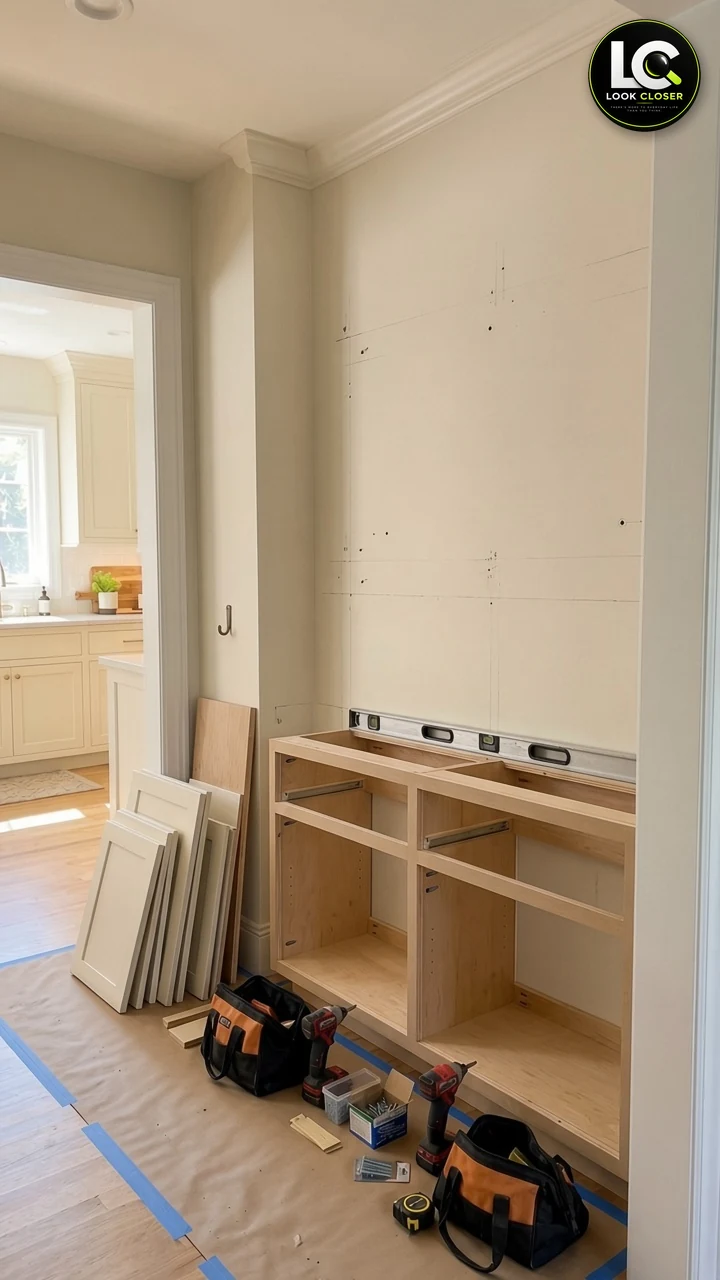
The base cabinets are the foundation of your DIY homework station, and floors are rarely flat. Find the high point of the floor along the run with your level or laser. Measure up from that point to the height of your base cabinets. For a standard base, that line is about 34-1/2 in. Draw the line across the whole wall. Every cabinet top will meet this line.
Set the first cabinet, usually the corner or end unit. Slide shims under the base until the top meets the line and the cabinet is level both ways. Add shims behind the back rail at any gap by a stud. That keeps screws from pulling the box out of shape.
Drill pilot holes through the cabinet’s back rail at each stud. Drive cabinet screws into the studs. Many guides use 2-1/2 in screws for this. Follow your cabinet maker’s instructions for screw size and spacing. Do not overtighten, or the box may rack.
Set the next cabinet, clamp the two face frames flush and drill pilot holes. Join them with screws through the frames or side panels, as the instructions show. Check level again, then score and snap off the shims.
Add the desk top. Fasten it from below through the corner blocks or rails with screws short enough not to poke through.
Step 4: Install the Hutch Above the Desk Top

The hutch is a row of wall cabinets. A shallow depth, such as about 12 in as a planning example, leaves open desk space in front of it.
Wall cabinets must be screwed to studs. Never hang them on drywall anchors alone. Draw a level line for the bottom or top edge of the hutch. Then screw a temporary ledger board along it to support the cabinets while you work.
Lift each cabinet onto the ledger with a helper. Drill pilot holes through the hanging rails into the studs and drive cabinet screws as the instructions direct. Join neighboring cabinets like the bases, then remove the ledger.
Leave the center bay for the desk. A simple open box of 3/4 in plywood works here, fastened to the studs and the cabinets beside it.
Step 5: Build the Fold-Down Desk for Your DIY Homework Station
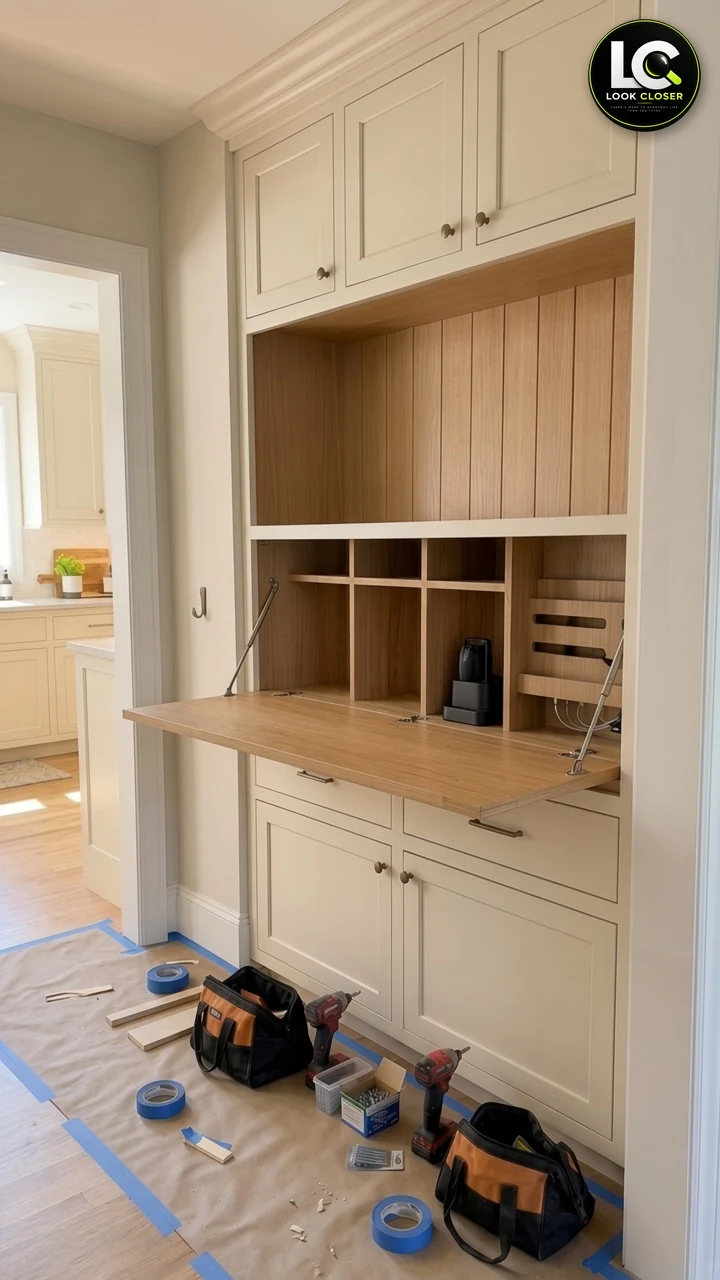
The fold-down desk is the heart of this DIY homework station. It hinges along its bottom edge and lowers until it rests on the desk top.
Make the flap from 3/4 in plywood or MDF with a hardwood edge. Size it to fit the opening with a small, even gap. Keep one planning rule in mind: make the flap’s height no more than the depth of the open desk top in front of the hutch. That way it can lie flat when open.
Hinge the flap at the bottom with hinges rated for its size and weight. Then add lid stays. A soft-down stay slows the flap so it does not slam or pinch small fingers.
How to Size the Lid Stays
Lid stays are rated by torque, in inch-pounds. One common formula used by stay makers is:
Torque (in·lb) = lid weight (lb) × lid height (in) ÷ 2
Planning example: a 30 in wide × 15 in tall flap of 3/4 in plywood weighs roughly 8 lb. That gives about 8 × 15 ÷ 2 = 60 in·lb. The Sugatsune soft-down drop-front support listed above is rated 43 in·lb per support, per its listing. One is not enough, so you would use a pair. Weigh your actual flap with its hardware and edge trim before you choose.
A torque rating covers lowering the lid. It does not mean the open flap can carry a load in mid-air. That is why this fold-down desk rests on the desk top. If your flap won’t touch a surface, ask the stay maker about load limits (verify) and add lopers or a support rail.
Also read the stay’s instructions for mounting position, speed adjustment and whether you need a separate catch to hold the flap shut.
Step 6: Drawers, Doors and Hardware
Install drawer slides with a level line or a slide jig so each pair sits parallel. Mount the drawer boxes and adjust until the fronts line up. Soft-close slides are worth it in a family homework station.
Hang the doors and adjust for even gaps. Most concealed cup hinges adjust in three directions.
Add the knobs and pulls last. A scrap-wood drilling template puts every handle in the same spot. Check that the screw length suits your door thickness.
Step 7: Add the Oak Slat Panel and Cubby Organizer
The slat panel is the back wall of the desk bay. Cut thin white oak strips to length, then sand and finish them before you attach them.
Glue the strips to a thin plywood backer with even spacers. A brad nailer holds them while the glue sets. Then screw the panel through the backer into the cabinet back.
Build the cubby insert from 1/2 in or 3/4 in plywood with pocket screws or glued dados. Plan three zones:
- Open slots on one side for folders, worksheets and notebooks.
- Small pigeonholes in the middle for pencils, sticky notes and calculators.
- A charging bay on the other side with grooves or dividers for phones and tablets.
Step 8: Set Up a Safe Charging Spot
A charging cubby makes a DIY homework station more useful, but it must follow basic electrical rules. Under the National Electrical Code (NEC), flexible cords cannot replace permanent wiring. They should not run through holes in walls, ceilings or floors. They also should not be hidden inside walls. Power strips are also not meant to be permanently fastened to cabinets or chained together.
You have two sound options:
- Plug-in setup. Run one listed surge-protected power strip from an accessible outlet. Let it sit loose in the charging bay. Do not screw it down or bury it. The Belkin strip listed above has USB-A and USB-C ports and is UL listed, per its listing. A small desk grommet in a shelf lets cables pass neatly between cubbies.
- Hardwired setup. Have a licensed electrician add a receptacle, possibly with USB ports, inside or behind the cabinet. They will follow your local code and pull any permit needed.
Lithium-ion batteries need care too. Charge devices on a hard surface with open air around them. Use the maker’s charger or a certified one. Don’t leave devices charging behind a closed flap for long, and stop using any battery that gets hot or swells.
Step 9: Add LED Lighting
Good light helps kids read without straining. Mount plug-in LED fixtures under the shelf above the cubbies. Warm white light, around 3000K, looks soft on oak.
Choose a kit that is UL or ETL listed. Linkable fixtures let one plug run the set. Clip the cord along the cabinet so doors and the flap cannot pinch it. Then plug it into the same accessible outlet or strip.
Want a wall switch and no visible cords? That is hardwiring, a job for a licensed electrician.
Step 10: Paint, Finish and Caulk
Sanding makes fine dust, so wear a respirator and use dust collection. OSHA’s wood dust page explains why.
For painted parts, scuff-sand and wipe them clean. Prime with a stain-blocking primer, especially over knots, tannin-rich wood or old finishes. Then apply two thin coats of cabinet enamel, such as the INSL-X Cabinet Coat listed above. Follow the can for dry times, recoat times and room temperature. Cabinet paint can take days or weeks to fully cure, so treat the surface gently at first.
Clear-coat the oak slats and cubbies with a water-based finish like Polycrylic. It stays clear on light wood. Still, ventilate the room.
Run a bead of paintable acrylic latex caulk where cabinets meet the wall and trim. Then reinstall the baseboard and toe kick.
Step 11: Do a Final Anchoring and Safety Check
Tip-overs are a real danger for kids, as the U.S. Consumer Product Safety Commission’s Anchor It! campaign explains. A DIY homework station is only safe if it is truly fixed to the wall.
Walk through this checklist before anyone uses the DIY homework station:
- Every base cabinet and hutch cabinet is screwed into studs.
- No cabinet moves when you pull firmly on the top edge.
- The flap lowers slowly and rests flat on the desk top.
- Drawers close softly and do not pull out past their stops.
- Cords are not pinched, not under rugs and not run through walls.
- The outlet and power strip are easy to reach.
- Heavy items, like binders and books, sit low.
Step 12: Style It for Real Life
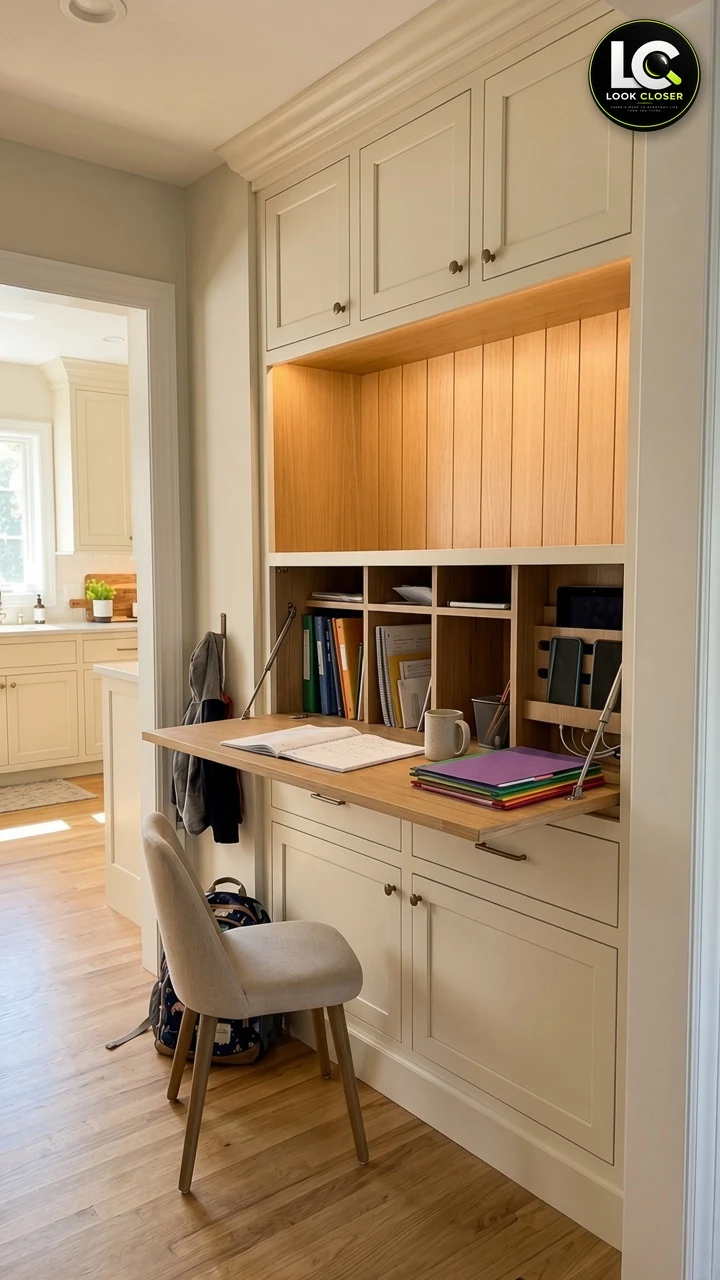
Give each child a labeled slot or bin. Keep daily supplies in the pigeonholes and extras in the drawers. Add a hook nearby for backpacks.
A comfortable chair matters as much as the desk. Look for an adjustable, armless chair that tucks under the top. A child’s feet should rest flat on the floor or a footrest.
Clear the flap each night before you close it. That habit is the real clutter fix.
Safety Tips for Building With Kids in the House
- Keep children out of the DIY homework station work area while you cut, drill or sand.
- Store screws, blades and finishes out of reach.
- Round over or sand sharp edges on the flap and cubbies.
- Choose soft-down stays and soft-close slides to reduce pinch points.
- Check screws, hinges and stays every few months.
Cost Estimate
Costs for a DIY homework station vary by region, cabinet line and finish. These are rough estimate ranges for a run about 6 ft long, not quotes.
| Item | Rough estimate range (USD) |
|---|---|
| Base cabinets (stock or RTA, 2–3 units) | $300–$1,000 |
| Hutch wall cabinets and center box | $250–$800 |
| Desk top, flap, oak slats and cubby plywood | $200–$600 |
| Hardware: stays, slides, hinges, knobs, pulls | $150–$350 |
| LED lighting and surge-protected strip | $60–$150 |
| Primer, cabinet paint, clear finish, caulk | $100–$200 |
| Screws, shims, glue, sandpaper | $40–$100 |
| Estimated total (materials only) | About $1,100–$3,200 |
| Licensed electrician (optional) | Varies; get a local quote |
Tools and the chair are not included. Check local prices before you budget.
Common Mistakes to Avoid
- Leveling from the wrong spot. Always start from the floor’s high point.
- Missing the studs. Drywall anchors alone are not enough for cabinets.
- Choosing stays by guesswork. Calculate the torque, and weigh the real flap.
- Letting the open flap hang unsupported. Rest it on the desk top or add proper supports.
- Hiding cords in the wall. Use an accessible outlet or call an electrician.
- Skipping finish cure time. Fresh enamel scratches easily.
FAQ
Can I use kitchen cabinets for a DIY homework station?
Yes. Stock kitchen cabinets are a common shortcut. Standard bases end up near counter height, so for seated work, look for desk-height units or plan a knee-space opening.
Is a fold-down desk strong enough for daily use?
It depends on the design. Lid stays are rated for lowering the lid, not for leaning on it in mid-air. In this plan, the open flap rests on the desk top, so the cabinet carries the load. Verify any open-load limits with your hardware maker.
Is it safe to put a charging station inside a cabinet?
It can be, if you keep it simple. Use a listed surge strip that sits loose, plugged into an accessible outlet. Keep the charging bay open and ventilated. For a built-in outlet, hire a licensed electrician.
Do I need a permit?
Cabinets alone usually don’t need one, but rules vary. New outlets or hardwired lights often do. Check with your local building department.
Final Thoughts
A DIY homework station turns a messy corner into a place that works every afternoon. Start with level cabinets, a hutch screwed to studs and a fold-down desk that rests on a solid top. Add safe charging, good light and smart storage, and the clutter finally has a home.
For more small-space ideas, see our narrow bathroom storage cabinet and vertical book rack. Or browse Indoor Spaces.