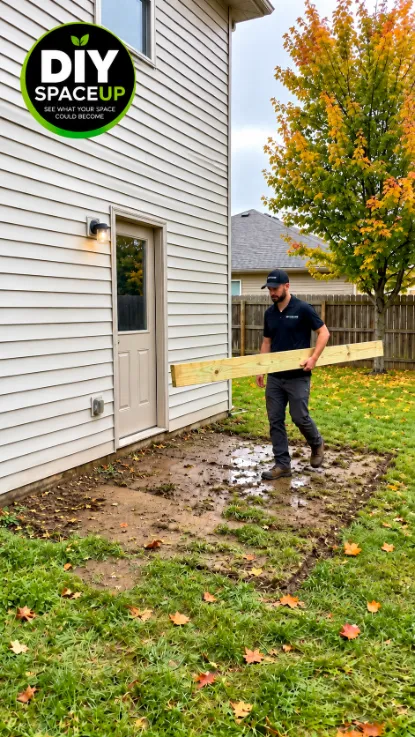
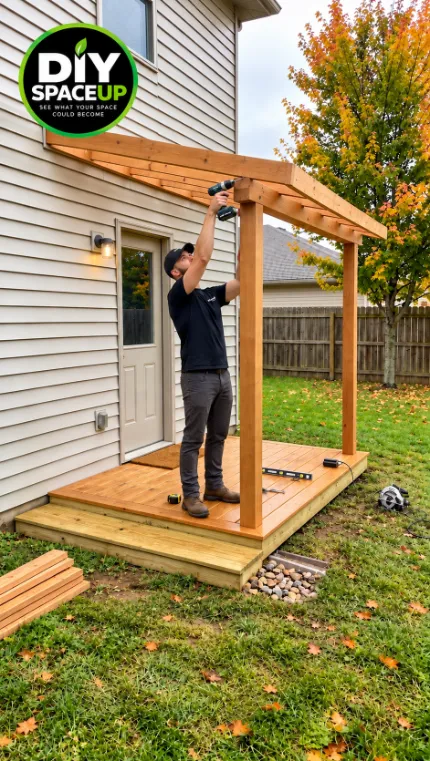
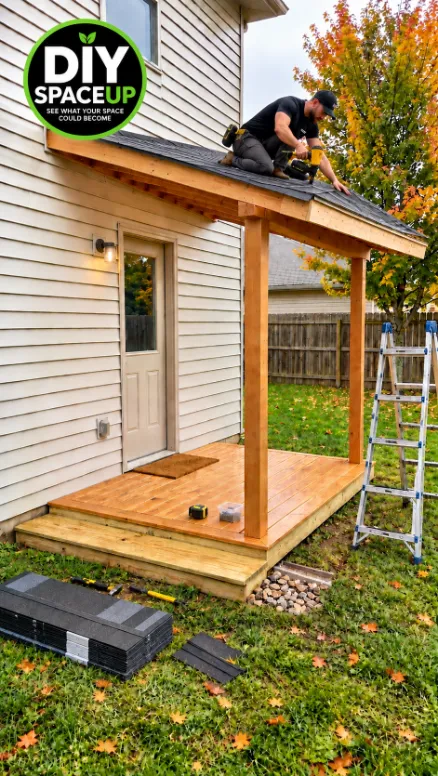
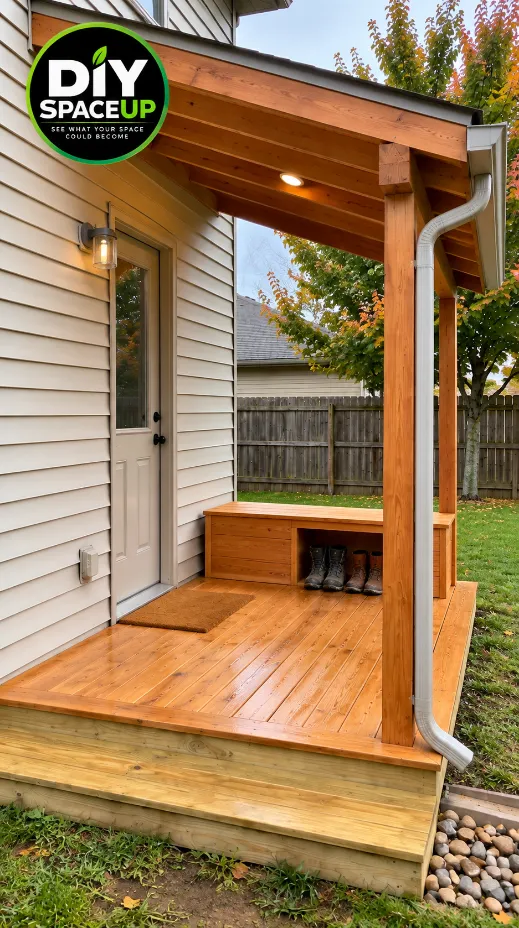
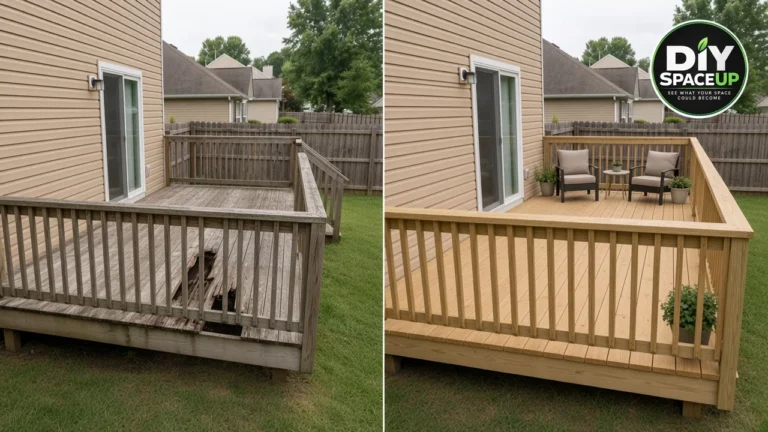
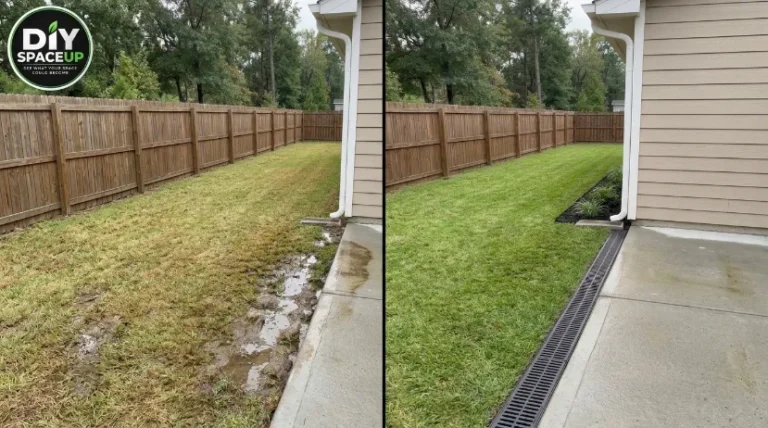
A muddy back-door entrance transformed into a practical covered porch with a wood platform, shed-style roof, rain drainage and convenient boot storage.
DIY Covered Back Door Porch: Build a Dry, Practical Entry for Rainy Fall Weather
Turn a muddy back-door entrance into a practical covered porch with a wood platform, shed-style roof, gutter, downspout and storage bench. This detailed DIY guide covers planning, measurements, framing, roofing, drainage, safety and costs.
Every time it rained, this back door had the same problem.
There was no real landing, no roof overhead, and nowhere convenient to leave muddy boots before stepping inside.
The result was exactly what you would expect during a wet fall: mud beside the door, water near the entrance, and shoes carrying part of the yard indoors.
Instead of treating those problems separately, this project turns the entire area into one compact outdoor entry.
A low wood platform creates a clean landing. Two front posts support a simple shed-style roof. A gutter and downspout control roof runoff. And a small storage bench gives wet boots and outdoor items somewhere to go.
The transformation looks simple in a 15-second video.
Building it correctly is not.
This guide breaks down the planning, structure, drainage, roofing, measurements, materials, costs, safety considerations and construction sequence behind the project so you can decide how to adapt the idea safely to your own home.
Table of Contents
What We Are Actually Building
The finished project shown here has several distinct systems working together.
Component
Purpose
Low wood platform
Creates a clean, usable landing
House-side roof connection
Supports and weatherproofs the upper roof edge
Two front posts
Support the outer roof beam
Outer beam
Carries the roof framing
Sloped rafters
Create the shed-roof structure
Roof deck + roofing
Protect the entrance from rain
Gutter
Collects roof runoff
Downspout
Carries collected water downward
Storage bench
Keeps boots and outdoor items organized
The important point is that these aren’t independent decorative pieces.
The roof loads have to travel safely through the framing and supports, while rainwater needs a deliberate path away from the house.
Before construction, the back-door entrance was an exposed muddy area with no platform, roof or protected place for wet boots.
Before You Buy Lumber, Study the Site
Our original space has a few important characteristics.
The back door opens onto a relatively flat area beside a two-story vinyl-sided house. There is enough yard depth for a small platform, and the finished roof projects outward from the wall rather than becoming a fully enclosed room.
Your site may be completely different.
Before designing anything, check:
door swing and threshold height;
siding type;
foundation location;
existing drainage;
underground utilities;
exterior electrical outlets and fixtures;
roof/eave conflicts above;
windows above the proposed roof;
property setbacks;
frost depth;
soil conditions;
snow and wind loads;
required permits.
A covered structure attached to a house can trigger requirements that a simple ground-level platform may not.
Check with your local building department before construction.
Measure the Door, Platform and Roof as One System
Don’t design the deck first and “figure out the roof later.”
Measure the entire assembly.
Measurement
Record
Available width along house
____ in.
Desired platform projection
____ in.
Door threshold above grade
____ in.
Proposed platform surface height
____ in.
Available roof attachment height
____ in.
Front beam height
____ in.
Roof horizontal run
____ in.
Roof vertical drop
____ in.
Roof overhang
____ in.
Gutter/downspout route
____
Bench footprint
____
The roof’s rise and run determine its slope.
For example, a roof that drops 24 inches over a 96-inch horizontal run has:
24 ÷ 96 = 0.25
That’s equivalent to a 3:12 slope.
But that does not mean 3:12 is automatically right for your project.
Your roofing system determines what slopes are permitted.
Choose the Roofing System From the Actual Slope
This is one of the most important details missing from many short DIY videos.
Asphalt shingles cannot simply be installed on any shallow porch roof.
GAF, for example, identifies 2:12 as the minimum slope for its asphalt shingles and classifies 2:12 to under 4:12 as low slope, requiring additional roof-deck protection. GAF
For lower slopes, a roof membrane may be more appropriate. GAF’s LIBERTY self-adhering system, for example, is designed for residential low-slope applications such as porches, garages and sheds, with product-specific slope ranges. GAF
So the sequence should be:
Measure → calculate slope → check local code → select approved roofing system → follow that manufacturer’s installation instructions.
Not the other way around.
Plan Where Every Roof Load Goes
Look closely at the middle construction image.
The roof doesn’t float above the platform.
Its front edge is carried by a horizontal beam supported by two vertical posts.
At the house side, the roof framing connects to the building.
The posts should not simply sit unsecured on deck boards.
Likewise, an attached roof shouldn’t depend on vinyl siding to support it.
The connection must reach appropriate structural framing and be detailed to keep water out.
Don’t Guess at the House Connection
This deserves its own section because it can be the difference between a durable porch and serious water damage.
The finished visual shows the upper roof edge meeting the wall of the house.
That junction must be properly designed and flashed.
Do not simply screw a board through vinyl siding and seal around it with caulk.
Siding is not structural framing, and caulk is not a substitute for a properly designed flashing system.
If you’re uncertain about the wall construction, attachment or waterproofing detail, this is a good place to involve a qualified contractor.
Foundation and Post Support
The photos don’t show the underground foundation system.
Therefore, we shouldn’t invent one.
Depending on local conditions and code, the project may require concrete footings, piers, approved precast systems, helical piles or another engineered foundation.
The correct solution depends on factors including:
soil;
frost depth;
platform/roof loads;
wind;
snow;
local code.
What matters is that the finished posts transfer their loads to an appropriate foundation—not merely to loose soil or unsupported decking.
Materials Planning
A typical version of this project may require:
Material
Use
Ground-contact/exterior-rated lumber where required
Platform framing
Deck boards
Walking surface
Structural posts
Roof support
Structural beam lumber
Front roof support
Rafter lumber
Roof framing
Exterior-rated sheathing
Roof deck
Approved roofing system
Weather protection
Flashing
House/roof transition
Gutter
Roof-water collection
Downspout
Controlled discharge
Exterior structural fasteners/connectors
Framing connections
Appropriate post bases
Post/foundation connection
Lumber for bench
Boot/storage area
Do not select lumber sizes from this table alone.
Beam, joist, rafter and post sizes depend on span, species/grade, loads and local requirements.
Useful Tools for This Project
Before cutting framing lumber, use a Swanson 7-inch Speed Squareto mark clean 90-degree cuts and consistent rafter layout lines. It becomes particularly useful when repetitive framing pieces need to match.
A DEWALT 20V MAX cordless drill/driver kit is useful throughout the build for pilot holes, hardware installation and general assembly. For structural connections, however, always use the fastener type specified by the connector manufacturer rather than substituting ordinary deck screws.
Keep an Empire 48-inch box level nearby while setting the platform framing, posts and beam. The platform needs to be appropriately laid out, and posts intended to be vertical need to be checked for plumb before the framing locks them into position.
During assembly, IRWIN QUICK-GRIP clamps can temporarily hold framing components in alignment while measurements and fasteners are checked.
For exterior structural wood-to-wood connections where appropriate to the design, GRK RSS exterior structural screws are one possible product family—but only where their specifications and the connection design permit them. Never substitute a structural screw simply because it physically fits the hole.
Affiliate disclosure: As an Amazon Associate, DIY SpaceUp earns from qualifying purchases. Some links below are affiliate links, which means we may earn a commission at no extra cost to you.
Step 1: Establish the Finished Platform Height
Start with the doorway.
The platform should create a practical transition at the entrance without interfering with the door or creating drainage problems against the house.
Don’t cover weep paths or bury vulnerable siding.
The relationship between the threshold, landing and grade may also be regulated locally because this is an exterior egress door.
Before construction, determine exactly where the finished walking surface will sit.
Then work downward to determine the framing and foundation elevations.
Step 2: Lay Out the Footprint
Mark the platform corners.
Check width and projection.
Then check the diagonals.
For a rectangular platform, equal corner-to-corner diagonal measurements indicate that the layout is square.
Don’t proceed simply because the four sides “look right.”
A small error at the base can become very visible once posts, beam and roof are added.
Step 3: Build the Foundation and Platform Structure
This is where local requirements matter heavily.
Establish the required foundation first.
Then build the platform framing with appropriately sized exterior-rated materials.
Where a deck is attached to a house, proper structural attachment matters: Simpson Strong-Tie notes that lateral connections and the ledger/gravity-load connection perform different jobs, reinforcing why a deck-to-house connection should be treated as a structural system rather than simply screwed to the exterior wall. Simpson Strong-Tie
The American Wood Council also maintains dedicated residential wood-deck design guidance covering deck construction and connections. American Wood Council
If the project is instead designed as a freestanding platform, follow the requirements for that design rather than mixing details from attached and freestanding systems.
Step 4: Frame and Deck the Platform
Install the platform joists according to the approved design.
Add required blocking.
Before installing decking, confirm:
framing is square;
supports are secure;
joists are properly connected;
required clearances are maintained;
water cannot become trapped against the house.
Then install the deck boards with exterior-rated fasteners and the spacing required for the material being used.
The finished project uses a straightforward wood walking surface rather than composite decking.
Keep that same visual if you’re reproducing this design.
Step 5: Set the Two Front Roof Posts
The finished project has two front posts.
Not three.
Not four.
They align with the outer roof beam and define the open front of the covered entry.
Set them using the approved post-base/foundation system.
Temporarily brace them.
Check each post in both directions with a level.
Don’t remove temporary bracing until the structure has enough permanent framing to remain stable.
Step 6: Install the Front Beam
The front beam is secured to the two support posts before the remaining roof structure and weatherproofing are completed.
The horizontal beam spans between the two posts and supports the outer ends of the rafters.
This is a structural component, not decorative trim.
Its size and connection need to match the span and roof loads.
Use approved structural connectors/fasteners as required by your design.
Once installed, recheck both posts for plumb and the beam for correct elevation.
Step 7: Create the House-Side Roof Support
The project has a single-slope roof descending away from the house.
That means the house-side support is higher than the front beam.
The difference between those elevations creates the roof pitch.
Before fastening anything permanently, calculate that slope and confirm that your intended roofing material allows it.
This is also where the wall attachment and flashing strategy should already be resolved.
Step 8: Install the Rafters
Lay out the rafter spacing according to the structural design.
Install the first and last rafters.
Check alignment.
Then use them as references for the remaining rafters.
The sloped roof rafters are installed between the house-side support and front beam before roof sheathing and weatherproofing are added.
Avoid the common shortcut of installing roof sheathing before confirming that the rafter structure is square, adequately connected and properly pitched.
Step 9: Sheath and Weatherproof the Roof
Install the roof sheathing required by the roofing system.
Roof sheathing is secured over the completed rafter structure before the weatherproofing layers and final roofing are installed.
Then install underlayment or membrane, flashing, drip-edge components and roof covering according to the selected manufacturer’s instructions and local requirements.
This isn’t an area where more caulk fixes incorrect construction.
The wall-to-roof transition must direct water over and away from vulnerable building components.
Step 10: Install the Gutter and Downspout
That is an important part of the project.
Without it, the new roof could simply move the original mud problem from beside the door to the front edge of the porch.
Install the gutter with positive drainage toward the outlet.
Then route the downspout to a suitable discharge location.
Don’t terminate it in a way that sends water underneath the platform, against the foundation or directly onto a vulnerable walking area.
Step 11: Build the Storage Bench
The finished porch includes a compact wood bench/storage area along the outer side.
It provides a convenient place for boots and outdoor items while keeping the doorway clear.
Keep the bench footprint out of the primary walking path.
It should not reduce required door/landing clearance or create a trip hazard.
Step 12: Final Drainage Test
Don’t wait for the first storm.
Use controlled water to verify the roof drainage.
Watch:
how water leaves the roof;
whether it enters the gutter;
whether the gutter drains toward the outlet;
whether the downspout carries it cleanly;
where it finally discharges.
Then inspect the house-side roof connection for any sign of water intrusion.
The Finished Result
A simple wooden bench keeps muddy boots organized under the covered porch while leaving the main entrance and walking area clear.
The finished structure doesn’t turn the back door into a giant porch.
That’s part of what makes the idea practical.
It creates just enough protected space to step outside, remove muddy footwear, store a few outdoor items and keep direct rain away from the entrance.
Critical Safety Checks
Check
Why It Matters
Permit/code requirements confirmed
Covered attached structures may require approval
Underground utilities located
Excavation can contact buried services
Footings/foundation appropriate
Supports deck and roof loads
Platform structurally sound
Carries occupants safely
Posts positively connected
Prevents displacement
Beam sized for span/load
Carries roof loads
Rafters sized correctly
Carries roof/sheathing loads
House attachment structural
Siding alone cannot support roof
Wall connection flashed
Helps prevent hidden water damage
Roofing approved for actual slope
Prevents incorrect roof application
Gutter/downspout drains safely
Prevents new water problems
Door operation/egress preserved
Entrance must remain functional
What About Railings and Stairs?
The visualization shows a very low platform with a step at the front and no guardrail.
Do not copy that detail blindly.
Whether guards, handrails, stairs or specific landing dimensions are required depends on the actual height and configuration and on the locally adopted code.
Build according to your actual site measurements and local requirements, not according to what happens to appear in an AI visualization.
How Much Will It Cost?
Giving one fixed price would be misleading.
The cost changes dramatically with size, lumber prices, foundation type, roofing, hardware, permit requirements and whether professional structural/roofing work is needed.
A more useful budgeting approach is:
Cost Area
Relative Impact
Platform framing/decking
Medium
Foundations
Low–High
Posts and beam
Medium
Roof framing
Medium
Sheathing
Low–Medium
Roofing/flashing
Medium
Gutter/downspout
Low–Medium
Structural hardware
Medium
Bench
Low
Permits/pro help
Location dependent
Before buying materials, create a full takeoff from your final dimensions.
Buying lumber first and designing around it afterward usually costs more, not less.
Common Mistakes to Avoid
Mistake
Better Approach
Building directly on muddy soil
Establish an appropriate foundation
Copying dimensions from the Reel
Measure your own house
Screwing roof support into siding
Connect to verified structure
Choosing roofing before slope
Calculate pitch first
Using shingles on an unsuitable low slope
Follow roofing-system requirements
Relying on caulk at wall connection
Use proper flashing details
Setting posts on deck boards alone
Use an engineered/approved load path
Using ordinary screws for structural connections
Use specified structural hardware
Forgetting gutter drainage
Plan discharge before roofing
Draining water under platform
Route runoff to a suitable location
Building bench into walking path
Preserve safe clearance
Ignoring permits/snow/wind loads
Verify local requirements first
Seasonal Maintenance
Before the wet fall season, inspect:
roof covering;
flashing;
gutter;
downspout;
post bases;
beam/post connections;
platform fasteners;
wood finish;
drainage around the platform.
Remove leaves from the gutter and confirm that the downspout still discharges properly.
Wood exposed outdoors also needs periodic inspection and refinishing according to the finish manufacturer’s instructions.
Final Build Checklist
Before You Call It Finished
Check
Local requirements verified
☐
Foundation complete
☐
Platform square and secure
☐
Door operates normally
☐
Posts plumb and connected
☐
Beam secure
☐
Roof pitch verified
☐
Rafters properly connected
☐
Roofing matches slope
☐
House connection flashed
☐
Gutter drains correctly
☐
Downspout discharges safely
☐
Bench does not obstruct entrance
☐
All structural hardware inspected
☐
Final rain test completed
☐
One Small Entry, Four Problems Solved
Before this project, the area was little more than a muddy patch outside the back door.
The transformation didn’t need a huge deck or a fully enclosed addition.
The platform creates a clean landing above the previously muddy entry area.
The roof creates shelter.
The gutter and downspout collect roof runoff and direct it toward a suitable discharge area.
And the bench gives boots a place to stay before they reach the house.
That’s the real value of the project: every part has a job.
Build the structure around your own house, climate, loads and local requirements rather than copying dimensions from an image, and this overlooked back-door space can become one of the most useful little areas around the home.
We use cookies and similar technologies to help our website function properly, understand how visitors use the site, and improve your experience. You can accept or manage your preferences at any time. Some features may not work as intended if certain cookies are disabled.
Functional
Always active
The technical storage or access is strictly necessary for the legitimate purpose of enabling the use of a specific service explicitly requested by the subscriber or user, or for the sole purpose of carrying out the transmission of a communication over an electronic communications network.
Preferences
The technical storage or access is necessary for the legitimate purpose of storing preferences that are not requested by the subscriber or user.
Statistics
The technical storage or access that is used exclusively for statistical purposes.The technical storage or access that is used exclusively for anonymous statistical purposes. Without a subpoena, voluntary compliance on the part of your Internet Service Provider, or additional records from a third party, information stored or retrieved for this purpose alone cannot usually be used to identify you.
Marketing
The technical storage or access is required to create user profiles to send advertising, or to track the user on a website or across several websites for similar marketing purposes.