There was nothing technically wrong with this kitchen corner.
That was the problem.
It was clean, finished, and almost completely unused.
A narrow stretch of countertop sat between the backsplash and the wall while everyday items competed for space elsewhere in the kitchen. Instead of adding another cabinet or filling the counter with organizers, we looked at the corner itself.
A tape measure came out.
And suddenly that empty triangle had a job.
The Look Closer concept turns it into a compact two-level station: a custom wooden corner stand on the countertop for a kettle, with storage underneath, plus a shallow floating shelf above for lighter items such as a plant or tea jar.
It looks simple in the finished image. Building a real version requires more thought about measurements, wall geometry, load, moisture, steam, electrical access and shelf attachment.
This guide covers all of it.
Transparency note: This project was developed from an AI-assisted DIY visualization. The images illustrate the design concept and intended result; they are not engineering drawings or proof of a completed physical installation. Adapt dimensions, materials, fasteners and construction methods to your actual kitchen, wall construction, appliance instructions and local requirements.
Table of Contents
Project at a Glance
Detail
Planning Guide
Project
DIY kitchen corner shelf / kettle station
Location
Countertop corner
Skill level
Beginner to intermediate
Build time
About 3–6 hours plus finish curing
Main material
Hardwood, plywood, or furniture-grade bamboo panel
These are planning ranges rather than a universal cut list.
Before: An Empty Corner With More Potential Than It Looks
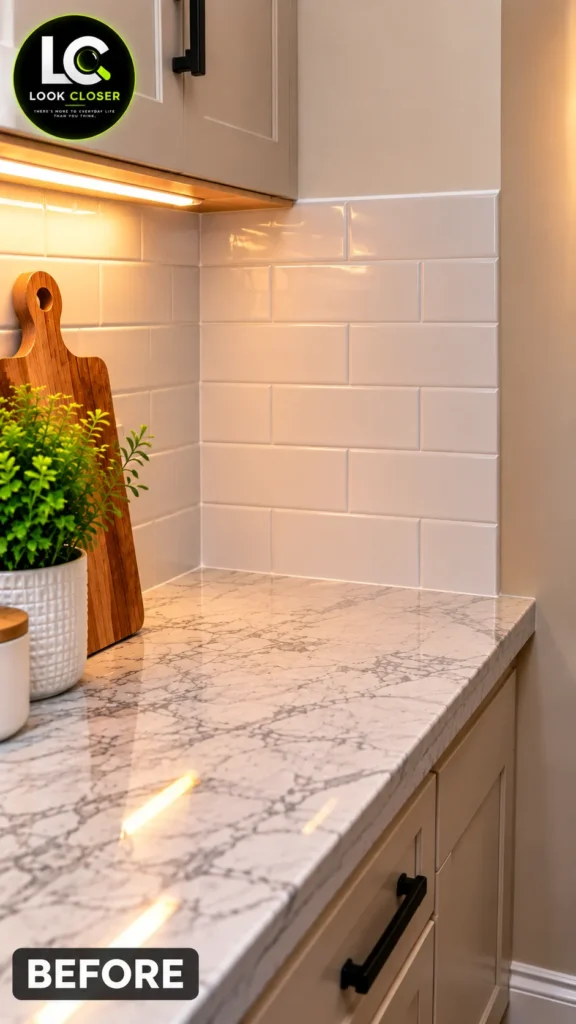
Before the project, this clean countertop corner offered unused space that could be turned into practical vertical storage.
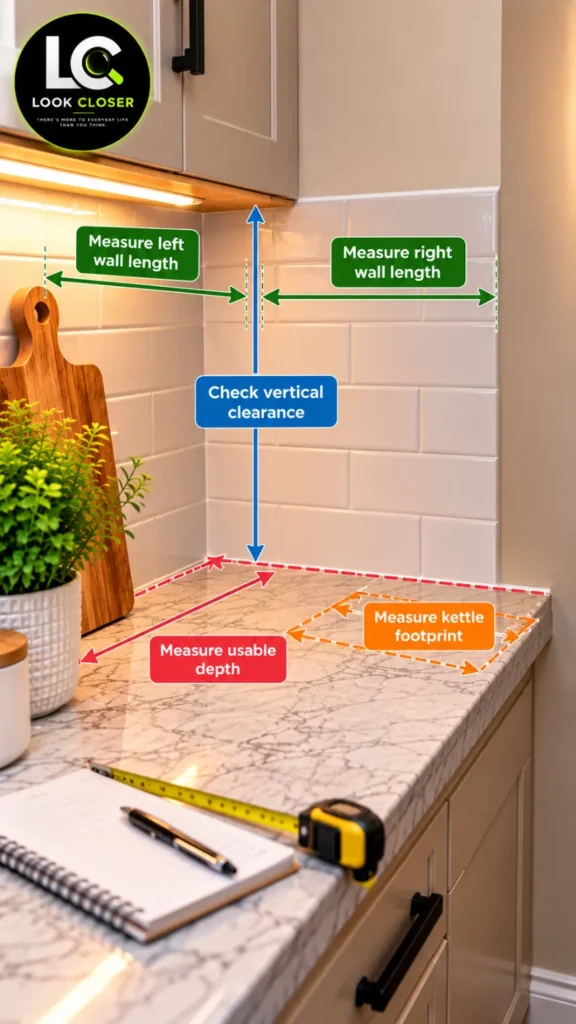
Caption: Start by measuring the actual countertop corner, backsplash and available vertical clearance before deciding the shelf dimensions.
The original space gives us an important clue.
There isn’t much room.
That means this project succeeds through fit, not size.
A shelf that extends too far forward steals prep space. One that’s too tall can interfere with upper cabinets. And a kettle platform that ignores steam and electrical access can create a completely different problem from the one we’re trying to solve.
So don’t begin with lumber.
Begin with the room.
Measure the Corner, Not Just One Wall
Kitchen corners are rarely as simple as they appear in a photograph.
Measure both walls independently.
Measurement
Why It Matters
Left-wall usable length
Determines one side of the platform
Right-wall usable length
Determines the other side
Counter to upper cabinet
Limits overall height
Counter depth
Prevents excessive projection
Backsplash thickness/shape
Affects rear fit
Outlet location
Determines appliance practicality
Under-cabinet lighting
Must remain unobstructed
Kettle footprint
Determines platform size
Kettle height with lid open
Determines vertical clearance
Distance to cabinet/wood above
Important for heat and steam
Don’t assume the corner is exactly 90 degrees.
Older walls—and plenty of newer ones—can be slightly out of square.
SpaceUp Tip
Make a cardboard template of the corner before cutting your finished material.
A five-minute template can save an expensive board.
Measure both sides of the corner, available vertical clearance, usable countertop depth and the kettle footprint before deciding the final shelf dimensions.
First Decision: Is This Corner Suitable for a Kettle?
Before building anything, place the kettle where you expect it to sit.
Then ask:
Can the lid open normally?
Can you fill and remove it comfortably?
Can the cord reach the outlet without an extension cord crossing the work surface?
Does steam rise directly into cabinetry or a wooden shelf?
Is there enough room to lift the kettle without hitting anything?
Will water splashes regularly reach unfinished wood?
Does the kettle manufacturer specify particular clearances or placement requirements?
The appliance manufacturer’s instructions take priority over our visualization.
If the corner can’t safely accommodate your particular kettle, use the shelf for something else.
Understanding the Look Closer Design
The Reel actually contains two separate builds.
Lower countertop stand
This is the main structure.
It consists of:
a curved or quarter-round-ish wooden top;
two front/side legs;
rear/central support as required by the design;
a small raised rear lip;
enough open space underneath for canisters.
The kettle sits on this structure.
Upper floating shelf
This is independent.
It sits above the kettle station and holds lighter accessories or decor.
Do not treat the upper shelf as structural support for the lower stand.
That distinction makes both construction and installation easier to understand.
Choosing the Dimensions
I would not publish exact dimensions from the AI image.
Instead, calculate yours from the actual corner.
For example:
Maximum stand width/depth = available corner space − working clearance
Maximum stand height = usable vertical space − kettle height − safe operating/steam clearance
And remember that the kettle footprint isn’t the only measurement that matters.
You need room for your hand, handle and lid.
Materials
Material
Purpose
What to Look For
Hardwood, quality plywood or bamboo panel
Main platform
Flat, stable material
Solid wood stock
Legs/supports
Straight pieces
Narrow wood strip
Rear retaining lip
Smooth edges
Wood glue
Joinery
Suitable woodworking adhesive
Wood screws
Mechanical fastening
Correct length for material
Wall hardware
Floating shelf
Matched to wall construction/load
Sandpaper
Surface preparation
Progressive grits
Protective finish
Moisture resistance
Appropriate for indoor countertop use
For this kitchen, bamboo is visually attractive because it coordinates with the cutting boards and warm cabinetry accents.
But appearance shouldn’t determine structural thickness.
Tools You’ll Need
Tool
Purpose
Tape measure
Measure corner/appliance
Combination or speed square
Layout
Cardboard
Corner template
Pencil
Marking
Jigsaw
Curved front
Circular/table saw
Straight cuts
Drill/driver
Assembly
Clamps
Hold pieces during assembly
Sander
Smooth curved and exposed edges
Stud finder
Locate framing for upper shelf where applicable
Level
Upper shelf installation
Safety glasses/hearing protection
Personal protection
Useful tools for this project
Jigsaw— particularly useful for creating the curved front profile.
Affiliate disclosure: As an Amazon Associate, DIY SpaceUp earns from qualifying purchases. Some links below are affiliate links, which means we may earn a commission at no extra cost to you.
How to Build the Countertop Corner Stand
Step 1: Make a Cardboard Template
Transfer the actual corner shape onto cardboard.
Fit it against both walls and the backsplash.
Mark:
front projection;
left and right boundaries;
appliance footprint;
desired curve.
Adjust the cardboard until you’re satisfied.
Only then transfer it to wood.
Step 2: Mark the Curved Front
The Reel uses a gentle curved front rather than a sharp triangular point.
That matters visually, but it also removes an awkward projecting corner from the countertop.
Use your template to reproduce the curve consistently.
Step 3: Cut the Platform
Make straight cuts first, then cut the curved front with the appropriate tool.
Don’t force a jigsaw rapidly through the material.
Support the workpiece properly and follow the tool manufacturer’s instructions.
Step 4: Sand the Curve
Smooth the saw marks.
Progress through appropriate grits until the front edge feels consistent.
Slightly ease exposed edges rather than leaving sharp corners.
Step 5: Cut the Legs and Supports
The finished concept needs to support not just the kettle but also the water inside it.
Cut all legs/supports to identical effective height so the platform sits flat.
This is more important than making the structure look perfectly symmetrical.
Step 6: Dry-Assemble Everything
Before glue or final screws:
position the legs;
place the top;
check for rocking;
verify the rear fit;
place the empty, unplugged kettle on top;
confirm the handle and lid remain accessible.
Don’t load a partially assembled structure with a full hot appliance.
Step 7: Assemble the Stand
Now fasten the supports to the platform using joinery appropriate to your material.
Pre-drill where necessary.
Keep screw heads flush or concealed.
Make sure no screw point emerges through an accessible surface.
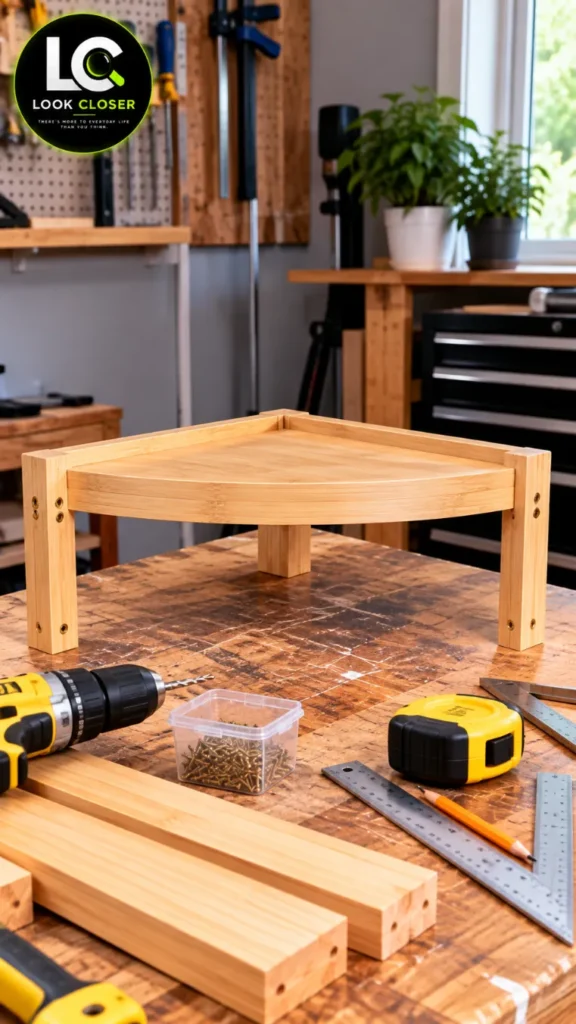
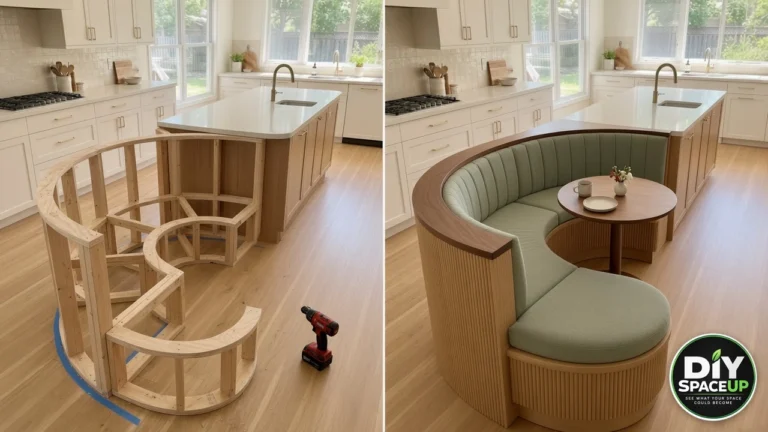
Assemble the wooden corner stand on a flat work surface, keeping the supports square and stable before sanding, finishing and testing it on the countertop.
Caption: Assemble the countertop stand on a flat work surface and verify that every support sits evenly before applying the final finish.
Step 8: Add the Rear Lip
The visualization includes a subtle raised edge along the rear.
Keep it modest.
It should not interfere with the backsplash, outlets or kettle cord.
And don’t treat a small lip as an appliance safety restraint—it isn’t one.
Step 9: Sand the Entire Stand
Pay particular attention to:
curved front;
exposed corners;
leg edges;
screw locations;
surfaces that may be wiped frequently.
The finished piece should feel like kitchen furniture, not rough workshop lumber.
Step 10: Apply a Protective Finish
A kitchen countertop environment includes water, steam and frequent wiping.
Choose a finish appropriate for the material and intended indoor use, and follow the finish manufacturer’s application and curing instructions.
Don’t put the kettle onto freshly finished wood before the coating has properly cured.
Before the Kettle Goes On: Test the Stand
Put the finished stand in position without the kettle.
Press gently at different areas of the platform.
It should not:
rock;
tip;
slide excessively;
flex noticeably;
interfere with the backsplash;
obstruct an outlet.
If it does, correct the structure before proceeding.
Installing the Upper Floating Shelf
This is where the project becomes more installation-dependent.
The visualization shows a clean floating wooden shelf above the kettle.
In a real kitchen, the attachment method depends on:
wall framing;
drywall/plaster/tile construction;
shelf depth;
shelf weight;
expected contents;
mounting hardware.
Don’t select a wall anchor based only on what looks convenient in a photograph.
Where appropriate, fastening into structural framing can provide stronger support; otherwise use a mounting system specifically rated and appropriate for the actual wall construction and intended load.
Never publish a load capacity unless the complete installed system has a supported rating.
Step 11: Locate Safe Attachment Points
Before drilling, consider what’s inside the wall.
Kitchen walls can contain:
electrical wiring;
water lines;
drain/vent plumbing;
other services.
A stud finder can help locate framing, but it does not magically guarantee that a drilling location is safe.
Use appropriate caution and professional help where uncertainty exists.
Step 12: Position the Shelf
Use a level.
Check the shelf visually against the cabinets and backsplash.
More importantly, verify that its position leaves appropriate clearance from the appliance below.
Don’t copy the vertical distance shown in the AI image.
Your kettle and shelf dimensions determine the real position.
Step 13: Install the Mounting System
Follow the hardware manufacturer’s instructions.
Use the specified fasteners and respect its installation requirements.
Don’t mix an arbitrary anchor with an unrelated shelf bracket and assume their individual ratings automatically apply to the completed system.
Step 14: Test the Empty Shelf
Before decorating it, gently verify that the shelf is stable and level.
Load it gradually rather than immediately placing several heavy objects on it.
For this concept, I would reserve it primarily for lightweight items.
The Kettle Changes the Safety Requirements
This isn’t just decorative shelving.
A kettle produces heat, hot water and potentially significant steam.
Before placing one beneath wood or cabinetry, read the appliance instructions for your exact model.
Keep steam in mind
If steam repeatedly hits the bottom of the floating shelf or upper cabinetry, you can get moisture accumulation and finish damage.
Keep electricity in mind
Don’t create a cord path across a sink, cooktop, walkway or frequently wet work area.
Keep water in mind
The kettle should sit on a stable, level surface.
Keep access in mind
You should be able to remove, fill and operate it normally.
Keep the outlet accessible
Don’t bury a receptacle behind permanent woodwork.
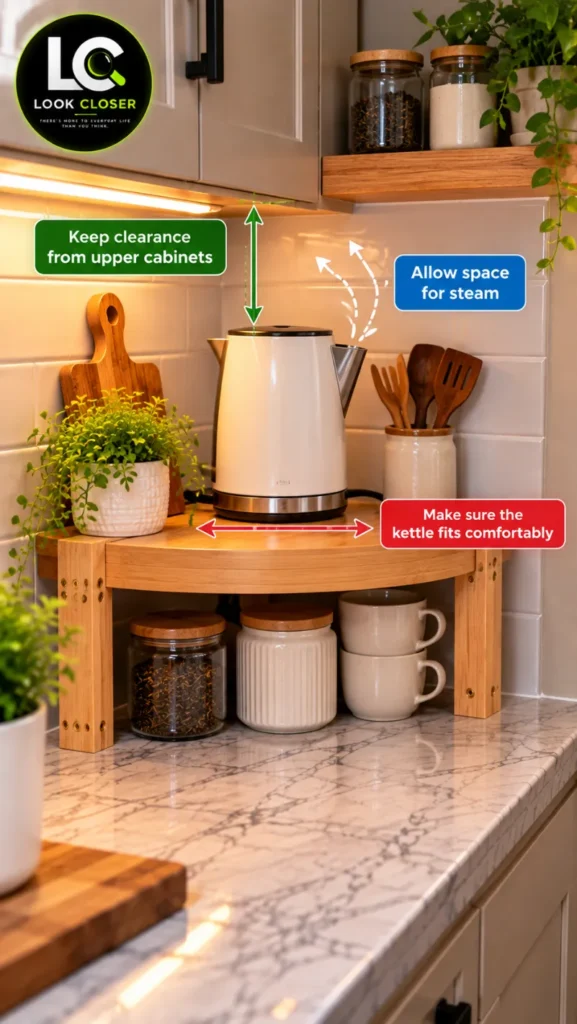
Before using the corner stand, make sure the kettle fits comfortably and has adequate operating and steam clearance from cabinets, shelves and nearby surfaces.
What Can Go Under the Stand?
The finished Look Closer image uses three matching canisters.
That’s a sensible use because it keeps frequently used items accessible without competing with the kettle.
Other possibilities include:
Good Candidates
Less Suitable
Tea bags
Heavy appliances
Coffee supplies
Large cookware
Sugar packets
Flammable paper touching hot appliances
Lightweight canisters
Cleaning chemicals
Small mugs if clearance allows
Unstable stacked items
Filters
Anything blocking the kettle cord
Don’t cram the lower space just because it exists.
Accessibility is part of good storage.
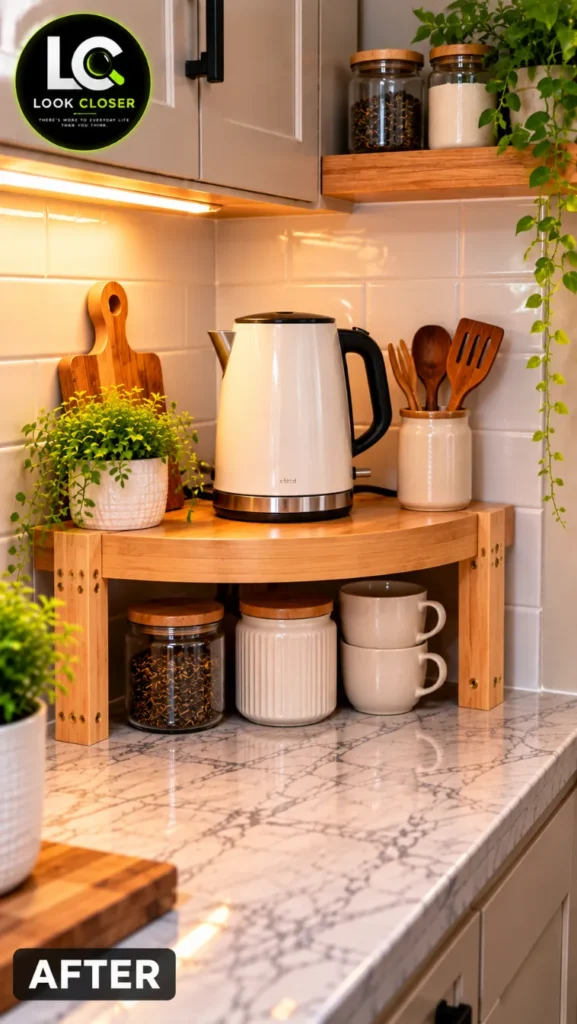
After: The Corner Finally Has a Purpose
The finished corner station turns previously unused countertop space into practical storage for the kettle, tea supplies, canisters and everyday kitchen essentials.
Caption: The finished concept creates two useful levels in an overlooked countertop corner while keeping everyday tea and coffee essentials within reach.
The transformation isn’t really about adding shelves.
It’s about recovering space.
The countertop still exists.
The cabinetry hasn’t changed.
But now the kettle has a defined home, smaller supplies fit underneath, and a lightweight upper shelf uses vertical space that previously did nothing.
That’s why tiny DIY projects can have an outsized effect on how a kitchen feels.
They don’t always give you more square footage.
They make the square footage you already have work harder.
What Might This Project Cost?
Actual prices vary by material, location and hardware, so treat these as planning ranges—not quoted retail prices.
Item
Approximate Planning Range
Wood/bamboo panel
$25–$60
Legs/support stock
$10–$25
Screws + glue
$8–$15
Finish/sandpaper
$10–$25
Floating shelf hardware
$15–$40+
Estimated project total
$68–$165+
If you already have wood offcuts or finishing supplies, your cost may be lower.
Follow appliance guidance and provide adequate clearance
Blocking the outlet
Preserve safe access
Using decorative wall hardware for a loaded shelf
Match hardware to wall/load
Publishing an invented weight capacity
Use documented hardware/system ratings
Leaving raw wood near splashes
Apply an appropriate protective finish
Overloading the upper shelf
Keep loads appropriate to the installed system
Building too deep
Preserve useful countertop space
Maintenance
Every few months:
inspect countertop stand joints;
look for water damage;
inspect finish near the kettle;
check for rocking;
inspect floating shelf mounting;
tighten hardware if the manufacturer permits/recommends it;
watch for moisture discoloration above the kettle;
clean spills promptly.
If the wood begins to swell, split or loosen, stop using the affected component until the problem is corrected.
Frequently Asked Questions
Can I copy the dimensions from the Reel?
No. The visualization establishes the concept, not a universal cut list. Measure your countertop, walls, cabinetry and appliance.
Does the lower corner stand need to be attached to the wall?
Not necessarily. The concept shown is a freestanding countertop structure. Its actual stability depends on its dimensions, construction and load. If your version isn’t stable as a freestanding piece, redesign it rather than assuming the visualization proves otherwise.
Can I put any electric kettle underneath the floating shelf?
Don’t assume so. Kettles differ in height, lid operation, steam behavior and manufacturer instructions. Verify the requirements for your exact appliance.
How deep should the corner shelf be?
Deep enough to safely accommodate the intended appliance while preserving useful countertop space. There isn’t one correct universal depth.
Can I use MDF?
You can build furniture from MDF, but for this particular location I prefer a material and finish strategy better suited to repeated kitchen moisture and wiping. Whatever material you choose needs appropriate protection.
How much weight can the upper shelf hold?
That cannot responsibly be answered from the image alone. Capacity depends on the shelf, bracket/mounting system, fasteners, wall construction and installation. Follow documented ratings for the complete system.
What if my walls aren’t square?
Make a cardboard template. That’s often easier than trying to force a perfectly square shelf into an imperfect corner.
Can I put a coffee maker here instead?
Potentially, but repeat the entire clearance assessment for that appliance. Coffee makers can introduce their own lid, reservoir, heat and steam requirements.
Is the upper floating shelf necessary?
No. The lower countertop stand can function independently. If wall construction or appliance clearance makes the upper shelf inappropriate, simply omit it.
Final Safety Checklist
Before daily use, verify that:
the countertop stand sits flat;
the platform doesn’t rock;
joints are secure;
exposed edges are smooth;
finish is fully cured;
kettle fits completely on the platform;
lid and handle operate freely;
manufacturer-required clearances are maintained;
steam isn’t being trapped against nearby surfaces;
cord reaches the outlet safely;
outlet remains accessible;
upper shelf is independently and appropriately mounted;
shelf hardware matches the actual wall construction;
no plumbing/electrical services were compromised during installation;
loads are kept within documented hardware/system limits.
One Corner, Three Useful Levels
The original kitchen didn’t need a renovation.
It needed a second look.
The countertop becomes the base level. The custom stand creates another. The floating shelf captures unused vertical space above.
Three usable zones now occupy essentially the same corner footprint.
And that is the part worth carrying into other rooms:
before asking where can I add more storage?, sometimes the better question is:
We use cookies and similar technologies to help our website function properly, understand how visitors use the site, and improve your experience. You can accept or manage your preferences at any time. Some features may not work as intended if certain cookies are disabled.
Functional
Always active
The technical storage or access is strictly necessary for the legitimate purpose of enabling the use of a specific service explicitly requested by the subscriber or user, or for the sole purpose of carrying out the transmission of a communication over an electronic communications network.
Preferences
The technical storage or access is necessary for the legitimate purpose of storing preferences that are not requested by the subscriber or user.
Statistics
The technical storage or access that is used exclusively for statistical purposes.The technical storage or access that is used exclusively for anonymous statistical purposes. Without a subpoena, voluntary compliance on the part of your Internet Service Provider, or additional records from a third party, information stored or retrieved for this purpose alone cannot usually be used to identify you.
Marketing
The technical storage or access is required to create user profiles to send advertising, or to track the user on a website or across several websites for similar marketing purposes.