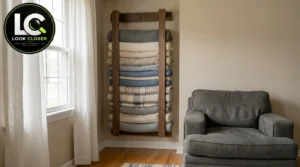
A stack of blankets can quickly turn into one of those small household messes that never seems to have a permanent home. In this living room, an unused wall niche provided the perfect opportunity to turn that wasted vertical space into practical blanket storage.
Instead of adding a bulky cabinet or freestanding basket, this project creates a simple wooden rack that keeps blankets neatly stacked while leaving the floor open and the room feeling uncluttered.
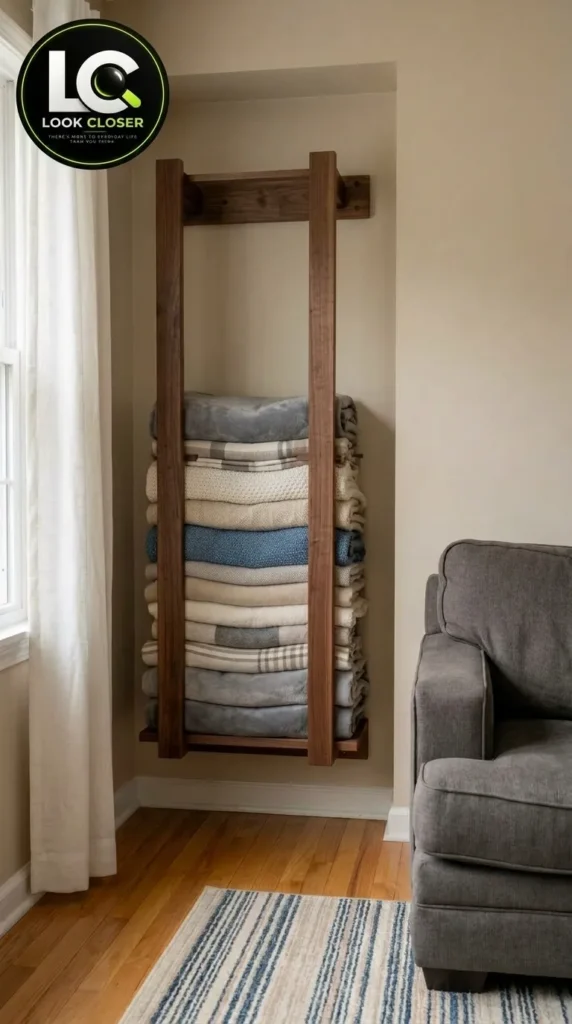
The finished rack uses two vertical wood members and horizontal wall-mounted supports to create a simple, open storage frame that fits neatly inside the existing niche.
Affiliate disclosure: As an Amazon Associate, DIY SpaceUp earns from qualifying purchases. Some links below are affiliate links, which means we may earn a commission at no extra cost to you.
Table of Contents
What We’re Building
The finished design is intentionally simple:
Component
Function
Two horizontal wall supports
Anchor the rack to the wall
Two vertical wooden members
Hold and contain the blanket stack
Wood fasteners
Connect the rack components to the wall/supports
Blankets
Finished stored contents
The exact wood species, board dimensions, fastener type, and wall-anchor system are not identifiable from the reference photos, so those details should be selected according to the actual wall construction and the materials available for your installation.
Measure the Wall Niche First
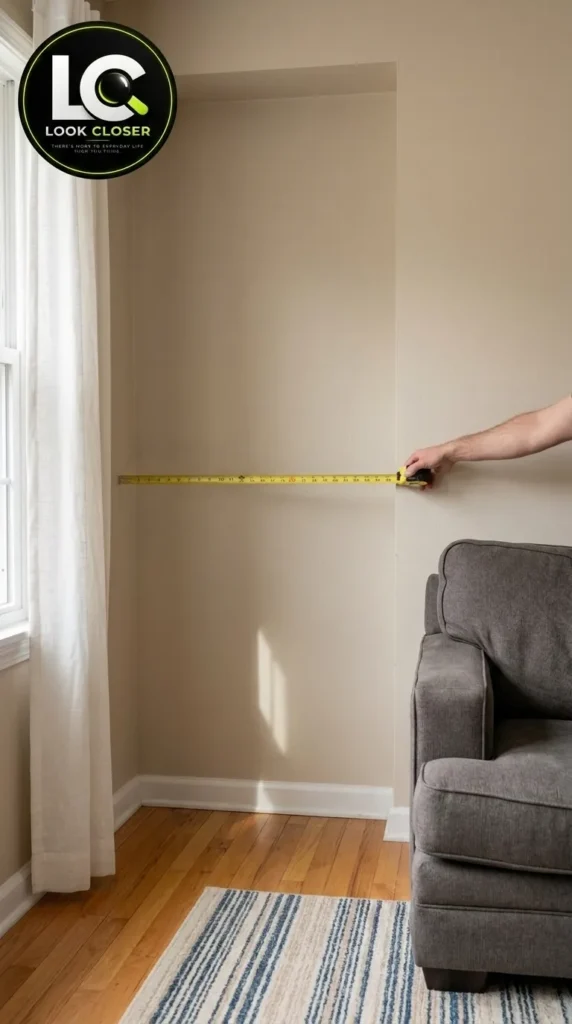
Before cutting any lumber, measure the opening where the rack will be installed.
Measure:
the overall width of the niche;
the available height;
the depth available for the blanket stack;
the location of the existing trim;
the position of any electrical outlets, switches, plumbing, or other hidden services.
Take measurements at more than one height. Interior walls and niches are not always perfectly square, and a small difference from top to bottom can affect how cleanly the finished rack fits.
For this type of project, the dimensions should be treated as project-specific measurements, not copied from a photograph.
A useful starting list is:
Measurement
Why it matters
Niche width
Determines the rack’s overall width
Niche height
Determines the vertical members
Available depth
Determines how far blankets can project
Distance between supports
Determines the usable storage height
Wall structure location
Determines suitable attachment points
A reliable STANLEY FATMAX 25-Foot Tape Measure is useful here because accurate measurements are more important than trying to estimate dimensions from the finished photograph.
Choose the Wood and Plan the Layout
The reference project uses a warm, dark-stained wood appearance that contrasts with the light-colored wall.
You do not need to use the exact same species to reproduce the visual concept. Choose straight, sound lumber with enough thickness and width for the intended rack and the way it will be attached.
Before making cuts, lay out the complete rack on paper.
The important relationship is the same as the reference:
two horizontal supports run across the niche;
the vertical members are positioned near the left and right sides;
the blankets occupy the open space between the vertical members;
the rack remains open rather than becoming a cabinet or enclosed shelf.
Do not add extra shelves or crossbars simply because they might make the rack look more substantial. The reference design is intentionally minimal.
Locate the Wall Structure
This is one of the most important parts of the project.
The photographs show horizontal wood supports mounted to the wall, but they do not prove whether those supports are attached directly into studs, masonry, blocking, or another substrate.
That needs to be determined at the actual installation site.
For a framed wall, locate suitable studs or other verified structural attachment points. For masonry or another substrate, use a fastening system specifically appropriate for that material.
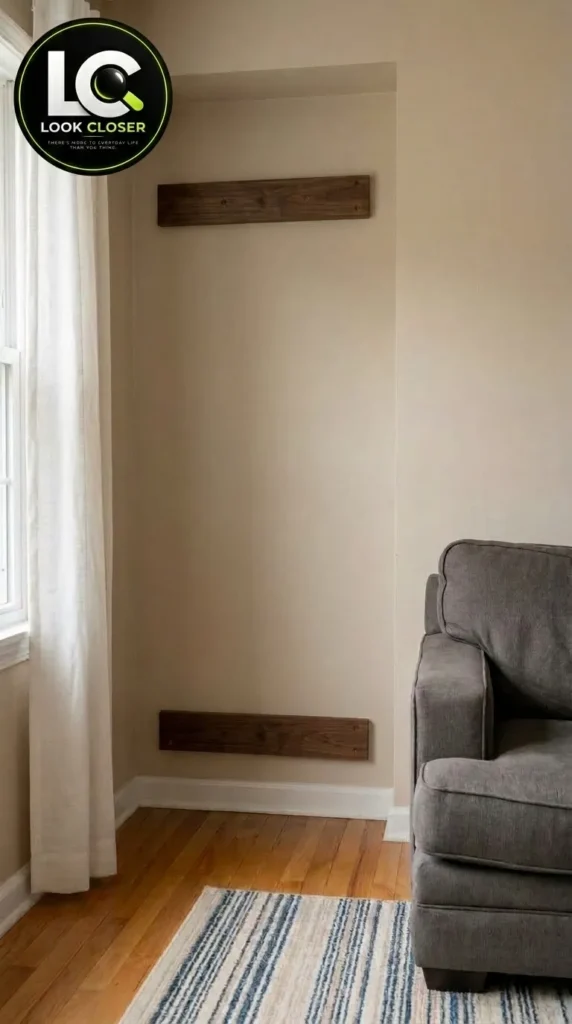
The two horizontal wooden supports are installed inside the wall niche before the vertical members are added.
A Franklin Sensors ProSensor Stud Finder can help locate framing behind drywall, but finding a stud is only one part of the process. The actual fastener must still be appropriate for the wall construction and the loads involved.
Check for Hidden Utilities
Before drilling, check for possible electrical wiring, plumbing, or other concealed services.
Do not assume that a clear-looking section of drywall is safe to drill.
If you cannot confidently establish what is behind the wall, stop and investigate before making the attachment holes.
Cut the Wooden Components
Once the measurements and attachment locations are established, cut the wood components to fit the actual niche.
The project shown uses:
two horizontal wall-support boards;
two vertical wooden members.
Dry-fit the pieces before making the permanent installation.
Set the horizontal supports in position and check that they sit level and align with the walls of the niche.
Then position the two vertical members and confirm that the blanket storage area has enough usable width.
A DEWALT 20V MAX Drill/Driver is useful for assembly and installation, while a quality circular saw can handle straight lumber cuts if your project requires them.
Prepare and Finish the Wood
Sand the visible wood surfaces before final assembly.
Start with an appropriate coarse-to-medium grit if the lumber needs significant smoothing, then move to a finer grit for the surfaces that will remain visible.
Pay particular attention to:
front edges;
corners;
cut ends;
areas that users may touch when removing blankets.
The reference rack has a warm, darker wood appearance. If you want to reproduce that look, apply a compatible wood stain or finish after preparing the surfaces.
Always follow the finish manufacturer’s instructions for surface preparation, drying time, ventilation, and recoat requirements.
A DEWALT Random Orbital Sander can make the preparation stage faster and more consistent on larger visible surfaces.
Install the Horizontal Wall Supports
The horizontal supports establish the foundation of the rack.
Position the first support according to your layout and verify it is level before fastening it permanently.
Then install the second support and check its relationship to the first.
Do not simply measure from the floor if the floor itself is not level. Use the actual rack layout and a level to establish the intended position.
The supports should be securely attached using a fastening method appropriate for the confirmed wall structure.
Important Structural Note
The photographs show the finished appearance, but they do not provide enough information to specify a universal screw size, anchor type, stud spacing, or load rating.
Those details depend on:
wall construction;
support-board dimensions;
fastener type;
number and location of attachment points;
blanket weight;
condition of the wall;
quality of the installation.
Do not rely on drywall alone for a structural attachment unless the selected fastening system is specifically designed and rated for that application.
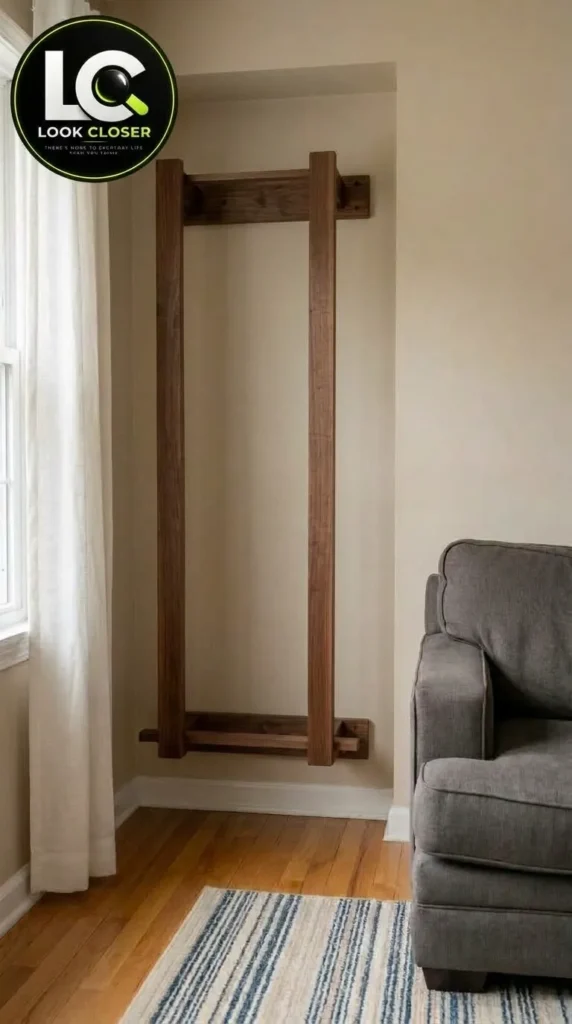
Install the Two Vertical Members
With the horizontal supports securely installed, position the two vertical wooden members.
The two vertical wooden members are installed between the horizontal wall supports to form the blanket rack frame.
This is where the rack begins to resemble the finished reference.
The vertical pieces should:
align consistently from top to bottom;
remain parallel;
create enough space for the intended blanket stack;
sit securely against the support structure;
remain visually centered within the niche.
Check both pieces with a level before completing the fastening.
A second person can be helpful during this stage simply to hold a long piece of lumber in position while you check alignment and make the attachment.
Check the Rack Before Loading It
Before placing the blankets inside, inspect every connection.
Check that:
the horizontal supports are secure;
the vertical members are firmly attached;
nothing rocks or shifts;
the wood has no sharp splinters;
all visible fasteners are properly seated;
the rack remains level and aligned.
Do not use the finished appearance as proof that the structure can support any particular load.
The appropriate capacity depends on the actual materials and attachment system.
Because blankets can become surprisingly heavy when stacked tightly, treat the rack as a wall-mounted storage structure rather than assuming it can support unlimited weight.
Load the Blankets
Once the rack has been inspected, begin loading the blankets.
The completed wooden blanket rack provides organized vertical storage inside the living-room wall niche.
Fold them consistently so the stack remains neat and distributes its weight evenly.
The finished reference shows blankets stacked vertically between the two wood members, with different neutral, gray, blue, and patterned fabrics creating a decorative appearance as well as useful storage.
This is one of the advantages of an open rack: the blankets become part of the room’s visual texture instead of being hidden inside a cabinet.
Avoid overpacking the rack simply to fill every available inch. Leave enough room to remove an individual blanket without pulling aggressively against the structure.
Safety Checklist
Before considering the project complete:
Verify the wall construction before selecting anchors.
Locate potential electrical and plumbing hazards before drilling.
Use appropriate eye protection while cutting and drilling.
Wear hearing protection when using loud power tools.
Secure lumber before cutting.
Sand exposed edges to remove splinters.
Follow the manufacturer’s instructions for stains and finishes.
Allow finishes to cure properly before bringing blankets into contact with the wood.
Inspect the wall connections before loading the rack.
Do not exceed the capacity supported by the actual attachment system.
Local building requirements can vary. If the installation involves unusual wall construction or significant loads, verify the appropriate requirements for your location.
Estimated Project Cost
For a small wall-mounted blanket rack like the reference, a reasonable planning range is roughly $60–$180 for materials and finishing supplies, depending heavily on lumber choice and finish.
Category
Planning range
Lumber
$30–$80
Fasteners / anchors
$10–$25
Sandpaper / consumables
$5–$15
Stain or finish
$15–$35
Estimated materials total
$60–$180
This is a planning range, not a quoted current retail price. It excludes tools you may already own and the blankets themselves.
Common Mistakes
Mistake
Better approach
Guessing the niche dimensions
Measure the actual opening at multiple points
Choosing anchors before checking the wall
Identify the wall construction first
Installing the supports without checking level
Level each support before final fastening
Making the vertical members too close together
Account for the actual folded blanket stack
Loading the rack immediately after installation
Inspect every connection first
Treating drywall as structural by default
Use verified framing or an appropriate rated anchoring system
Overbuilding the design
Keep the simple two-rail geometry of the reference
How to Keep the Rack Looking Good
Because the rack remains visible, maintenance is mostly about keeping the wood and blankets clean.
Dust the exposed wood periodically and inspect the fasteners occasionally for any movement.
If the wood finish becomes worn, follow the finish manufacturer’s recommendations for cleaning and refinishing rather than applying a new product blindly over the existing surface.
For the blankets, rotate which ones are used most often so the same pieces do not remain compressed at the bottom of the stack indefinitely.
Why This Simple Rack Works
The best part of this project is that it does not require a complicated piece of furniture.
The existing wall niche provides the location. Two horizontal supports establish the attachment structure, two vertical wood members create the visual frame, and the blankets provide the finished storage.
The result is practical without making the room feel more crowded.
We use cookies and similar technologies to help our website function properly, understand how visitors use the site, and improve your experience. You can accept or manage your preferences at any time. Some features may not work as intended if certain cookies are disabled.
Functional
Always active
The technical storage or access is strictly necessary for the legitimate purpose of enabling the use of a specific service explicitly requested by the subscriber or user, or for the sole purpose of carrying out the transmission of a communication over an electronic communications network.
Preferences
The technical storage or access is necessary for the legitimate purpose of storing preferences that are not requested by the subscriber or user.
Statistics
The technical storage or access that is used exclusively for statistical purposes.The technical storage or access that is used exclusively for anonymous statistical purposes. Without a subpoena, voluntary compliance on the part of your Internet Service Provider, or additional records from a third party, information stored or retrieved for this purpose alone cannot usually be used to identify you.
Marketing
The technical storage or access is required to create user profiles to send advertising, or to track the user on a website or across several websites for similar marketing purposes.