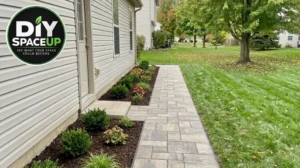
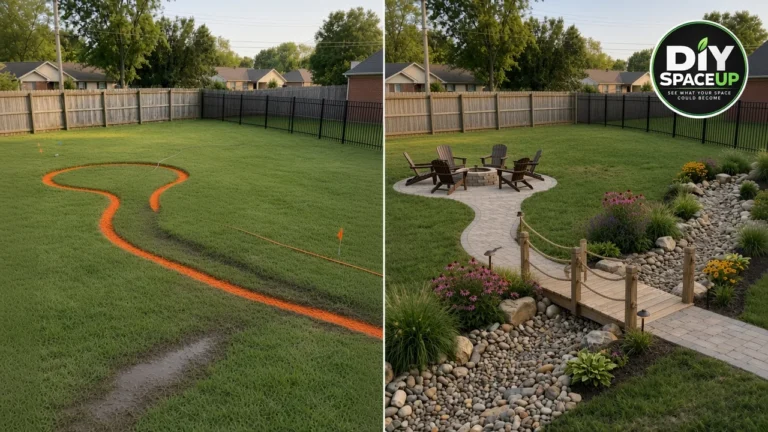
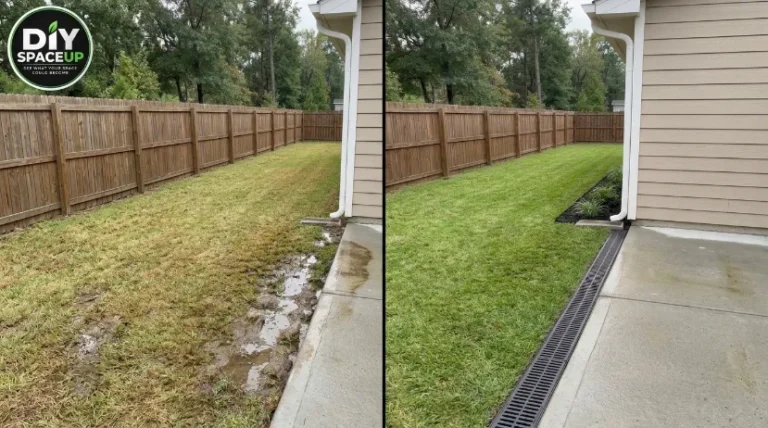
A muddy side yard becomes a clean, practical paver walkway with landscaped planting beds.
How to Build a Paver Walkway Along the Side of a House
Transform a muddy side yard into a practical paver walkway. This DIY project covers excavation, base preparation, compaction, paver installation, edging, drainage, and the landscaping that completes the path.
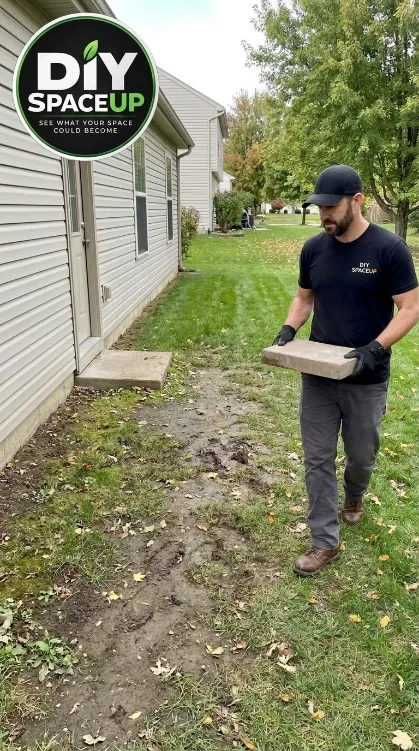
That muddy strip of ground beside the house was doing very little for the property. It was difficult to walk through, became messy when wet, and left the side entrance looking unfinished.
The solution was to turn that narrow side-yard area into a defined paver walkway. The finished path runs directly alongside the house, beginning at the existing concrete step by the door and continuing through the side yard. On one side, landscaped planting beds soften the edge of the house; on the other, the walkway meets the lawn.
The muddy side yard before the new paver walkway was installed.
The important part of this project isn’t simply placing pavers on the ground. The long-term result depends on preparing the soil, building a stable aggregate base, controlling the finished elevation, and placing the pavers carefully.
Affiliate disclosure: As an Amazon Associate, DIY SpaceUp earns from qualifying purchases. Some links below are affiliate links, which means we may earn a commission at no extra cost to you.
Table of Contents
What We’re Building
The finished project is a straight, professionally defined walkway running along the side of the house.
Component
Function
Concrete pavers
Create the finished walking surface
Compacted aggregate base
Provides the stable foundation beneath the pavers
Landscape fabric
Separates the prepared base from the surrounding soil where used
Edge restraint
Helps keep the walkway edges defined
Planting beds
Create a landscaped transition beside the house
Mulch and plants
Finish the garden areas alongside the path
Existing concrete step
Remains as the access point at the side door
The exact paver dimensions and quantities should be determined from your actual site. The photos show the design and construction sequence, but they do not provide verified measurements.
Start by Measuring the Actual Side Yard
Before removing soil, measure the route from the existing concrete step outward along the side of the house.
The finished reference shows the walkway running parallel to the house, with the house on one side and the lawn on the other. The path starts at the existing concrete landing beside the door and continues toward the rear portion of the property.
Do not copy an estimated width from the photograph. Measure:
Total walkway length
Desired finished width
Distance between the house and property-side edge
Existing concrete-step dimensions
Available space for planting beds
Changes in elevation along the route
Location of downspouts and other drainage points
A durable STANLEY FATMAX 25 ft. Tape Measure is a practical choice for establishing the layout. STANLEY’s current FATMAX models include a 25-foot blade and features designed for repeated jobsite use. Stanley Tools
Mark both sides of the proposed walkway with stakes and string. Step back and check the entire route before excavation begins.
Check Drainage Before You Dig
This project is directly beside the house, so drainage deserves special attention.
The finished walkway should not create a situation where water is directed toward the foundation. Pay particular attention to:
Roof runoff
Downspout discharge
Existing low spots
The elevation of the concrete step
The finished height of the walkway
Where water will go after heavy rain
The correct slope depends on the site and drainage requirements. Do not copy a generic slope without evaluating the actual property.
Also identify underground utilities before excavation. Use the appropriate local utility-locating service before digging.
Plan the Excavation Depth
Pavers need more than a shallow layer of gravel beneath them.
The actual excavation depth depends on the paver thickness, aggregate/base system, soil conditions, drainage, climate and local construction requirements.
A useful way to think about the build is:
Existing soil → compacted base → setting layer → pavers
The exact thickness of each layer must be established for the actual site rather than guessed from the photos.
The goal is to excavate deeply enough to accommodate the complete assembly while maintaining the correct finished elevation at the existing concrete step.
Excavate the Walkway
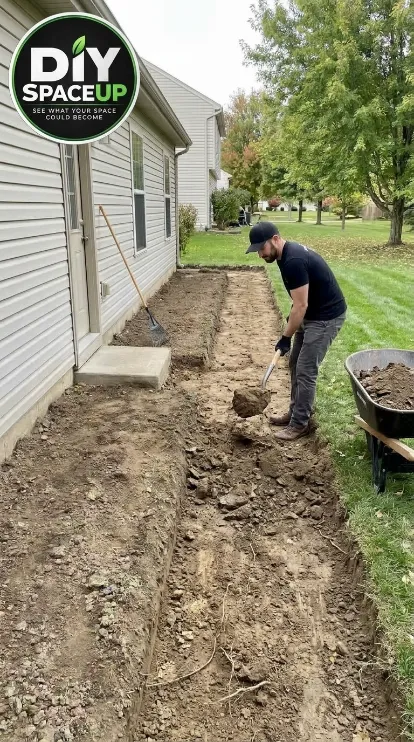
Remove the grass, roots and unsuitable soil from the marked area.
The grass and unsuitable soil are removed to create the footprint for the new paver walkway.
The reference construction shows the entire walkway footprint being opened up before the base material is installed.
Keep the excavation as consistent as practical and avoid disturbing soil outside the planned walkway and planting areas.
A sharp digging shovel makes this stage considerably easier. For larger quantities of soil, a sturdy wheelbarrow can save substantial effort.
A True Temper-style contractor wheelbarrow is a useful category to consider here, particularly when moving excavated soil and aggregate. Choose a model appropriate for the volume and weight you expect to move rather than buying the largest model simply because it is available.
As you excavate, keep checking the elevation rather than waiting until the end.
Prepare and Compact the Subgrade
Once the soil has been removed, inspect the exposed ground.
Soft or unstable areas should not simply be covered with aggregate and forgotten. Correct the problem before building the base.
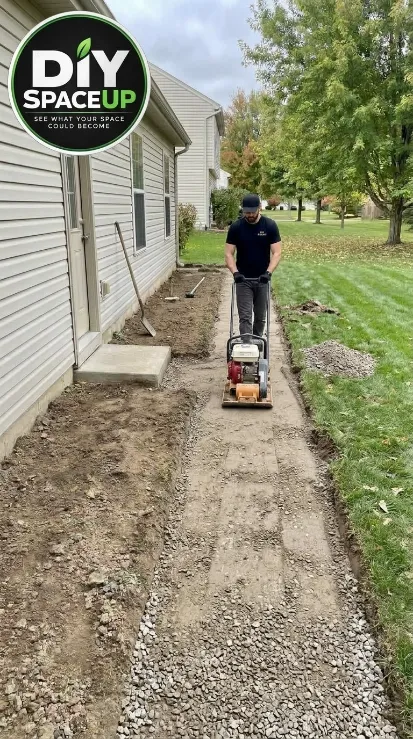
The construction reference shows the prepared route being compacted before the finished surface is installed.
The excavated walkway is prepared with aggregate before the concrete pavers are installed.
For a walkway of this scale, a plate compactor can make the base-preparation process much more efficient than trying to compact everything manually.
For readers who expect to do several landscaping projects, the DEWALT POWERSHIFT Forward Plate Compactor DCPS7154 is a substantial equipment option. DEWALT lists it as a 15 kN-class forward plate compactor designed for site preparation, with a sealed brushless motor and integrated water-tank and mobility accessories in the kit. DeWALT
For a single walkway, however, renting a plate compactor may make more financial sense than purchasing one.
Compact the prepared ground according to the requirements of your base system.
Install the Separation Layer
The construction references show a dark landscape fabric beneath portions of the aggregate preparation.
Where a geotextile is appropriate for your soil and base system, install it over the prepared subgrade according to the manufacturer’s instructions.
Overlap and secure the fabric appropriately so it stays in position while aggregate is placed.
The fabric should not be treated as a substitute for proper excavation or a properly compacted base. Its purpose depends on the specific soil and construction system.
Build the Aggregate Base in Controlled Layers
This is one of the most important parts of the project.
Place the appropriate crushed aggregate/base material over the prepared area rather than trying to create the entire base in one loose layer.
Spread the material evenly and compact it progressively.
A landscape rake is useful for distributing aggregate, while a shovel and wheelbarrow make moving material manageable.
The finished reference shows a substantial prepared base beneath the pavers. That foundation is what helps the walkway remain stable instead of simply following every movement of the underlying soil.
Why Compaction Matters
Loose aggregate can settle after the pavers are installed.
That can lead to:
Uneven pavers
Low spots
Standing water
Rocking pavers
Differential settlement
Compact the base thoroughly and check the elevation repeatedly.
A DEWALT 48 in. Magnetic Premium I-Beam Level is a useful higher-quality layout tool for checking long sections. DEWALT specifies a 48-inch I-beam design with block vials and a stated leveling accuracy of ±0.0005 in./in. DeWALT
Establish the Finished Elevation
Before placing the pavers, spend time getting the base elevation right.
This is where the walkway needs to relate correctly to the existing concrete step.
The finished paver surface should transition cleanly from the existing landing without creating an awkward lip or drainage problem.
Use your level and string lines to check:
Longitudinal alignment
Cross slope
Transition to the existing step
Finished height
Consistency of the prepared base
Do not rely on visual judgment alone.
The exact elevation relationship cannot be determined from the photographs, so this is one of the measurements that must be established on the real property.
Lay Out the Pavers Before Committing to the Pattern
The finished walkway uses rectangular concrete pavers arranged in a repeating pattern.
Because the exact paver product and dimensions shown in the reference are not identified, purchase quantities and layout should be calculated from the actual pavers you select.
Before fixing the pattern, dry-place enough pavers to understand:
How the pattern repeats
Where cuts will be necessary
How the pattern meets the concrete step
How the outside edges will finish
Whether the final row requires narrow pieces
Avoid ending the walkway with extremely narrow pieces whenever the actual layout allows a better adjustment.
Install the Pavers
Begin laying the pavers according to the planned pattern.
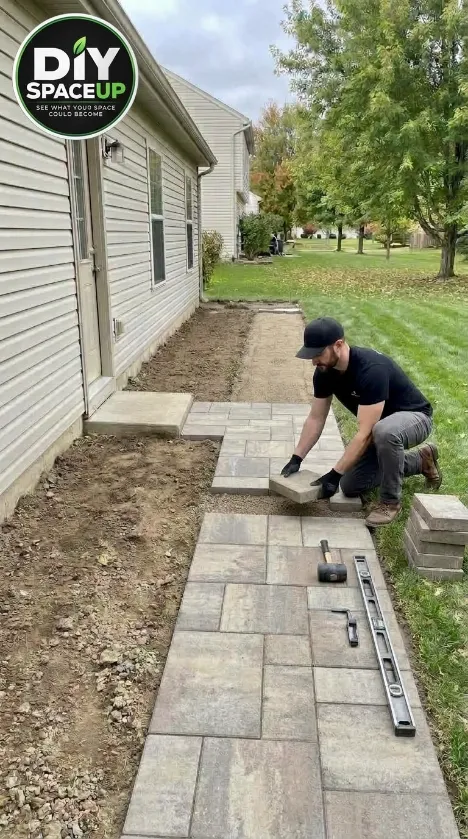
Concrete pavers are carefully positioned along the prepared base to create the new side-yard walkway.
Work progressively along the prepared walkway rather than disturbing the compacted base unnecessarily.
The construction reference shows the pavers being positioned and checked individually.
A 16 oz. rubber mallet is a useful addition to a paver-installation tool kit because it allows controlled adjustment without striking the concrete pavers with a conventional steel hammer.
Set each paver carefully and check the surrounding pieces.
The goal is a consistent finished plane rather than forcing every individual paver to match an arbitrary measurement.
Keep Checking the Surface as You Go
This is where a long level becomes especially useful.
Place the level across several pavers whenever practical and check the transition between neighboring pieces.
If one paver sits too high or too low, correct its bedding rather than trying to compensate with the surrounding stones.
Do not use the pavers themselves to hide an improperly prepared base.
The better the foundation was prepared, the easier this stage becomes.
Finish the Walkway Edges
The finished project has a clean, defined boundary between the paver walkway and the surrounding landscape.
An appropriate edge-restraint system helps keep the paver field from spreading outward over time.
The exact restraint and fastening method are not sufficiently visible in the photographs to identify the installed product, so choose a system compatible with your specific pavers and base.
Do not assume that a decorative plastic border, adhesive or another light-duty product is structurally equivalent to a proper paver edge-restraint system.
Build the Planting Beds Along the House
Once the hardscape footprint is established, the remaining soil areas beside the house can be shaped into planting beds.
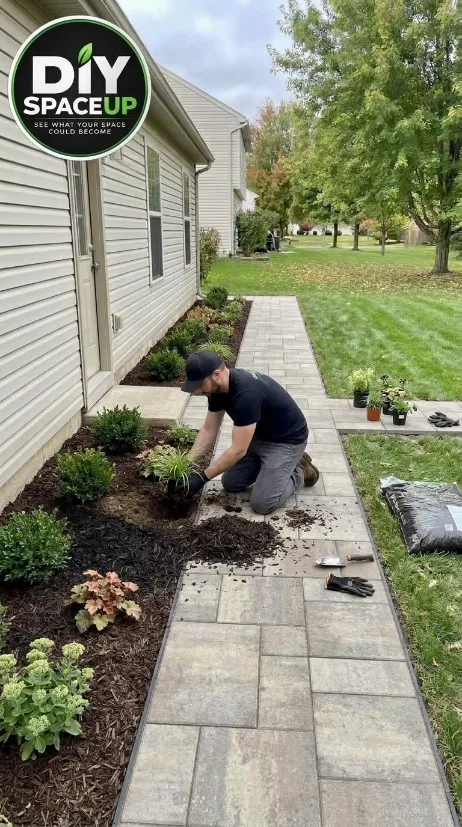
The walkway edges and surrounding planting beds are shaped and finished before the final landscaping is complete.
The finished reference shows:
Dark mulch
Low shrubs
Ornamental grasses
Small flowering/perennial plants
Defined beds between the house and walkway
The planting is decorative rather than part of the structural foundation of the walkway.
Keep soil and mulch at appropriate elevations relative to the house siding and foundation. Do not raise the landscape bed simply to make the finished image look fuller.
Choose plants according to your actual climate, sunlight and mature size.
Finish the Landscape and Clean the Site
After the pavers are installed and the planting areas are prepared, clean the walkway thoroughly.
Remove excess aggregate and construction debris from the surface and surrounding lawn.
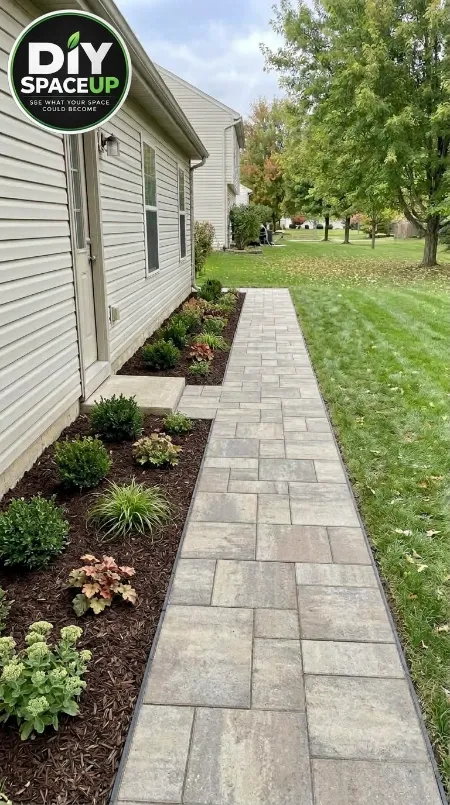
The finished reference shows a clean transition between:
house → planting bed → paver walkway → lawn
That relationship is one of the reasons the project looks substantially more finished than the original muddy side yard.
Structural Considerations
A paver walkway may look simple, but its performance depends heavily on what is underneath it.
Area
What to verify
Soil
Stable enough for the proposed base
Base
Correct aggregate and adequate preparation
Drainage
Water has a suitable path away from the house
Elevation
Finished walkway works with existing concrete step
Edges
Proper restraint for the selected pavers
Pavers
Suitable for the intended outdoor application
Utilities
Underground services located before excavation
The photographs cannot establish the soil bearing conditions, exact base thickness, hidden drainage system or long-term load capacity of this specific installation.
For unusual soil, significant slopes, drainage problems or areas subject to vehicle loading, get site-specific advice rather than copying a residential footpath detail.
Tools and Materials
Here is the practical shopping list for reproducing the project:
The specific DEWALT models above are current examples verified against the manufacturers’ product information; they are comparable recommendations, not claims that these exact products were used in the photographed project. The tape measure and level specifications are likewise based on current manufacturer information. Stanley Tools
When Renting Equipment Makes More Sense
A professional-grade machine can be useful, but buying one for a single walkway may not be economical.
If this is your only hardscape project, compare the purchase price against local equipment-rental rates.
If you’re planning multiple patios, walkways or landscaping projects, owning a compactor becomes a different calculation.
The important point is to use proper compaction equipment, whether that means buying or renting.
Estimated Project Cost
Actual costs vary significantly with walkway length, paver choice, excavation depth, aggregate quantity, plant selection and local material prices.
A reasonable planning framework is:
Category
Typical planning range
Pavers
$4–$12+ per sq. ft.
Aggregate/base
$2–$6+ per sq. ft.
Geotextile
$0.25–$1 per sq. ft.
Edge restraint
$1–$4+ per linear ft.
Mulch/plants
$100–$500+
Equipment rental
$75–$250+
Miscellaneous supplies
$50–$200+
These are planning ranges, not prices taken from the photographed project. Local supplier pricing, quantities and premium material choices can move the total substantially.
Tools you already own are excluded.
Common Mistakes and Better Approaches
Common mistake
Better approach
Laying pavers directly on soil
Build a properly prepared aggregate base
Skipping compaction
Compact the subgrade and base appropriately
Guessing the walkway elevation
Establish elevations before laying pavers
Ignoring the existing concrete step
Plan the finished transition before excavation
Creating drainage toward the house
Evaluate the site’s water flow before construction
Using random paver dimensions
Measure the actual pavers and plan the pattern
Leaving unstable edge conditions
Use a compatible edge-restraint system
Buying a plate compactor for one small project without comparison
Compare ownership with rental cost
Raising planting beds too high
Maintain appropriate clearance around the house
Choosing plants only for appearance
Consider mature size, sunlight and local climate
Safety Checklist
Before starting:
Call the appropriate utility-locating service before excavation.
Wear safety glasses during excavation, cutting and compaction.
Use hearing protection around powered equipment.
Wear gloves suitable for handling concrete pavers.
Use proper lifting technique; pavers can be heavy even when individually manageable.
Keep children and pets away from open excavation.
Follow the plate-compactor manufacturer’s operating instructions.
Do not operate powered equipment on unstable slopes unless the equipment is designed for that application.
Be especially careful around the existing concrete step and any changes in elevation.
Verify local requirements for drainage, property setbacks and excavation where applicable.
Maintenance After Installation
A paver walkway is relatively straightforward to maintain.
Inspect it periodically for:
Settling
Rocking pavers
Washed-out joints
Edge movement
Weeds
Soil or mulch migrating onto the walkway
Drainage changes
Keep the planting beds from gradually encroaching onto the path.
After major storms, check whether water is flowing where intended. A drainage problem is much easier to address early than after repeated saturation causes settlement.
The Finished Transformation
What started as a muddy, undefined strip beside the house is transformed into a dedicated walkway with a much clearer relationship between the house, garden and lawn.
The completed paver walkway creates a clean path beside the house with landscaped planting beds along the edge.
The key lesson is that the visible pavers are only the final layer of the project. The excavation, base preparation, compaction, elevation control and edge treatment underneath them determine much of the finished walkway’s performance.
For a DIYer, the project is achievable when it is approached as a site-preparation project first and a paver-laying project second.
We use cookies and similar technologies to help our website function properly, understand how visitors use the site, and improve your experience. You can accept or manage your preferences at any time. Some features may not work as intended if certain cookies are disabled.
Functional
Always active
The technical storage or access is strictly necessary for the legitimate purpose of enabling the use of a specific service explicitly requested by the subscriber or user, or for the sole purpose of carrying out the transmission of a communication over an electronic communications network.
Preferences
The technical storage or access is necessary for the legitimate purpose of storing preferences that are not requested by the subscriber or user.
Statistics
The technical storage or access that is used exclusively for statistical purposes.The technical storage or access that is used exclusively for anonymous statistical purposes. Without a subpoena, voluntary compliance on the part of your Internet Service Provider, or additional records from a third party, information stored or retrieved for this purpose alone cannot usually be used to identify you.
Marketing
The technical storage or access is required to create user profiles to send advertising, or to track the user on a website or across several websites for similar marketing purposes.