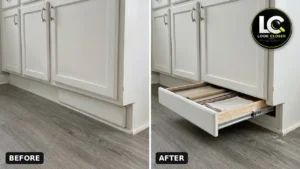

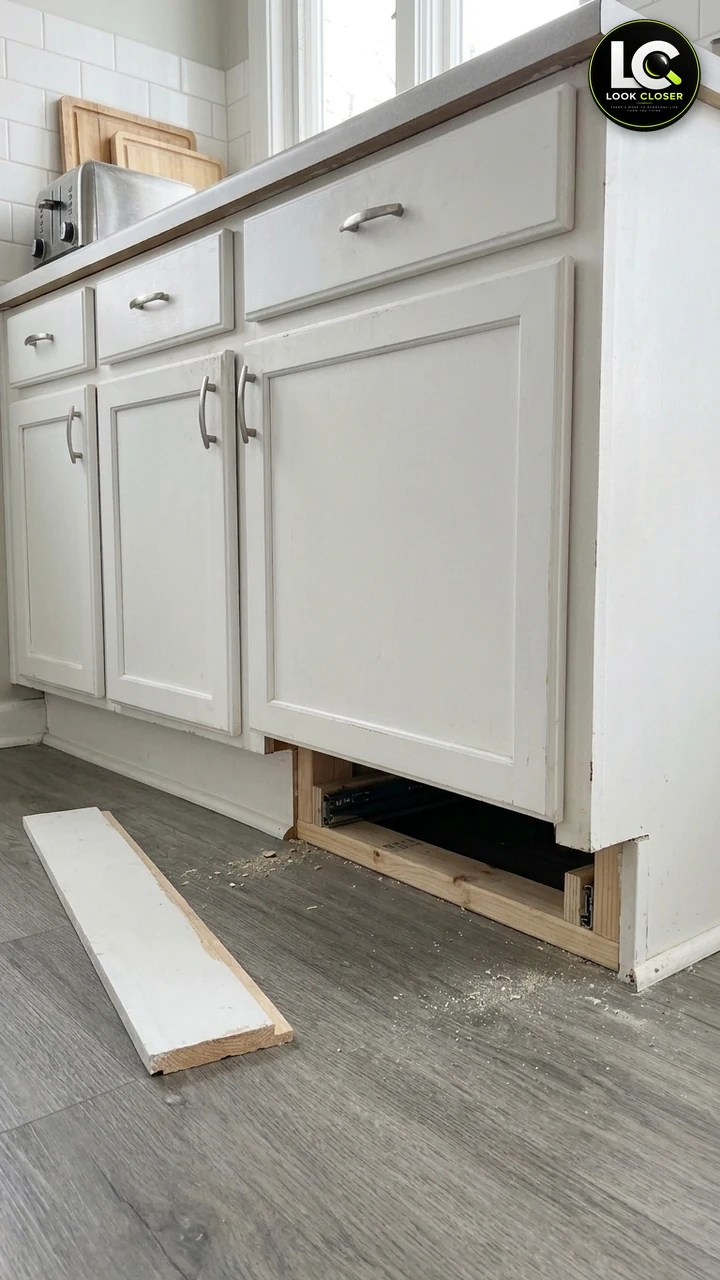
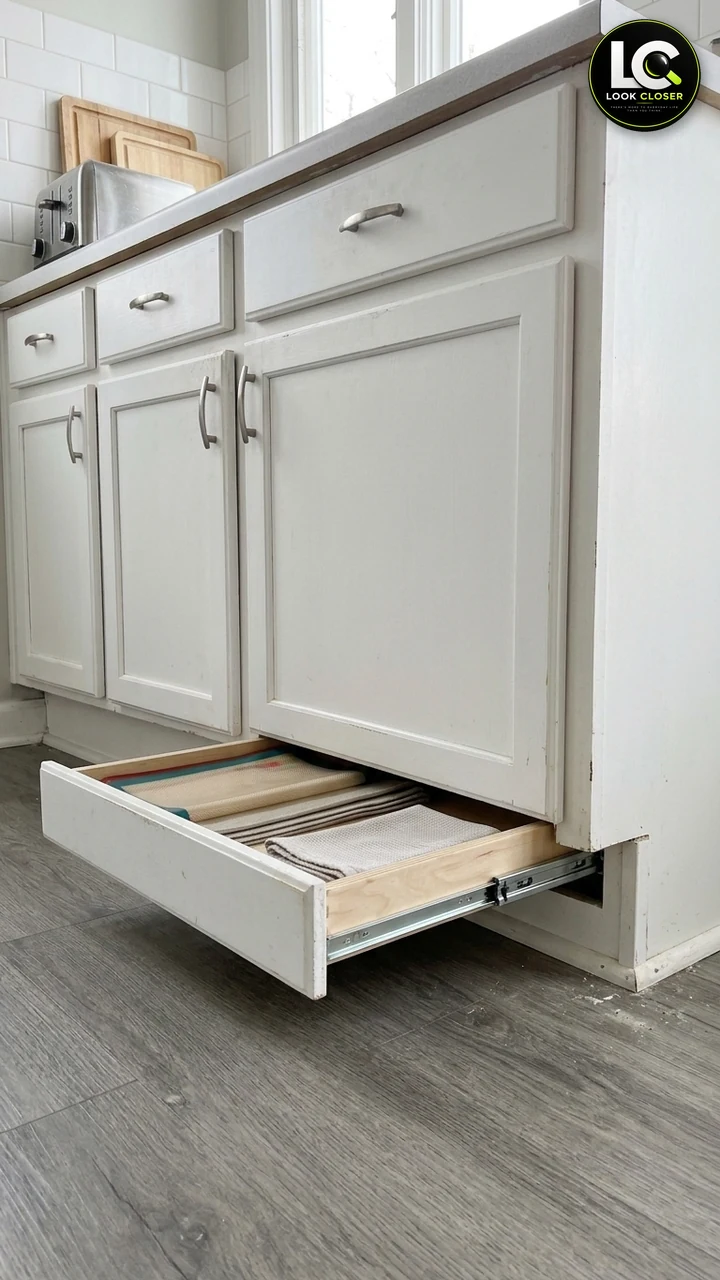
For years, the strip under these white shaker cabinets did one job: it collected dust. It’s only about four inches tall, so it never looked like storage. But behind that painted board is a hollow pocket almost as deep as the cabinet. Baking mats, placemats, sheet pans and flat cutting boards are exactly that thin. Turn the board into the front of a shallow drawer and you get a hidden spot for the flat stuff that clutters your cabinets, and when it’s closed, the kitchen looks the same as before.
That’s the idea behind this toe kick drawer. The reel that inspired it makes it look like a 10-second trick: pull off the board, slide in a drawer, done. Real cabinets need a few more steps. You have to check what’s hiding back there, build solid supports for the slides, and size the box so it clears the floor. This guide walks through all of it in the order a cabinetmaker would.
Important: The source video is an AI-assisted DIY visualization, not a record of a real build. It skips every construction step, and one slide in it is floating with nothing behind it. One step photo in this article is an AI illustration based on the same kitchen. All dimensions here are planning examples. Measure your own cabinets, follow your slide and latch instructions, and call a pro if you find plumbing, gas, wiring or a heat register in the toe space.
Affiliate Disclosure: As an Amazon Associate I earn from qualifying purchases. Product links in this article may earn a commission at no additional cost to you.
In This Guide
- What We’re Building
- Will a Toe Kick Drawer Fit Your Cabinet?
- Measurements: Planning Examples
- Materials and Tools
- Step-by-Step: Build the Toe Kick Drawer
- How Much Can It Hold?
- Safety Checklist
- Estimated Project Cost
- Common Mistakes to Avoid
- Frequently Asked Questions
What We’re Building
One shallow drawer under a single base cabinet. It runs on two side-mount, full-extension slides and is supported by a wood frame that ties into the cabinet, not the floor. The original toe-kick board becomes the drawer front, so the run of cabinets still looks continuous.
| Component | Function |
|---|---|
| Original toe-kick board (trimmed) | Becomes the drawer front, with a small even reveal all around |
| Wood blocking or frame | Gives both slides a flat, solid, parallel surface; fastened to the cabinet sides and base, not to a floating floor |
| Low-profile side-mount slides | Full extension so you can reach the back; roughly 1-3/4 in tall, so they fit a short box |
| Drawer box (1/2 in plywood, 1/4 in bottom) | Holds flat items; sized to clear the floor and the cabinet bottom |
| Push-to-open latch or small finger pull | Opens the drawer without a handle that catches toes |
| Clear water-based finish | Seals the box against mop water and spills |
Prefer a ready-made box? Purpose-built toe kick drawer kits exist, usually sized to a cabinet width with slides included. They save the box build, but you still need the inspection, blocking and fitting steps below. The two kits we checked on Amazon were out of stock at the time of writing, so check a cabinet-hardware supplier too.
Will a Toe Kick Drawer Fit Your Cabinet?
This is the step the reel skips, and it decides whether you can build this at all. Pull or pry the toe-kick off one cabinet first (Step 2), then look in with a flashlight before you buy anything.
| Check | What you’re looking for | If you find it |
|---|---|---|
| Cabinet construction | Solid base frame, or adjustable plastic leveling legs (common on frameless cabinets) | Legs: the drawer must fit between them; never remove or cut a leg |
| Sink base | Drain, water supply lines, shutoff valves, a leak tray | Usually skip this cabinet |
| Dishwasher | Supply line, drain hose and electrical junction box run through the toe space | Never under or beside the dishwasher; leave its access free |
| Range or cooktop | Gas line or electrical cable | Skip this cabinet |
| HVAC toe-kick register or duct | A metal boot or vent in the toe space | Never block it; pick another cabinet |
| Floor | Floating vinyl plank or laminate, high spots, old vinyl | Don’t screw through a floating floor; plan clearance from its high point |
| Pests and moisture | Droppings, damp wood, swelling | Fix the leak or pest problem first |
If the house is older and the toe-kick has old paint, assume it may contain lead and follow the EPA’s lead-safe renovation tips before you cut or sand it.
Measurements: Planning Examples
These are typical ranges, not numbers taken from the photos. Measure your own opening in three places and use the smallest value.
| Measurement | Typical range | How to use it |
|---|---|---|
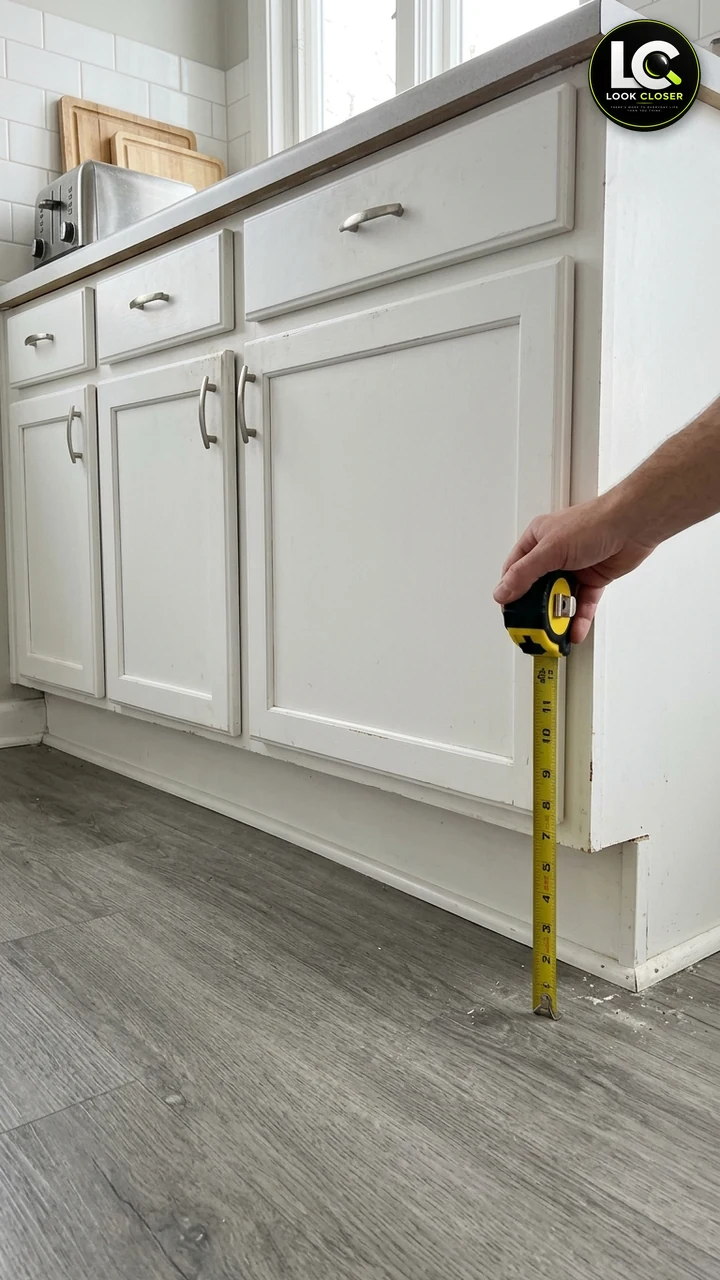
| Toe-kick height (floor to cabinet bottom) | 3-1/2 to 4-1/2 in | Drawer box height = opening minus about 1/2 in |
| Toe-kick setback | About 3 in | Space for the front to sit flush with the original line |
| Usable depth (front to obstruction) | 18 to 21 in | Pick the longest slide that fits, often 18 in; box length matches the slide |
| Opening width (between cabinet sides) | Cabinet width minus side panels | Box width = space between blocking minus 1 in for side-mount slides (1/2 in per side) |
| Floor clearance | About 1/4 in minimum | Measured from the floor’s high point, so the box never drags |
Example: a 24 in cabinet with a 4 in toe kick might take a box about 20 in wide, 18 in long and 3 in tall, with about 2-1/4 in of inside depth. That’s plenty for silicone baking mats, placemats, trays and thin cutting boards.
Materials and Tools
| Item | Why you need it |
|---|---|
| Highpoint 3J01 18 in Full-Extension Side-Mount Slides (pair) | Low-profile, full-extension slides with screws; match the length to your depth |
| Sugatsune Magnetic Touch Latch (2-pack) | Push-to-open, so the front needs no handle |
| DEWALT DWE315K Oscillating Tool Kit | Cuts nails or a glued joint behind the toe-kick cleanly |
| Estwing PB-18 Pry Bar | Eases the toe-kick off without crushing it (use a scrap pad) |
| STANLEY FATMAX 25 ft Tape Measure | Height, depth and width checks |
| Kreg Pocket-Hole Jig 320 | Fast, square drawer-box joints in 1/2 in plywood (sample screws included) |
| Titebond II Premium Wood Glue | Box joints and blocking; handles damp conditions (Titebond specs) |
| Minwax Polycrylic, Clear Satin | Water-based seal for the box and any bare wood |
| DEWALT Anti-Fog Safety Goggles | Cutting, prying and drilling at floor level |
| 1/2 in Baltic birch plywood, 1/4 in plywood bottom | Drawer box (local lumberyard) |
| 3/4 in plywood or straight 2x lumber, shims | Blocking/frame (local) |
| #8 wood screws, 1-1/4 in pocket screws | Fastening (local) |
| Drill/driver, clamps, square, 120–220 grit sandpaper, flashlight, knee pads | General tools you likely own |
Step-by-Step: Build the Toe Kick Drawer
Step 1: Pick the Cabinet and Measure
Choose a cabinet with nothing in its toe space: not the sink, dishwasher or range base, and not one with a register. Measure the height at both ends and the middle, and find the floor’s high point with a level. Write down the smallest number.
Step 2: Remove the Toe-Kick Cleanly
Many toe-kicks are just nailed or stapled to the cabinet base; some clip on. Run a utility knife along any caulk or paint line. Then slide the oscillating tool’s flush-cut blade behind the board to cut the fasteners, or pry gently with a pad behind the bar. Mark which way the board faces. You’re reusing it, so keep it in one piece. If the toe-kick is one long board under several cabinets, cut it at the cabinet joint with the oscillating tool, square to the floor.
Step 3: Inspect and Clean the Cavity
Vacuum out the dust and check everything in the table above. Confirm the depth all the way back. A stray screw, a dishwasher hose or a cabinet back rail can shorten the usable depth.
Step 4: Install Blocking So Both Slides Are Fully Supported
This is the part the reel faked. A slide needs a solid, flat surface along its whole length, and both slides must be parallel and level. Build a simple frame: two side runners of 3/4 in plywood or straight 2x stock, set flush with the inside edge of the opening, with a back cross-piece. Glue and screw it to the cabinet’s side panels and base frame. If the frame sits on a floating floor, shim it level and fasten it only to the cabinet so the floor can still move. Check that the two runners are parallel with a tape (measure front and back), and shim behind a runner if needed.
Mount the slides on the runners with their bottom edge about 1/2 in above the floor’s high point, level front to back, and set back from the face by the front’s thickness plus the reveal you want.
Step 5: Build the Drawer Box
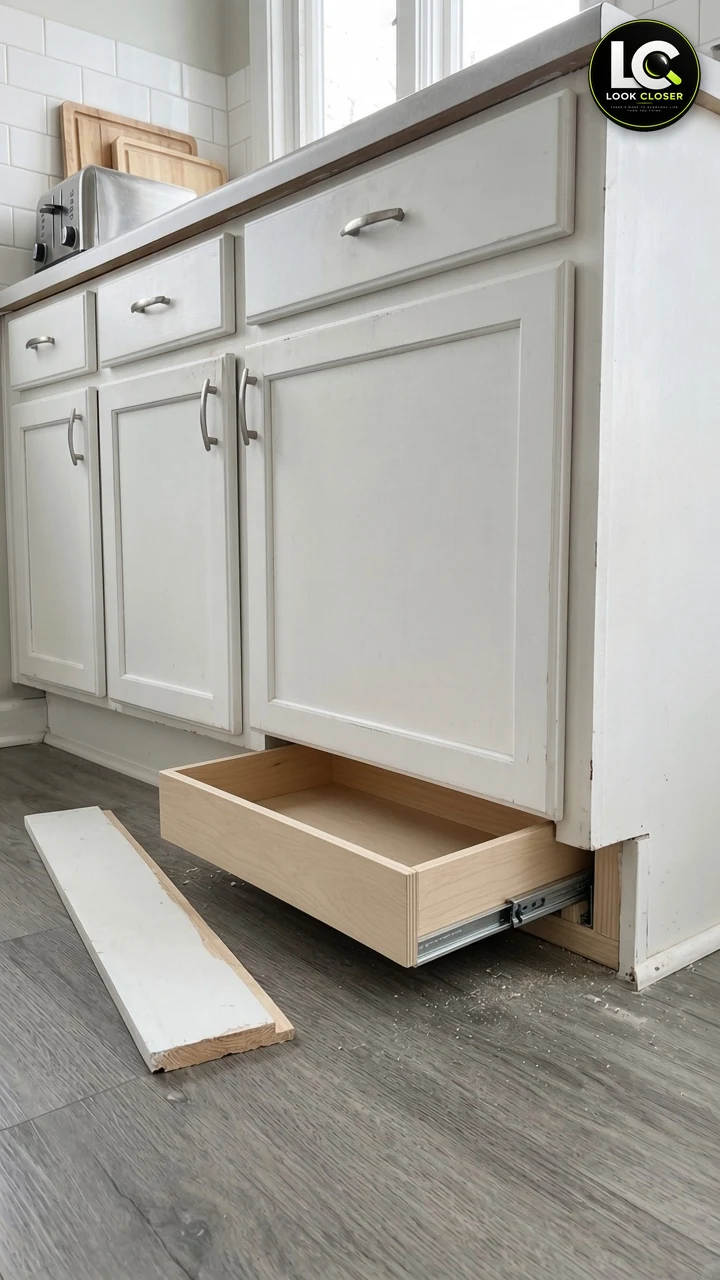
Cut the sides, front and back from 1/2 in plywood. Make the box height about 1/2 in less than the opening, and the width 1 in less than the space between the runners (or whatever your slide instructions say). Groove or rabbet a 1/4 in bottom, or glue and screw it on. Assemble with glue and pocket screws (Kreg’s pocket-hole guides cover screw length for 1/2 in stock) or screws, and check that the diagonals match so the box is square. A box that’s out of square will bind.
Step 6: Dry-Fit on the Slides
Attach the drawer members of the slides to the box and slide it in. It should run smoothly to full extension without rubbing the floor, the cabinet bottom or anything in the cavity. Adjust now, before you finish anything.
Step 7: Fit the Original Toe-Kick as the Front
Trim the toe-kick so it leaves an even reveal of about 1/16 to 1/8 in at each end and clears the floor by at least 1/4 in. Clamp it to the box with spacers, check that it sits on the same line as the neighboring toe-kick, then screw it on from inside the box. If your face is thin particleboard, back it with a 1/2 in plywood strip so the screws hold.
Step 8: Add a Push Latch or Pull
A magnetic touch latch on the back blocking, with its strike on the drawer back, lets you open the drawer with a light push of your toe. Leave the small gap the latch needs (Sugatsune lists about 3.5 mm). Push-to-open slides are an alternative. If the latch fights your slide, a small recessed finger pull on the top edge of the front works too.
Step 9: Finish, Seal and Load
Remove the box, sand edges to 180–220 grit, and brush on two or three thin coats of water-based Polycrylic inside and out, sanding lightly between coats. Touch up the cut ends of the toe-kick with matching paint. Let it cure before loading, then fill it with flat, light items.
Building more small-space kitchen storage? See our slim rolling pantry beside the fridge, the pull-out tilt-down spice rack and the DIY kitchen corner shelf. For a bigger version of the same idea, our under-bed storage drawer uses similar box-building steps.
How Much Can It Hold?
We won’t give you a single number, because it depends on your build. A slide’s rating, for example 75 lb for the Highpoint pair, is tested on a properly mounted slide and a sturdy box. Your real limit is the weakest link.
| Factor | Why it matters |
|---|---|
| Blocking and fasteners | Slides are only as strong as what they’re screwed to |
| Box joinery and bottom | A 1/4 in bottom on a wide box can sag under heavy pans |
| Slide length and mounting | Long slides on uneven runners bind and wear early |
| Use | Kicking it shut and stepping on it open strain everything |
Treat it as storage for flat, light items. Cast iron and stand mixers belong in an upper drawer.
Safety Checklist
- Inspect the toe space before cutting; stay clear of water, drain, gas and electrical lines
- Never block an HVAC toe-kick register or the dishwasher’s service access
- Wear safety glasses when cutting and prying; wear a dust mask when sanding (see OSHA on wood dust)
- Unplug the oscillating tool before changing blades
- Assume old paint may contain lead until it’s tested
- Kneel on pads and keep fingers clear of the slides when you close the drawer
- Let the finish cure fully before storing anything that touches food
Estimated Project Cost
| Category | Estimated range |
|---|---|
| Slides (pair) | $15–$45 |
| Plywood for box and blocking | $25–$70 |
| Latch, screws, glue, finish | $20–$50 |
| Ready-made toe kick drawer kit (instead of the box and slides) | About $100–$250 when available |
| DIY total, one drawer | About $60–$165 (not counting tools) |
Time: one weekend: an evening to measure and inspect, a few hours to build and fit, and a day for the finish to dry.
Common Mistakes to Avoid
| Mistake | Better approach |
|---|---|
| Cutting before you look behind the toe-kick | Remove it and inspect for plumbing, wiring, gas and registers first |
| Slides screwed to thin air or a single board | Blocking on both sides, flat, parallel and fastened to the cabinet |
| Screwing into a floating floor | Fasten the frame to the cabinet only; shim to level |
| Box sized to the opening with no floor clearance | At least 1/4 in off the floor’s high point |
| Splitting the toe-kick on removal | Cut the fasteners with an oscillating tool; pry with a pad |
| Front touching neighbors | Even 1/16–1/8 in reveal at each end |
| Putting heavy cookware in it | Flat, light items only |
Frequently Asked Questions
Can every cabinet take a toe kick drawer?
No. Skip the sink base, dishwasher, range and any cabinet with a heat register or utilities in the toe space. Cabinets on plastic leveling legs can work if the drawer fits between the legs.
How tall does the toe kick need to be?
Most US toe kicks are about 3-1/2 to 4-1/2 in tall. That leaves room for a box about 3 in tall with roughly 2 in of usable inside depth. Below about 3-1/2 in, it gets tight for side-mount slides.
What slides work best?
Low-profile side-mount, full-extension ball-bearing slides are the easiest to fit. Push-to-open versions remove the need for a latch. Undermount slides need specific box dimensions, so check their specs first.
Do I need a handle?
No. A push latch or push-to-open slide lets you open the drawer with your toe. A small finger pull on the top edge also works if you’d rather not use a latch.
Can I buy a toe kick drawer kit instead?
Yes. Kits come sized to standard cabinet widths with slides, but you still have to inspect the cavity, add support if needed, and fit the front.
What fits in a toe kick drawer?
Baking mats, placemats, sheet pans, cutting boards, trays, kitchen towels and pet bowls: anything flat and light.