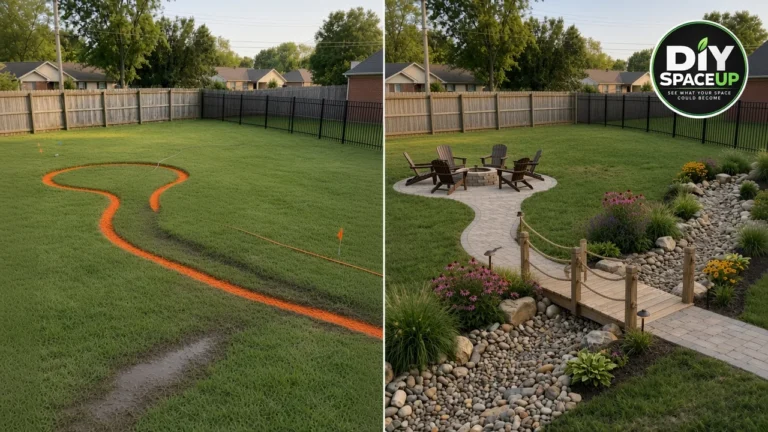
A simple backyard lawn becomes a dedicated play space with a custom wood-framed sandbox.
How to Build a Backyard Sandbox With a Wood Frame
Turn an unused section of backyard lawn into a dedicated play space with this DIY wood-framed sandbox. See how the ground is prepared, the frame is assembled, the liner is installed, and the sandbox is filled with play sand.
A patch of lawn can be more useful than it looks. In this project, an ordinary section of the backyard was turned into a dedicated sandbox with a simple rectangular wood frame, a protective liner underneath, and a deep layer of play sand.
The finished result creates a defined play area without changing the surrounding lawn or existing paved area. The build is straightforward, but the preparation underneath the sand matters just as much as the visible wood frame.
Project note: The supplied references show the actual project and its construction sequence. Exact lumber dimensions, overall sandbox dimensions, fastener specifications, liner type, and sand quantity are not verifiable from the images alone. Measure your own space and verify the materials and construction details for your installation.
Affiliate disclosure: As an Amazon Associate, DIY SpaceUp earns from qualifying purchases. Some links below are affiliate links, which means we may earn a commission at no extra cost to you.
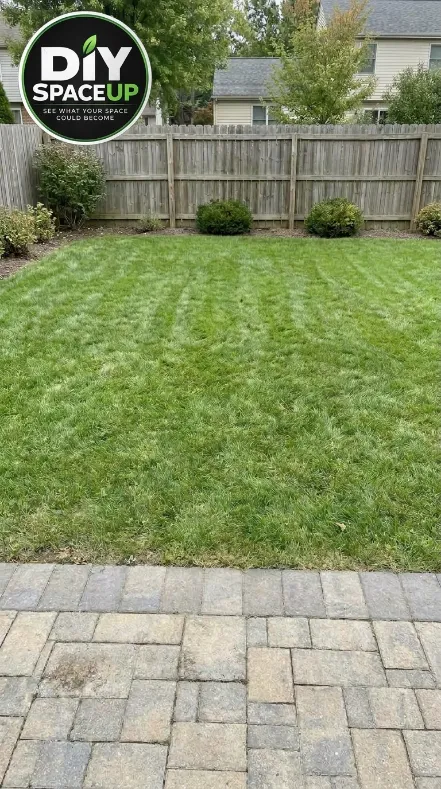
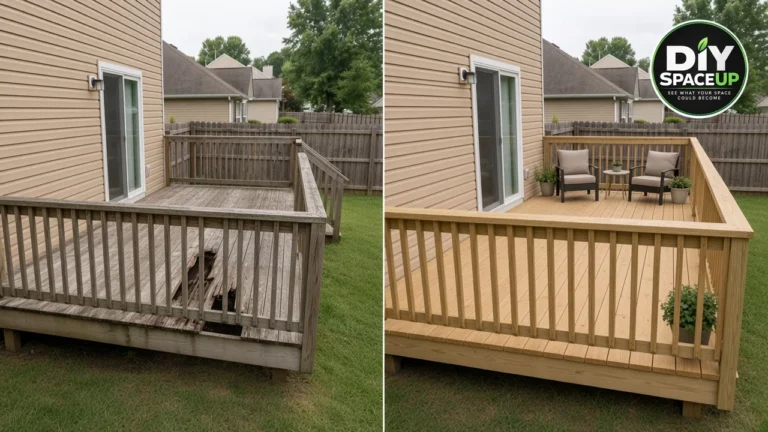
The backyard lawn before construction of the wood-framed sandbox.
Table of Contents
What We’re Building
The project consists of a freestanding rectangular sandbox installed on an existing backyard lawn.
Component
Purpose
Wood frame
Defines the sandbox perimeter
Prepared ground
Creates a reasonably level installation area
Black ground liner
Separates the sand from the underlying soil
Play sand
Creates the finished play surface
Raised wood section
Forms the built-in feature visible along one side of the finished sandbox
Surrounding lawn
Remains outside the sandbox footprint
Existing paver area
Remains in front of the sandbox
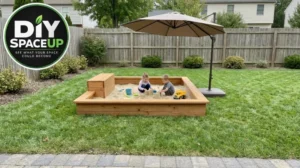
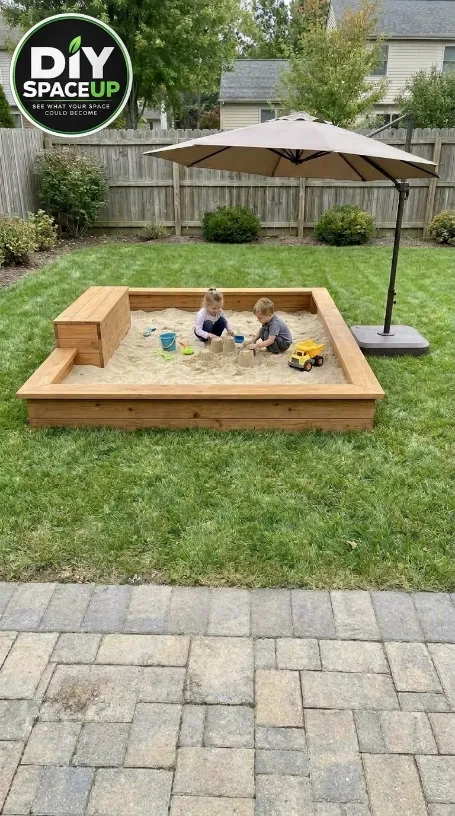
The finished reference also shows a large offset patio umbrella and children’s sand toys. These are use/accessory elements, not part of the sandbox’s structural construction.
Plan the Sandbox Location
Start by choosing a location that matches the character of the reference: an open section of backyard lawn with enough room around the sandbox for children and adults to move safely.
Before cutting or digging, measure the available area.
Because the exact dimensions of the photographed sandbox are not provided, don’t copy a dimension from the image and treat it as a measurement. Instead, determine:
Overall length and width
Available clearance around the sandbox
Distance from fences and property boundaries
Relationship to existing patios or walkways
Location of underground utilities
Sun and shade throughout the day
How water moves through the yard after rain
The finished reference places the sandbox in the lawn behind an existing paved area, with the fence forming the background of the play space.
A useful planning rule
Make the sandbox large enough for the intended number of children, but don’t use the entire available lawn simply because you can. Leave comfortable circulation around it and enough open space for maintenance.
Also consider where the sand will go when children climb in and out. A location directly beside a paved walkway may eventually require more sweeping or cleanup.
Gather the Materials
The visible project uses wood for the perimeter frame, a black liner underneath, and sand as the finished fill.
Your exact shopping list will depend on the dimensions you choose.
Materials
Exterior-rated lumber suitable for the intended sandbox construction
Exterior-rated structural screws or appropriate outdoor fasteners
Black ground/separation fabric or liner appropriate for the installation
Clean play sand intended for children’s sandboxes
Stakes or temporary layout markers
Optional landscape edging or similar perimeter treatment if required by your design
For the wood, don’t assume that a particular species or treatment is appropriate simply because it resembles the reference. Choose lumber based on outdoor exposure and, importantly, its suitability for a children’s play environment.
If children will have frequent skin contact with the wood, choose an appropriate finish or lumber product and follow the manufacturer’s guidance.
Tools
The project can be completed with fairly common landscaping and woodworking tools.
A pair of IRWIN QUICK-GRIP Bar Clamps can also help hold boards together while you align and fasten the corners.
These are comparable product options, not claims that they are the exact tools used in the photographed project.
Mark the Sandbox Footprint
Once you’ve selected the location, mark the complete perimeter.
Use stakes and string to establish straight sides and square corners.
This is worth taking your time over. A small error at the layout stage becomes much more obvious once the wood frame is assembled.
Check:
Overall length.
Overall width.
Corner alignment.
Diagonals, if you’re creating a rectangular frame.
Relationship to the existing paved area.
Clearance from the fence and other permanent features.
Don’t start cutting lumber until you’re satisfied with the footprint.
Remove the Grass
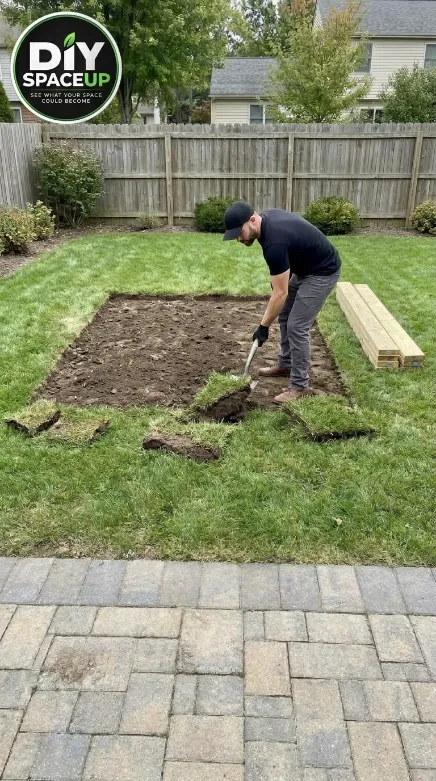
The reference sequence shows the lawn being cleared before the sandbox is assembled.
Remove the grass and organic material from the entire sandbox footprint.
The grass is removed from the planned sandbox footprint before the wood frame is assembled.
Use a shovel to cut through the sod, then remove the grass in manageable sections. A garden rake can help collect remaining roots and loose debris.
A Round-Point Digging Shovel is a practical choice for cutting through the turf and loosening the soil inside the marked footprint.
The goal is not simply to make the area look clean. Organic material left beneath the sandbox can decay and create unevenness later.
After removing the turf, rake the exposed soil and remove obvious roots, stones, and other debris.
Keep the base reasonably level
The ground doesn’t need to be perfectly engineered like a foundation, but it should be reasonably level and stable.
Check the surface in multiple directions with a level.
If one area is significantly higher, remove soil rather than simply adding large amounts of loose fill beneath the sandbox.
Build the Wood Frame
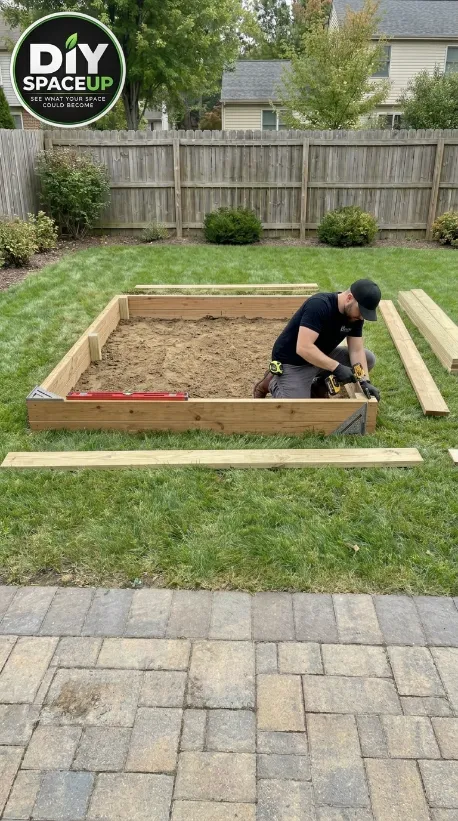
The reference construction shows the wood perimeter being assembled directly around the prepared sandbox area.
The wooden boards are assembled to form the rectangular frame of the backyard sandbox.
Cut the boards according to your measured dimensions and dry-fit the perimeter before permanently fastening anything.
Use a square to check each corner.
The frame needs to remain rigid enough to contain the sand and maintain its shape during normal use.
Corner assembly
Bring the boards together at each corner and verify the alignment before driving the fasteners.
Use exterior-rated fasteners appropriate for the lumber and the intended outdoor exposure.
Do not assume that a particular screw size or fastening pattern is universally adequate. The correct fastener depends on the lumber dimensions, joint configuration, exposure, and loads placed on the structure.
The sandbox is primarily a containment structure, but children may climb, sit, or lean on its edges. Build accordingly.
Add the Ground Liner
Once the frame is positioned, prepare the interior for the sand.
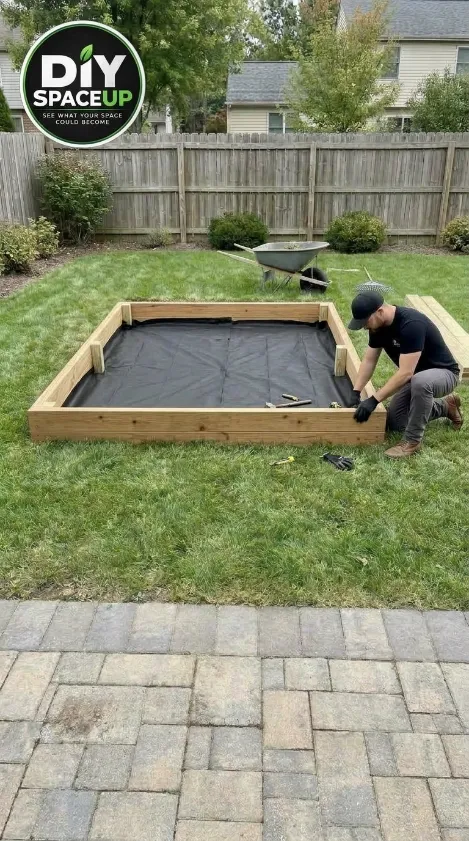
The supplied construction reference clearly shows a black material covering the ground inside the wood frame.
Lay the liner across the entire prepared footprint and bring it up toward the inside edges of the frame.
A black ground liner is positioned inside the wooden sandbox before the play sand is added.
Trim excess material only after you’ve confirmed that the entire area is covered.
The liner should not have large folds or loose sections that could create unnecessary unevenness beneath the sand.
Why use a liner?
A separation layer helps keep the play sand from mixing directly with the underlying soil.
It can also help limit weed growth through the sandbox, although no liner should be treated as a guarantee against weeds forever.
Use a product appropriate for ground contact and the intended application rather than automatically choosing the thinnest plastic sheet available.
Fill the Sandbox With Play Sand
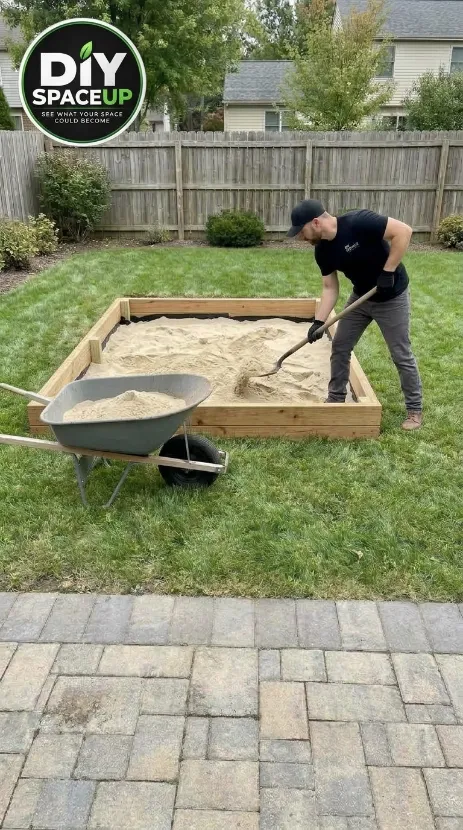
The reference sequence shows sand being brought in with a wheelbarrow and distributed throughout the frame.
Play sand is added to the wooden sandbox after the frame and ground liner are installed.
Then convert the volume to the units used by your supplier.
Because different sand products have different packaging weights and bulk densities, check the manufacturer’s or retailer’s coverage information when determining how many bags or bulk quantities to purchase.
A wheelbarrow with a suitable capacity can make transporting multiple loads substantially easier.
A garden rake is useful for spreading the sand evenly without repeatedly disturbing the liner.
Level the Sand
Once enough sand has been added, spread it across the entire interior.
Work gradually instead of dumping a large quantity into one corner.
Use a landscape or garden rake to distribute the material, then check the surface visually and with your chosen reference depth.
The finished sand should provide an even play surface while remaining deep enough for the intended use.
Don’t compact play sand like an aggregate driveway base. The goal here is a usable, loose play surface.
Add the Built-In Wood Feature
The finished reference shows a raised wood structure along one side of the sandbox.
Because the supplied images do not establish its exact internal construction or intended load capacity, treat it as a project-specific feature rather than assuming it is a structural bench, storage compartment, or seating platform.
If you reproduce this feature, determine its intended use first and build it accordingly.
If children will climb or sit on it, its framing and fastening should be designed for that purpose rather than relying on the appearance of the reference alone.
Check the Finished Sandbox
Before allowing children to use the sandbox, inspect the entire installation.
Check:
Wood corners for sharp edges
Fasteners for exposed points
Splinters or damaged lumber
Loose liner material
Uneven or contaminated sand
Frame movement
Sand escaping beneath the frame
Standing water after rain
Any objects or debris inside the sandbox
Run your hand carefully along accessible wood surfaces to identify rough areas that need attention.
Safety Considerations
A sandbox is a children’s play area, so safety deserves more attention than it might receive in an ordinary landscaping project.
Sandbox Safety Checklist
Use clean play sand intended for children’s use.
Inspect the sand regularly for foreign objects.
Keep the area free of sharp hardware and splinters.
Cover the sandbox when appropriate to keep animals and debris out.
Provide shade when children will be playing for extended periods.
Keep water from accumulating inside the sandbox.
Check the frame periodically for movement or deterioration.
Follow the manufacturer’s instructions for any treated lumber, finishes, liners, or play-sand products.
Verify local requirements that may apply to outdoor children’s structures.
The large umbrella visible in the final reference provides shade, but it should be installed according to its manufacturer’s instructions and secured appropriately for local wind conditions. Don’t assume that the umbrella base shown in the photo is suitable for every location.
Maintenance
The finished sandbox is relatively simple to maintain.
Regularly:
Remove leaves and debris.
Inspect the sand for foreign objects.
Rake the surface after heavy use.
Check the frame for cracks, movement, or splinters.
Inspect the liner where it is accessible.
Look for drainage problems after rain.
Replace contaminated or deteriorated sand as appropriate.
The surrounding grass will also need normal mowing and maintenance. Keep grass clippings from accumulating inside the sandbox.
Estimated Project Cost
The largest variables are the sandbox dimensions, lumber choice, amount of play sand, liner, and whether you already own the necessary tools.
Category
Typical cost consideration
Lumber
Depends heavily on size and lumber type
Exterior fasteners
Relatively small portion of the project
Ground liner
Low to moderate cost depending on material
Play sand
Potentially one of the larger material expenses
Tools
Minimal if you already own basic woodworking and landscaping tools
Wheelbarrow
Useful if transporting multiple loads
Optional shade
Additional cost; highly variable
Sand toys
Optional finished-space accessory
For a one-time sandbox project, buying every tool may not make sense. Borrowing or renting equipment can reduce the upfront cost.
Common Mistakes
Mistake
Better approach
Building directly on thick grass
Remove the turf and organic layer first
Guessing the sandbox dimensions
Measure the actual available space
Leaving the ground badly uneven
Prepare and level the footprint before assembly
Using any type of sand
Choose sand specifically intended for children’s play
Installing the liner loosely
Cover the footprint carefully and trim excess after positioning
Using unsuitable outdoor fasteners
Choose fasteners appropriate for the lumber and exposure
Treating a decorative-looking side feature as structural seating
Design and fasten it specifically for its intended use
Ignoring drainage
Observe the area after rain before finalizing the location
Filling the sandbox before checking the frame
Verify the frame alignment and stability first
The Finished Backyard Sandbox
The transformation is simple: a section of lawn becomes a dedicated play area with a defined wood perimeter, separation layer, and play-sand surface.
The completed wood-framed sandbox creates a dedicated play area in the backyard.
The important part isn’t just the finished sandbox. The preparation underneath it—removing the turf, getting the ground reasonably level, installing the liner, and building a stable frame—is what makes the finished result practical and repeatable.
The final reference adds the accessories and play elements after the construction is complete, showing how the sandbox can become a functional part of the backyard without redesigning the entire yard.
For a finished setup similar to the reference, a Large Offset Patio Umbrella can make the sandbox more comfortable during sunny periods while keeping the play area relatively open. Choose the umbrella size, canopy material, base, and wind rating according to your actual yard and local conditions. The umbrella shown in the reference is a visual reference only and is not being identified as a specific product.
We use cookies and similar technologies to help our website function properly, understand how visitors use the site, and improve your experience. You can accept or manage your preferences at any time. Some features may not work as intended if certain cookies are disabled.
Functional
Always active
The technical storage or access is strictly necessary for the legitimate purpose of enabling the use of a specific service explicitly requested by the subscriber or user, or for the sole purpose of carrying out the transmission of a communication over an electronic communications network.
Preferences
The technical storage or access is necessary for the legitimate purpose of storing preferences that are not requested by the subscriber or user.
Statistics
The technical storage or access that is used exclusively for statistical purposes.The technical storage or access that is used exclusively for anonymous statistical purposes. Without a subpoena, voluntary compliance on the part of your Internet Service Provider, or additional records from a third party, information stored or retrieved for this purpose alone cannot usually be used to identify you.
Marketing
The technical storage or access is required to create user profiles to send advertising, or to track the user on a website or across several websites for similar marketing purposes.