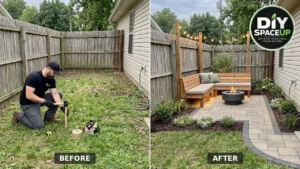

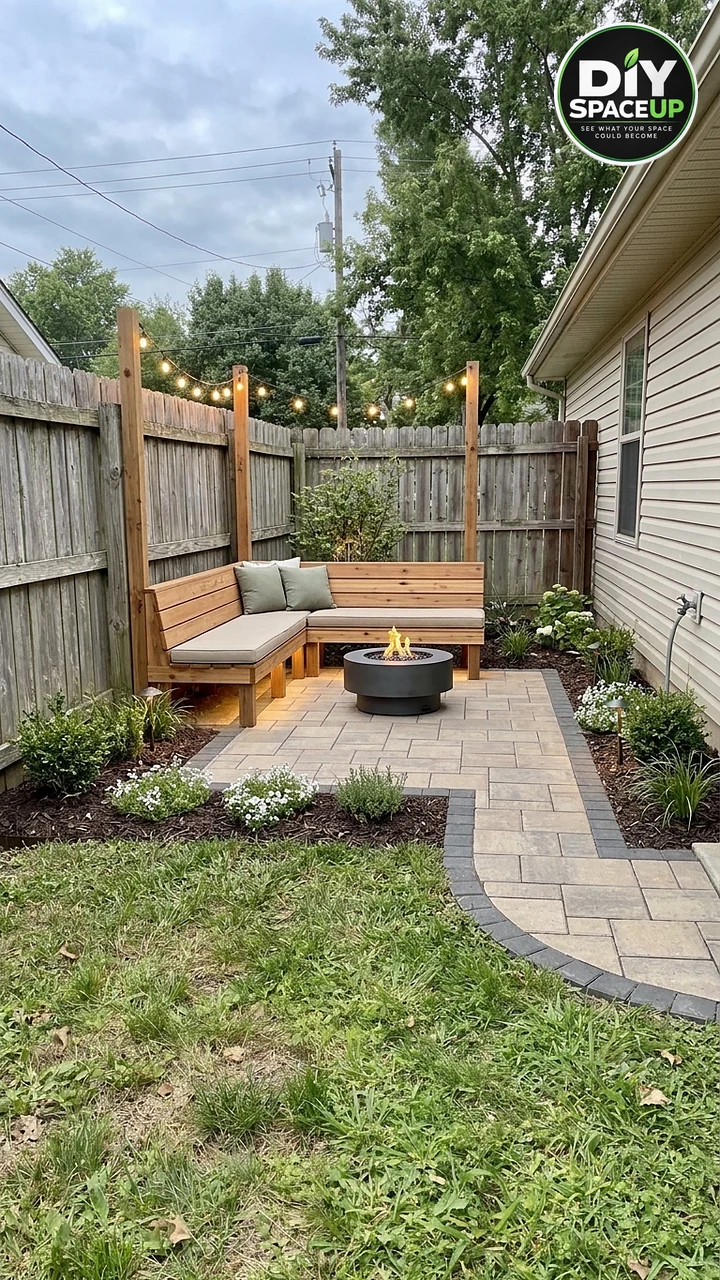
Every house seems to have one: a strip of grass along the side of the house that nobody really uses. In this yard it was a narrow corner boxed in by a tall wooden privacy fence on two sides and the beige vinyl siding of the house on the third. The grass got mowed, the hose got dragged through it, and that was about it.
The opportunity was the enclosure itself. Two fence lines and a wall already made the corner feel private, which is exactly what you want in a spot for evening conversation. So the plan became a small backyard fire pit corner: a paver patio with a charcoal border, a built-in L-shaped cedar bench with cushions, string lights hung between three tall posts, planted and mulched beds, low landscape lights, and a curved paver walkway that ties it back to the rest of the yard.
Why it is worth doing right: the paving, bench, and lights are straightforward weekend-scale work, but the fire part is not. Fire safety organizations commonly advise keeping a fire pit at least 10 feet from anything that can burn, and this corner puts a wood fence, a wood bench, and vinyl siding all within a few steps of the center of the patio. Short videos also skip the parts that decide whether a patio stays flat and the posts stay straight. This guide fills those gaps: fire type and clearances first, then the layout, a proper paver base with edge restraint, posts on real footings, a bench tied to those posts, and lighting on a GFCI-protected outlet.
Treat this as a planning and building roadmap, not a site-specific design. Every dimension below is a planning example, not a measurement taken from the photos. Measure your own yard, read the manuals that come with your fire feature and lights, and check your local codes. Costs are estimates.
Affiliate Disclosure: As an Amazon Associate I earn from qualifying purchases. Product links in this article may earn a commission at no additional cost to you.
What’s in This Post
- What We’re Building
- Is Your Corner Big Enough for a Fire Pit?
- Before You Dig: 811, HOA, Burn Rules, and Permits
- Materials and Tools
- Step-by-Step Build
- Safety Checklist
- Estimated Cost
- Common Mistakes and Better Approaches
- Maintenance and Care
- FAQ
What We’re Building
The finished corner is a compact outdoor room. A rectangular patio of tan concrete pavers fills the back of the corner, framed by a darker charcoal soldier border. An L-shaped slatted wood bench with seat and back cushions wraps the back and left side of the patio, set just in front of three tall wood posts. Warm string lights hang between those posts. Mulched beds with shrubs and white flowers line the fence and the house, a small landscape light washes the plants, and a curved paver walkway with the same charcoal border runs from the patio out toward the lawn. A round, dark fire bowl sits in the middle of the patio.
| Component | Function |
|---|---|
| Fire feature (gas recommended for a tight corner) | The focal point. Its type and its listed clearances set where everything else can go |
| Stake-and-string layout | Fixes the patio and walkway outline, square corners, and the drainage slope before any digging |
| Excavation and graded subgrade | Removes sod and topsoil and creates a gentle fall away from the house |
| Three light posts on footings | Freestanding posts set below the frost line that carry the string-light cable and anchor the bench back |
| Geotextile and compacted aggregate base | Keeps the patio and walkway flat, firm, and free-draining for years |
| Bedding sand, pavers, and charcoal border | The walking surface, laid in a pattern with a contrasting soldier course around the edge |
| Edge restraint and joint sand | Locks the pavers in place so the border and field cannot creep outward |
| L-shaped cedar bench | Built-in seating that sits on the pavers and fastens to the posts, not to the fence |
| String lights on a guide wire, landscape and bench lights | Evening light on a GFCI-protected outlet, with low-voltage fixtures in the beds |
| Planting beds and mulch | Soften the fence and siding; planned with the fire feature in mind |
If a quick, budget-friendly version is more your speed, our gravel patio makeover for a forgotten outdoor strip uses loose stone instead of pavers, and the muddy-corner gravel patio with a DIY wood bench shows another take on built-in seating. This guide focuses on the fire feature, the paver base, and the post-mounted lights.
Is Your Corner Big Enough for a Fire Pit?
Decide this before you buy a single paver, because the fire feature’s clearances decide how big the patio has to be and where the bench can go.
Wood-burning fire pits need a lot of room
The NFPA’s fire pit safety tips say to use fire pits outdoors only and at least 10 feet from anything that can burn, and to keep them away from siding, decks, railings, grass, and vegetation, and out from under eaves and overhanging branches. The Kansas State Fire Marshal calls 10 feet from any structure or neighboring yard a minimum and 25 feet preferable. Local fire codes can require more, and some towns limit or ban wood fires altogether.
Now picture this corner. In the finished photo, the fire bowl sits only a few feet from the seat, the fence, and the vinyl siding, with a wood bench and mulched beds wrapped around it. That arrangement looks cozy, but it does not give a wood fire anything close to 10 feet from combustibles. Embers do not respect fence lines, and vinyl siding can warp or melt from radiant heat long before wood would catch. If you want this exact layout in a corner like this, a wood fire is the wrong fuel.
The realistic fix: a listed gas fire feature
For a tight corner, use a propane or natural gas fire bowl or fire table that is certified to the outdoor decorative gas appliance standard (ANSI Z21.97 / CSA 2.41), and place it exactly where its manual allows. Clearances vary by product, so the manual wins. As one example, a manufacturer’s certified outdoor fire pit manual lists 24 inches minimum to combustible side walls and 7 feet to a ceiling above the fire pit. Other units ask for more. Check the side clearance to the bench, cushions, fence, and siding, and the overhead clearance to string lights, branches, and eaves.
Gas does not make clearances optional. It does make them achievable in a small space, because there are no flying embers and the flame shuts off with a valve.
Planning dimensions to measure (examples only)
| What to measure | Why it matters | Planning example only |
|---|---|---|
| Flame edge to fence, siding, and bench back | Must meet the gas unit’s listed side clearance; a wood fire needs 10 ft or more | Use the number in your manual, often 24 to 36 inches or more for gas |
| Front edge of the seat to the fire feature | Legroom and a comfortable, safe gap for knees and feet | At least 2 to 3 feet, more if the manual requires it |
| Flame to anything overhead | String lights, utility lines, branches, eaves | Your manual’s overhead figure, often 6 to 7 feet or more; never under power lines |
| Walking path around the fire | People should not squeeze past the flame | About 3 feet of clear path is a comfortable target |
| Patio size | Must fit the bench depth, legroom, fire feature, and path | Sketch it to scale before you dig |
Look up before you finalize the spot. In this yard, overhead utility lines cross above the corner. Never put an open flame under power lines, and keep the string-light run outside the overhead clearance your fire feature lists. If your corner cannot meet the gas unit’s numbers either, choose a smaller listed unit, move the fire to a more open part of the yard, or skip the flame and let the lights and cushions carry the mood.
Before You Dig: 811, HOA, Burn Rules, and Permits
- Call 811 a few business days before digging. It is free, and it gets buried utility lines marked before you excavate the patio or auger post holes. See the 811 information from the Common Ground Alliance.
- Check burn rules. Ask your fire department or city about recreational fires, gas fire features, and burn bans. Rules for wood and gas are often different.
- Check HOA rules and permits. Some HOAs limit fire features, lighting, or structures near the fence. A new gas line, a new electrical circuit or outdoor outlet, and sometimes tall posts can need permits.
- Find the frost depth. Your local building department can tell you how deep footings need to go in your area. That number sets how deep you dig for the posts.
- Note where water goes. The patio should shed water away from the house, not toward the foundation or into a neighbor’s yard.
Materials and Tools
Amazon links below are similar options unless the text names a product as the specific choice. Pavers, gravel, sand, concrete, lumber, plants, and mulch are usually best bought locally, and the heavy equipment is a rental.
| Item | What it is for | Where to get it |
|---|---|---|
| Mason line and wood stakes | Marking the outline, square corners, and the slope | T.W. Evans braided nylon mason line, 500 ft (stakes from the lumber yard) |
| Line level | Setting the string to the drainage slope | Irwin aluminum line level |
| 25-foot tape measure | Layout, clearances, and squaring with the 3-4-5 method | Stanley FatMax 25-foot tape measure |
| 4-foot level with slope vials | Checking grade, screed rails, and the bench | Kapro 105 gradient box level, 48-inch |
| Post hole digger | Digging the three post footings | Roughneck post hole digger (or rent a power auger) |
| Post level | Holding each post plumb while the footing sets | Irwin magnetic post level |
| Ground-contact posts, concrete or gravel | The three light posts and their footings | Local lumber yard (rated for ground contact) |
| Geotextile fabric | Separating soft soil from the aggregate base | Non-woven geotextile fabric, 3 x 50 ft |
| Crushed aggregate base and concrete sand | Base and 1-inch bedding layer | Local stone yard, by the ton |
| Pavers and border pavers | Patio, walkway, and charcoal soldier course | Local hardscape supplier |
| Paver edge restraint | Holding the border and field in place on curves and straight runs | Dimex paver edging, 60 ft, with spikes |
| 10-inch steel spikes | Extra anchoring for the restraint into the compacted base | WOWCASE 10-inch metal edging spikes, 50-pack |
| Rubber mallet | Seating pavers without chipping them | Titan 32 oz non-marking rubber mallet |
| Polymeric sand (or plain joint sand) | Filling and locking the joints | DOMINATOR polymeric sand, titanium gray, 40 lb |
| N95 respirator | Dust protection while sweeping and handling cut pavers | 3M 8511 N95 respirators, 10-pack |
| Plate compactor, wet saw or cut-off saw | Compacting the base and pavers; cutting pavers | Rent for a day or two |
| Cedar or ground-contact lumber | Bench frame, seat slats, and backrest | Local lumber yard |
| Structural wood screws | Fastening the bench frame to the posts | Simpson Strong-Drive SDWS timber screws, 5 inch |
| Stainless steel deck screws | Seat and back slats (stainless resists staining in cedar) | #10 x 2-1/2 inch 304 stainless steel deck screws |
| Impact driver (optional) | Driving long structural screws | DEWALT 20V MAX impact driver kit |
| Outdoor string lights | Overhead light between the posts | Brightech Ambience Pro 48 ft string lights |
| Guide wire kit | Carrying the light strand between posts | NEREUS string light hanging kit, vinyl-coated cable |
| In-use outlet cover | Keeps a GFCI outlet weatherproof with a plug in it | TayMac 1-gang weatherproof in-use cover |
| Low-voltage transformer | Powers the 12V landscape and bench lights | DEWENWILS 60W low-voltage transformer with dusk sensor |
| Low-voltage spotlights | Uplighting the shrubs and posts | Gardencoin 12V landscape spotlights, 6-pack |
| Low-voltage hardscape lights | Soft light under the bench seat | LEONLITE 7-inch hardscape lights, 8-pack |
| Listed propane fire bowl | The fire feature for a tight corner | Outland Living Firebowl 24-inch propane fire pit |
| Fire extinguisher | On hand whenever the fire is lit | Amerex B500T 5 lb ABC fire extinguisher |
| Spark screen (wood fires only) | Contains embers on a wood-burning pit that has full clearance | RAY 22-inch fire pit spark screen (match the size to your pit) |
Step-by-Step Build
The order matters. Clearances and layout come first, posts go in before the base so the footings are not dug through finished paving, and the fire feature goes in last, once everything around it is built.
Step 1: Choose the Fire Feature and Sketch the Corner to Scale
Pick the fire feature first and download its manual. Write down its side clearance, overhead clearance, and fuel. Then sketch the corner on graph paper: fence lines, siding, the outdoor outlet and hose bib, overhead lines, the bench footprint, legroom, the fire feature with its clearance circle, and a walking path. If the clearance circle runs into the bench, the fence, or the house, make the patio bigger, the bench shorter, or the fire smaller until it fits.
This is also where the bench gets its size. Typical built-in benches land around 17 to 19 inches high to the top of the seat cushion, with a seat about 20 to 24 inches deep including the cushions and a backrest leaned back slightly. Those are comfort examples, not rules, so test a chair you like and copy its numbers.
Step 2: Lay Out the Patio With Stakes and String
Drive wood stakes a little outside each corner and run braided mason line between them at the height of the finished patio surface. Square the corners with the 3-4-5 method: mark 3 feet along one line and 4 feet along the other, and adjust until the diagonal between the marks reads exactly 5 feet. Then hang a line level on the string and lower the outer end so the patio will fall about 1/4 inch per foot away from the house. Mark the curved walkway with a garden hose and spray paint or stakes.
Remember the base has to extend past the pavers. Plan to dig roughly 6 inches beyond the finished edge on sides that get an edge restraint, so the restraint and its spikes sit on compacted stone.
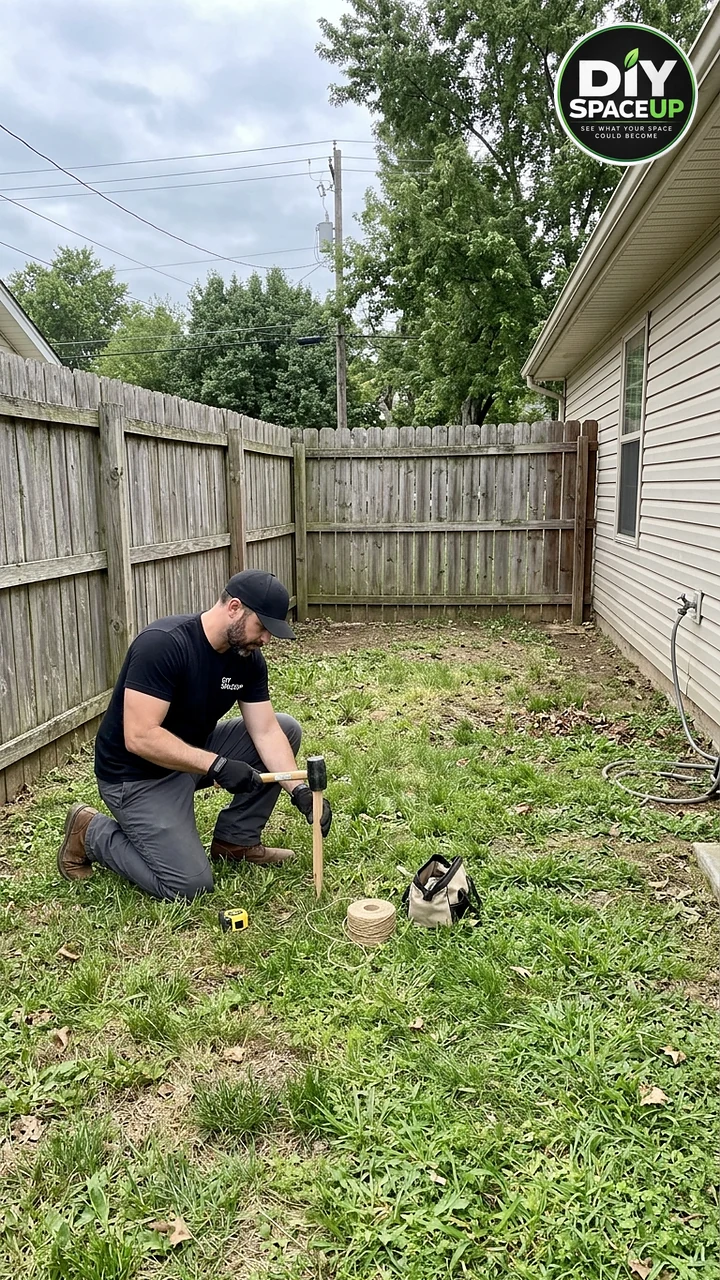
Step 3: Excavate and Grade for Drainage
Strip the sod and dig out the patio and walkway to a consistent depth below the string. Add up the layers: paver thickness (pedestrian pavers are typically 2 3/8 inches), 1 inch of bedding sand, and the compacted base. The Concrete Masonry and Hardscapes Association’s installation guidance for interlocking concrete pavements calls for a minimum 4-inch compacted base for patios and walkways over well-drained soils, thicker in cold climates or on wet or weak soils. Many builders use 4 to 6 inches for a patio. That puts the dig at roughly 7 1/2 to 9 1/2 inches below the finished surface in this example.
Check the bottom of the hole with a long level that has slope vials, such as the Kapro 105 gradient box level, so the subgrade already follows the 1/4-inch-per-foot fall. Compact the soil at the bottom with the plate compactor and fix soft spots by digging them out and replacing with base stone.
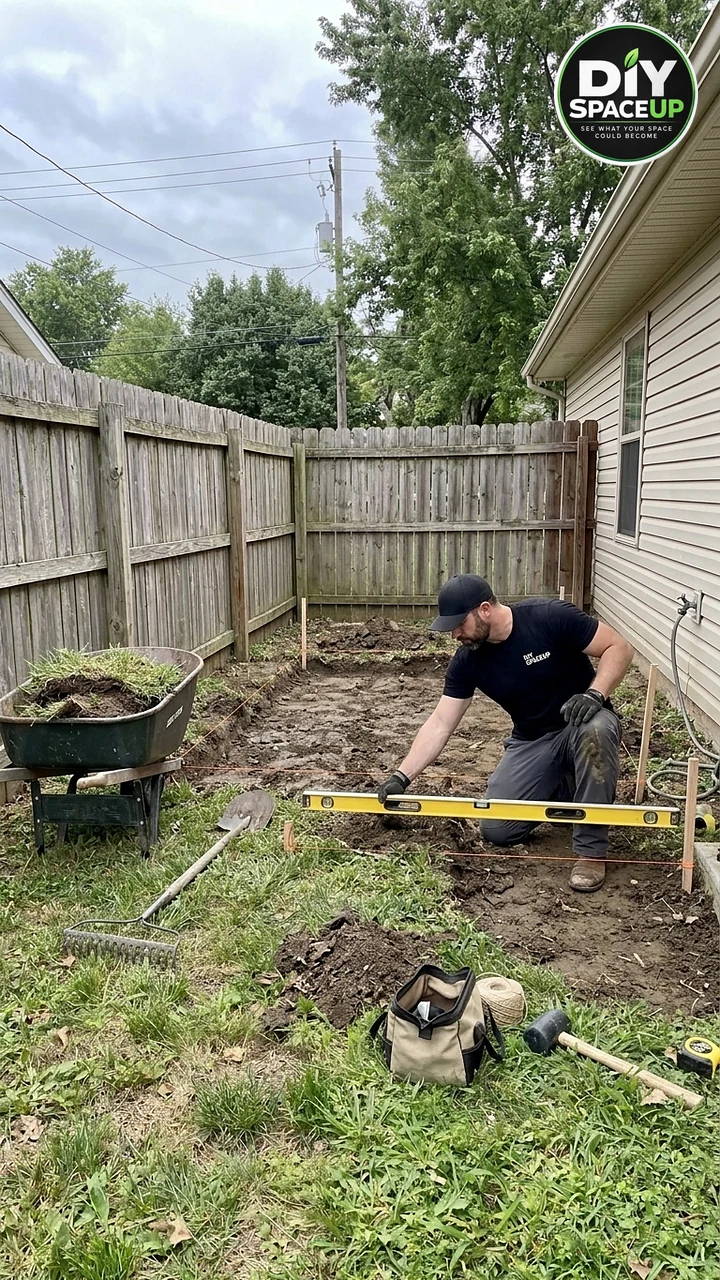
Step 4: Set the Three Light Posts on Real Footings
The posts hold a tensioned light cable and the back of a bench, so they need to resist leaning. That is a different job from a deck post that is braced at the top. Simpson Strong-Tie notes that its standoff post bases do not provide enough resistance to keep a post from rotating at the base and are not recommended for installations that are not supported at the top, such as fences. For freestanding light posts, the common approach is to bury the post itself.
- Dig below the frost line. Use a post hole digger or a rented auger. A common rule of thumb is to bury about a third of the post’s total length, and never less than your local frost depth. Keep the holes outside the paver field, in the planting beds, the way the posts in this build stand just beyond the patio edge.
- Use ground-contact rated posts. Pressure-treated lumber rated for ground contact holds up in the soil. 4×4 posts are common for light strands; 6×6 posts are stiffer, look more substantial at this height, and are a sensible choice if the bench also fastens to them. Your lumber yard or local practice can guide the choice.
- Set them in concrete or tamped gravel, per local practice. Put a few inches of gravel in the bottom of the hole for drainage, then fill with concrete crowned to shed water, or tamp gravel in thin lifts in well-drained soils.
- Plumb and brace. Strap an Irwin magnetic post level to each post, hold it plumb with two diagonal braces, and leave the braces on until the concrete cures.
- Keep them independent of the fence. Fence posts and panels are not built to carry a light cable or a bench, and you may not own the fence.
The light cable pulls the end posts inward. If your posts are tall or the span is long, plan a guy wire or a tie into the bench frame for the end posts, and keep the cable tension moderate.
Step 5: Lay Geotextile and Compact the Aggregate Base
On clay or soft soils, roll out a non-woven geotextile fabric over the compacted subgrade, overlapping seams about 12 inches and running it up the sides of the excavation. It keeps the base stone from pushing down into the mud over time.
Spread crushed aggregate base (the kind with fines that locks together, not round pea gravel) in lifts of about 2 to 4 inches. Dampen each lift slightly and run the plate compactor over it in overlapping passes before adding the next. Keep the top of the base parallel to the finished surface, with the same 1/4-inch-per-foot fall. Build the walkway on the same base at the same time, so the two meet at one consistent height.
Step 6: Screed the Sand and Lay the Pavers and Border
Set two screed rails (1-inch pipes work) on the base, fill between them with concrete sand, and pull a straight board across the rails to leave a smooth, uncompacted 1-inch bed. Do not use the sand to fix low spots in the base; fix the base instead. Do not walk on the screeded sand.
Start in a square corner and lay the charcoal border course and the tan field pavers by placing them straight down onto the sand, not sliding them. Keep joints consistent and check your lines often with a string. Tap any high paver down with a non-marking rubber mallet. Cut pavers for the curve of the walkway with a rented wet saw, or a cut-off saw with water suppression. Cutting concrete pavers releases crystalline silica dust, so follow OSHA silica guidance: cut wet when possible, and wear eye and hearing protection and a respirator.
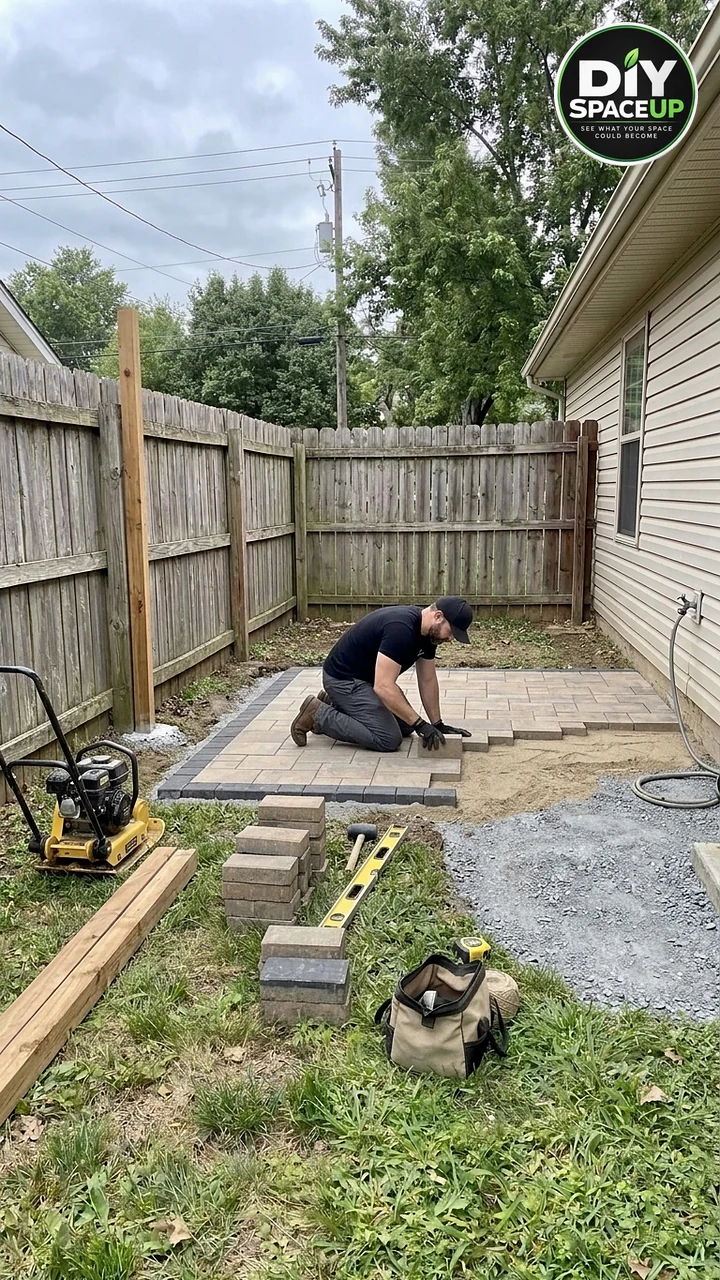
Step 7: Install Edge Restraint, Compact, and Fill the Joints
Any edge that is not held by a wall or a curb needs a restraint, including the full outer edge of the charcoal border and both sides of the walkway. Set the Dimex paver edging tight against the outside of the border pavers, on top of the compacted base, not on the bedding sand. Pin it with spikes about every 12 inches, more on tight curves; long 10-inch steel spikes bite deeper into the base. Trim back any loose bedding sand beyond the pavers first.
Sweep the surface clean and run the plate compactor over the pavers with a protective pad on its plate, which sets them into the sand. Then sweep joint sand into the joints and compact again until the joints are full. If you use polymeric sand, follow the bag exactly: dry pavers, fill the joints to the specified depth, blow every grain off the surface, and mist with water only as directed. Wear an N95 respirator while sweeping, and avoid rain in the forecast.
Step 8: Build the L-Shaped Bench and Tie It to the Posts
Cedar is a good choice for the visible parts because it resists decay and stays comfortable to touch. Use ground-contact rated lumber for anything that touches soil or stays wet. The bench in this build is a slatted L: two seat runs meeting in the back corner, with slatted backrests in front of the three posts.
- Frame first. Build each seat run as a frame of 2x lumber with legs, cross supports under the seat roughly every 16 to 24 inches, and a sturdy back frame. Dry-fit both runs on the patio before final assembly.
- Fasten to the posts. Attach the back frame to the posts with exterior structural screws such as Simpson Strong-Drive SDWS timber screws, or through-bolts, following the fastener maker’s spacing and edge-distance guidance. Do not screw the bench to the fence.
- Add slats. Fasten seat and back slats with stainless steel deck screws and a small gap between boards for drainage. Pre-drill near ends to prevent splits. An impact driver makes the long structural screws much easier to drive.
- Level and protect the feet. Shim the legs so the seat is level even though the patio slopes, and consider plastic feet or pads so the end grain is not sitting in water.
- Ease every edge. Round over the front edge of the seat and sand the slats smooth. Use outdoor cushions with removable covers and store them when the fire is lit if they sit within the clearance zone.
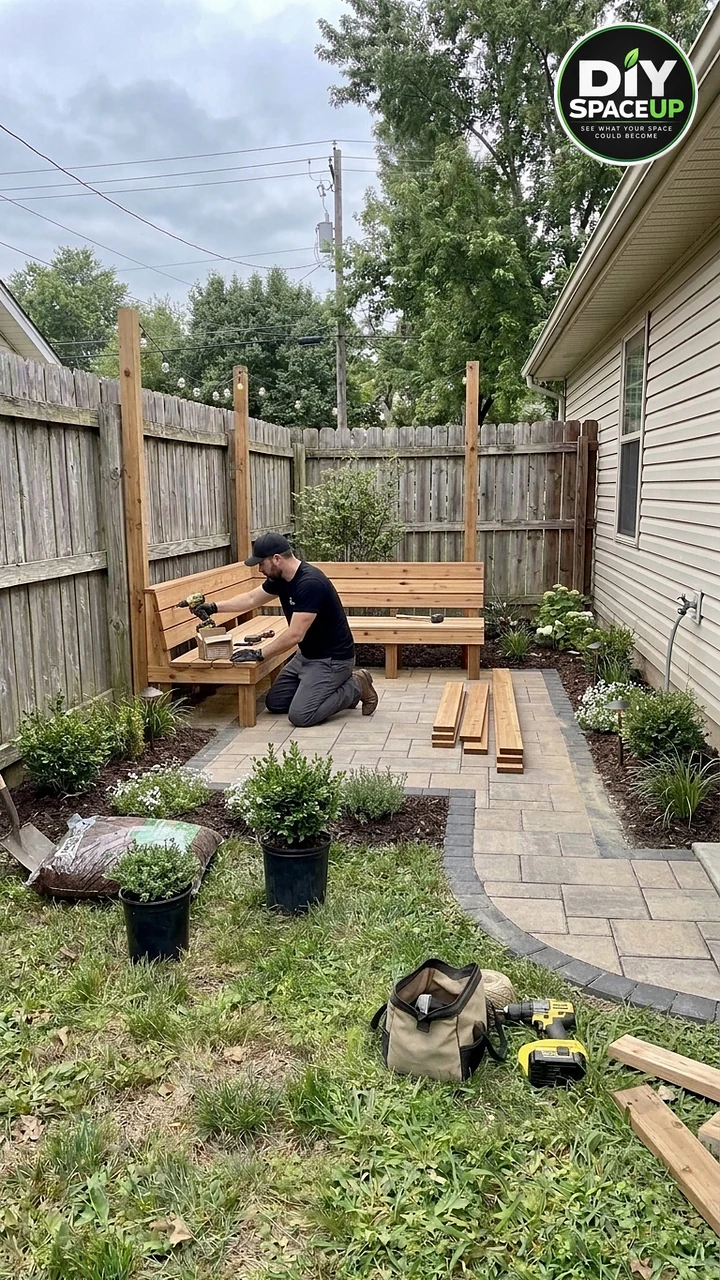
Want more built-in seating ideas? Our paver patio and walkway guide and the cedar lean-to pavilion build show how other DIY SpaceUp projects handle posts, pavers, and seating.
Step 9: Hang the String Lights and Wire the Low-Voltage Lights Safely
Outdoor receptacles need GFCI protection, and the NFPA notes that the National Electrical Code requires outdoor receptacles in damp and wet locations to be weather-resistant and to stay weatherproof whether or not a cord is plugged in, usually with an in-use cover (NFPA on GFCI protection outdoors). Test the GFCI before you plug in. If your outlet is not GFCI protected or lacks an in-use cover such as the TayMac weatherproof in-use cover, or if you want a new outlet or circuit near the patio, hire a licensed electrician.
- Run a guide wire first. Stretch a vinyl-coated steel cable between the posts with eye bolts and turnbuckles, like the NEREUS string light hanging kit, and snug it up. Then clip the light strand to the cable so the bulbs do not hang from their own wire.
- Use outdoor-rated lights. Choose strands marked for outdoor or wet locations, such as the Brightech Ambience Pro string lights, and stay within the maximum number of connected strands on the label.
- No extension cord tangle. Route the lead neatly to the outlet, keep connections off the ground, and never run cords under cushions, through doors, or across the walking path.
- Go low-voltage in the beds. A plug-in DEWENWILS low-voltage transformer with a dusk sensor powers 12V landscape spotlights in the beds and LEONLITE hardscape lights tucked under the bench seat. Bury the low-voltage cable shallowly in the beds, away from where you will dig for plants.
- Keep lights away from the flame. Hang the strand outside the fire feature’s overhead clearance, and never run it under or toward overhead utility lines.
Step 10: Plant the Beds With the Fire in Mind
Plant the shrubs, perennials, and grasses in the beds along the fence and the house, water them in, and spread mulch. Bark mulch is combustible, and the NFPA’s home ignition advice includes keeping mulch, plants, and firewood out of the first 5 feet around the house. Near a fire feature and along vinyl siding, consider decorative rock instead of bark, keep plants trimmed back from the flame, and keep them out of the clearance zone in your fire feature’s manual.
Step 11: Place, Connect, and Test the Fire Feature
Now bring in the fire feature and set it where your clearance sketch says, on the level, noncombustible pavers. For a propane unit such as the Outland Living Firebowl, check the label and manual for its certification and clearances, keep the 20-pound cylinder upright, outdoors, and out of the flame’s reach, and never store spare cylinders under the bench. Leak-test every connection with soapy water before the first lighting; bubbles mean a leak. A natural gas line is a job for a licensed gas fitter, usually with a permit.
Keep a charged 5 lb ABC fire extinguisher or a garden hose within reach, never leave the fire unattended, and turn the gas fully off when you go inside. Keep children and pets at least 3 feet from the fire, as the NFPA advises. If your yard does have room for a wood fire 10 feet or more from everything that can burn, use a spark screen, burn only dry seasoned firewood, and drown the ashes before you walk away.
Planning to burn wood somewhere with more room? Our cedar firewood station keeps logs dry and off the ground, and the dry creek bed with a fire pit patio shows a more open layout.
Safety Checklist
- Buried utilities marked by 811 before digging the patio and the post holes.
- Burn rules, HOA rules, and any permits for gas or electrical work checked.
- Fire feature chosen first; its side and overhead clearances measured to the bench, cushions, fence, siding, plants, and string lights.
- No wood fire unless it can sit at least 10 feet from anything that can burn, and more where local code requires.
- No fire under overhead utility lines, eaves, or branches.
- At least 2 to 3 feet of legroom between seat edge and fire feature, or more if the manual says so.
- Propane cylinder upright, outdoors, connections leak-tested; natural gas lines installed by a licensed pro.
- Fire extinguisher or hose at hand; the fire is never left unattended.
- Posts set below the frost line, plumb, braced while curing, and independent of the fence.
- Pavers fully restrained at every open edge so the border cannot shift and create trip edges.
- String lights outdoor-rated, hung from a guide wire, plugged into a tested GFCI outlet with an in-use cover.
- Eye, hearing, and respiratory protection when cutting pavers; wet cutting where possible.
Estimated Cost of a Small Backyard Fire Pit Corner
These are rough 2026 ranges for a compact patio and walkway in the range of 120 to 200 square feet, built mostly DIY. Prices swing a lot by region, paver style, and delivery fees, so treat them as a starting budget and get local quotes.
| Category | Typical DIY range | Notes |
|---|---|---|
| Layout tools, stakes, string, levels | $40 to $150 | Many people already own some of these |
| Base aggregate, bedding sand, geotextile | $250 to $700 | Delivery fees can be a big part of this |
| Pavers and border pavers | $500 to $1,600 | Depends on size, style, and how much walkway you add |
| Edge restraint, spikes, joint or polymeric sand | $100 to $300 | |
| Rentals: plate compactor, wet saw, auger | $150 to $400 | One to two days |
| Posts, concrete or gravel, hardware | $150 to $450 | Taller or 6×6 posts cost more |
| Bench lumber and fasteners (cedar) | $400 to $1,200 | Cedar prices vary widely |
| Cushions | $200 to $700 | Outdoor fabric with removable covers |
| String lights, guide wire, low-voltage lights, transformer | $150 to $450 | |
| Electrician (GFCI outlet, in-use cover, or new circuit) | $200 to $800+ | Only if needed; more for a new circuit |
| Listed propane fire bowl or table | $250 to $1,500+ | Natural gas line by a licensed fitter adds more |
| Plants and mulch or rock | $150 to $600 |
All in, a DIY version often lands somewhere around $2,500 to $7,000+. Hiring a hardscaper for the patio and walkway typically adds labor that can equal or exceed the material cost. Furniture extras, decor, and any drainage repairs are not included.
Common Mistakes and Better Approaches
| Mistake | Better Approach |
|---|---|
| Placing a wood fire pit a few feet from a fence, bench, and vinyl siding | Use a listed gas unit at its stated clearances, or put a wood fire 10 ft or more from everything that can burn |
| Choosing the fire feature last | Pick it first and size the patio around its clearances |
| Fire under string lights or utility lines | Keep the flame outside the overhead clearance; never under power lines |
| Laying pavers on leveled dirt or sand alone | Excavate for a compacted aggregate base of at least 4 inches, plus 1 inch of bedding sand |
| Flat patio, or a slope toward the house | Build in about 1/4 inch per foot of fall away from the house |
| No edge restraint on the border or walkway | Restrain every open edge, on the base, pinned with spikes |
| Light posts on surface-mounted standoff bases | Bury ground-contact posts below the frost line in concrete or tamped gravel |
| Screwing the bench or lights to the fence | Keep everything on your own posts, independent of the fence |
| Hanging bulbs from their own cord | Run a guide wire with turnbuckles and clip the lights to it |
| Extension cords from an unprotected outlet | Use a tested GFCI outlet with an in-use cover; hire an electrician for new circuits |
| Bark mulch right up against the siding and the fire | Use rock near the house and keep plants and mulch out of the clearance zone |
| Dry-cutting pavers without protection | Cut wet when possible and wear a respirator, eye, and hearing protection |
Maintenance and Care
- Sweep the patio regularly and top up joint sand where it has washed out. Reseal or refill polymeric sand joints as the manufacturer recommends.
- Check the edge restraint each spring and re-drive any spikes that frost has lifted.
- Look over the posts once or twice a year for lean, and tighten the guide wire turnbuckles if the lights sag.
- Refresh the cedar with an exterior penetrating finish if you want to keep the warm color, or let it weather to silver.
- Bring cushions in or cover them when not in use and during fire use if they sit close to the flame.
- Before each fire season, inspect the gas hose and connections, leak-test again, and clear out debris, spiders, and insect nests from the burner.
- Test the GFCI outlet monthly and replace any damaged light strand instead of taping it.
- Keep the clearance zone clear of new plants, decor, and stored firewood as the garden grows.
FAQ
How far should a fire pit be from a house or fence?
For wood-burning fire pits, the NFPA recommends at least 10 feet from anything that can burn, including the house, siding, decks, fences, and plants, and some fire marshals recommend 25 feet. Local codes can require more. Listed gas fire features follow the clearances in their own manuals, which are usually smaller but still matter.
Can I put a wood-burning fire pit in a small backyard corner?
Only if it can sit at least 10 feet from every combustible surface and away from overhead lines, eaves, and branches, and your local rules allow wood fires. In a tight corner like this one, wrapped by a wood fence, a wood bench, and vinyl siding, that is usually not possible. A listed gas fire feature is the more realistic choice.
Is a propane fire pit safe next to a wooden bench?
It can be, if the unit is certified for outdoor use (for example to ANSI Z21.97 / CSA 2.41) and you keep at least the side clearance its manual lists from the bench, cushions, fence, and siding. Leave comfortable legroom, keep the cylinder away from the flame, and never leave it burning unattended.
What is the best way to start a small backyard fire pit corner?
Start with the fire feature and its clearances, then sketch the corner to scale. Once you know where the flame can go, you can size the patio, the bench, and the walkway around it, and then call 811 before you dig.
How deep should a paver patio base be?
Industry guidance calls for at least 4 inches of compacted aggregate base for patios and walkways on well-drained soil, more in cold climates or on wet or weak soil, plus about 1 inch of bedding sand under the pavers. Excavation depth is the base plus the sand plus the paver thickness.
Do the light posts need concrete?
They need a footing that resists leaning, below your local frost line. Burying ground-contact rated posts in concrete or well-tamped gravel is the common approach for freestanding posts. Surface standoff bases are meant for posts that are braced at the top, not for freestanding light posts.
Can I plug the string lights into an extension cord?
Plug outdoor-rated lights into a GFCI-protected outdoor outlet with an in-use cover, and keep the run short and tidy. If you need power closer to the patio, have an electrician add a proper outdoor outlet rather than relying on long extension cords.
How much does a backyard fire pit corner like this cost?
A mostly DIY build with pavers, a cedar bench, lights, plants, and a listed propane fire bowl often lands around $2,500 to $7,000 or more, depending on size, materials, and region. Professional installation of the patio adds significant labor cost.
Final Thoughts
The magic of a small backyard fire pit corner is not its size; it is the enclosure and the evening light. Keep that, and build the parts you cannot see the right way: clearances first, a real base under the pavers, posts that will not lean, and lights that are safe in the rain. If the ground in your corner stays soggy, read how we fixed a sinking paver patio and sent roof water away from the house before you dig, and for the path out to the lawn, our curved paver walkway with drainage is a good next read.