
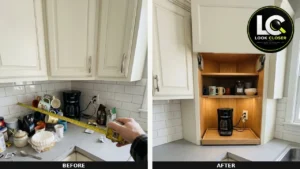

This everyday kitchen corner coffee station started as a packed upper cabinet and a countertop full of mugs, filters, and a coffee maker that never quite had a home. The corner did the job, but every morning began with a small shuffle just to pour a cup.
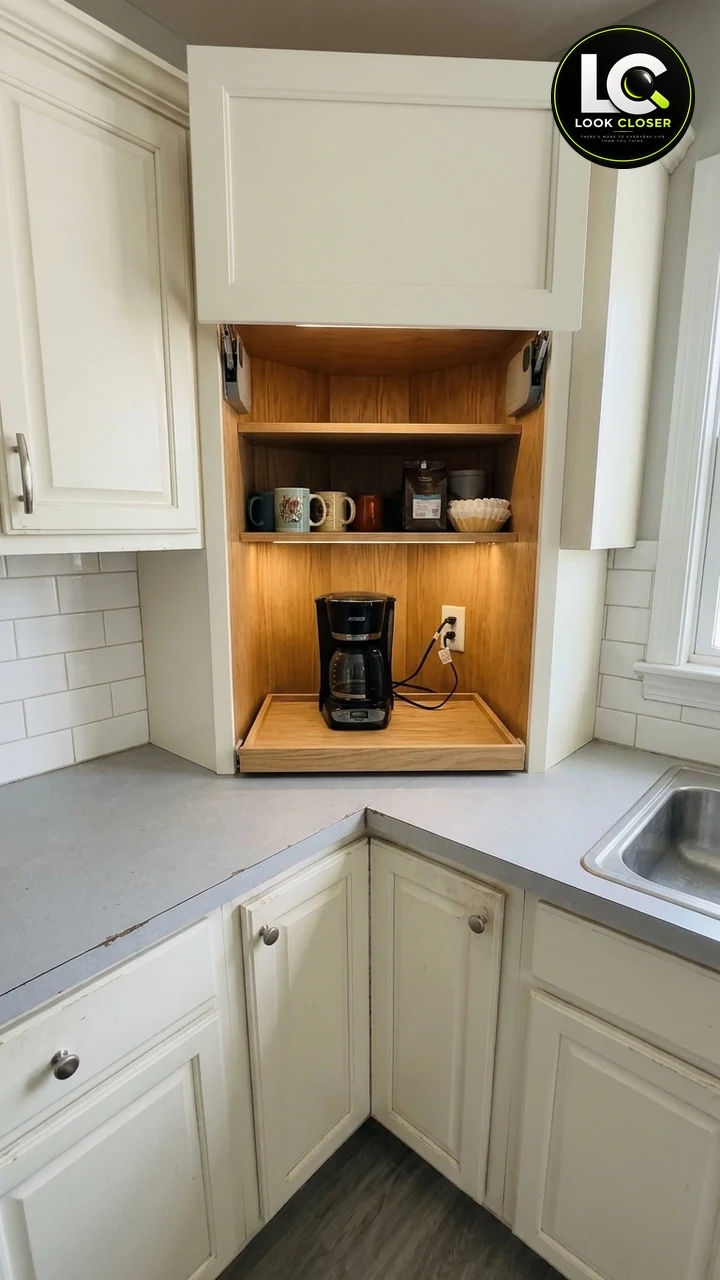
The project, shared as design inspiration on the Look Closer Facebook page, keeps the original cream corner cabinet and its raised-panel door. It lines the cavity with light oak, extends the box down to the gray laminate counter as an open appliance alcove, adds a warm LED strip at the header, and rehangs that same door on two folding lift-up stays. A flush outlet on the right oak panel, three oak shelves, and a solid-wood tray with raised edges let the coffee maker sit in place instead of living on the worktop.
This is a cabinet conversion, not a new piece of furniture. If you want a freestanding corner shelf instead, see our DIY kitchen corner shelf for a coffee and tea station. For other tight-kitchen storage, browse the slim rolling pantry beside the fridge and the under-sink pull-out drawer.
Affiliate Disclosure: As an Amazon Associate I earn from qualifying purchases. Product links in this article may earn a commission at no additional cost to you.
What’s in This Post
- What We’re Building
- Is This Project a Good Fit?
- Measure and Plan (Use Your Own Numbers)
- Safety First
- Materials and Tools
- Build the Station, Step by Step
- What It Typically Costs
- Common Mistakes and Easy Fixes
- Everyday Use and Care
- FAQ
What We’re Building
This kitchen corner coffee station reuses the existing wall cabinet. The list follows what is visible in the project photos, not a generic built-in kit.
| Component | Function |
|---|---|
| Existing cream corner wall cabinet and original raised-panel door | The structure and door stay; the door is later rehung on lift-up hardware instead of side hinges |
| Light oak lining on the cavity sides and back | Gives the upper box a continuous wood interior behind the shelves |
| Lower alcove extension down to the counter, outer sides painted cream to match | Creates an open appliance garage at counter level without a new base cabinet |
| Warm LED strip at the alcove header | Lights the coffee maker and the lower shelves from above |
| Flush outlet in the right oak side panel | Lets the coffee maker plug in inside the nook; a licensed electrician must install or relocate this receptacle |
| Two folding lift-up stays, one on each side of the door | Hold the original door up and out of the way while you use the station |
| Two oak shelves on the left, plus one small corner shelf on the right above the outlet | Holds mugs, a coffee bag, and filters without crowding the appliance |
| Solid-wood tray with raised edges, sitting on the alcove floor | Gives the coffee maker a stable base you can pull forward; the photos do not show drawer slides, so treat slides as optional, not required |
Is This Project a Good Fit?
This conversion makes sense if you already have a corner wall cabinet above a clear stretch of counter, the cabinet is securely hung, and you are willing to change its structure. It is a poor fit if the box is loose, water-damaged, or barely clinging to a few short screws, or if your coffee maker is too tall for the opening once you leave the clearance its manual requires.
Plan to hire an electrician if a new or relocated outlet is part of the design. The existing backsplash outlet can stay where it is; the in-cabinet receptacle is a separate electrical job, not a weekend wiring tutorial.
Measure and Plan (Use Your Own Numbers)
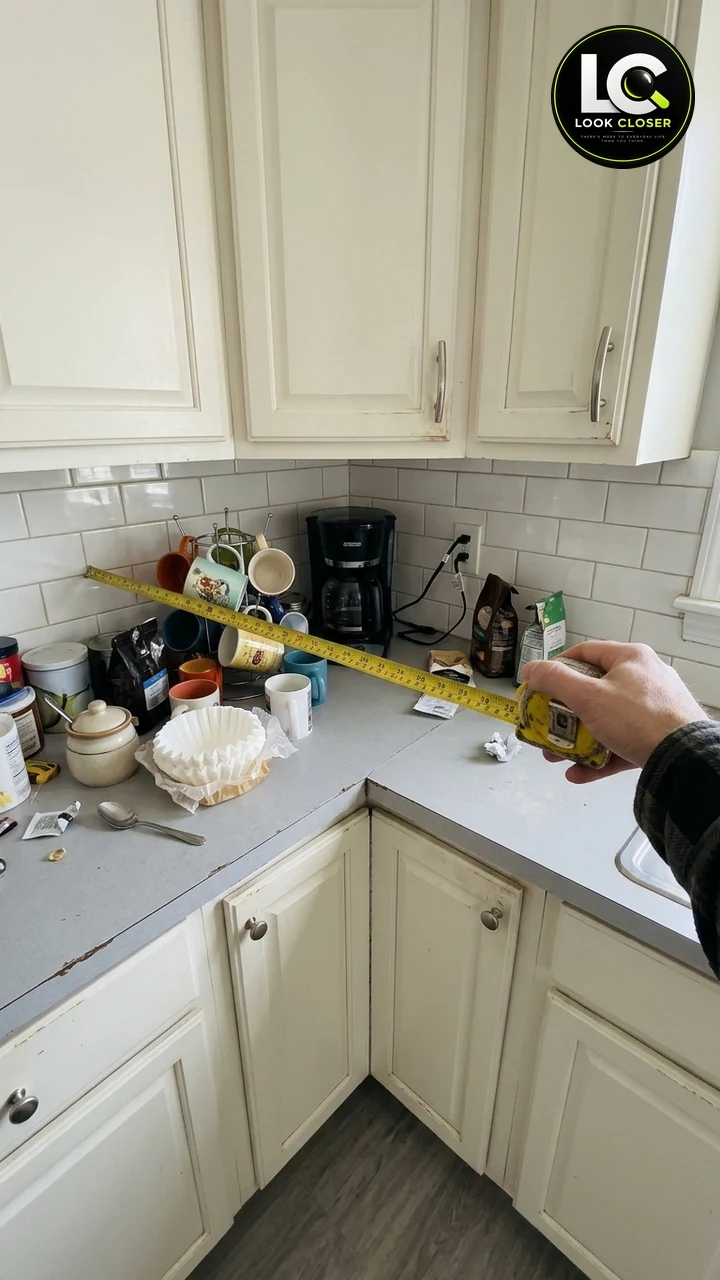
Write down measurements from your own kitchen. The source images do not include a complete dimension set, so any sizes mentioned here are planning examples only, not measurements taken from this cabinet.
- Interior width, height, and depth of the upper cabinet.
- Distance from the underside of the current cabinet (or from the remaining side panels after the bottom comes off) down to the countertop.
- Door width, height, and weight, so you can match lift stays to the manufacturer’s chart. A luggage scale works well for the door.
- Coffee maker height, plus the overhead clearance listed in its manual, plus a little extra so steam is not trapped against the LED header.
- Thickness of the oak panels, so the lining and the lower extension stay in plane.
As a planning example only: if a coffee maker is 14 inches tall and its manual asks for 4 inches of clearance above the lid, you need at least 18 inches of open height in the alcove. Confirm both numbers on your own appliance and cabinet before you cut anything. Also confirm that the door can lift without hitting a soffit, range hood, or ceiling beam.
Safety First
Treat this as a real cabinet modification, not a styling project.
- Electricity. A new or relocated receptacle inside the cabinet is a job for a licensed electrician, with a permit if your local code requires one. Do not fish cable through the wall or splice into the existing backsplash outlet unless you are that licensed electrician. See the U.S. Consumer Product Safety Commission’s home electrical safety guidance for general household cautions, and follow your local electrical code.
- Cabinet structure. Removing the bottom panel of a wall cabinet can weaken the box. The sides may have relied on that panel to stay square and to help carry the load. Before you cut, inspect the hanging rail, confirm the cabinet is fastened into solid structure, and plan a way to keep the sides tied together after the bottom is gone, such as a new header, cleats, or a well-fitted lining that is also structurally fastened. If the cabinet feels loose now, repair the hanging hardware first.
- Lift-stay rating. The two stays must be rated for the actual weight of your door, following the manufacturer’s chart, not a guess. Adjust the tension so the door stays up on its own and closes without slamming, then test it several times with the door fully fitted.
- Heat, steam, and ventilation. A coffee maker under a cabinet produces heat and steam. Read the appliance manual for overhead clearance, keep the lift-up door open while you brew, and do not pack the alcove so tightly that vapor has nowhere to go. Do not run the machine with the door closed.
- Lighting. Use a listed, low-voltage, plug-in under-cabinet kit rather than hardwiring a strip unless an electrician is doing that work. Keep the strip and its driver away from the steam path as much as the layout allows, and do not pinch the cord behind a panel.
- Wear eye protection when you drill or cut. Support the door and any loose panels so they cannot drop on the counter or the sink.
Materials and Tools
Buy oak plywood from a lumberyard or home center, and have the sheets cut there if you do not have a saw you trust for long rips. Full sheets are omitted from the Amazon list below because they are not always practical to ship.
| Item | Notes |
|---|---|
| Qrity Adjustable Lift-Up Stay Support Hinges, pack of 2 (New Version) | A similar option to the chrome folding lift-up stays in the photos, sold as a pair. Treat the listing’s “up to 20 kg” figure as the manufacturer’s claim, not a universal rating; weigh your door and follow the chart. Select size “2 PCS (New Version) (Pack of 2).” |
| Litever Under Cabinet LED Lighting Kit, 4-piece 20-inch strips, Warm White 2700K | A listed Class 2 plug-in kit with a 12-volt adapter. Choose the Warm White 2700K color option. One header usually uses only part of the kit; keep cords away from the coffee maker. |
| Edge Supply Red Oak Iron-On Wood Veneer Edge Banding | Covers raw plywood edges. Choose Red Oak and a width that covers your panel thickness (13/16 or 7/8 inch is typical for 3/4-inch plywood), then iron it on as directed. |
| Titebond Original Wood Glue, 16 oz (5064) | Interior wood glue for lining panels, shelf cleats, and the tray. Select the 16-fluid-ounce volume. Not for exterior or structural, load-bearing use. |
| Kreg Pocket-Hole Jig 320 | Useful for joining the lower extension panels and cleats in tight space. Select the Jig style, and use screws sized for your panel thickness. |
| STANLEY FATMAX 25-Foot Tape Measure (33-725) | For the layout measurements above. Select the 25-foot size in Black, Yellow. |
| Oak plywood or oak project panels, plus finishing supplies | From a lumberyard or home center: enough for the liners, lower extension, three shelves, and a raised-edge tray. Add a clear indoor finish, cream paint to match the cabinets, filler, sandpaper, and painter’s tape. |
| Cordless drill, clamps, square, level, and a stud finder | A drill and driver (any reliable cordless drill is fine), a stud finder to confirm how the cabinet is hung, plus a fine-tooth saw or store cutting for the panels. |
Build the Station, Step by Step
Empty the cabinet and remove the bottom. Clear the corner completely. Take the door off its side hinges and keep the door and hardware in a labeled bag. Remove the adjustable shelves and any bins, then take out the cabinet’s bottom panel, working carefully so you do not blow out the side walls or the face frame.
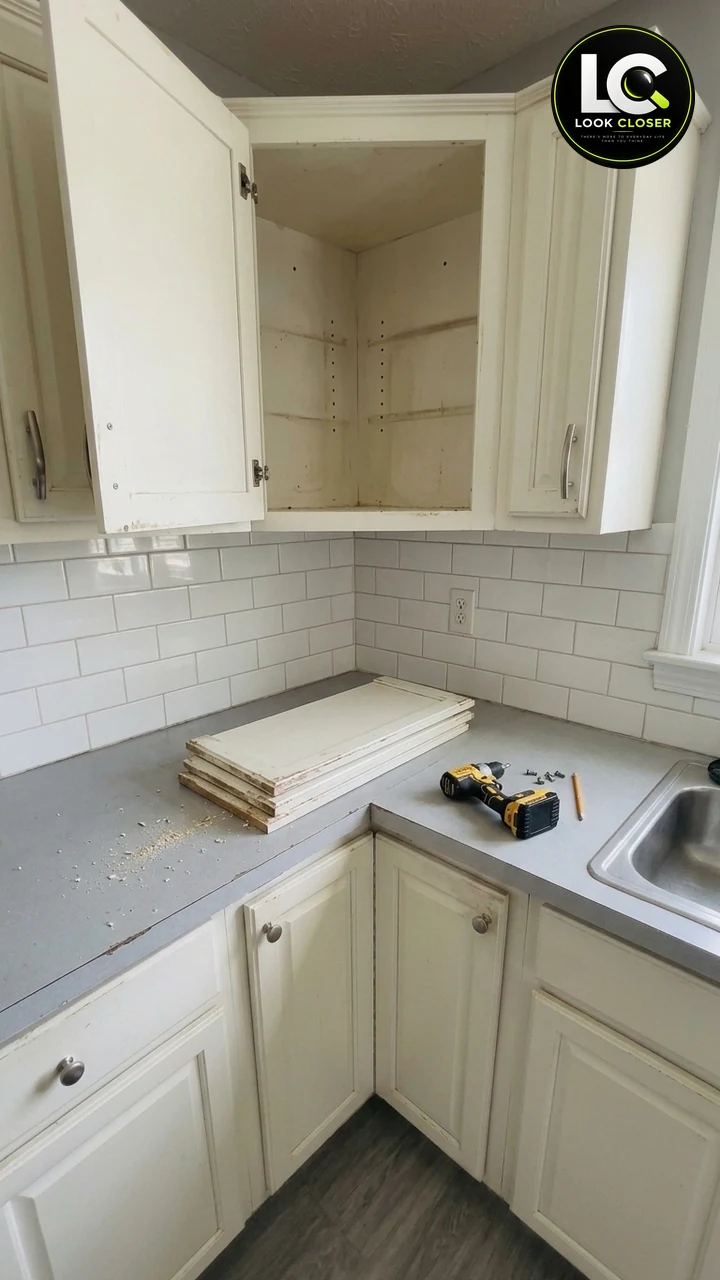
This is the step that changes the structure. After the bottom is out, check that the cabinet is still tight to the wall and that the sides have not spread. If they have, pull them back to square and add temporary cleats before you go any further. Save the original door; it comes back later on new hardware, not on the old side hinges.
Line the cavity with oak. Cut oak panels for the two sides and the back of the upper cavity, and dry-fit them first. In the photos, the grain runs vertically on the sides. Glue and fasten the liners so they cannot bow, fill old shelf-pin holes if they will show, and iron on oak edge banding wherever a raw plywood edge stays visible. A temporary shelf is fine for a look check; the final three-shelf layout waits until the alcove, outlet, and LED strip are in place.
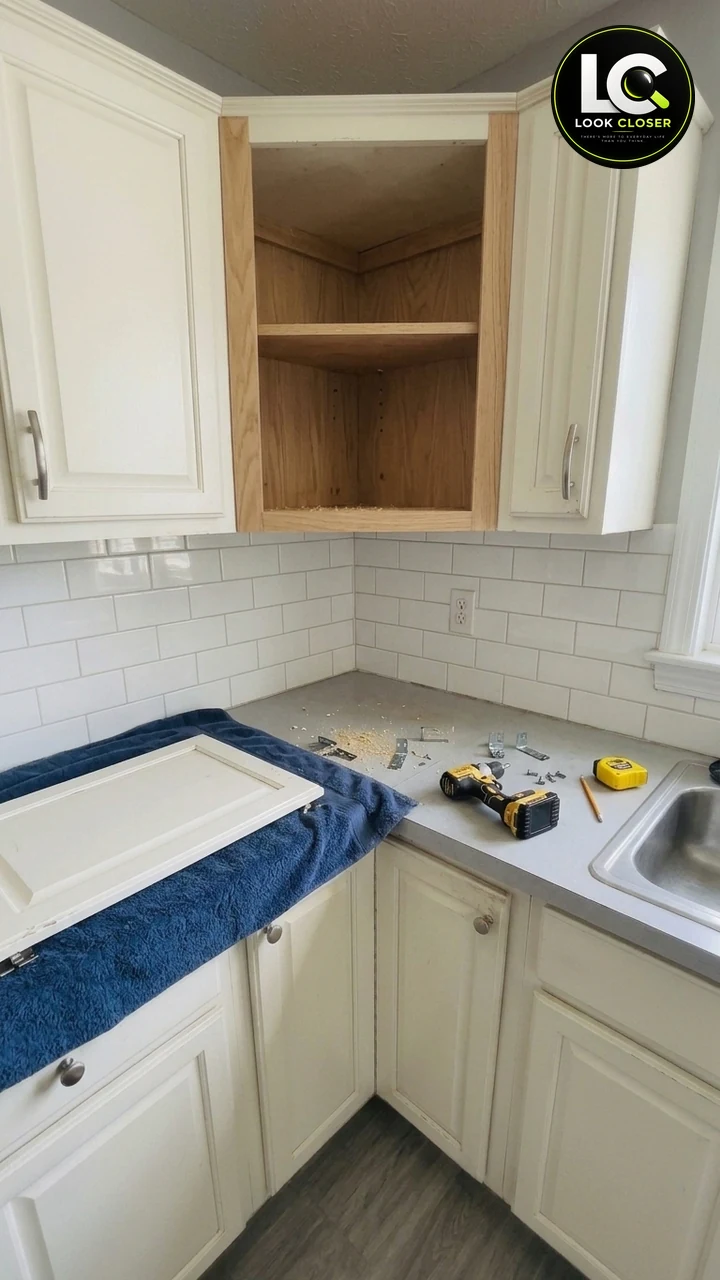
Extend the cabinet down to the counter. Build the open alcove that carries the cabinet to the countertop. The photos show oak on the inside and cream paint on the outside, so the new sides read as a continuation of the existing cabinets. Line the new sides up with the lining above, sit them squarely on the counter, and tie them back to the remaining structure with pocket-hole joints or cleats, not glue alone. Add a header at the top of the opening for the LED strip, leave the front open, and ease any gap at the counter so crumbs cannot collect. Paint the exterior after the structure is locked in, and let it cure before you install hardware.
Add the warm LED strip. Mount a warm-white LED strip on the underside of the alcove header, aimed down toward the tray. A plug-in Class 2 kit keeps this from becoming another hardwired circuit. Plan the cord route first so the adapter can reach a receptacle and the cord cannot drape across the coffee maker or get pinched. Do not bury a power supply in an unventilated cavity; if you want the adapter concealed, ask the electrician for a code-compliant option. For a related approach to shelves and LED lighting, see our window breakfast bar with shelves and LED lighting.
Have a licensed electrician place the outlet. In the finished photos, a white receptacle sits flush in the right-hand oak panel, with the coffee maker plugged into it, and the original backsplash outlet remains on the wall to the right of the corner. How that new receptacle is fed, what cable is used, and whether a permit is required are questions for a licensed electrician and your local code. This article will not invent a wiring path, wire gauge, or box type.
What you can do as the carpenter is leave a clean opening in the right oak panel, in the location you and the electrician agree on, and keep the inside of that panel accessible until the device is installed. The small corner shelf belongs above the outlet, not in front of it. If you would rather skip a new receptacle, you can plug the coffee maker into the existing backsplash outlet and accept a visible cord, as long as the cord is not pinched or stretched across a walkway.
Rehang the door on lift-up stays. The original raised-panel door returns to the upper opening, but not on the old side hinges. Two chrome folding lift-up stays, one on each side, hold it open above the alcove. Follow the manufacturer’s marking diagram, set both sides at the same height, and choose stays whose rated range includes the door’s actual weight, with a little margin. After you hang it, adjust the tension and test it: the door should stay up on its own, come down under control, and not spring into a soffit. If it feels too heavy, step up to a higher-rated pair rather than cranking a light-duty stay past its range.
Add the shelves and the raised-edge tray. Fit two oak shelves on the left and one small corner shelf on the right, above the outlet. Edge-band the front edges, keep the shelves shallow enough that they do not hit the door, and treat them as mug-and-filter shelves rather than inventing a load rating. Fasten cleats into the solid lining, not only into a thin back, or match shelf pins to the panels.
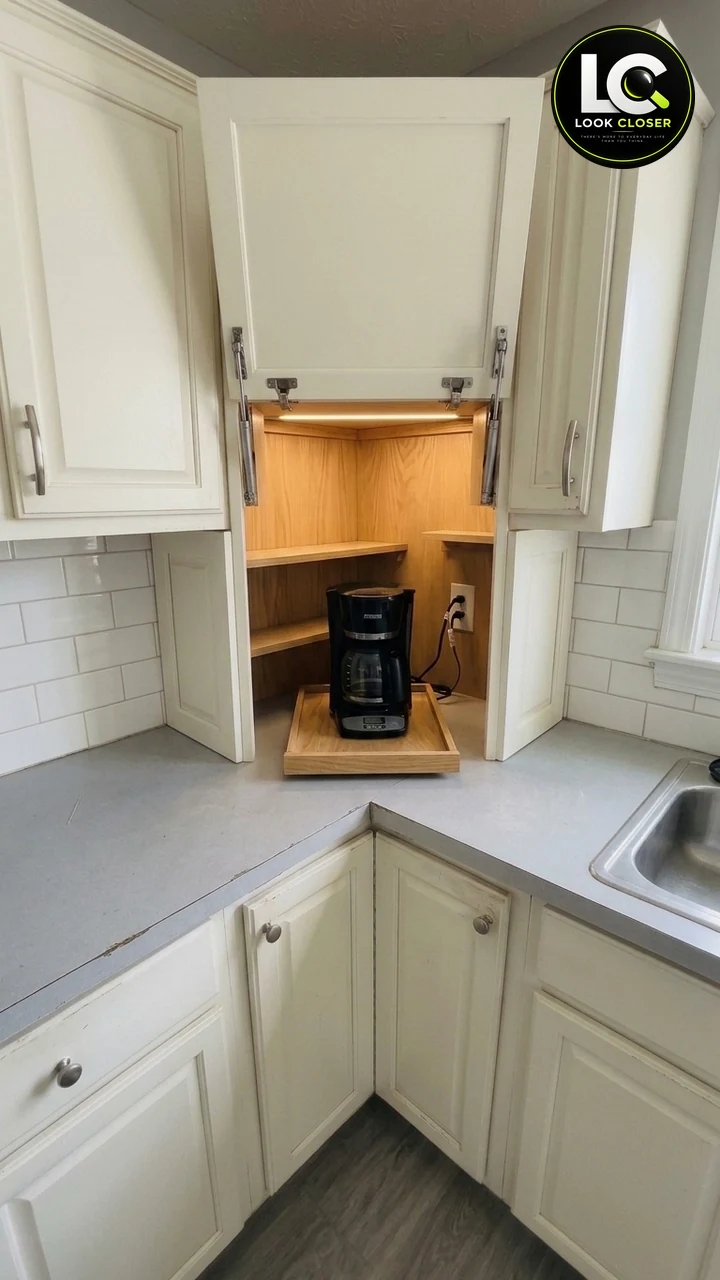
Build a solid-wood tray with a low raised edge that sits on the alcove floor. In the photos, it pulls forward by hand; there is no visible drawer-slide hardware, so slides are an optional upgrade, not a required part of the build. Leave clearance for the coffee maker cord if you add them later.
What It Typically Costs
Costs vary with cabinet size, oak grade, and the tools you already own. As a planning range, expect roughly $150 to $400 for lumber, edge banding, glue, stays, a plug-in LED kit, finish, and paint. A licensed electrician for a new or relocated receptacle is often the largest single line item and varies widely by region and permit fees, so get a local quote before you start. Budget any hanging-hardware repairs before the oak and stays.
Common Mistakes and Easy Fixes
| Mistake | What to do instead |
|---|---|
| Cutting out the cabinet bottom without checking how the box is hung | Inspect the hanging rail and fasteners first, and add reinforcement so the sides cannot spread or pull off the wall |
| Choosing lift stays by looks alone | Weigh the door and buy stays whose manufacturer chart includes that weight, then adjust and test both sides |
| Wiring a new outlet yourself | Hire a licensed electrician and pull a permit if your area requires one |
| Building the alcove too short for the coffee maker plus its required clearance | Measure the appliance and read its manual before you cut the lower panels |
| Brewing with the lift-up door closed | Leave the door up whenever the machine is on, so heat and steam can escape |
| Treating the tray as a heavy-duty drawer without slides or a known rating | Use it as a pull-forward tray, or add properly rated slides if you want a guided drawer |
| Skipping edge banding on visible plywood edges | Iron on oak banding, trim it flush, and finish the shelves and liners together so the color matches |
Everyday Use and Care
Keep the door open while you brew, then close it when the station is idle if you want a cleaner run of cabinet fronts. Wipe the oak tray and the counter under it so drips do not sit against the wood. Recheck the stay tension after the first week of use, and again if the door starts to drift. Do not store sharp or heavy cookware on the small corner shelf above the outlet, and keep liquid away from the receptacle.
If you later want more closed storage in the same kitchen, a toe-kick drawer is a useful companion project that does not compete with this alcove for wall space.
FAQ
Will this work on any corner cabinet?
Only if the cabinet is structurally sound, there is a clear counter beneath it, and the door can lift without hitting a soffit or hood. A damaged or poorly hung box should be repaired or replaced first. This layout is a conversion of a wall cabinet, not a retrofit for a base cabinet.
Do I have to add an outlet inside the cabinet?
No. The in-cabinet receptacle is what makes the finished nook look tidy, but you can use an existing backsplash outlet if the cord reaches safely. A new or relocated receptacle should be installed by a licensed electrician.
How do I know if the lift stays will hold my door?
Weigh the door and compare that number with the manufacturer’s chart for the stays you buy. Do not rely on a generic weight claim, and test the installed door several times before you load the shelves.
How much space does a coffee maker need under a cabinet?
Use the clearance in your coffee maker’s manual, not a one-size rule. As a planning example only, a 14-inch machine plus 4 inches of specified clearance would need 18 inches of open height. Always confirm both figures for your own appliance, and brew with the door open.
Is the wood tray a pull-out drawer?
In this design it is a raised-edge tray that sits on the alcove floor and can be pulled forward by hand. Drawer slides are an optional upgrade, not a part you have to invent to match the photos.
Do I have to use oak on the inside?
Oak is what this project uses, and it is what gives the alcove its warm look under the LED strip. You could line the box with another hardwood plywood if you prefer, but stay with a real wood veneer you can edge-band and finish, and keep the exterior paint matched to your existing cabinets.
If a cluttered kitchen corner has been collecting mugs and coffee supplies on the counter, this lift-up cabinet conversion is a realistic way to give them a permanent home without taking over the room. Measure twice, respect the structure and the electrical work, and the everyday corner can work a lot harder than it does now.
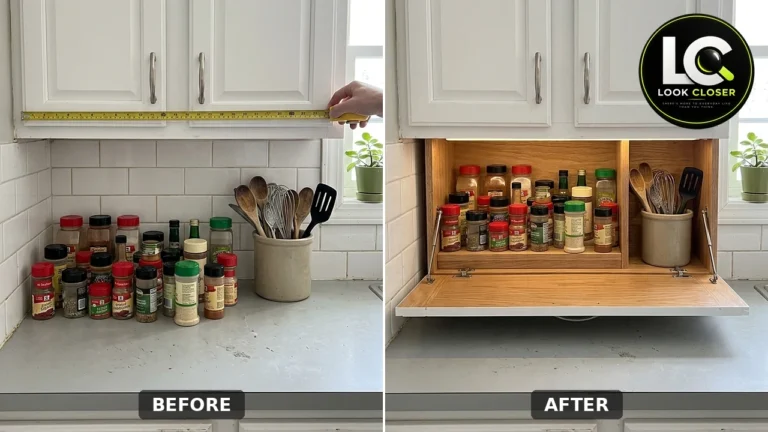
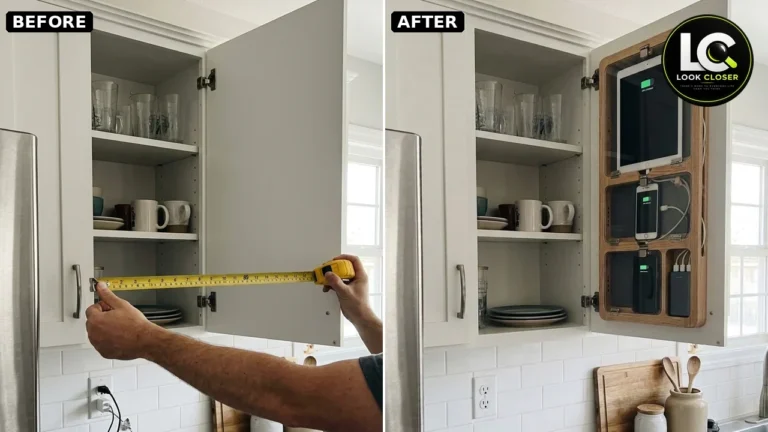
[…] you like hiding everyday clutter behind a door, this pairs well with our lift-up kitchen corner coffee station and the hidden paper towel drawer: same idea, different corner of the […]
[…] you like this kind of upgrade, the lift-up coffee station uses a similar oak interior and warm lighting inside an upper cabinet, and the hidden cutting board […]