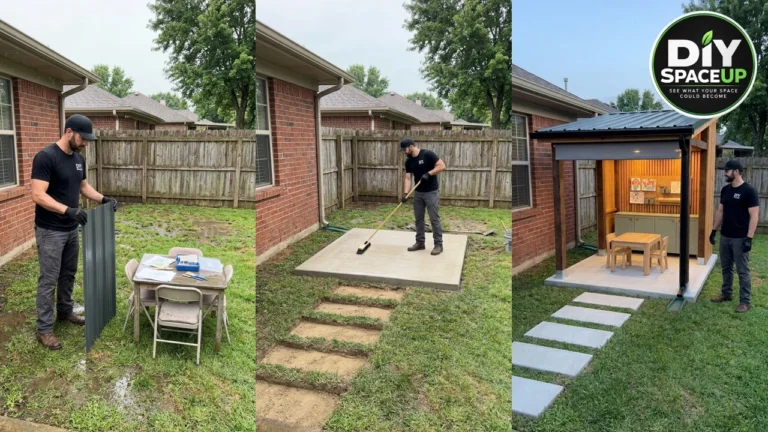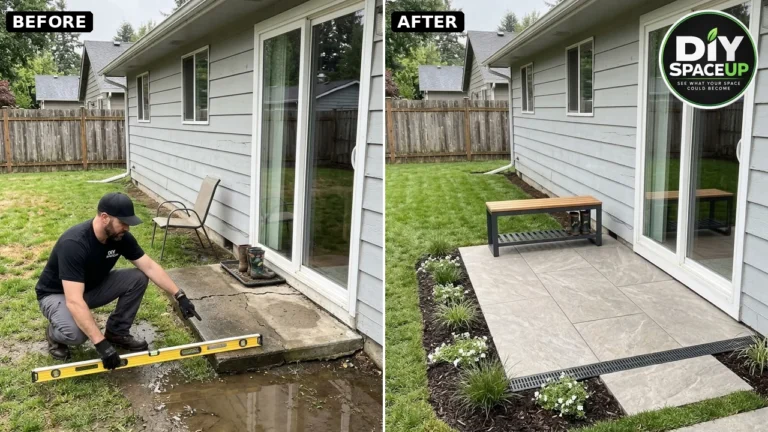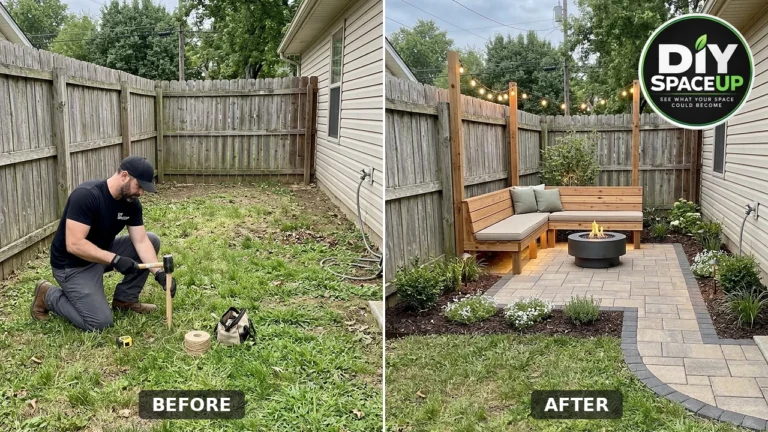

Every time it rained, the back corner of this yard turned into a pond, and the old canopy swing sat in the middle of it. The fix in the reel looked great: a tan paver patio, four cedar posts, a shed roof with recessed lights, beds and a sectional. This guide builds the same cedar lean-to pavilion, in the same spot and at the same size, but in the order a pro would use. The wet spot gets fixed first. The posts stand on concrete piers below the frost line instead of on the pavers. The roof gets real connectors, sheathing, underlayment and metal panels. The downspout water is piped away from the corner instead of dumped back into it.
Important: The original reel is an AI-generated renovation concept, and the step photos here are AI illustrations of the same yard. They show the look and a realistic build order, not a tested or engineered design. We corrected the reel’s shortcuts using US code references (IRC, NEC), Simpson Strong-Tie connector guidance and interlocking-paver base practice, linked in Sources. Your local building department, your connector and roofing manufacturers’ instructions and, where needed, an engineer always win over a general guide. Costs and times are estimates.
Affiliate Disclosure: As an Amazon Associate I earn from qualifying purchases. Product links in this article may earn a commission at no additional cost to you. Lumber, pavers, gravel, sand, concrete and rental equipment are bought locally, so they are not linked.
Contents
- Cedar Lean-To Pavilion: Project Overview
- What the Reel Got Wrong and How We Fixed It
- Before You Build: 811, Permits, HOA and Setbacks
- Materials and Tools
- Step 1: Diagnose and Fix the Wet Corner
- Step 2: Lay Out and Pour the Pier Footings
- Step 3: Build the Paver Base
- Step 4: Lay the Pavers Around the Piers
- Step 5: Set the Posts on Standoff Bases
- Step 6: Beams, Knee Braces and Rafters
- Step 7: Roof, Drip Edge, Gutter and Downspout
- Step 8: Lights, Finish and Planting
- Estimated Cost and Time
- Safety Checklist
- Common Mistakes to Avoid
- Frequently Asked Questions
- Sources
Cedar Lean-To Pavilion: Project Overview
A lean-to (shed-roof) pavilion is the simplest roofed structure you can put over a patio: four posts, two beams, rafters on a single slope, and one gutter on the low side. Here it is freestanding, not attached to the house, which keeps the permit and engineering questions simpler. The example footprint is about 12 by 12 feet of roof over a slightly larger paver patio, with the roof sloping down toward the left fence so the gutter and downspout sit on the left, away from the house and the path.
If you want a roof over an existing patio that connects to the house, our DIY covered patio roof guide covers that job. This one is a full build from soggy lawn to finished outdoor room, and it focuses on the parts a short video can’t show: drainage, footings, connectors and roof layers.
| Component | What it does | Key detail |
|---|---|---|
| Drainage fix | Stops water collecting in the corner | Grade away at about 2%, then French drain, dry well or daylight outlet as the perc test indicates |
| Pier footings | Carry the roof and resist uplift | Concrete piers below the local frost line, poured before the pavers |
| Standoff post bases | Hold posts off the concrete so the end grain dries | Galvanized base (e.g. Simpson ABU66Z) anchored into each pier |
| Paver base | Keeps the patio flat for decades | Geotextile, 4–8 in crushed stone compacted in lifts, 1 in bedding sand, edge restraint, polymeric sand |
| Post-beam caps and knee braces | Tie the frame together and resist racking | Metal post caps plus 45° braces at every post |
| Rafter ties | Keep the roof on in high wind | Hurricane ties at every rafter-to-beam crossing |
| Roof layers | Keep water out of the ceiling | Sheathing, synthetic underlayment, drip edge, metal panels at their minimum slope or steeper |
| Gutter and downspout | Collect the roof water | Solid pipe carries it away from the patio to a dry well, rain garden or daylight |
| Lighting | Makes the space usable at night | Damp/wet-rated fixtures, GFCI protection, conduit at code depth, by a licensed electrician |
What the Reel Got Wrong and How We Fixed It
| What the reel showed | What we do instead | Why |
|---|---|---|
| Built a patio right on the puddle | Diagnose first: grade away, perc test, then a French drain, dry well or daylight outlet | A patio on saturated soil settles and heaves; water under it never leaves |
| Thin gravel, hand tamper only | Geotextile, 4–8 in crushed stone compacted in 2–3 in lifts with a plate compactor, 1 in bedding sand | A hand tamper can’t reach base density over a full patio |
| Posts bolted on top of pavers | Concrete piers below the frost line with galvanized standoff bases; pavers cut around the piers | Pavers on sand can’t hold roof loads or uplift; frost lifts shallow supports |
| Beams and rafters just screwed on | Post caps, knee braces and hurricane ties | Wind uplift and racking are the real loads on an open pavilion |
| Metal or boards straight on rafters | Sheathing, underlayment, drip edge, metal panels at their minimum slope | Keeps the tongue-and-groove ceiling dry and meets roof-covering rules |
| Downspout dumped in the corner | Solid pipe routed left and away to a dry well, rain garden or daylight | Otherwise you rebuild the original puddle |
| Lights with no visible wiring | Wet-location fixtures, GFCI, buried conduit, permit and a licensed electrician | Outdoor wiring is shock and fire territory |
| No mention of permits | 811, permit check, HOA approval and setbacks before digging | Roofed structures often need a permit; electrical always does |
Before You Build: 811, Permits, HOA and Setbacks
Call 811 (or file online at call811.com) a few business days before you dig. Pier holes are deep and narrow, which is exactly how people hit gas and power lines. Private lines such as a sprinkler system or a line to a shed are not marked by 811, so find those yourself.
Permits. The model code (IRC R105.2) exempts some one-story detached accessory structures, often up to 200 square feet, from a building permit, but many towns lower that limit or treat any roofed structure as needing review. A 12-by-12 roof is 144 square feet, so it may be exempt where you live, and it may not. Call your building department with your size and height. Electrical work for the lights and receptacle needs an electrical permit almost everywhere.
HOA and setbacks. Most HOAs require approval for roofed structures, and zoning sets how close one can be to the property line and fence (often 3–10 feet for accessory structures). Measure from the roof edge, not the post. Keep the gutter outlet and any pipe discharge on your own property.
When to bring in an engineer: a roof larger than the span tables cover, heavy snow loads, high-wind or coastal zones, attaching the roof to the house, a roof deck or swing hung from the frame, or poor or filled soil. Your building department will tell you if stamped drawings are required.
Materials and Tools
Items with links were checked live on Amazon on November 10, 2026. Prices and stock change, so confirm them on the listing. Structural hardware sizes must match your lumber; Simpson’s catalog lists the load ratings and required fasteners.
| Item | What it’s for | Where to get it |
|---|---|---|
| Simpson Strong-Tie ABU66Z standoff post base | Anchors each 6×6 post to its pier, 1 in above the concrete | Amazon (4 needed) |
| Simpson Strong-Tie EPC6Z end post cap | Connects beams to the corner posts | Amazon (stock was low; Simpson’s BC6/PC6Z caps at a home center also work for your beam size) |
| Simpson Strong-Tie H2.5A hurricane ties (100-pack) | Ties every rafter to the beams against uplift | Amazon |
| Simpson Strong-Drive SDWS 5-in timber screws (50-pack) | Structural screws for knee braces and beam plies | Amazon |
| Cedar 6×6 posts, 2x beams, 2x rafters, 2x knee braces, T&G ceiling boards | Pavilion frame and ceiling | Local lumberyard (sized by span tables or engineer) |
| Plywood or OSB roof sheathing, synthetic underlayment, metal panels, trim and drip edge | Roof layers | Local roofing supplier or home center |
| Concrete mix, 12-in form tubes, anchor bolts | Pier footings | Local |
| Crushed stone base, concrete sand, pavers | Patio | Local landscape supplier (bulk) |
| Super Geotextile non-woven fabric, 4 oz | Separates the base from the soil and wraps the drain | Amazon |
| EasyFlex Snip-to-Flex paver edging, 60 ft | Edge restraint around the patio | Amazon (spikes sold separately) |
| DOMINATOR polymeric sand, 40 lb | Locks the paver joints | Amazon |
| 4-in solid drain pipe, fittings, gravel for the dry well or outlet | Downspout and drain line | Local home center |
| NDS pop-up drainage emitter | Daylight outlet at the end of the downspout line | Amazon |
| Ready Seal Natural Cedar stain and sealer, 1 gal | Protects the cedar frame | Amazon |
| HALO LT 4-in canless LED, wet-location listed | Recessed lights in the ceiling (electrician installs) | Amazon |
| Leviton GFWR2 weather-resistant GFCI receptacle | Protected outdoor outlet (electrician installs) | Amazon |
| Plate compactor, post-hole auger | Base compaction and pier holes | Rental yard |
| Truper 8×8 steel hand tamper | Tamping pier holes, edges and trenches | Amazon |
| DEWALT 20V MAX drill and impact driver kit | Driving structural screws and connectors | Amazon |
| DEWALT DWE575 7-1/4-in circular saw | Cutting posts, beams, rafters and braces | Amazon |
| STABILA 48-in level | Leveling beams, piers and paver screed rails | Amazon |
| Swanson magnetic post level | Plumbing posts hands-free | Amazon |
| CMI braided nylon mason line, 250 ft | Layout lines for the patio and piers | Amazon |
| Stanley aluminum line levels (3-pack) | Checking grade and slope on the string lines | Amazon |
| IRWIN STRAIT-LINE chalk line, 100 ft | Marking paver cuts and rafter layout | Amazon |
| STANLEY FATMAX 25-ft tape measure | Layout and squaring (3-4-5 diagonals) | Amazon |
| Rust-Oleum inverted marking paint | Marking pier centers and the drain route | Amazon |
| DEWALT Concealer safety goggles | Eye protection for cutting and compaction | Amazon |
| 3M Aura N95 respirators (10-pack) | Silica dust when cutting pavers and mixing concrete | Amazon |
| 3M PELTOR X4A earmuffs | Hearing protection for the compactor and saws | Amazon |
Step 1: Diagnose and Fix the Wet Corner
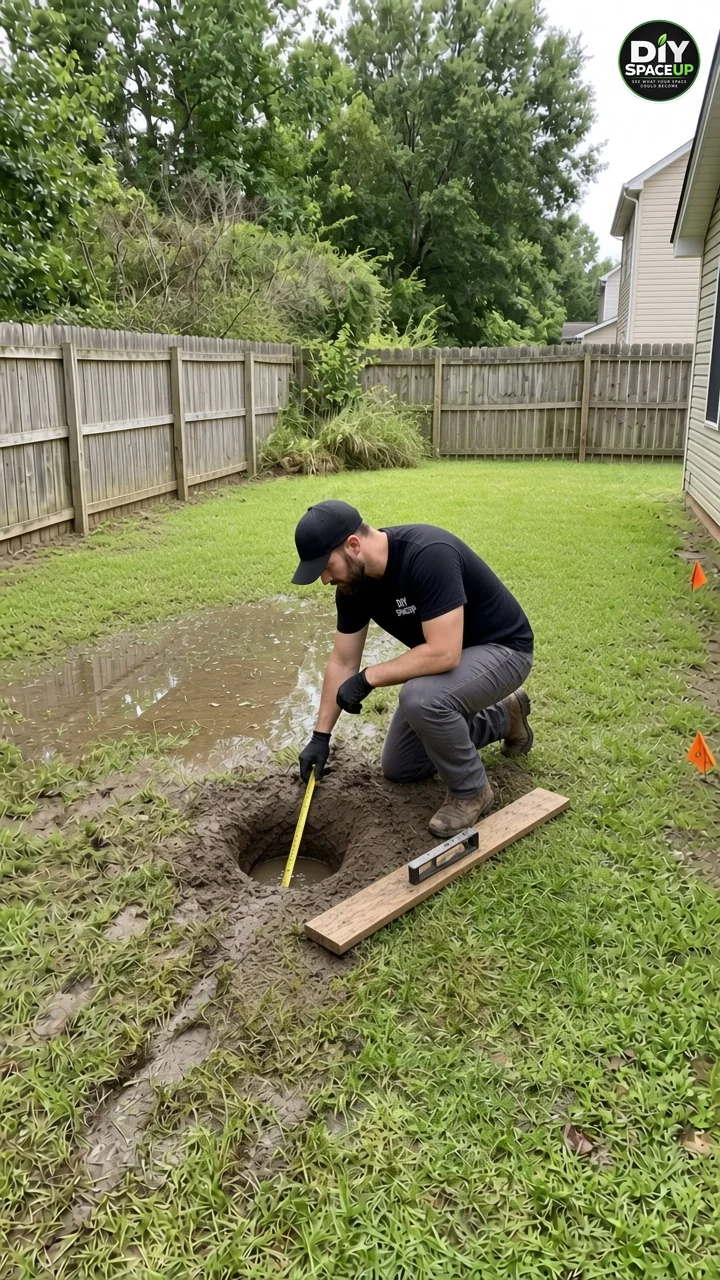
Before anything is built, find out where the water comes from and where it can go. Walk the yard in a rain. Look for downspouts, a neighbor’s yard or a low spot feeding the corner. Then grade: the ground should fall away from the house (the code asks for 6 inches of fall in the first 10 feet) and the patio area should fall about 2% (1/4 inch per foot) toward where the water will exit.
Do a simple perc test. Dig a hole about 12 inches wide and 12–18 inches deep where the patio will go, fill it with water and let it drain once to saturate the soil, then refill it and measure how far the level drops per hour. Roughly: 1 inch per hour or more means the soil drains well enough for a dry well or rain garden; less than about 1/2 inch per hour (common in clay) means you need to carry the water somewhere lower instead.
- Daylight outlet: if any part of the yard is lower than the corner, run a solid or perforated pipe at a 1% or steeper slope and end it in a pop-up emitter or a rock outlet. This is the most reliable fix.
- French drain: a gravel trench wrapped in fabric with a perforated pipe intercepts groundwater or runoff coming toward the corner. See our French drain guide.
- Dry well or rain garden: only where the perc test shows the soil drains. Place it at least 10 feet from the house and away from the patio. Our rain garden build shows the sizing logic.
In this yard the downspout line from the new roof will run along the left side toward the fence and away from the patio, so plan that route now and dig it at the same time as the base.
Step 2: Lay Out and Pour the Pier Footings
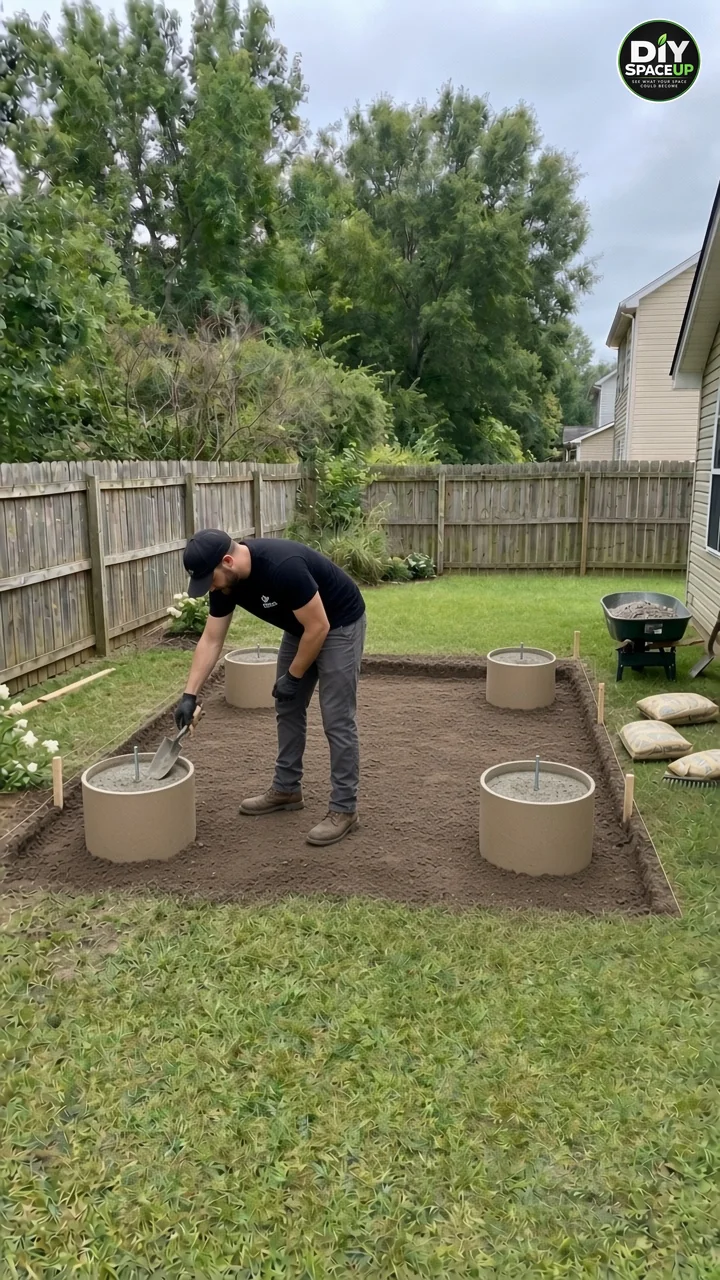
Set batter boards and mason lines for the patio rectangle, then mark the four post centers inside it. Square the layout by measuring both diagonals until they match. In this design the posts sit just inside the patio corners so the roof overhang covers the furniture zone. The piers go in before the patio is built so the pavers can be cut around them later.
Dig each hole below your local frost line (the IRC requires at least 12 inches below undisturbed soil; frost depth ranges from about 12 inches in the South to 48 inches or more in the North, so ask your building department). A 12-inch form tube is typical for a small lean-to, with a wider bell or footing pad if your design or inspector calls for it. Set the tubes plumb, backfill around them, and fill them with concrete. The tops should finish about 1 inch above the future paver surface so water runs off the pier, not into the post base.
Set a galvanized anchor bolt (or the anchor specified for your post base) in the center of each wet pier, using the mason lines to keep all four in line. If an inspection is required, it usually happens with the holes open, before the pour. Let the concrete cure for several days before loading it.
Step 3: Build the Paver Base
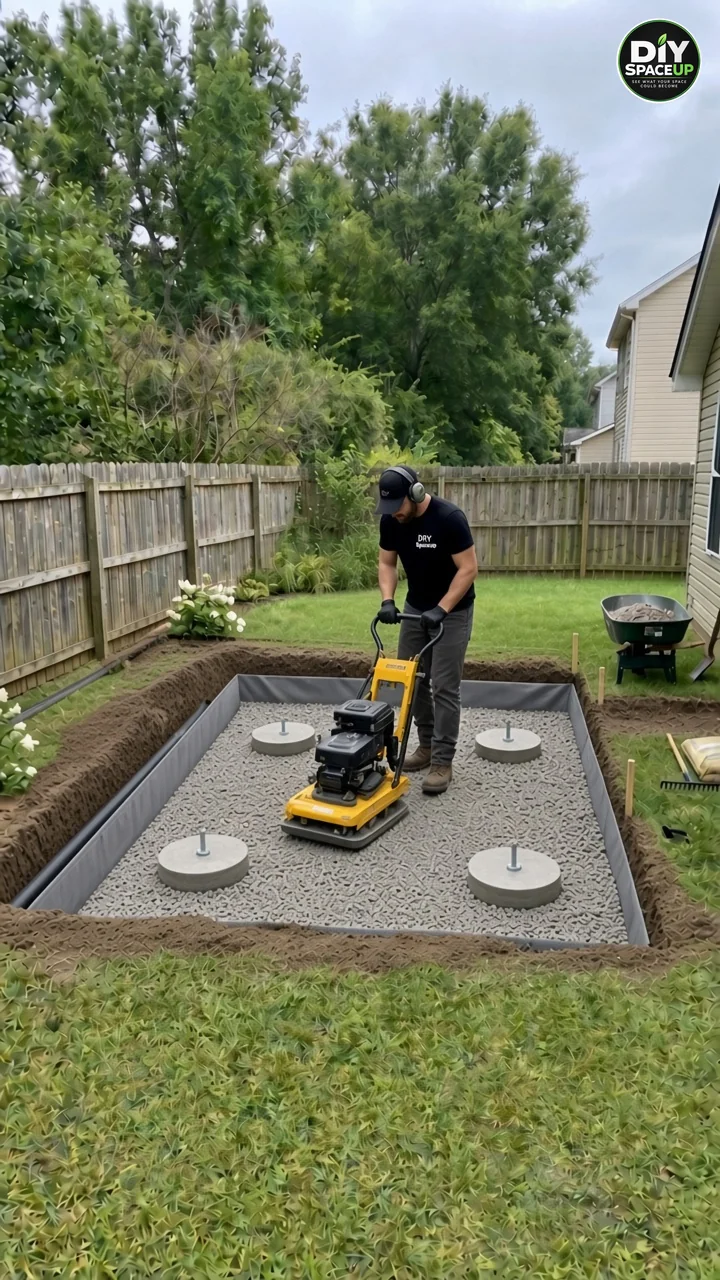
Excavate the patio to the depth of your base, plus 1 inch of bedding sand, plus the paver thickness. Following the interlocking-paver guidance from ICPI/NCMA, a pedestrian patio on well-drained soil uses about 4–6 inches of compacted crushed stone; on clay or a historically wet spot like this one, use 6–8 inches. Slope the excavated subgrade the same 1/8–1/4 inch per foot you want on the finished patio, falling away from the house and toward the drainage outlet, then compact the subgrade itself.
- Lay non-woven geotextile over the subgrade and up the sides. It keeps the base stone from pushing down into the wet soil.
- Place the crushed stone in 2–3 inch lifts. Moisten it slightly and run a plate compactor over each lift in two directions before adding the next.
- Use a hand tamper tight around the piers, where the plate can’t reach.
- Check the finished base with a string line and line level: it should follow the planned slope and be within about 3/8 inch over 10 feet.
This is also the time to dig the downspout line on the left side. Keep it a solid (non-perforated) pipe sloped at least 1/8 inch per foot to its outlet, so roof water can’t seep back under the patio.
Step 4: Lay the Pavers Around the Piers
Set two 1-inch screed rails on the base, fill between them with concrete sand and pull a straight board across to leave a flat 1-inch bedding layer. Don’t compact the sand or walk on it. Lay the pavers from one corner in your chosen pattern, with the darker soldier course around the edge as in the reel. Where the pattern meets a pier, mark the paver with a chalk line and cut it with a wet saw for a tight ring around the concrete (wear an N95 and goggles; paver dust is silica).
Install the edge restraint around the perimeter and spike it into the base, not into the sand. Run the plate compactor (with a pad) over the pavers to seat them, sweep in polymeric sand, compact again, top up the joints to about 1/8 inch below the surface, then blow the surface clean and mist it as the bag directs. For the full paver process, see how to build a DIY paver patio and walkway, and if an old patio is already sinking, our guide to fixing a sinking paver patio.
Step 5: Set the Posts on Standoff Bases
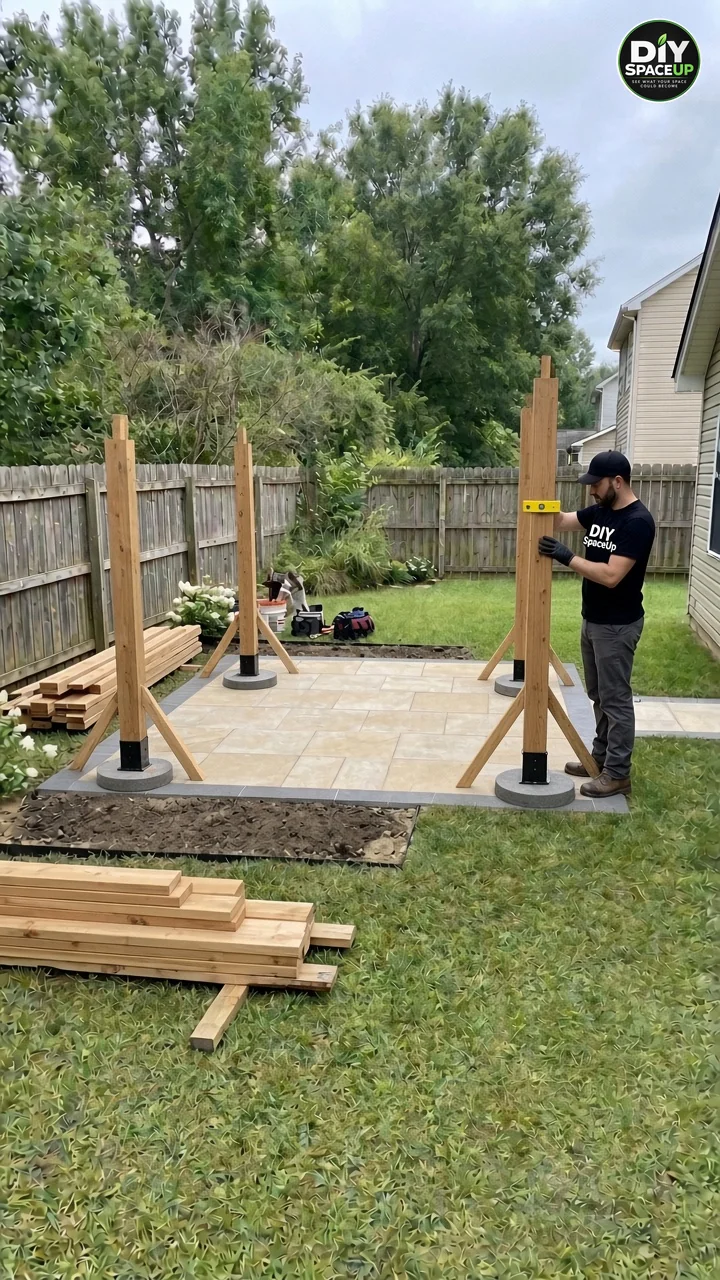
Bolt a standoff post base to each pier. The standoff plate holds the post end about an inch above the concrete so the end grain can dry; that, more than the wood species, is what stops post rot. Cut the posts to length, keeping in mind that the two right-side (high) posts and the two left-side (low) posts differ by the roof drop. For a 12-foot roof run at 3:12, that is about 3 feet.
Stand each post in its base, plumb it in two directions with a post level, and hold it with two diagonal temporary braces staked to the ground. Fasten it with the exact nails or screws Simpson specifies for that base; partial fastening gives partial capacity.
Step 6: Beams, Knee Braces and Rafters
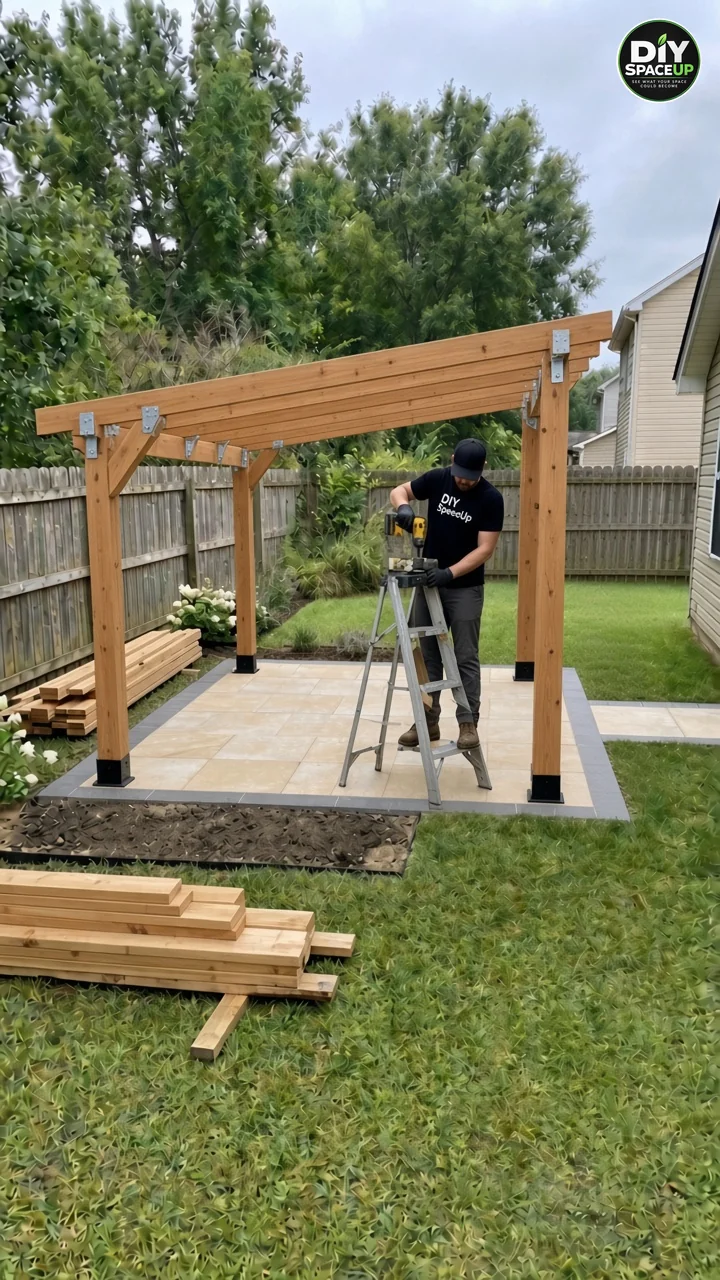
Set a beam across the two high posts on the right and another across the two low posts on the left (typically a doubled 2×10 or 2×12, or a solid 4x or 6x beam; size it from the American Wood Council span tables or by an engineer). Connect each beam to its posts with a metal post cap sized for your post and beam, and fasten it fully.
- Knee braces: add a 45-degree brace from each post to the beam, about 2–3 feet long on each leg, fastened with structural screws. On an open four-post structure these braces are what keeps it from racking side to side.
- Rafters: lay out the rafters with a chalk line, usually 16 or 24 inches on center, cut the seat angles, and run them from the high beam to the low beam with a modest overhang on each side.
- Hurricane ties: fasten an H2.5A or similar tie at every rafter-to-beam crossing. On an open pavilion, wind lifting the roof is a bigger risk than weight pushing down.
Check that the frame is square, then remove the temporary post braces only after the rafters and ties are in.
Step 7: Roof, Drip Edge, Gutter and Downspout
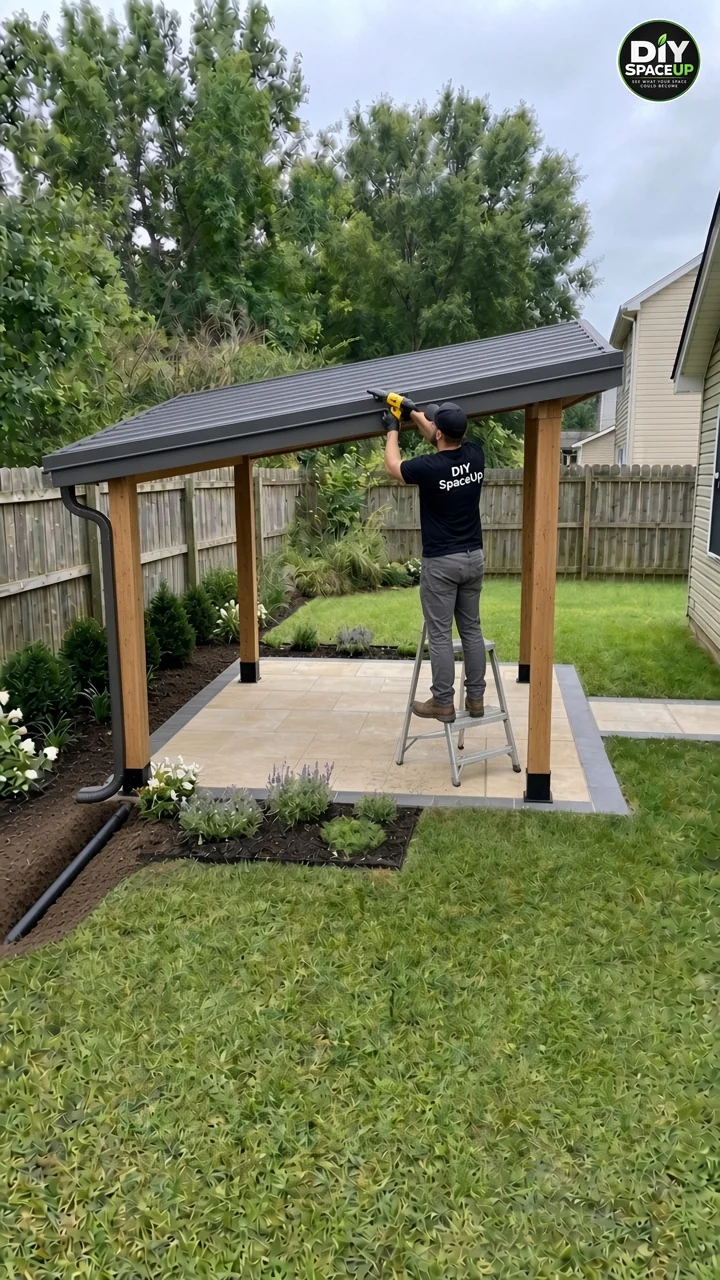
If you want a tongue-and-groove ceiling like the reel’s, install it on the underside of the rafters, or on top of them with the sheathing above. Either way, the roof needs these layers to keep the ceiling dry:
- Sheathing: plywood or OSB nailed to the rafters, joints staggered and landing on rafters.
- Underlayment: synthetic roofing underlayment lapped from the low edge up, as the roofing manufacturer specifies.
- Drip edge: metal drip edge along the eaves under the underlayment, and along the rakes over it, so water drips clear of the fascia.
- Metal panels: follow the panel maker’s minimum slope. Under IRC R905.10, lapped exposed-fastener panels without lap sealant need at least 3:12; standing-seam panels can go as low as 1/4:12. A lean-to at 2:12 to 3:12 looks right and drains well with the correct panel.
Hang the gutter on the low (left) edge with a slight fall toward the downspout. Bring the downspout down the front-left post, then into a solid 4-inch pipe at ground level, and run that pipe away to the left, through the bed, toward the outlet you planned in Step 1: a dry well, a rain garden or a daylight pop-up emitter. Never let it discharge into the corner you just drained. Our underground downspout drainage guide shows the trench and fittings in detail.
Step 8: Lights, Finish and Planting
Lighting and power are a job for a licensed electrician with a permit. Under the NEC, fixtures under a roof that is open on the sides must be at least damp-rated, and wet-rated where rain can reach them. Outdoor receptacles need GFCI protection and weather-resistant, in-use covers. Buried wiring usually runs in PVC conduit about 18 inches deep, or 12 inches for a GFCI-protected residential 120-volt circuit of 20 amps or less; your inspector decides. Plan the conduit route before the pavers go down so you’re not cutting the patio later.
Finish the cedar. Let new cedar dry for a few weeks if it’s wet, then apply a penetrating cedar stain or sealer to all sides you can reach, especially the post ends and the tops of beams. Re-coat every 2–3 years, or when water stops beading.
Plant and furnish. Mulch beds along the left and back hide the drain line and soften the edges. Keep the mulch an inch or two below the paver surface and clear of the post bases. Then bring in the sectional.
Estimated Cost and Time
These are 2026 planning ranges for a cedar lean-to pavilion of about 12 by 12 feet over a slightly larger paver patio. Cedar and metal roofing prices swing by region, so price your own list.
| Item | Estimated range |
|---|---|
| Drainage (pipe, fittings, gravel, outlet or dry well) | $200–$700 |
| Pier footings (concrete, tubes, anchors) | $150–$350 |
| Patio base, sand, fabric, edging and polymeric sand | $600–$1,200 |
| Pavers (about 170 sq ft) | $700–$1,700 |
| Cedar posts, beams, rafters, braces and T&G ceiling | $2,000–$4,000 |
| Sheathing, underlayment, metal roofing, drip edge, gutter | $800–$1,700 |
| Simpson connectors and structural screws | $350–$650 |
| Electrician (lights, GFCI, conduit, permit) | $800–$2,000 |
| Rentals (plate compactor, auger, wet saw) | $200–$450 |
| Permits, plants, mulch and sealer | $300–$1,000 |
| Total DIY (with electrician) | About $6,100–$13,750 |
Time: plan 5 to 7 weekends for two people: one for drainage and layout, one for piers (plus cure time), one or two for the base and pavers, one for posts and framing, and one or two for the roof, gutter and finish. Add 811 lead time, any permit review and the electrician’s schedule.
Safety Checklist
- 811 locate done, and private lines found, before any digging
- Permit and HOA approval in hand; engineer involved where the span, snow, wind or attachment calls for it
- N95, goggles and hearing protection when cutting pavers and running the compactor
- Two people to raise posts and beams; posts braced until the rafters and ties are in
- Ladders on firm, level ground; never stand on the top two steps
- Roof work off the ground only in dry, calm weather
- All electrical work by a licensed electrician, GFCI-protected and inspected
- Kids and pets kept away from open pier holes and trenches
Common Mistakes to Avoid
| Mistake | Better approach |
|---|---|
| Building on the wet spot without fixing the water | Grade, perc test, then drain, dry well or daylight |
| Bolting posts to pavers | Concrete piers below frost line with standoff bases |
| Pouring piers after the patio | Pour them first and cut the pavers around them |
| Skipping knee braces and hurricane ties | Brace every post; tie every rafter |
| Metal panels on a slope below their minimum | Check the panel’s minimum slope (3:12 for many exposed-fastener panels) |
| Downspout dumped at the post | Solid pipe routed away to an outlet |
| Running wiring after the pavers are down | Lay conduit before the base |
| Mulch piled against the post bases | Keep beds below the pavers and clear of the posts |
Frequently Asked Questions
Do I need a permit for a cedar lean-to pavilion?
Often, but not always. The IRC exempts some detached one-story accessory structures (often up to 200 sq ft), but many towns treat any roofed structure as needing a permit. The electrical work for lights and outlets needs one almost everywhere. Call your building department first.
Can I put pavilion posts on top of pavers?
No. Pavers sit on sand and gravel and can’t resist roof loads, wind uplift or frost. Set the posts on concrete piers that go below the frost line, with galvanized standoff bases, and cut the pavers around them.
How deep should pavilion footings be?
Below your local frost depth, and at least 12 inches below undisturbed soil. That ranges from about 12 inches in warm climates to 48 inches or more in the North. Your building department will tell you the number.
What slope does a lean-to metal roof need?
It depends on the panel. Exposed-fastener lapped panels without lap sealant need at least 3:12 under the IRC; standing-seam panels can go much lower. Follow your panel manufacturer’s minimum.
Where should the downspout drain?
Away from the patio and the house, through a solid pipe, to a dry well, rain garden or daylight outlet at a lower spot, all on your own property. Never back into the corner you just fixed.
Can I wire the lights myself?
In most places homeowners can pull a permit for their own house, but outdoor wiring is a common source of shocks and failed inspections. We recommend a licensed electrician, damp/wet-rated fixtures and GFCI protection.
How long will a cedar pavilion last?
With posts off the concrete, a good roof, gutters and a sealer re-coated every few years, cedar framing can last 20–30 years or more.
Sources
- Call 811: Know what’s below
- International Code Council: IRC R105.2 work exempt from permit
- International Code Council: IRC Chapter 4 foundations (frost protection)
- International Code Council: IRC Chapter 9 roof assemblies (R905.10 metal roofing)
- NFPA 70: National Electrical Code
- Simpson Strong-Tie: post bases, post caps and hurricane ties
- American Wood Council: span tables
- NCMA / ICPI: interlocking concrete pavement installation
- US EPA: Soak Up the Rain, rain gardens