
There was nothing obviously wrong with this bathroom.
The vanity worked. The toilet fit. The room looked finished.
But between the vanity and the wall beside the toilet was a narrow strip of unused floor space—too small for a normal cabinet, yet large enough to collect dust and make you wonder whether those few inches could actually do something useful.
They could.
With careful measurements and a simple plywood build, that forgotten gap can become a slim floor-to-counter storage tower for towels, toiletries, and extra bathroom essentials.
The key is not building the biggest cabinet possible. It is building one that fits the space precisely without interfering with the vanity, toilet, plumbing, baseboard, or normal use of the bathroom.
Table of Contents
What We’re Building
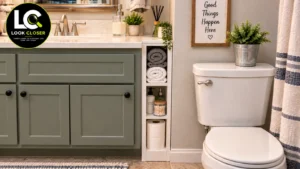
The project shown here is a simple open-front vertical storage cabinet.
It sits in the narrow gap beside the vanity rather than being recessed into the wall. The basic structure consists of two tall side panels, a top and bottom, and several fixed shelves.
The finished cabinet is painted white so it blends naturally with the bathroom trim and countertop.
| Component | Purpose |
|---|---|
| Two plywood sides | Form the tall cabinet body |
| Top panel | Squares and closes the cabinet |
| Bottom panel | Supports the cabinet structure |
| Fixed shelves | Divide the narrow space into useful storage |
| White bathroom-suitable finish | Protects the wood and visually integrates the cabinet |
| Wall restraint/anchoring | Helps prevent a tall, narrow cabinet from tipping |
This is deliberately a simple build. There are no drawers, doors, hidden mechanisms, or pull-out hardware in the design shown.
Step 1: Measure the Gap Before Cutting Anything
This is the most important part of the project.
The reference visualization suggests a very narrow gap, but its apparent dimensions should not be treated as measurements.
Measure the opening at the bottom, middle, and top.
Walls and vanity cabinets are not always perfectly parallel, so use the smallest measurement as your starting point.
Also measure the available depth from the front of the vanity toward the back wall.
A STANLEY FATMAX 25-Foot Tape Measure is useful here because a rigid tape makes checking narrow openings easier.
Record these measurements:
| Measurement | What to Check |
|---|---|
| Gap width | Bottom, middle and top |
| Cabinet height | Floor to desired finished height |
| Available depth | Wall to front edge of vanity |
| Baseboard projection | How far trim extends into the opening |
| Toilet clearance | Cabinet must not interfere with normal use |
| Countertop overhang | Check whether it reduces usable width |
| Plumbing/access | Do not block valves or service points |
Leave a small installation tolerance rather than constructing the cabinet exactly to the tightest measurement.
A cabinet that fits perfectly on paper can become impossible to slide into place because of a slightly bowed wall or uneven baseboard.
Step 2: Check What the Cabinet Could Block
Before designing the box, look beyond the empty space.
Can the vanity door or drawer still open fully?
Can the toilet be used comfortably?
Is there a water shutoff, electrical outlet, plumbing cleanout, or other service point that needs to remain accessible?
Is the cabinet close to a bathtub or shower?
This last question matters particularly in U.S. bathrooms. Bathroom receptacles require GFCI protection, and the NEC also restricts receptacles within the defined tub/shower zone. Local requirements and the bathroom’s actual configuration should therefore be checked rather than treating an electrical clearance as a universal DIY measurement. NFPA Document Information
The cabinet sits within the existing gap and is not recessed into the wall. Because it is tall and narrow, it should be appropriately restrained to suitable wall structure
Step 3: Choose the Material
For a slim cabinet like this, cabinet-grade plywood is a practical choice because it creates a strong box without requiring a complicated frame.
Birch plywood is commonly used for cabinet construction because its hardwood veneer provides a durable, clean surface. In bathrooms, the finish is equally important because the material will be exposed to humidity. This Old House
For a project matching the reference image, 3/4-inch cabinet-grade birch plywood is a sensible starting point.
Do not use ordinary unfinished particleboard in a location where repeated moisture exposure is likely.
Basic Materials
| Material | Approximate Need |
|---|---|
| 3/4-in cabinet-grade plywood | Depends on cabinet dimensions |
| Wood glue | 1 bottle |
| Appropriate wood/cabinet screws | 1 box |
| Sandpaper | 120–220 grit range |
| Primer | Small quantity |
| Bathroom-suitable paint | Small quantity |
| Wall restraint/fastener | As required for wall construction |
Because every gap is different, make the cut list after measuring, not before.
Step 4: Cut the Cabinet Pieces
- two identical tall side panels;
- one top;
- one bottom;
- the required number of shelf panels.
The cabinet should remain rectangular and square.
A Swanson 7-Inch Speed Square is useful for checking layout lines, while a straightedge or track guide can help produce clean plywood cuts.
If you do not have equipment for safely breaking down a full plywood sheet, ask the lumber supplier or home center to make rough cuts first. This also makes transporting the sheet much easier. This Old House
Step 5: Dry-Fit Everything First
Do not immediately glue the cabinet together.
Place the pieces together on a flat work surface and confirm that:
- both side panels are identical;
- the top and bottom fit between them correctly;
- the cabinet is square;
- the finished exterior width matches the bathroom opening;
- your shelf spacing makes sense for what you actually plan to store.
This five-minute check can save an entire rebuild.
Step 6: Assemble the Tall Cabinet Box
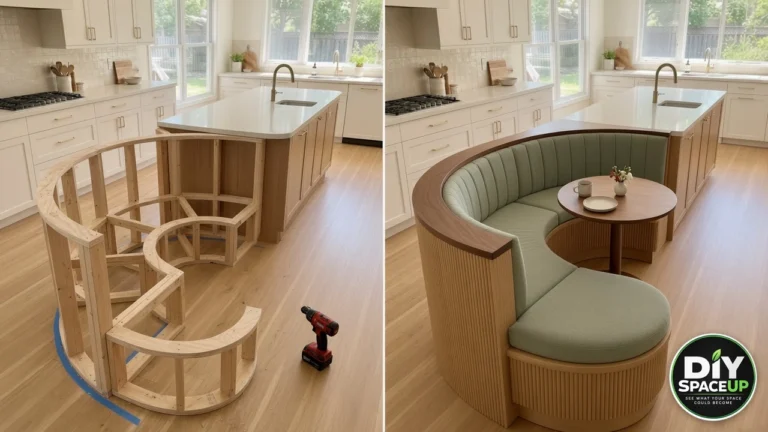
The MIDDLE reference image shows the essential construction clearly: a tall, narrow plywood box being screwed together in the workshop.
Apply an appropriate bead of wood glue at the joints, align the pieces carefully, clamp them, and secure them using the chosen joinery method.
A DEWALT 20V MAX Cordless Drill/Driver is useful for drilling pilot holes and driving screws without over-tightening them.
For keeping the narrow assembly aligned while fastening, IRWIN QUICK-GRIP Bar Clamps are particularly helpful.
If using pocket-hole construction, a Kreg Pocket-Hole Jig 320 can make repeatable concealed joints, provided the screw length and jig settings are appropriate for the actual plywood thickness.
Check for square before the glue sets.
Step 7: Plan the Shelf Heights Around Real Bathroom Items
This is where custom construction becomes more useful than buying a generic organizer.
Instead of dividing the cabinet into identical compartments, decide what each level will hold.
For example:
| Storage Zone | Suitable Items |
|---|---|
| Upper compartment | Rolled hand towels |
| Middle shelf | Soap and toiletries |
| Lower-middle shelf | Cotton swabs or small containers |
| Bottom compartment | Spare toilet paper |
Measure your largest items before fixing the shelves.
For inspiration, narrow vertical bathroom storage is an established way of making small bathrooms more functional without consuming much floor area. This Old House
Step 8: Sand and Protect the Wood
Bathroom furniture needs more protection than a similar piece sitting in a dry bedroom.
Sand the exposed surfaces and edges until smooth, remove the dust, and apply a suitable primer and durable bathroom-compatible finish.
Pay particular attention to plywood edges and end grain, because unfinished edges can absorb moisture more readily.
If you prefer a clear wood appearance instead of the white finish shown here, a compatible water-resistant clear finish can be used. This Old House similarly recommends protecting bathroom cabinetry with a moisture-resistant painted or sealed finish. This Old House
For this particular project, however, white paint matches the supplied AFTER design most closely.
Step 9: Test-Fit the Cabinet in the Bathroom
Before final installation, place the finished cabinet into the empty gap.
Do not force it.
Check that it:
- sits flat;
- does not rub hard against the vanity;
- clears the baseboard configuration;
- doesn’t interfere with toilet use;
- leaves required plumbing/electrical access available;
- doesn’t prevent vanity doors or drawers from opening.
If the floor is slightly uneven, correct the installation appropriately rather than forcing a tall cabinet out of square.
Step 10: Secure the Tall Cabinet
This is an important safety step.
A cabinet this narrow relative to its height can be easier to tip than a broad base cabinet. Do not rely only on friction between the vanity and wall to hold it upright.
Where appropriate, secure it to suitable wall structure using hardware compatible with the wall construction.
Do not simply drive a random screw into drywall and assume it is secure.
If anchoring into the wall, first identify studs and make sure the fastening location does not conflict with hidden plumbing or electrical services.
Step 11: Load It Without Overfilling It
Once installed, start with the items the cabinet was designed around.
Rolled towels work particularly well in the upper compartment. Small toiletries can occupy the middle shelves, while toilet paper can use the taller lower section.
Avoid placing unnecessarily heavy objects on upper shelves.
The goal isn’t to fill every cubic inch. The goal is to transform a useless gap into accessible everyday storage.
Safety Checks Before Calling It Finished
| Check | Why It Matters |
|---|---|
| Cabinet is stable | Reduces tipping risk |
| Wall restraint is secure | Important for tall narrow furniture |
| No sharp plywood edges | Prevents cuts |
| Plumbing remains accessible | Future repairs must remain possible |
| Vanity doors/drawers work | Storage shouldn’t create a new problem |
| Toilet clearance remains comfortable | Preserves normal bathroom use |
| Finish tolerates bathroom humidity | Helps protect plywood |
| Electrical locations remain compliant | Particularly important near wet areas |
Bathroom electrical rules can vary with configuration and local adoption, so verify the applicable local code before altering or obstructing electrical equipment. The current NFPA NEC edition is 2026. NFPA
How Much Does This Project Cost?
This is one of those projects where cost depends more on what you already own than on the cabinet itself.
| Cost Area | Relative Cost |
|---|---|
| Cabinet-grade plywood | Medium |
| Screws + glue | Low |
| Primer + paint | Low–Medium |
| Sanding supplies | Low |
| Wall anchoring hardware | Low |
| New power tools, if required | High |
If you already own the tools and can build this cabinet from part of a plywood sheet, the material cost can remain relatively modest.
Buying a full set of tools specifically for one six-inch cabinet obviously changes the economics, so borrow or use existing tools where practical.
Tools Worth Having for This Build
Rather than buying gadgets just because they are available, these are the tools that have a genuine role in this project:
DEWALT 20V MAX Cordless Drill/Driver Kit — for pilot holes, cabinet assembly and appropriate installation fasteners.
Kreg Pocket-Hole Jig 320 — useful if you choose pocket-hole joinery for clean cabinet assembly.
IRWIN QUICK-GRIP Bar Clamps — keeps the narrow carcass aligned while fastening and while glue cures.
Swanson 7-Inch Speed Square — useful for marking cuts and checking assembly.
STANLEY FATMAX 25-Foot Tape Measure — especially important because the entire project depends on accurate gap measurements.
Affiliate disclosure: As an Amazon Associate, DIY SpaceUp earns from qualifying purchases. Some links below are affiliate links, which means we may earn a commission at no extra cost to you.
Common Mistakes to Avoid
| Mistake | Better Approach |
|---|---|
| Copying dimensions from another bathroom | Measure your own opening |
| Measuring width only once | Check bottom, middle and top |
| Building exactly to gap width | Allow installation tolerance |
| Ignoring countertop overhang | Measure the complete opening |
| Ignoring the baseboard | Account for it before cutting |
| Installing shelves randomly | Size compartments around actual items |
| Leaving plywood unfinished | Seal/paint surfaces and edges |
| Making the cabinet tall but unsecured | Use appropriate restraint |
| Blocking plumbing access | Check service points first |
| Adding unnecessary mechanisms | Keep this build simple and open |
Final Build Checklist
Before loading the shelves, verify:
- measurements were taken at several heights;
- cabinet fits without being forced;
- all joints are tight and square;
- shelves are securely supported;
- plywood edges are finished;
- cabinet is stable and appropriately restrained;
- plumbing and electrical access remain available;
- toilet and vanity still function normally;
- the bathroom-compatible finish has fully cured.
Then add the towels, toiletries and spare rolls.
What looked like a useless strip of floor now performs the job of a small linen cabinet.
And that’s the real lesson behind this project: in a small bathroom, useful storage isn’t always about finding more square footage. Sometimes it’s about looking more closely at the inches you already have.