
The old railroad-tie wall along this fence line did its job for a long time, and then it quit. The ties went soft and black, the top courses rolled forward, and every hard rain pushed a fan of mud out onto the lawn. Rebuilding it with more wood would only start the countdown again. This guide shows how to replace timber retaining wall with block the way the block manufacturers actually spell it out: a compacted base in a real leveling trench, a buried first course, a perforated drain behind the wall, clean drainage stone with filter fabric, setback and staggered joints, geogrid where the slope calls for it, backfill compacted in thin lifts, and caps glued down. It is the complete A-to-Z version: safety, drainage, materials, reinforcement, common mistakes and the products that help.
Important: The original social reel is an AI-generated renovation concept, and the images in this article are AI illustrations of the same yard. They show the look and a realistic build order, not a tested installation. We corrected the reel’s shortcuts using installation guides from Allan Block, Versa-Lok, Belgard and Pavestone plus extension and code sources, linked throughout. Your block system’s own installation guide always wins over any general rule here. Wall height limits, permits and engineering requirements depend on your local code. Costs and times are estimates, not quotes.
Affiliate Disclosure: As an Amazon Associate I earn from qualifying purchases. Product links in this article may earn a commission at no additional cost to you. Blocks, gravel and rental equipment are bought locally, so they are not linked.
Contents
- Replace Timber Retaining Wall with Block: Overview
- What the Reel Skipped and How We Fixed It
- Before You Start: 811, Height Limits and Permits
- Materials and Tools
- Step 1: Remove the Old Ties Safely
- Step 2: Dig the Leveling Trench and Compact the Base
- Step 3: Set the Buried First Course and the Drain Pipe
- Step 4: Drainage Stone, Filter Fabric and Backfill in Lifts
- Step 5: Geogrid Reinforcement
- Step 6: Caps, Adhesive and Final Grade
- Estimated Cost and Time
- Safety Checklist
- Common Mistakes to Avoid
- Maintenance
- Frequently Asked Questions
- Sources
Replace Timber Retaining Wall with Block: Overview
A segmental retaining wall (SRW) is a dry-stacked wall of interlocking concrete units. It holds soil back by its own weight, by the small setback each course gets, and by the gravel and compacted soil behind it. Taller walls, or walls with a slope or load above them, also use geogrid that ties the wall into the soil mass behind it. There is no mortar and no footing, but the base, drainage and compaction are not optional. Those three are what keep the wall straight after ten winters.
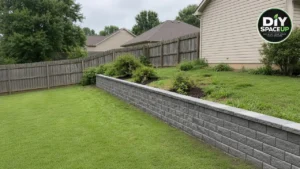
In this yard the new wall follows exactly the same line as the old ties: it runs from the near corner along the lawn back toward the wood fence, holding up the planting bed on the slope behind it. The lawn in front keeps its full width. The example in this guide is about 40 feet long, with roughly 30 inches of exposed block plus the cap and one buried course. That keeps the total height, measured from the bottom of the base, under 4 feet.
| Component | What it does | Key detail |
|---|---|---|
| Leveling trench | Gives the wall a stable, flat start | About 24 in wide; deep enough for the base plus the buried course |
| Compacted base | Spreads the weight and keeps the first course level | At least 6 in of compacted gravel on compacted subgrade |
| Buried first course | Stops the toe from kicking out | At least 6 in, or the manufacturer’s ratio (about 1 in per 8 in of height is a common rule) |
| Perforated drain pipe | Removes water collecting behind the wall | At the back of the base, behind the blocks, sloped to a daylight outlet |
| Drainage aggregate | Lets water fall to the pipe instead of pushing on the wall | About 12 in of clean 3/4-in angular stone behind the blocks, plus the block cores |
| Filter fabric | Keeps soil from clogging the stone | Non-woven geotextile between the stone and the retained soil |
| Setback and running bond | Leans the wall into the hill and ties units together | Built-in lip or pin sets the batter; joints staggered by half a block |
| Geogrid | Reinforces taller, sloped or loaded walls | Per the manufacturer’s chart; laid between courses, pulled taut into compacted backfill |
| Caps and adhesive | Finishes the top and locks the last course | Concrete/landscape block adhesive under every cap |
| Final grade | Keeps surface water from pouring over the wall | Soil sloped away from the cap or a shallow swale above the wall |
What the Reel Skipped and How We Fixed It
The reel looks great, and its finished wall is a good target. But several steps were skipped or shown in the wrong order. Here is what changed in this guide and in the step photos.
| What the reel showed | What we do instead | Why |
|---|---|---|
| No utility locate | Call 811 a few business days before digging | Gas, power and irrigation lines often run along fences |
| Ties pulled bare-handed and stacked anywhere | Gloves and eye protection; ties staged on a tarp for proper disposal | Old railroad ties are usually creosote-treated wood |
| Gravel spread at lawn level, barely compacted | Trench dug below grade, 6 in base compacted in lifts | A thin, loose base settles and the wall rolls |
| First course sitting on top of the ground | First course buried at least 6 in | Embedment keeps the toe from sliding forward |
| Drain pipe in front of the wall, no outlet | Perforated pipe behind the wall at the base, routed to daylight | A pipe in front can’t drain the soil behind |
| Soil dumped right against the blocks | About 12 in of clean stone plus filter fabric | Water pressure is the main reason small walls fail |
| Perfectly vertical stacking | Manufacturer’s setback, joints staggered | The batter leans the wall into the hill |
| Geogrid roll left on the lawn | Geogrid installed between courses per the chart | The slope above this wall acts like extra load |
| Backfill dumped in one pass | Backfill in 6–8 in lifts, compacted each time | Loose fill settles, and the cap line dips |
| Caps dry-set | Caps glued with block adhesive | Loose caps get kicked off or frost-heaved |
Before You Start: 811, Height Limits and Permits
Call 811 first. In the US, 811 is the free call-before-you-dig service. Request a locate a few business days before you dig and wait until all utilities have marked or cleared the area. Flags and paint show public lines only. Private lines such as irrigation, low-voltage lighting or a buried downspout pipe are on you.
Know the height limit. Treat about 3 to 4 feet as the DIY ceiling, and measure it the way the code does: from the bottom of the base (or footing) to the top of the wall, not just the part you can see. The model International Residential Code, section R105.2 exempts retaining walls up to 4 feet from the bottom of the footing to the top of the wall from a permit, unless the wall supports a surcharge such as a slope, a driveway, a building, a fence footing or a stack of firewood. Many towns change this number, so call your building department. Versa-Lok’s guidance is similar: an unreinforced wall is only stable to about 4 feet with level backfill, good soil and no load above it, and any wall over 4 feet should be reinforced and engineer-designed.
When to call an engineer. Get a licensed engineer and a permit if the wall will be taller than about 4 feet in total, if it holds up a driveway, parking or structure, if the slope above it is steep (roughly steeper than 3:1), if the soil is wet clay or fill, or if the wall is tiered close to another wall. For a wall like this one, about 3.5 feet in total height with a planted slope above it, the manufacturer’s geogrid chart is the minimum. If your chart shows the wall is past its unreinforced limit, follow the grid layout exactly.
Plan where the water goes. The drain pipe needs an outlet that daylights lower than the pipe, on your own property, and away from the house foundation and the neighbor’s yard. If you are already dealing with roof water here, see our guides to underground downspout drainage and to a French drain for backyard flooding.
Materials and Tools
Quantities below are for the example wall of about 40 feet. Use the block manufacturer’s calculator for your own length and height. Blocks, caps, base gravel, drainage stone and rental tools come from a local landscape yard or home center, so they are not linked. Everything that is genuinely sold on Amazon has a checked link.
| Item | Use | Where to get it |
|---|---|---|
| Segmental retaining wall blocks (one system, with lip or pins) | Wall courses | Local supplier, about 210–230 units for this example; buy one extra pallet row for cuts |
| Matching cap units | Top course | Local supplier, about 30–35 caps for 40 ft |
| Base gravel (3/4-in minus crushed stone or the manufacturer’s “wall rock”) | 6 in leveling pad | Local, about 2–3 tons |
| Clean 3/4-in angular drainage stone | 12 in drainage zone and block cores | Local, about 4–6 tons |
| Geogrid | Reinforcement layers per the chart | Geostar Bi-Directional Geogrid, 4 ft × 45 ft roll, or the grid your block maker specifies |
| Non-woven filter fabric (4 oz) | Between drainage stone and retained soil | Super Geotextile 4 oz Non-Woven Geotextile Fabric (choose a 3–6 ft width) |
| 4-in perforated drain pipe with sock, plus solid pipe to the outlet | Drain behind the wall | Local home center (no in-stock Amazon offer when checked; it is bulky to ship anyway) |
| Steel hand tamper | Compacting the trench, base and lifts | Truper 8 × 8 in Cast Steel Hand Tamper |
| Plate compactor | Faster base and backfill compaction | Rental yard, about one day |
| 48-in level | Checking courses front-to-back and side-to-side | STABILA 70A-2 48-in Level |
| Line levels | Setting the trench grade on a string | Stanley Aluminum Line Level, 3-Pack |
| Mason’s line | Straight wall line and course alignment | CMI Braided Nylon Mason Line, 250 ft |
| Rubber mallet | Seating blocks without chipping them | IVY Classic 32 oz Rubber Mallet |
| Landscape block adhesive | Gluing the caps (and the top course, if the guide says so) | Loctite PL 500 Landscape Block Adhesive, 6-Pack |
| Caulk gun | Applying the adhesive | Newborn 940-GTD Drip-Free Caulking Gun |
| Wrecking bar | Prying out old ties and spikes | Estwing 36-in Gooseneck Wrecking Bar |
| Round-point shovel | Digging the trench and moving backfill | Truper Tru Pro Round-Point Shovel |
| Tape measure | Layout and course heights | STANLEY FATMAX 25-ft Tape Measure |
| Marking paint | Marking the wall line and outlet route | Rust-Oleum Inverted Marking Paint, 2-Pack |
| Chemical-resistant gloves | Handling creosote ties and gravel | SHOWA 7166R Nitrile-Coated Gloves |
| Safety goggles | Prying, cutting and tamping | DEWALT Concealer Anti-Fog Safety Goggles |
| N95 respirator | Cutting block (silica dust) and dusty demolition | 3M Aura 9205+ N95 Respirators, 10-Pack |
| Wheelbarrow, tarp, wet saw or masonry blade | Hauling stone, staging ties, cutting blocks | What you own, or rent the saw |
Step 1: Remove the Old Ties Safely
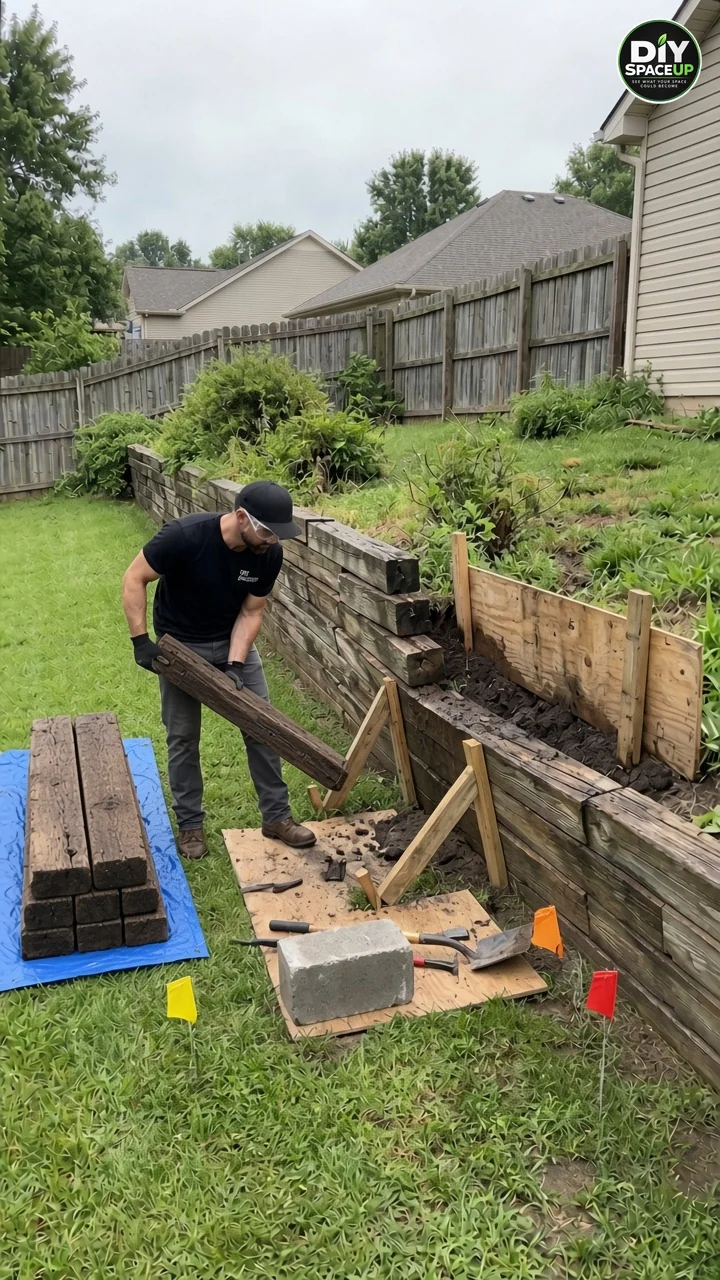
Most old railroad ties were treated with creosote. Handle them with chemical-resistant gloves, long sleeves and eye protection, and wash up before eating. The EPA says treated wood should never be burned, and Extension guidance at Ask Extension adds that creosote ties are not meant for garden borders, raised beds or mulch. Do not reuse them in the vegetable garden or play areas, and do not cut them up for firewood. Many areas accept household quantities in the trash, while others send them to a transfer station or construction-and-demolition landfill. Ask your local solid-waste office and stage the ties on a tarp until pickup.
Pull ties from the top down. Use a wrecking bar to pop the long spikes or rebar pins, and cut any that won’t come out flush with the ground. Work in short sections. As each tie comes out, the bank behind it is exposed. On a short wall like this, cutting the bank back to a gentle angle (benching) or bracing it with plywood and stakes keeps it from slumping onto your work area. Never get into a trench or against a cut that is taller than your knees and could collapse. If the cut gets deep or the soil is sandy or wet, follow the OSHA excavation guidance and shore or slope it properly, or hire a contractor.
Pull out the old deadmen (the ties that ran back into the hill), roots and any soft, organic soil behind the wall line. Allan Block’s guide says to remove wet, clay-rich or organic soil from the base area and replace it with compactable base material.
Step 2: Dig the Leveling Trench and Compact the Base
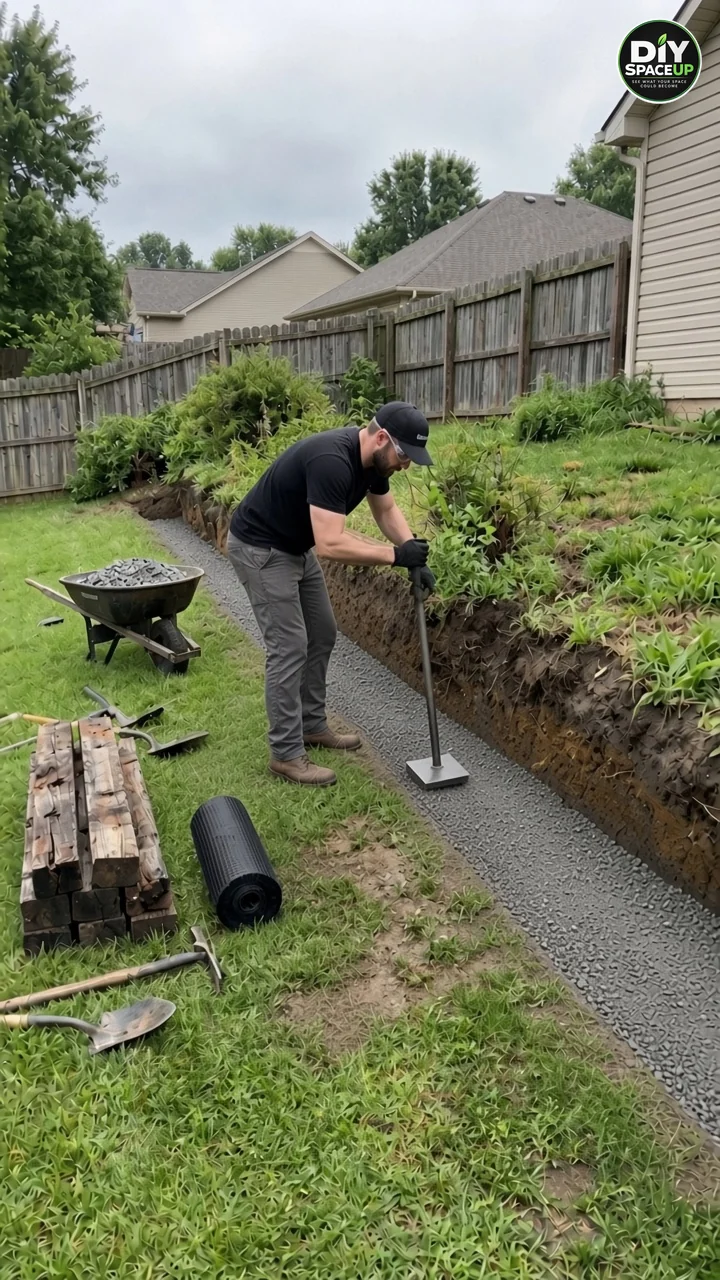
Snap a mason’s line along the front face of the new wall, on exactly the same line as the old one. Then dig the leveling trench: about 24 inches wide (both Allan Block and Versa-Lok use a 24-in pad for small walls), and deep enough for 6 inches of compacted base plus the buried part of the first course. For this wall, that’s about 12 inches below the lawn at the front edge. Allan Block’s rule of thumb for the trench depth is 6 inches plus 1 inch per foot of wall height.
Compact the bottom of the trench (the subgrade) first. Then add base gravel in 3–4 in lifts and compact each lift with a hand tamper or a rented plate compactor until it stops moving and your boot leaves no print. Allan Block calls for at least two passes over every lift, and its spec book targets 95% Standard Proctor. The finished base must be at least 6 inches thick after compaction.
Level the base front to back and side to side with a long level or a string and line level. If the lawn slopes along the length of the wall, step the base down in increments of one block height rather than tilting it. Start at the lowest point and work up.
Step 3: Set the Buried First Course and the Drain Pipe
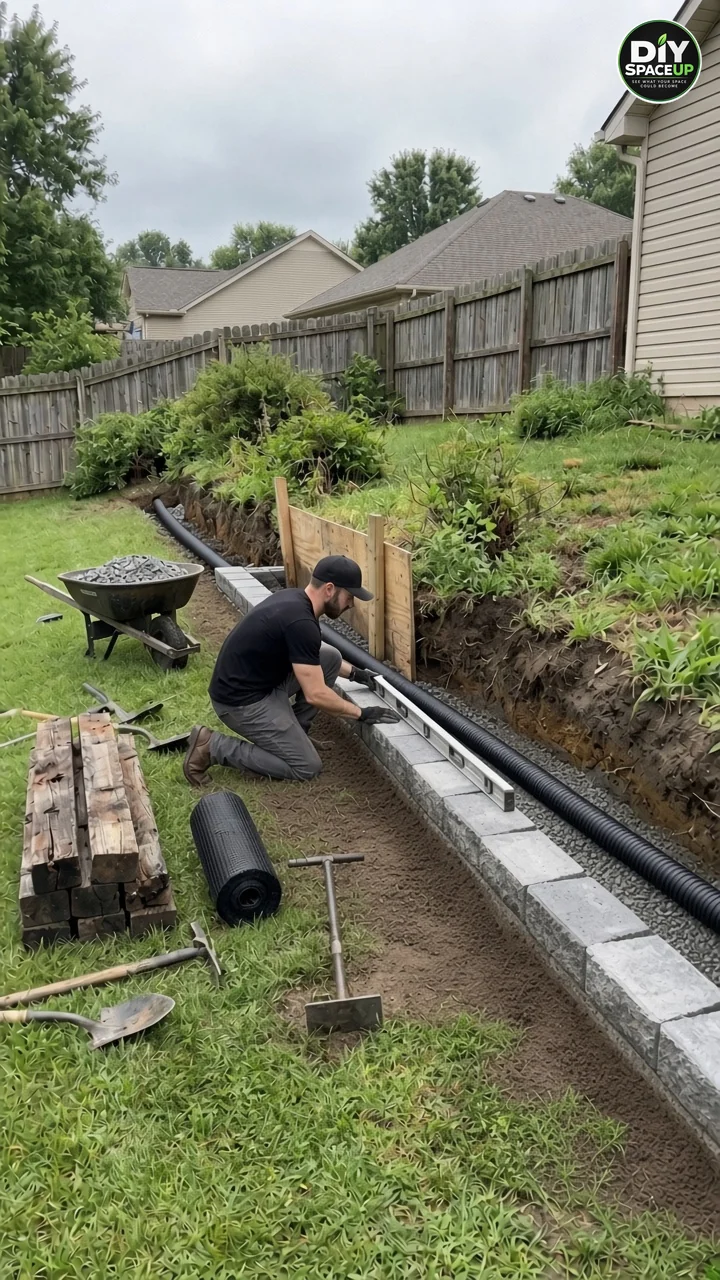
Lay the first course on the compacted base, tight against the string line, with the lip or pins oriented the way the guide shows. Most systems are flipped or the lip is removed for the base course so it sits flat. Check every block front to back and side to side, and tap it down with a rubber mallet. This is the course that controls the rest of the wall, so take your time here.
Burial depth. The first course must be buried at least 6 inches. Pavestone and several dealer guides use about 1 inch of burial for every 8 inches of wall height. Allan Block uses 1 inch per foot of height (minimum 6 in) and Versa-Lok uses about one-tenth of the exposed height. Use your manufacturer’s number. On sloping ground in front of the wall, add more burial.
Drain pipe. Lay a 4-in perforated pipe (with a filter sock in fine soils) on the base at the back of the trench, behind the blocks. Slope it at least slightly (about 1% is plenty) toward the outlet end, and switch to solid pipe where it leaves the wall and runs to daylight. Versa-Lok places a drain on walls taller than about 3 feet with outlets every 40–50 feet; Allan Block requires it for reinforced walls, walls over 4 feet and sites with poor drainage. On a sloped bed like this one, put it in. It is cheap insurance.
Fill the block cores and the space right behind the first course with clean drainage stone, then backfill and compact soil in front of the course so it is truly buried. Sweep the top of the blocks clean before setting the next course. One pebble can throw the course out of level.
Step 4: Drainage Stone, Filter Fabric and Backfill in Lifts
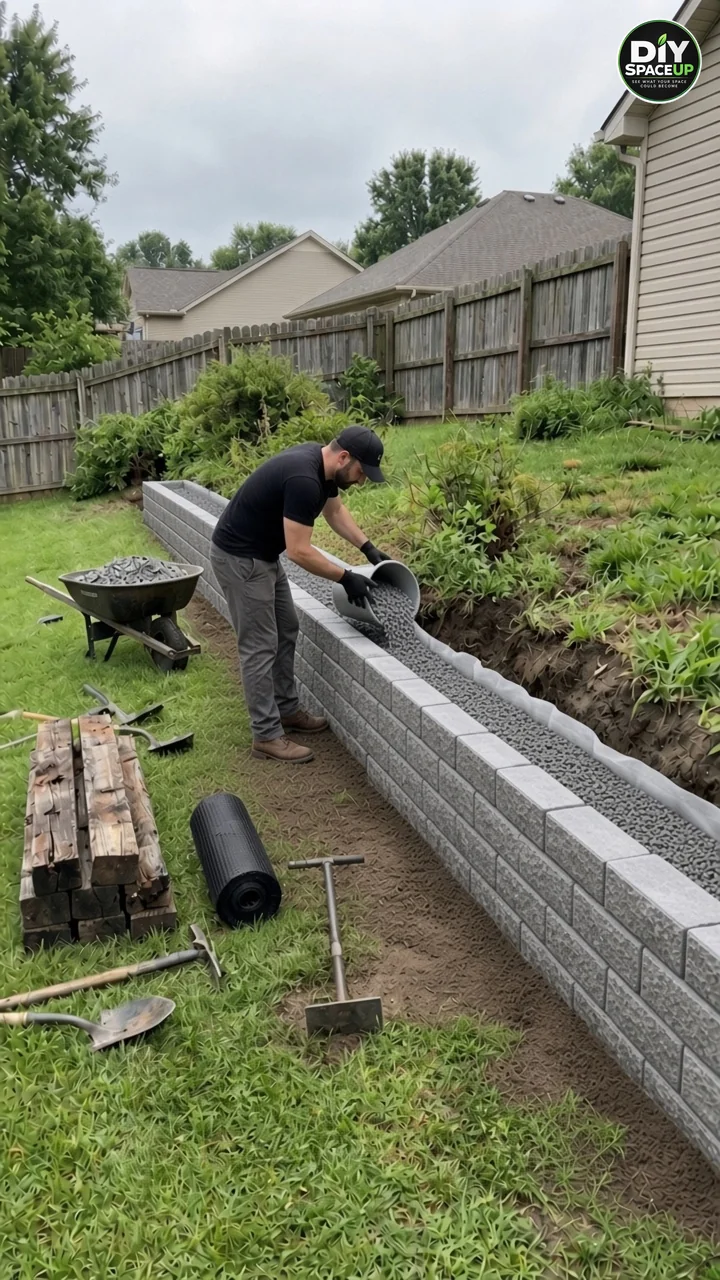
Set each new course so its joints are staggered by about half a block from the course below (running bond), and let the lip or pins pull every course back by the manufacturer’s setback. On Versa-Lok that’s about 3/4 in per course. Never fight the setback to make the wall vertical.
After each course, fill the cores and a zone about 12 inches deep behind the blocks with clean 3/4-in angular stone. Behind that stone, line the cut bank with a non-woven geotextile so fine soil can’t wash into the stone and clog it. Allan Block says fabric is needed when the retained soil is fine or sandy; Versa-Lok and several dealer guides show it as standard practice. On clay-silt garden soil like this, use it.
Behind the fabric, backfill with the excavated soil (or better soil, if yours is wet clay) in lifts of no more than 6–8 inches. Compact every lift with the tamper or plate compactor before setting the next course, working from the back of the blocks toward the slope. Keep heavy compactors about 3 feet back from the block face, and compact the stone zone right behind the blocks with a hand tamper. Do not dump all the fill at the end. Compaction in lifts is what stops the soil from settling and pushing the wall out of line.
Step 5: Geogrid Reinforcement
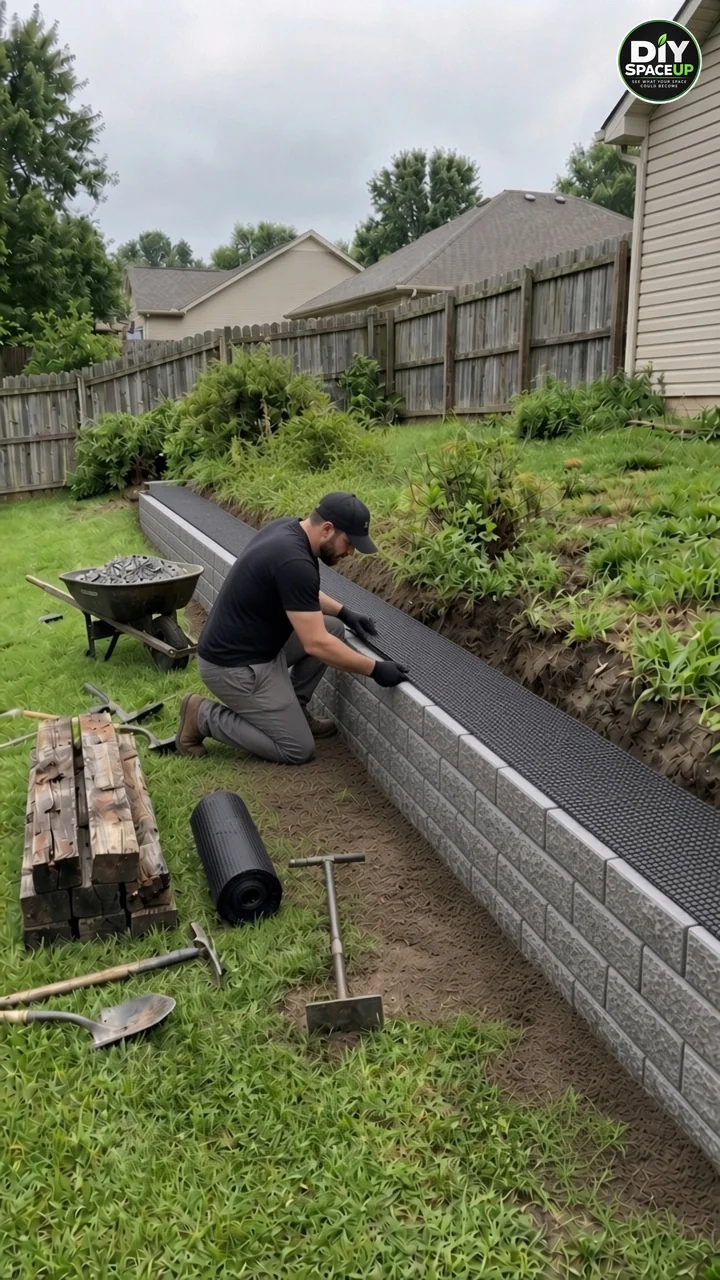
Geogrid is a strong polymer mesh. Laid between courses and buried in compacted backfill, it turns the soil behind the wall into part of the wall. Manufacturers require it on walls above their unreinforced limit (about 4 feet on level ground) and on lower walls with a slope, driveway, fence or other load above them. This wall has a planted slope rising behind it, so it gets grid per the chart.
- Use the chart. Your block system’s chart gives the layers (often every second or third course), the length back into the soil (often about 60–70% of the wall height, never less than about 3 feet for small walls in many charts), and the grid strength for your soil and slope.
- Direction matters. Roll the grid out with its strong direction perpendicular to the wall face, back into the hill.
- Start near the face. Lay it on a clean course, about 1 inch from the front face, then set the next course on top to lock it in.
- Pull it taut. Pull the back edge tight and pin or weight it, then backfill. No wrinkles, no gaps between strips along the wall and no overlaps on the same course.
- Protect it. Place at least 6 inches of fill on top before driving any equipment over it, then compact as usual.
Geogrid is only part of the system. If your wall needs it, it also needs good backfill, drainage and compaction. If the chart shows a wall height or load that is past what you’re comfortable with, that is the point where an engineered design pays for itself.
Step 6: Caps, Adhesive and Final Grade
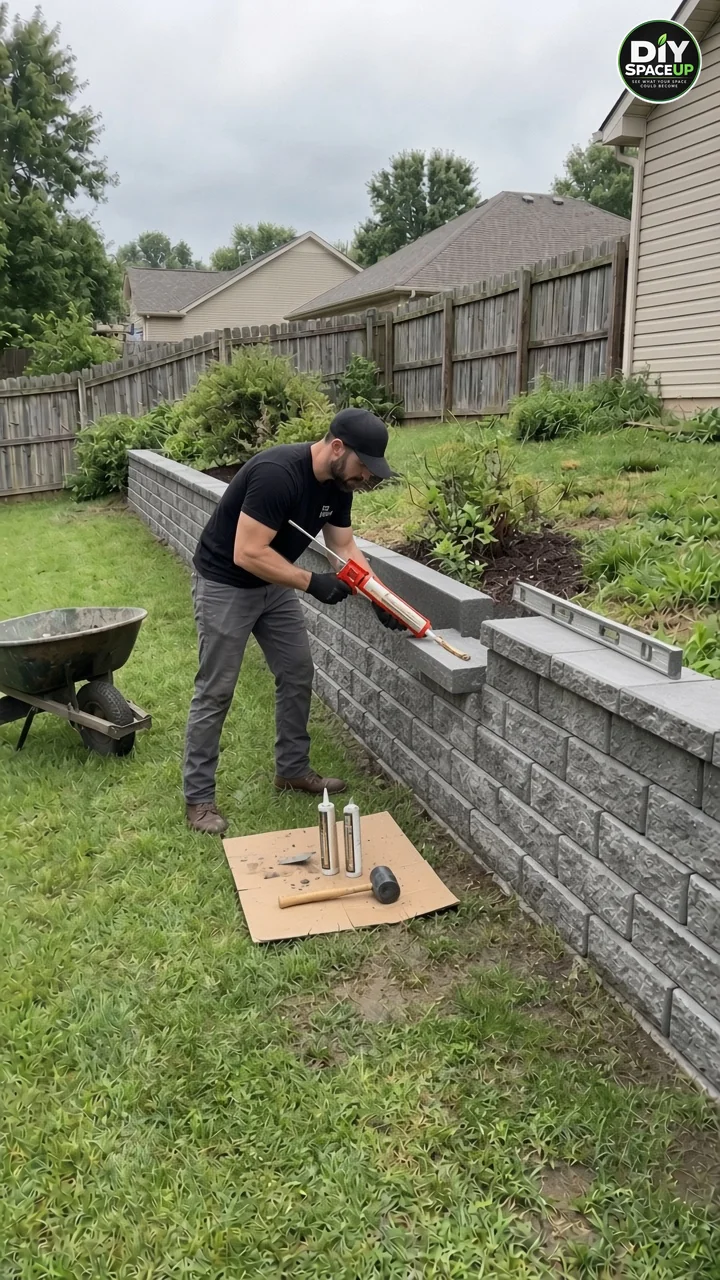
Brush the top course clean and dry-fit the caps first, starting at the lowest point or at a corner, as Belgard’s guide suggests. Cut any caps needed on curves. Then lift each cap, run two beads of concrete or landscape block adhesive along the top course, and set the cap back in place with a slight twist. Check it with a level, and tap it with the rubber mallet if needed. Some guides also glue the top course to the course below. Follow your system’s guide.
Finish the backfill with about 6 inches of lower-permeability topsoil over the drainage stone, as the Anchor/Belgard guidance shows, so surface water doesn’t pour straight into the drainage zone. Shape the soil above the wall so it slopes back away from the cap, or make a shallow swale a foot or two behind the wall that carries water to one end. Water should never sheet over the face of the wall. Mulch and plant the bed, keeping large shrubs and trees back from the wall so their roots don’t push on it.
Estimated Cost and Time
If you plan to replace timber retaining wall with block yourself, these are 2026 planning ranges for a wall of about 40 feet, roughly 3.5 feet in total height including the buried course. Local block and stone prices vary widely, so get a quote from your supplier.
| Item | Estimated range |
|---|---|
| Blocks and caps | $1,100–$2,400 |
| Base gravel and drainage stone (delivered) | $350–$800 |
| Geogrid, filter fabric, pipe and fittings | $300–$650 |
| Adhesive, string, small tools and safety gear | $150–$350 |
| Plate compactor and saw rental | $100–$250 |
| Tie disposal (dump fees or bulk pickup) | $50–$200 |
| Total DIY | About $2,050–$4,650 |
| Typical installed by a contractor | Often 2–3 times the DIY total |
Time: plan about 3 to 4 weekends for two people: one for removal and trench, one for the base and first course (the slowest, most careful part), and one or two for the courses, grid, backfill and caps. Add a few business days for the 811 locate and time for any permit.
Safety Checklist
- 811 locate requested, all utilities marked or cleared before digging
- Total height checked against local code; engineer and permit if over the limit or loaded
- Chemical-resistant gloves, long sleeves and eye protection for tie removal; ties never burned or reused in beds
- Cut bank benched or shored; nobody works in an unprotected trench deeper than knee height
- N95 respirator, eye and hearing protection when cutting block (wet cutting cuts dust)
- Lift with your legs; blocks can weigh 30–80 lb each. Team-lift and use a cart or dolly
- Plate compactor kept on level ground with steel-toe or sturdy boots
- Kids and pets kept away from open trenches and stacked block
Common Mistakes to Avoid
| Mistake | Better approach |
|---|---|
| Setting the first course on top of the lawn | Bury it at least 6 in, or the manufacturer’s ratio |
| A thin or loose base | At least 6 in of gravel compacted in lifts on compacted subgrade |
| Drain pipe in front of the wall, or with no outlet | Pipe at the back of the base, sloped to a daylight outlet |
| Backfilling with soil right against the blocks | 12 in of clean stone plus filter fabric |
| Stacking perfectly vertical | Use the built-in setback; stagger every joint |
| Skipping geogrid on a sloped or loaded wall | Follow the manufacturer’s chart, or have it engineered |
| Dumping all the backfill at the end | Backfill and compact in 6–8 in lifts with every course |
| Measuring height from the lawn | Measure from the bottom of the base to the top of the cap |
| Burning or reusing creosote ties | Dispose of them under local rules |
| Letting water sheet over the wall | Slope the soil back from the cap or add a small swale |
| Mixing block brands or ignoring the system’s guide | Use one system and its own installation guide |
Maintenance
Walk the wall after the first few heavy rains and once a year. Check that the outlet is running clear and isn’t buried by mulch or grass clippings. Look for any cap that has loosened and re-glue it. Watch for bulges, a cap line that dips, or wet spots or mud at the base. Those mean water or settlement is getting where it shouldn’t, and you should find out why early. Keep the soil above the wall graded back, and keep downspouts from discharging right behind it. If you also have pavers sinking nearby, our guide to fixing a sinking paver patio uses the same base and drainage logic. For stone paths and patios around the new wall, see how to build a DIY paver patio and walkway, and for handling runoff in a side yard, our side yard dry creek bed build.
Frequently Asked Questions
Can I replace a timber retaining wall with block myself?
Yes, for walls up to about 3–4 feet total height on good soil without a driveway or structure above. Above that, or with a steep slope or a load on top, local code usually requires an engineer and a permit.
How deep should the first course be buried?
At least 6 inches. A common rule is about 1 inch per 8 inches of wall height; Allan Block uses 1 inch per foot and Versa-Lok about one-tenth of the height. Use your manufacturer’s number, whichever is greater.
Where does the drain pipe go?
Behind the wall, at the back of the leveling base, inside the drainage stone. It slopes to a solid pipe that daylights at a lower point on your property. A pipe in front of the wall does nothing for the soil behind it.
Do I need filter fabric behind a retaining wall?
Put non-woven fabric between the drainage stone and the retained soil whenever the soil is fine, silty, clayey or sandy, which covers most yards. It stops soil from clogging the stone.
When does a small wall need geogrid?
When it is above the manufacturer’s unreinforced height (often about 4 feet on level ground) or when there is a slope, driveway, fence or other load above it. The block system’s chart tells you the layers and length.
What should I do with old railroad ties?
Don’t burn them, and don’t reuse them for garden beds or play areas. Wear gloves to handle them, and dispose of them according to your local waste rules, usually trash or a C&D landfill.
Can I glue every course instead of using geogrid?
No. Adhesive keeps caps and top courses from shifting, but it does not replace reinforcement, drainage or base compaction.
How long does a block retaining wall last?
A properly built segmental wall can last decades. The base, drainage and compaction decide that, far more than the block itself.
Sources
- Allan Block: Basic Residential Installation
- Versa-Lok: Standard installation guide and design guidance
- Belgard: retaining wall installation guides
- Pavestone: retaining wall installation guidance
- International Code Council: IRC R105.2 work exempt from permit
- US EPA: Creosote
- Ask Extension: Railroad ties in landscaping
- Call 811: Know what’s below
- OSHA: Trenching and excavation safety