
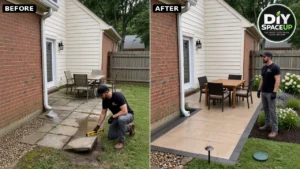

Every time it rained, this little patio corner got worse. The downspout on the brick wall emptied straight onto the old concrete squares, water slipped through the joints, and the pavers closest to the lawn slowly sank into soft, muddy soil. By midsummer there was a puddle where a chair should be, one paver had tipped up like a trap door, and the table by the back door had stopped getting used.
The opportunity was obvious once we looked at where the water was going. This is a small, sheltered spot right outside the door, with a brick wall, a fence for privacy and room for a dinner table. Fix the water first, then rebuild the surface on a real base, and it becomes the easiest outdoor dining spot on the property. This guide walks through how to fix a sinking paver patio the way paver manufacturers and the interlocking concrete paver industry say to build one: diagnose the cause, carry the roof water away from the house, dig to the right depth, compact a gravel base in layers, screed a thin sand bed, and lay large-format pavers with a charcoal border inside a solid edge restraint.
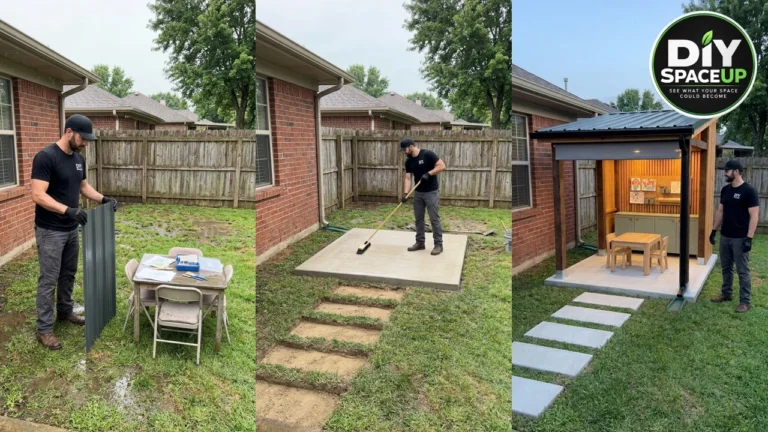
Important: The original social post is an AI-generated renovation concept, and the photos in this article are AI illustrations too. They show the sequence, not a tested installation. The video also skipped or got wrong several steps that matter (no compaction, no visible base, and a downspout extension running along the foundation). This article corrects them, and the full list is in What the Video Got Wrong. Base depths, slopes and drainage distances below come from manufacturer guides, ICPI/CMHA guidance, the residential code and public agencies, linked where they are used. Your soil, slope, climate and local rules decide the final numbers.
Affiliate Disclosure: As an Amazon Associate I earn from qualifying purchases. Product links in this article may earn a commission at no additional cost to you.
In this guide
- Sinking Paver Patio Makeover: What We’re Building
- Why the Old Pavers Sank
- The Numbers That Matter: Slope, Depth and Layers
- Where Should the Roof Water Go?
- Materials and Tools
- Step-by-Step: Rebuild It in the Right Order
- What the Video Got Wrong
- Estimated Cost and Time
- Common Mistakes to Avoid
- Safety Checklist
- When to Call a Pro
- Maintenance
- Frequently Asked Questions
Sinking Paver Patio Makeover: What We’re Building
Nothing about the house changes. The red brick wall, the white downspout, the cream siding, the glass door and carriage lamp, the wood fence, the trees and the river-stone gravel strip at the front all stay where they are. What changes is everything under your feet and where the roof water ends up.
| Component | What it does | Key detail |
|---|---|---|
| Buried downspout line | Carries roof water from the downspout to a safe release point in the lawn | Solid (non-perforated) pipe with continuous fall, installed before the patio base |
| Pop-up drainage emitter | Lets the water out at the end of the line and closes when flow stops | Set flush with the lawn, downhill and away from the house and the neighbors |
| Compacted subgrade | Firm native soil at the bottom of the excavation | Soft or wet spots dug out and replaced before any gravel goes in |
| Aggregate base | The structural layer that actually carries the patio | Dense-graded crushed stone, placed and compacted in lifts |
| Bedding sand | A thin, even setting bed for the pavers | About 1 in. of coarse concrete sand, screeded, never used to fix base dips |
| Edge restraint | Stops pavers and sand from creeping outward | Installed on the compacted base, tight to the border pavers |
| Large-format pavers | The beige field of the patio | Laid on a slope away from the house |
| Charcoal border | Frames the field and meets the edge restraint | Soldier or sailor course along the outside edges |
| Joint sand | Locks the pavers together | Polymeric sand applied per the manufacturer’s instructions |
| Landscaping bed and path lights | Softens the edge and lights the step from patio to lawn | Mulch, hydrangeas, grasses, low-voltage path lights |
| Dining set for four | The reason for the whole project | Square table with four chairs, sized to the patio |
If you are building a brand-new patio instead of rebuilding a failed one, our paver patio and walkway guide covers layout from scratch. This article focuses on what’s different when water has already wrecked the old one.
Why the Old Pavers Sank
Pavers rarely sink because of the pavers. They sink because what’s under them moved. ICPI/CMHA’s construction spec puts it plainly: compaction of the soil and the base is critical to minimizing settlement. In this corner, the photos and the setting point to several causes stacked on top of each other.
| Likely cause | What you see | What fixes it |
|---|---|---|
| Roof water dumped onto the patio | Downspout ending at the pavers, puddles and mud at the low corner | Carry the water away in a solid pipe or a code-compliant extension |
| Thin or missing base | Pavers sitting almost directly on soil, rocking underfoot | Excavate deep enough for a real compacted aggregate base |
| Poor compaction | Dips that grow after every storm | Compact the subgrade, then the base in lifts with a plate compactor |
| Saturated or weak soil | Mud that pumps up through joints, soft spots under foot | Dig out soft pockets; on clay, follow manufacturer guidance for thicker base and geotextile |
| No edge restraint | Edge pavers drifting into the lawn, joints opening | Install a restraint along every edge not held by a wall |
| Wrong slope | Water sitting on the surface or running toward the house | Set string lines to a slope away from the house |
Before you rebuild, lift two or three of the worst pavers and look. If you find little or no gravel, or gray mud where gravel should be, the base has to be rebuilt. Re-sanding the joints or stuffing more sand under one paver only hides the problem until the next storm.
The Numbers That Matter: Slope, Depth and Layers
These are the published starting points. Your paver manufacturer’s installation guide for the exact product you buy has the final say, and local code may add requirements.
| Item | Published guidance | Source |
|---|---|---|
| Surface slope away from the house | Minimum 1.5% (about 3/16 in. per foot); 2% (1/4 in. per foot) is common and drains better | Belgard Technical Resource Guide; Techo-Bloc guide |
| Code slope near the foundation | Impervious surfaces within 10 ft of the foundation slope at least 2% away from the building | IRC R401.3 (as adopted locally) |
| Compacted base, pedestrian patios | At least 4 in. over well-drained soils; thicker in cold climates or on wet or weak soils | ICPI/CMHA Tech Spec 2 |
| Base by soil type (residential patios) | 4–6 in. minimum on sandy/gravelly soil; 6–8 in. minimum on clayey or silty soil | Techo-Bloc paver guide |
| Lift thickness | 4–6 in. lifts with a 7,000 lbf reversible plate; thinner lifts with a 5,000 lbf plate | ICPI/CMHA Tech Spec 2 |
| Base compaction target | At least 98% standard Proctor density for pedestrian areas | ICPI/CMHA Tech Spec 2 |
| Bedding layer | Nominal 1 in. uncompacted concrete sand (ASTM C33); no masonry sand, screenings or stone dust | ICPI/CMHA Tech Spec 2; Belgard |
| Base flatness | Within ±3/8 in. under a 10-ft straightedge | ICPI/CMHA Tech Spec 2; Techo-Bloc |
| Excavation beyond the edge | Over-excavate past the paver edge; Techo-Bloc says the base behind the edge should be as wide as the base is thick | Belgard; Techo-Bloc |
Sources: ICPI/CMHA Tech Spec 2, Belgard Technical Resource Guide, Techo-Bloc paver installation guide, Unilock basic paver installation guide, and the IRC R401.3 drainage text.
Worked example: how deep to dig
This is a planning example only, not a measurement from the photos. Measure your own pavers and soil. Say your pavers are 2 3/8 in. thick (check the product sheet), you plan 6 in. of compacted base because the soil is clay, and you use 1 in. of bedding sand. Excavation depth below the finished patio surface is about 6 + 1 + 2 3/8 = 9 3/8 in., before any extra for soft spots. Because the finished surface slopes, the bottom of the excavation should follow the same slope. Techo-Bloc notes the excavation should mirror the final grade of the pavement.
Worked example: how much fall
If the patio runs 12 ft out from the house at 2%, the far edge sits about 12 × 1/4 in. = 3 in. lower than the edge at the wall. At 1.5% it’s about 2 1/4 in. Make sure that fall still leaves the patio below the door threshold and the bottom of the siding, and that the water has somewhere lower to go once it leaves the patio.
Where Should the Roof Water Go?
The video’s fix was a black extension pipe lying along the base of the brick wall and emptying into the gravel strip at the front. That moves the water a few feet, but it keeps it right against the foundation the whole way. Roof water needs to leave the house, not travel along it.
The U.S. Department of Energy’s Building America Solution Center gives two benchmarks: downspouts that end at least 5 ft from the foundation, or that tie into an underground catchment system at least 10 ft away, with the lateral piping made from non-perforated pipe. The IRC R401.3 text requires surface drainage to go to a storm sewer conveyance or another approved point of collection that does not create a hazard. And the EPA’s Soak Up the Rain program notes that redirecting downspouts isn’t right for every site, so check local rules and where the water will end up.
| Option | When it fits | Watch out for |
|---|---|---|
| Solid surface extension or splash block | The lawn already slopes away and there’s room for the water to spread | Trip hazard; can’t cross the patio; still needs to end well away from the wall |
| Buried solid pipe to a pop-up emitter (our choice) | There is a lower spot in the lawn you can reach with continuous fall | Pipe must slope the whole way; emitter downhill, away from house and neighbors |
| Buried solid pipe to daylight | The yard drops off to a safe outlet, swale or approved drainage path | Outlet must not erode soil or cross a property line |
| Rain garden | Soil can soak up water and there’s a suitable spot well away from the house | Site and size it properly; see our rain garden guide |
| Dry well or infiltration pit | Soils drain well, groundwater is deep and local rules allow it | Some designs are regulated as Class V stormwater drainage wells (EPA); check first |
| Rain barrel | You want to reuse water for the garden | Needs an overflow routed the same safe way |
Neighbors matter too. Portland’s downspout rules, as one real-world example, require the end of an extension to be at least 5 ft from the neighbor’s property line and 10 ft from structures on adjacent property, and they say not to run extensions across walkways or patios. Your city’s numbers may differ, so treat that as a reason to check, not as a rule for your yard (Portland.gov downspout disconnection). For a deeper dive into underground lines, see our underground downspout drainage guide. If the whole yard stays soggy, a drainage channel or a French drain may be the bigger fix.
One rule that’s easy to break by accident: roof water goes in solid pipe, not perforated pipe. Perforated pipe leaks water along its whole length, which is the opposite of what you want next to a foundation. Building America’s guidance specifically calls for non-perforated lateral piping for roof runoff.
Materials and Tools
Bulk materials (base stone, bedding sand, pavers) come from a local landscape supplier, and the supplier can tell you what dense-graded base and ASTM C33 concrete sand are called in your area. Heavy tools like a plate compactor and a wet saw are usually rented.
| Item | Why you need it | Notes | Where to get it |
|---|---|---|---|
| Large-format concrete pavers + charcoal border pavers | Field and border | Buy 10–20% extra for cuts and breakage, the waste allowance HomeAdvisor suggests | Local supplier |
| Dense-graded aggregate base | Structural base | Quantity = area × compacted thickness, plus extra for compaction | Local supplier |
| Coarse concrete sand (ASTM C33) | Bedding layer | Not masonry sand, screenings or stone dust | Local supplier |
| Geotextile (if soil calls for it) | Keeps clay or silt from mixing into the base | Techo-Bloc recommends it over clay-like soils | Check on Amazon |
| Edge restraint + spikes | Holds the border in place | Plastic, aluminum or steel; follow the maker’s spike spacing | Check on Amazon |
| Polymeric joint sand | Locks joints, helps resist weeds and insects | Pick a color that suits beige field and charcoal border | Check on Amazon |
| 4-in. solid drain pipe + fittings | Downspout line | Match pipe type to the fittings (sewer-and-drain vs. Schedule 40) | Local supplier |
| Downspout adapter | Connects the downspout to the pipe | Measure your downspout first (2×3 vs. 3×4 in.) | Check on Amazon |
| Pop-up drainage emitter | Releases water in the lawn | Set flush with the turf | Check on Amazon |
| Plate compactor (rental) | Compacts subgrade, base and pavers | Ask for a protective pad or roller attachment for the pavers | Rent locally |
| Stakes, mason line, line level, 4-ft level, straight 2×4 | Layout, slope and screeding | Two 1-in. pipes as screed rails | Check on Amazon (stakes) Check on Amazon (mason line) Check on Amazon (line level) Check on Amazon (4-ft level) Local supplier (2×4) |
| Tape measure, shovels, rake, wheelbarrow, broom | General work | Check on Amazon (tape measure) Check on Amazon (shovel) Check on Amazon (rake) Check on Amazon (wheelbarrow) Check on Amazon (broom) | |
| Rubber mallet | Seats pavers without chipping | Non-marring head | Check on Amazon |
| Wet saw or cut-off saw (rental) | Cutting pavers | Wet cutting controls dust; wear a respirator for dry cuts | Rent locally |
| Work gloves, eye and hearing protection, knee pads | Safety | Pavers and base stone are heavy and abrasive | Check on Amazon (gloves) Check on Amazon (safety glasses) Check on Amazon (hearing protection) Check on Amazon (knee pads) |
A few tools we’d actually reach for on this job: a STANLEY FATMAX 25-Foot Tape Measure for layout and depth checks, Mechanix Wear Original Work Gloves for hauling base stone and pavers all weekend, and a non-marring ESTWING 18 oz Deadhead Rubber Mallet for seating pavers.
Step-by-Step: Rebuild It in the Right Order
The order matters more than any single trick. The water line goes in before the base, the base is compacted before the sand, the edge restraint goes in before the joints are filled, and the furniture comes last.
Step 1: Diagnose Why the Pavers Sank
Wait for a rain, or run a hose into the gutter, and watch where the water goes. In this corner it came straight out of the downspout onto the pavers and collected at the low corner near the lawn. Lift the worst pavers and check what’s underneath: how much gravel, how wet, how soft. Push a screwdriver or steel rod into the soil in a few spots. If it slides in easily in one place and stops hard in another, you’ve found the soft pockets. Take photos and notes; they’ll guide how deep you dig.
Also check the house side. Look for water stains on the foundation, dampness in a basement or crawl space under this wall, and whether the soil next to the wall slopes toward the house. If you find any of those, put the call to a pro higher on your list (see When to Call a Pro).
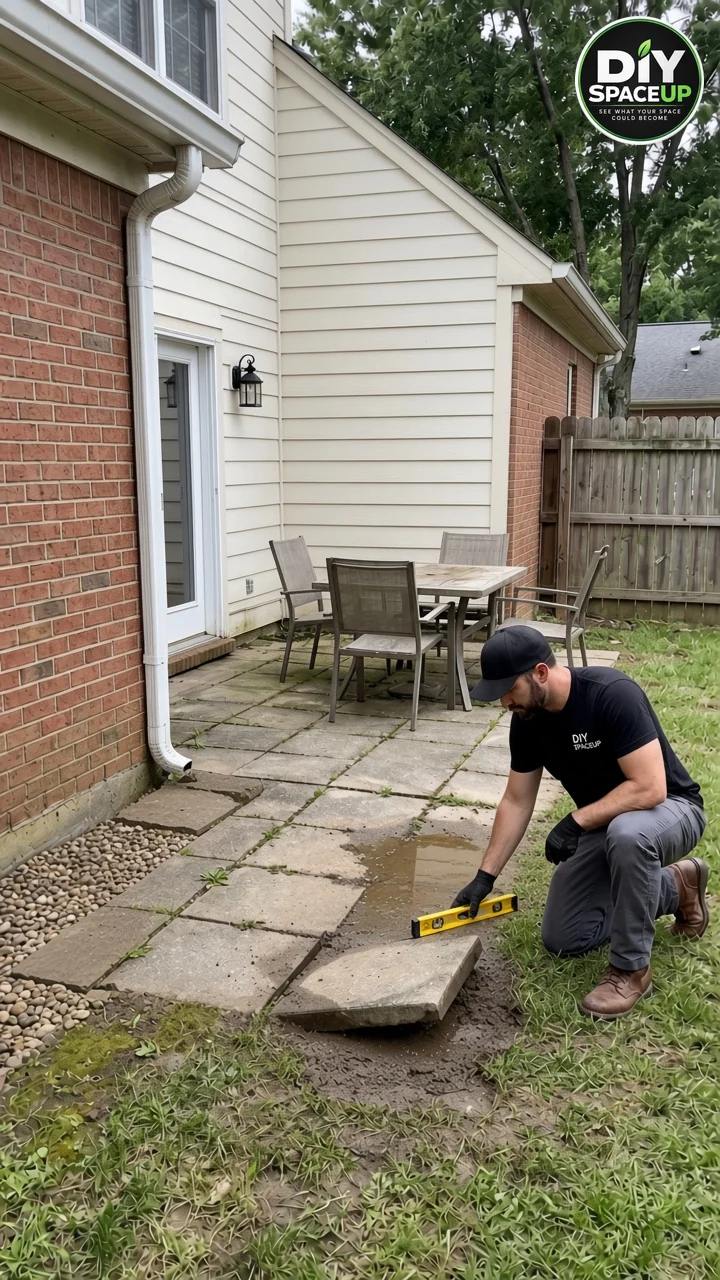
Step 2: Call 811 and Plan the Water Route
Contact 811 a few business days before digging. 811 says to wait until every utility has responded and to dig carefully around the marks. Shallow digging is still digging. Then decide where the roof water will go. Find the lowest safe point you can reach with continuous fall, away from the house and away from the neighbors. Measure the distance and the drop with a tape and a line level, and write down your target slope for both the patio and the pipe. Check local rules on downspout discharge and on whether a patio this size needs a permit.
Step 3: Remove the Old Pavers, Excavate and Set String Lines
Pull the old pavers and stack them on a tarp. Concrete squares in good shape can be reused elsewhere or recycled. Set wooden stakes just outside the patio and run tight mason lines at the finished paver height, sloping away from the house at your chosen slope. Belgard recommends setting the lines at finished elevation and measuring every depth from them. Excavate to the depth from your worked example, extending the dig past the edges so the base can run out under the edge restraint. Keep the bottom of the excavation parallel to the string lines.
In the video, a long board and level are dragged across raw dirt. That’s fine for checking grade, which is all the board is doing in our photo, but it isn’t screeding. Screeding happens later, on bedding sand over a compacted base.
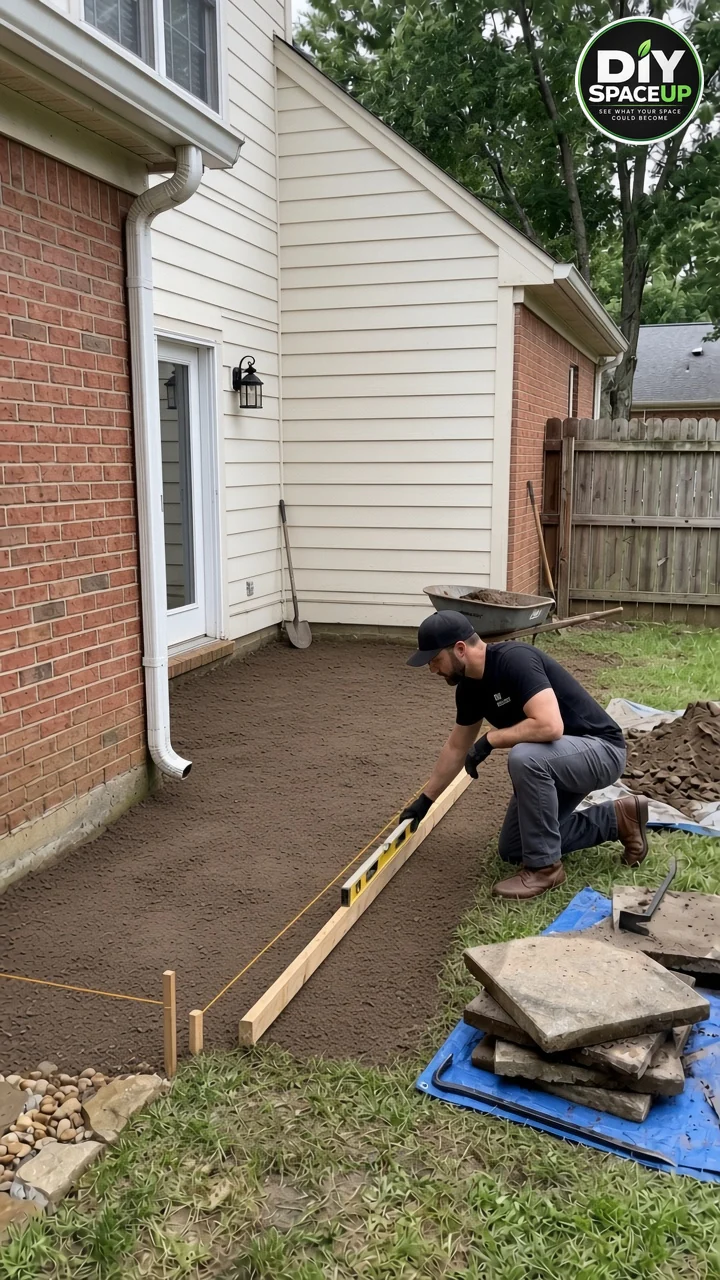
Step 4: Compact the Subgrade and Fix Soft Spots
Run the plate compactor over the bare soil. Any spot that stays soft, pumps water or ruts under your boots needs to be dug out and replaced with compacted base material. Belgard calls for compacting the subgrade and making sure it slopes 1–2% in the direction you want the water to go. On clay or silty soil, Techo-Bloc recommends a geotextile over the subgrade to keep it from mixing into the base. Don’t compact or build on frozen or saturated soil. ICPI/CMHA says frozen material shouldn’t be used and nothing should go on a frozen subgrade, so wait for it to dry out.
Step 5: Reroute the Downspout Before the Base Goes In
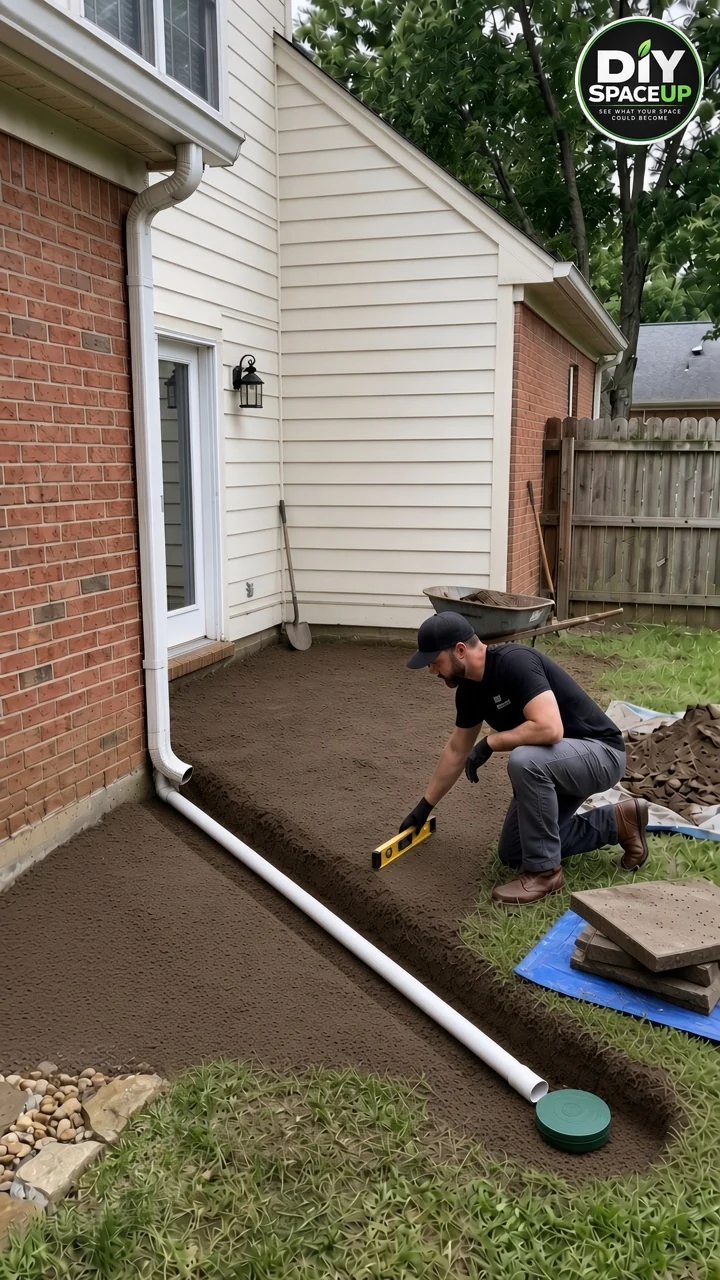
Because the pipe crosses under the patio, it has to go in now. Dig a trench from the base of the downspout diagonally away from the brick wall, across the excavation and out into the lawn toward the release point. Never run it along the foundation. Lay smooth, solid 4-in. pipe with continuous fall the whole way. A sag that holds water will collect debris and, in cold climates, ice.
- At the top, connect the downspout with an adapter sized to it. For a 3×4-in. downspout, the NDS 9P06 PVC Downspout Adapter connects to 4-in. sewer-and-drain pipe. Note that NDS says it isn’t compatible with DWV Schedule 40 fittings, so match your pipe to it. Many installers add a debris filter or cleanout here so leaves can be cleared without digging.
- At the bottom, finish with a pop-up emitter set flush with the turf, like the NDS 422G Pop-Up Drainage Emitter with Elbow. NDS says to put the emitter downhill from the collection point, away from foundations and neighboring properties, in an area where water can disperse safely. The elbow has a small weep hole so the line can drain between storms.
- Use Building America’s benchmark as a minimum: an underground system should release water at least 10 ft from the foundation. Farther is better if your yard allows it.
- Before backfilling, run a hose into the downspout and watch: water should reach the emitter, the cap should pop up, and nothing should leak or pond. NDS recommends exactly this test.
- Backfill the trench in layers and compact it, especially under the patio area, so it doesn’t become the next soft spot.
Step 6: Build the Aggregate Base in Compacted Lifts
This is the step the video skipped, and it’s the one that decides whether the new patio sinks too. Spread dense-graded base in layers, keep it lightly damp, and compact each layer before adding the next. ICPI/CMHA calls for 4–6 in. lifts with a 7,000 lbf reversible plate compactor and thinner lifts with a 5,000 lbf machine. Unilock’s and Belgard’s homeowner guides use 2–3 in. and 2–4 in. lifts. So the right lift thickness depends on the machine you rent. Ask the rental counter for the compactor’s rating and the manufacturer’s guidance. Make extra passes along the brick wall, in corners and over the backfilled pipe trench, which Belgard calls the areas most likely to settle later.
Check the finished base against the string lines. It should follow the slope, sit one sand-bed-plus-paver-thickness below the lines, and stay within ±3/8 in. under a 10-ft straightedge (ICPI/CMHA). Fix low spots with base material and recompact. Don’t plan to fill them with sand later.
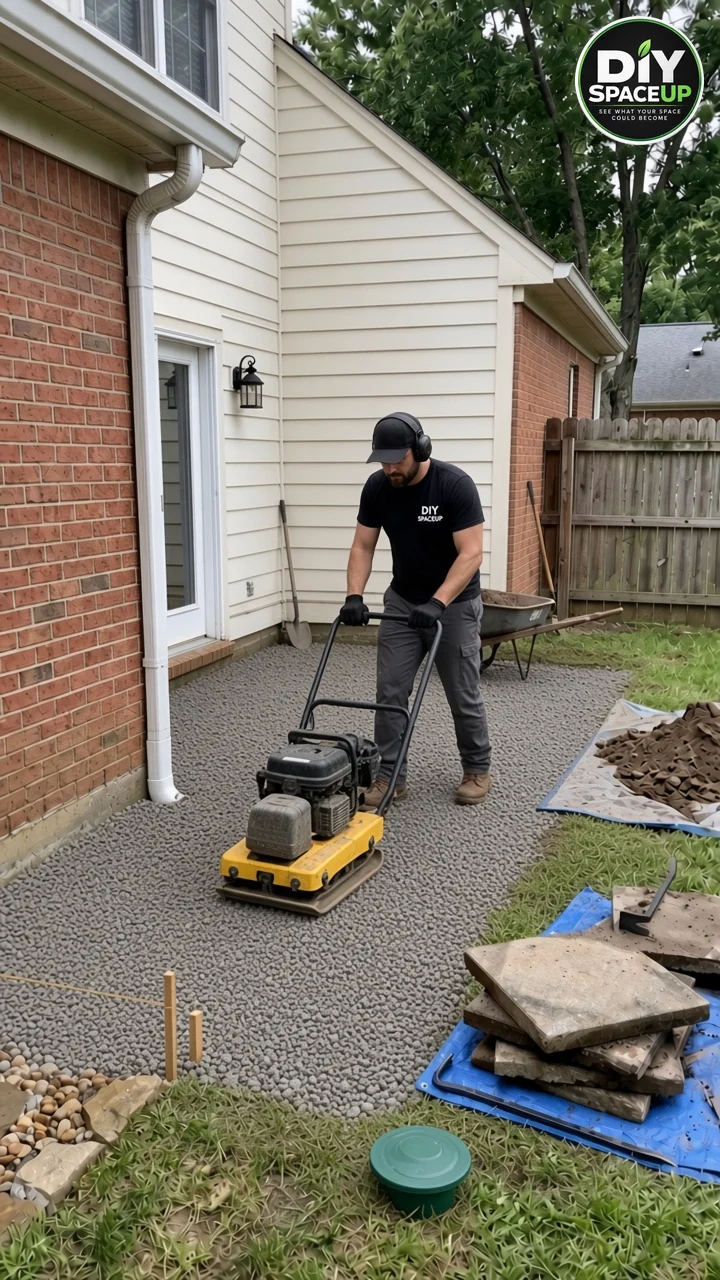
Step 7: Install the Edge Restraint
Edge restraints keep pavers from creeping sideways and keep the bedding sand from washing out. CMHA calls them essential. Belgard says to set the restraint on the compacted base, at the right height, with at least 1 in. of vertical surface against the side of the border paver, and to follow the restraint maker’s instructions. Along the house, the wall itself holds that side. On the lawn and bed sides, install restraint along every edge. Belgard’s sequence installs the restraint before the bedding sand; some installers set it right after the border course so it sits tight against the pavers. Either way, it must be in place before the pavers are compacted.
Step 8: Screed the Bedding Sand
Lay two 1-in. pipes on the base as screed rails, 6–8 ft apart. Spread moist (not wet) coarse concrete sand and pull a straight board across the rails until the bed is smooth. Then remove the rails, fill the grooves and stay off the screeded sand (Belgard). Screed only as much as you’ll pave soon, so rain or foot traffic doesn’t disturb it. The sand bed is for bedding, not leveling. ICPI/CMHA warns that unevenness in the sand reflects through to the surface over time.
Step 9: Lay the Large-Format Pavers and Charcoal Border
Start at a square corner against the house and work outward, setting each paver straight down rather than sliding it into the sand. Place the charcoal border along the outside edges, then fill the field with the large beige pavers, keeping joints consistent and checking lines with a string as you go. Tap pavers into place with a rubber mallet. Large slabs are heavy and easy to lip at the edges, so check each one against its neighbors with a straightedge. Cut edge pieces with a diamond blade, and avoid tiny slivers at the border.
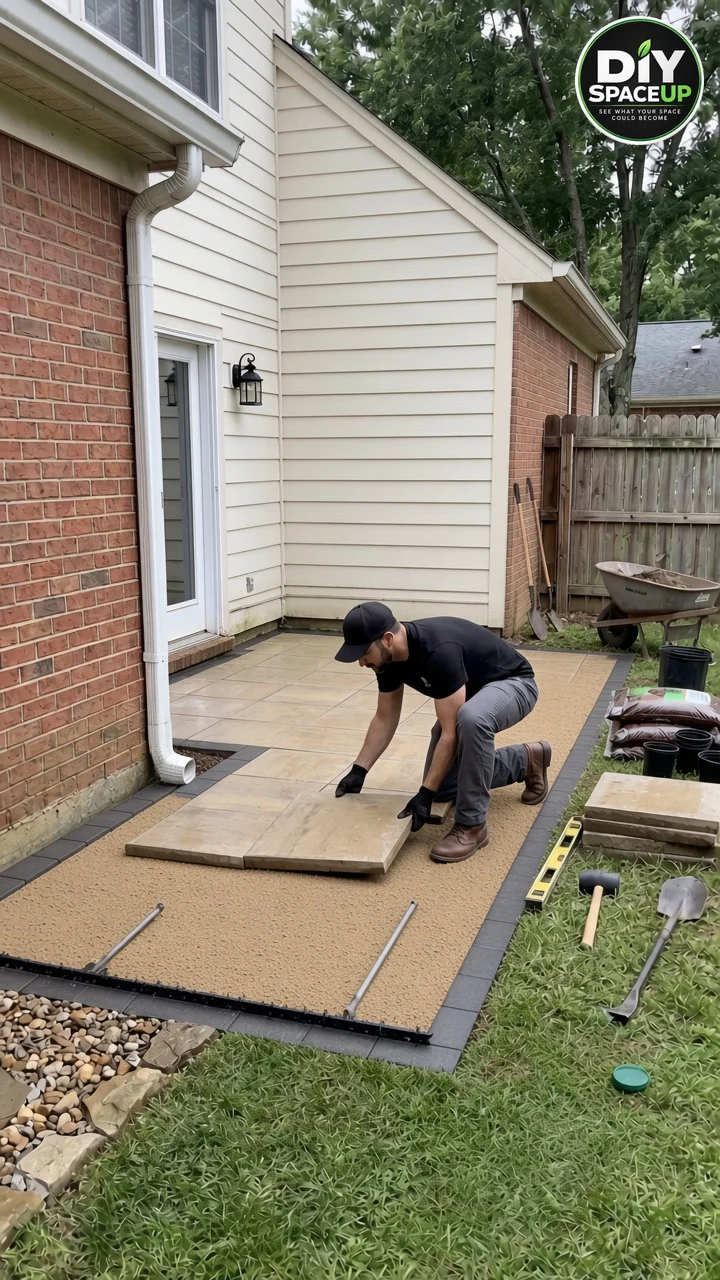
Step 10: Compact the Pavers and Fill the Joints
Here large-format pavers need extra care. Belgard says to use a vibratory plate of at least 5,000 lbs force for standard concrete pavers, but a roller compactor for larger-format slabs over 12 × 12 in. Manufacturers also recommend a pad or mat between the plate and the paver face to prevent scuffs. Read the instructions for your exact slab and follow them, even if that means renting a roller attachment.
Sweep the surface clean and dry, then fill the joints. Belgard recommends polymeric jointing sand. A product like Alliance Gator G2 Polymeric Super Sand (Slate Gray) is rated for joints up to 2 in. Follow the bag exactly: pavers and joints completely dry, sweep in, compact and top up as directed, blow or sweep every grain off the surface, then mist to activate. Don’t apply it below the temperature on the bag or before rain.
Step 11: Plant the Bed, Add Lighting and Set Up Dining for Four
Shape the bed along the right side so its soil sits below the patio edge and slopes away from it, so mulch and soil don’t wash onto the pavers. Plant hydrangeas, ornamental grasses and a few perennials, and mulch the bed. Low-voltage path lights go in per the kit maker’s instructions, with the transformer plugged into a GFCI-protected outdoor outlet. Keep cable runs clear of the pop-up emitter and the pipe trench. Finally, bring in a dining set for four. The video’s final shot shows six chairs, but the post itself promises dining for four, and four chairs leave room to walk around the table on a patio this size.
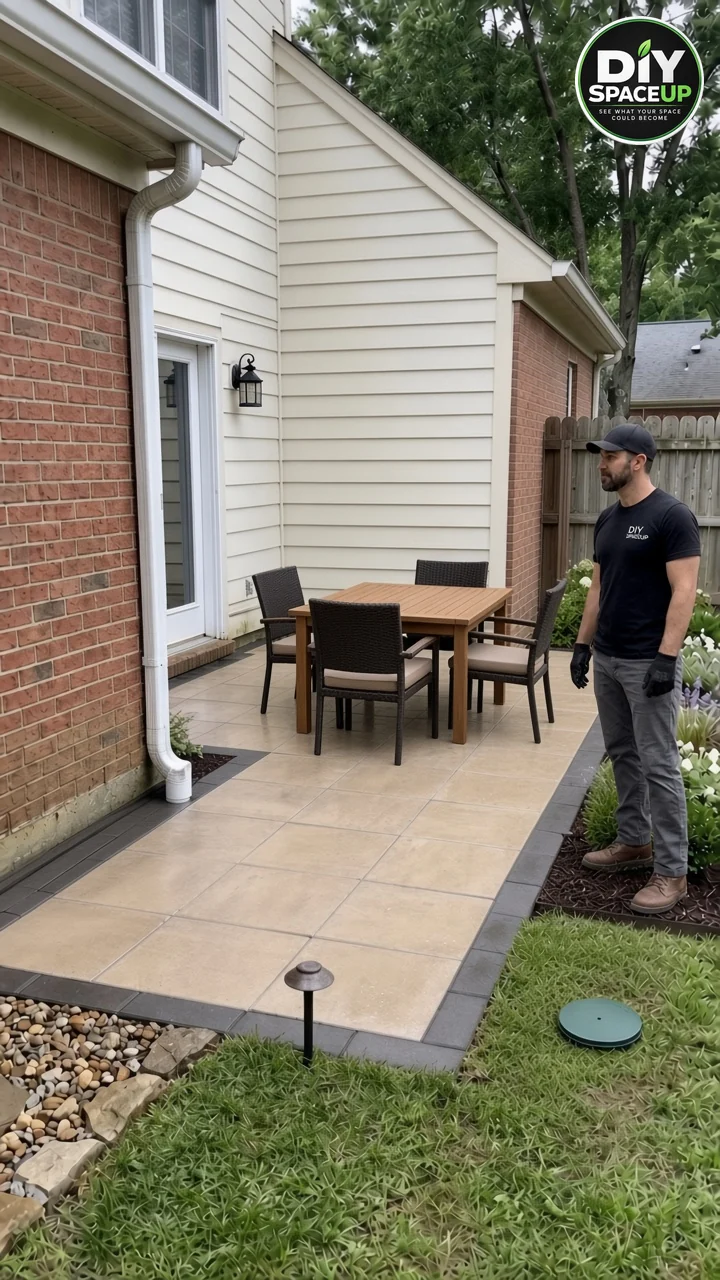
Step 12: Test It in the Rain
Run a hose on the roof or wait for the next storm. You want to see water leave the downspout into the pipe and pop out at the emitter in the lawn, with nothing pooling on the patio, at the wall or in the gravel strip. Look again a few weeks later for any paver that rocks or any joint that has opened, and fix it while it’s small.
What the Video Got Wrong
| What the video showed | Why it’s a problem | What we did instead |
|---|---|---|
| No compaction at any stage | Uncompacted soil and base are a leading cause of settlement (ICPI/CMHA) | Compacted subgrade, base in lifts and pavers; added image of the plate compactor |
| No visible base or bedding sand; pavers set almost on dirt | Pavers sink again, just like the old ones | Compacted aggregate base sized to the soil, plus 1 in. of concrete sand |
| A board dragged across raw dirt as if screeding | Screeding belongs on bedding sand over a compacted base | Board used only to check subgrade grade; real screeding in Step 8 |
| Black downspout extension along the foundation, dumping into the front gravel strip | Keeps roof water against the house; may send it toward the neighbors | Solid buried pipe running away from the wall to a pop-up emitter in the lawn |
| No visible slope or string lines on the new patio | Water can sit or run toward the house | String lines at finished height, 1.5–2% slope away from the house |
| No edge restraint visible during laying | Pavers creep and sand washes out | Restraint along every edge not held by the wall |
| Six chairs in the final reveal | Post promises dining for four; six crowds this small patio | Square table with four chairs |
| Tools appearing and disappearing between shots | AI artifact | Ignored; the article lists what you actually need |
Estimated Cost and Time
Costs swing a lot by region, patio size, paver choice and how much soil has to come out. These national figures are from HomeAdvisor’s paver patio cost guide (updated June 2026). Use them for budgeting, then get local material quotes.
| Item | Published range | Notes |
|---|---|---|
| Professionally installed paver patio | $8–$25 per sq ft; normal total range $2,400–$7,000 (average about $3,800 for 280 sq ft) | Complex drainage, slopes and premium pavers push it higher |
| Concrete pavers (material) | About $8–$15 per sq ft | Large-format and premium finishes cost more |
| Sand and gravel base | Around $1 per sq ft | More if your soil needs a thicker base |
| Pro labor | $4–$11 per sq ft, or $50–$80 per hour | Drainage work is extra |
| Rentals | Sod cutter about $65/day; wet saw about $60/day | Plate compactor rental not listed; call your local rental shop |
| Landscaping | $1,350–$5,700 if hired out | Optional; DIY planting costs far less |
Time: HomeAdvisor estimates about 50 hours for a typical DIY paver patio, and 35–40 pro hours for a 300-sq-ft patio. Add a day for the downspout line, plus waiting time for 811 marks and dry weather. Not included: furniture, lighting kits, plants, tool purchases, haul-away fees for old pavers and soil, and any permit fees.
Common Mistakes to Avoid
| Mistake | Better approach |
|---|---|
| Re-leveling sunken pavers with extra sand | Find the cause; rebuild the base where it failed |
| Leaving the downspout dumping onto or beside the patio | Carry roof water away in solid pipe to a safe outlet |
| Running the extension along the foundation | Route it directly away from the house |
| Using perforated pipe for roof water | Non-perforated pipe, continuous fall, tested before backfill |
| Pouring the whole base at once and compacting the top | Compact in lifts sized to the compactor |
| Using stone dust or masonry sand for bedding | Coarse concrete sand (ASTM C33), about 1 in. |
| Fixing base dips with bedding sand | Fix the base, then screed |
| Building a flat patio | Slope 1.5–2% away from the house |
| Skipping edge restraint | Restraint on every open edge |
| Running a plate compactor straight onto large slabs | Follow the slab maker: roller or protective pad as specified |
| Raising the patio up to the door threshold or siding | Keep the finished surface below both; adjust excavation depth instead |
| Spreading polymeric sand on damp pavers | Dry surface, clean sweep, activate exactly as the bag says |
Safety Checklist
- Contact 811 and wait for all utilities to mark before any digging, including the pipe trench.
- Plate compactors are loud, heavy and vibrate hard: hearing and eye protection, sturdy boots, and keep feet clear of the plate.
- Cutting concrete pavers makes silica dust: cut wet when possible and wear a properly fitted respirator.
- Lift pavers and bags with your legs, use a helper or a dolly for large slabs, and wear gloves.
- Keep the open trench and excavation marked if kids or pets use the yard.
- Use only GFCI-protected outdoor outlets for the compactor charger, saws or the lighting transformer.
- Don’t send water toward a neighbor’s property, a septic field, or the base of a retaining wall.
- Check local code and HOA rules; this guide doesn’t certify code compliance for your property.
When to Call a Pro
- There’s water in the basement or crawl space, foundation cracks, or soil sloping toward the house along this wall.
- The soil is expansive clay, organic fill, or stays saturated. ICPI/CMHA and Techo-Bloc both say these need thicker bases, and Techo-Bloc recommends a geotechnical professional for unstable soils.
- There’s no lower point to drain to without crossing a property line, or the yard slopes toward a neighbor.
- You’re considering a dry well or infiltration system, since local rules and EPA’s Class V program may apply (see EPA: stormwater drainage wells).
- The patio would need steps, a retaining wall, or would sit higher than the door threshold or siding.
- Your city requires a permit for the patio, the grading, or changes to downspout discharge.
Maintenance
- Clean the gutters and the downspout adapter’s debris filter (if fitted) each spring and fall.
- After big storms, check that the pop-up emitter opens and that water flows away from it, not back toward the patio.
- Keep mulch and soil from the bed below the patio edge and off the pavers.
- Top up polymeric sand where joints open, following the product instructions.
- Fix a rocking or sinking paver promptly: lift it, check the base, correct it and reset it.
Frequently Asked Questions
Can I just lift the sunken pavers and add sand underneath?
Only if the base under them is sound and the low spot is tiny. ICPI/CMHA says bedding sand shouldn’t be used to make up for an uneven base, because the unevenness shows through again. When pavers sink because water softened the soil or the base was thin, the lasting fix is to rebuild the base and stop the water.
How much slope does a paver patio need?
Belgard’s guide gives a 1.5% minimum (about 3/16 in. per foot) and notes many patios are built at 2% (1/4 in. per foot). The residential code (IRC R401.3) requires impervious surfaces within 10 ft of the foundation to slope at least 2% away from the building where it’s adopted. Check what your jurisdiction uses.
How thick should the gravel base be?
ICPI/CMHA calls for at least 4 in. of compacted base for patios over well-drained soils, and more in cold climates or on wet or weak soils. Techo-Bloc’s patio range is 4–6 in. minimum on sandy soil and 6–8 in. minimum on clay or silt. Your paver manufacturer and local conditions set the final number.
How far from the house should the downspout drain?
The DOE Building America benchmarks are at least 5 ft from the foundation for a surface outlet and at least 10 ft for an underground system. Local codes and utilities may set their own distances, plus distances from property lines, so check yours.
Can the downspout pipe run under the patio?
Yes, if it goes in before the base, slopes continuously, is solid pipe, and the trench backfill is compacted like the rest of the base. Plan access for cleaning at the downspout end, since you won’t be digging up the patio to clear it.
Can I connect the downspout to a French drain or foundation drain?
Not to perforated pipe next to the house. Building America calls for non-perforated piping for roof runoff, and perforated foundation drains are a separate system. If you need a French drain for groundwater, design it separately.
Do I need a plate compactor, or is a hand tamper enough?
For a patio base, use a plate compactor. ICPI/CMHA’s lift guidance is written around 5,000–7,000 lbf machines. A hand tamper is useful for tight spots against the wall and in the trench, not as a substitute for the whole base.
Should I use polymeric sand or regular joint sand?
Belgard recommends polymeric jointing sand to stabilize joints and help control weeds and insects. Pick one rated for your joint width and apply it exactly as directed, since haze and soft joints usually come from damp pavers or skipped steps.
When can we put the table back?
After the joints are filled, compacted and cured per the joint sand instructions. Check the bag for foot-traffic and rain times.
Is this project realistic for a DIYer?
The patio part is a big but common DIY job if you rent the right compactor and take your time. The drainage part is where to be honest with yourself: if you can’t find a downhill outlet away from the house and neighbors, or you see foundation water issues, get a drainage pro or engineer involved first.
A sinking paver patio is almost always a water and base problem wearing a paver costume. Send the roof water away from the house, give the pavers a compacted base and a proper slope, lock the edges, and this little corner can go from muddy to the best seat at the house for a dinner for four.
More outdoor guides: Turn a muddy garden gate path into a paver walkway · DIY underground downspout drainage · Muddy backyard rain garden
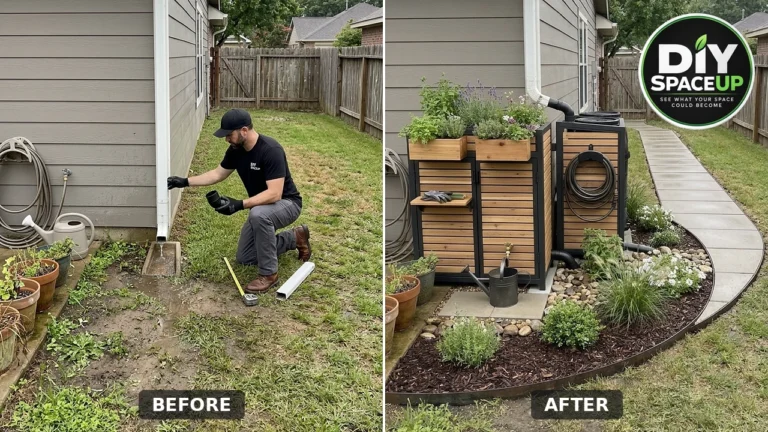
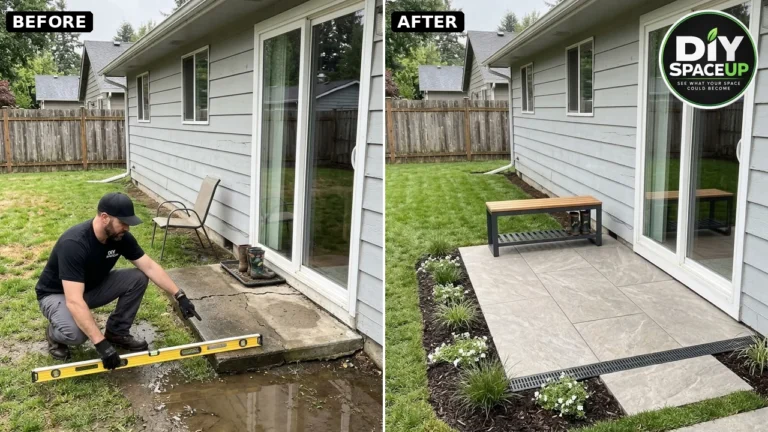
[…] In our yard the nearest downspout is at the far corner of the house, not at the door, and it already ends in an elbow on the lawn. Do not tie a downspout into a small trench drain: a roof can dump far more water in a storm than a 5-in. channel and its pipe are sized for, and it will back up onto the landing. If the downspout is part of your mud problem, give it its own solid pipe and its own outlet. Our underground downspout drainage guide walks through that, and we did exactly that on the patio in how we fixed a sinking paver patio. […]