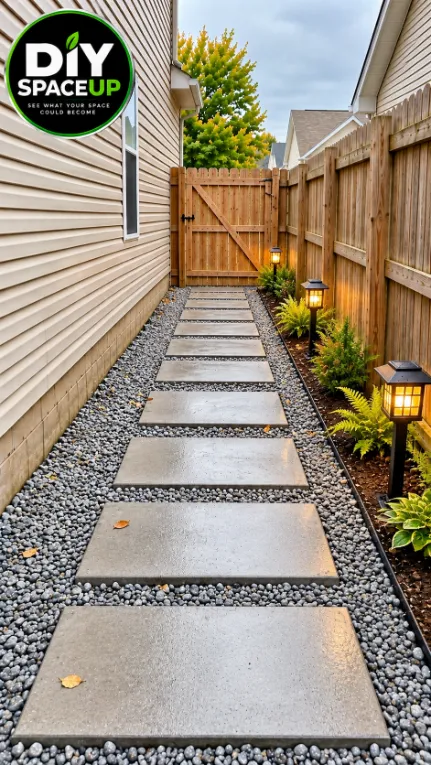
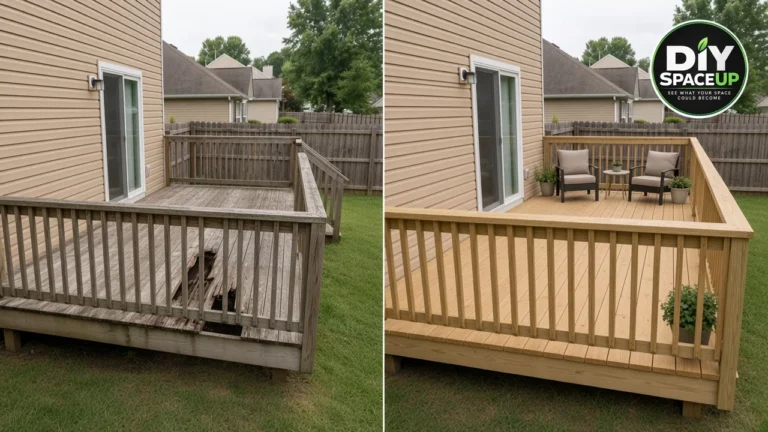
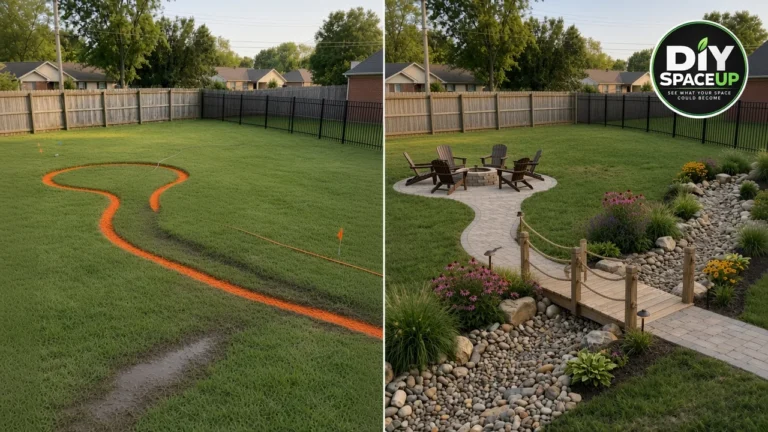
A muddy narrow side yard transformed into a clean gravel walkway with large stepping stones, a planted border and solar path lights.
DIY Side Yard Gravel Walkway With Stepping Stones: A Practical Step-by-Step Guide
A practical side yard transformation that replaces a muddy passage with a prepared gravel walkway, large stepping stones, landscaping and simple path lighting.
This narrow side yard had become the kind of space we walked through only when we had to.
It was muddy after rain, weeds were beginning to take over, and the route between the house and fence had no defined walking surface. But the space itself wasn’t useless—it simply needed a better foundation and a clearer purpose.
Instead of covering the entire area with concrete or building an elaborate patio, we kept the solution simple: landscape fabric, compacted gravel, large rectangular stepping stones, a narrow planting strip, and low solar path lights.
The result is still a side yard. It just works much better.
Table of Contents
What We’re Building
The finished project uses the full length of the existing side yard while preserving the house, fence and gate exactly where they are.
A straight row of large rectangular stepping stones creates the walking line. Gray gravel fills the surrounding area, while a narrow planting bed remains along the fence.
Element
Purpose
Prepared subgrade
Creates a firm starting surface
Geotextile/landscape fabric
Separates soil from aggregate and helps suppress weeds
Compacted aggregate
Creates the stable drainage/base layer
Rectangular stepping stones
Provides a comfortable walking surface
Landscape edging
Keeps gravel and planting soil separated
Gray decorative gravel
Finishes the exposed surface
Narrow planting bed
Softens the fence side
Solar path lights
Adds low-level nighttime visibility
The project shown is pedestrian-only. It isn’t designed as a driveway or vehicle surface.
Step 1: Study the Side Yard Before Buying Materials
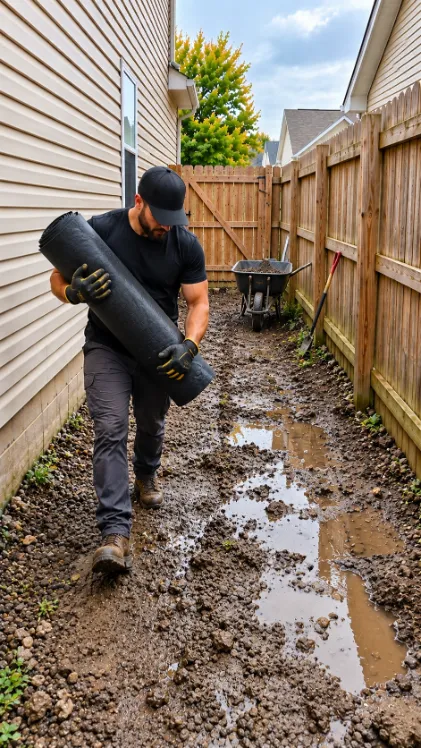
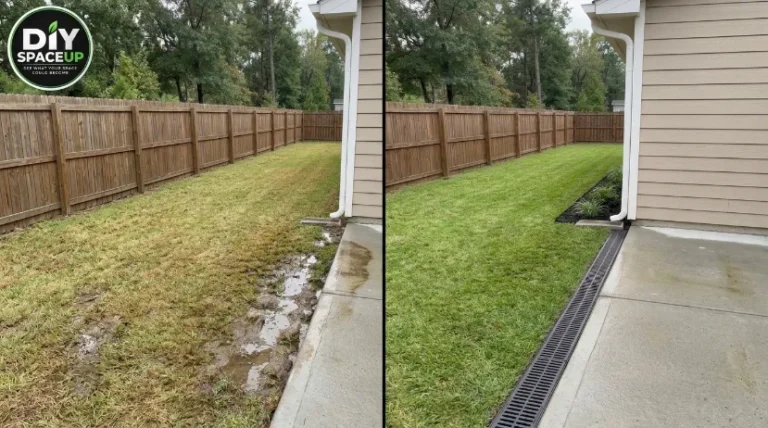
The BEFORE photo tells us something important: this area already holds water after rain.
That means the goal isn’t simply to hide mud beneath gravel.
First determine why the area stays wet.
Look for roof runoff, downspouts, low spots, water flowing from neighboring property and soil that drains slowly. Also verify that the finished path won’t direct water toward the house foundation.
Before excavating, underground utilities should also be located. Lowe’s recommends contacting 811 before digging for a walkway project in the U.S. Lowe’s
The original side yard became muddy and difficult to use after rain, creating the need for a properly prepared gravel walkway.
Step 2: Measure and Mark the Finished Walkway
Don’t begin by unrolling landscape fabric.
First establish the final geometry.
Measure the distance between the house and fence, the total length from the entrance to the rear gate, and the width needed for the planting strip.
Then mark:
the gravel zone;
the centerline of the stepping stones;
the planting-bed edge;
the finished surface elevation.
The path should remain comfortably clear of the house siding and should not block access to anything that may need future maintenance.
For a straight run like this, stakes and mason’s string (IRWIN Strait-Line Mason’s Line) make the layout much easier to control. Lowe’s likewise recommends stakes and string for laying out a straight walkway. Lowe’s
Step 3: Remove Vegetation and Soft Material
This step is easy to underestimate.
The finished path should not be constructed directly over the muddy grass visible in the BEFORE image.
Remove weeds, grass, roots, loose organic material and excessively soft soil from the entire construction footprint.
Then correct obvious low spots.
The goal is a clean, predictable subgrade—not a surface with vegetation trapped underneath.
How Deep Should You Excavate?
There isn’t one universal number because the required depth depends on the soil, climate, aggregate system, stone thickness and intended use.
For comparison, QUIKRETE’s conventional paver guidance calls for excavation of approximately 4–7 inches, allowing for a compactable aggregate layer, leveling material and the paver itself. QUIKRETE
Our project uses spaced stepping stones surrounded by gravel rather than a fully interlocking paver field, so calculate the excavation from your actual layer thicknesses and desired finished elevation instead of blindly copying one depth.
Step 4: Grade and Compact the Bare Soil
This is one of the most important stages.
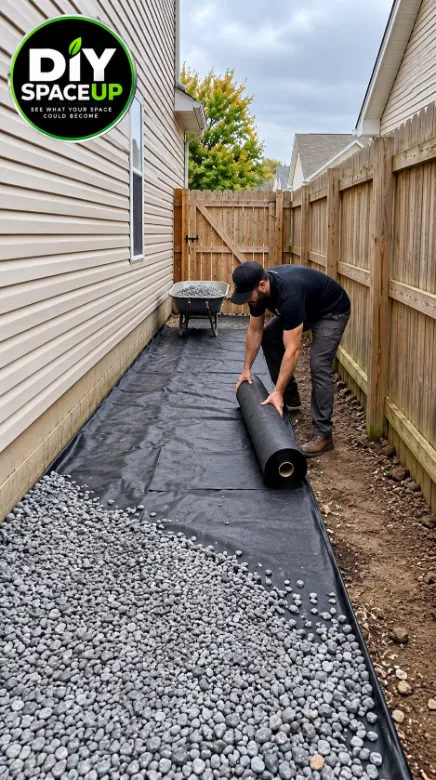
Before the black fabric seen in our MIDDLE photo is installed, the entire soil surface should already be:
cleared → shaped → graded → compacted
Do not use the landscape fabric to conceal an uneven muddy surface.
For larger areas, a rented plate compactor is useful. Smaller areas can sometimes be handled with a hand tamper, depending on soil conditions and project size.
Now the fabric shown in our construction image makes sense.
Its primary value beneath aggregate is separation: it helps prevent the underlying soil from migrating into the gravel while also contributing to weed control.
Nonwoven geotextile is commonly used under gravel and pavers for soil separation and drainage. Lowe’s guidance recommends leveling/compacting the soil first, overlapping seams, securing the material and then adding the aggregate. Lowe’s
Where multiple sheets are necessary, overlap them according to the fabric manufacturer’s instructions rather than leaving open seams.
After the ground is cleared, graded and compacted, geotextile fabric is installed to separate the soil from the aggregate base.
Important
Fabric comes after ground preparation—not before it.
If the soil is still full of depressions, vegetation and loose material, covering it with fabric doesn’t fix the foundation.
Step 6: Install the Edge Restraint
The AFTER photo has a clean boundary between the gravel path and the narrow planting bed along the fence.
That edge matters.
Without containment, loose stone gradually migrates into soil and the planting bed begins spreading into the path.
A product such as EasyFlex No-Dig Landscape Edging can work for separating decorative gravel from the planting strip when installed for its intended application.
Keep the top subtle. The edging should contain materials without becoming an obvious trip hazard.
Step 7: Add the Aggregate Base
Now add the crushed aggregate in manageable lifts rather than dumping the full amount and trying to compact only the surface.
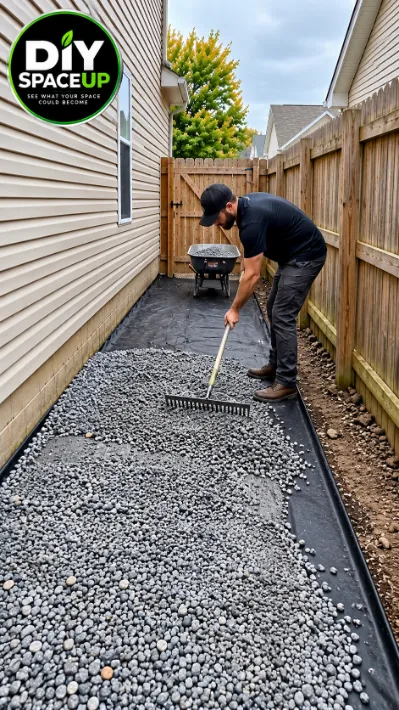
Spread it across the entire prepared path with a landscape rake.
Crushed aggregate is spread evenly over the geotextile before compaction, creating a stable base for the stepping stones and finished gravel surface.
Compact the material until it forms a firm, consistent base.
Traditional paver construction relies on a compacted gravel base because the stability of the finished surface depends heavily on what is underneath. Lowe’s conventional walkway example describes a 6-inch gravel paver base plus bedding sand, while QUIKRETE describes 2–4 inches of compactable gravel for its patio/walkway method. These are examples of different systems—not interchangeable universal specifications. Lowe’s
For our stepping-stone design, choose the base thickness for local soil, drainage, climate and stone requirements.
Step 8: Set the Large Stepping Stones
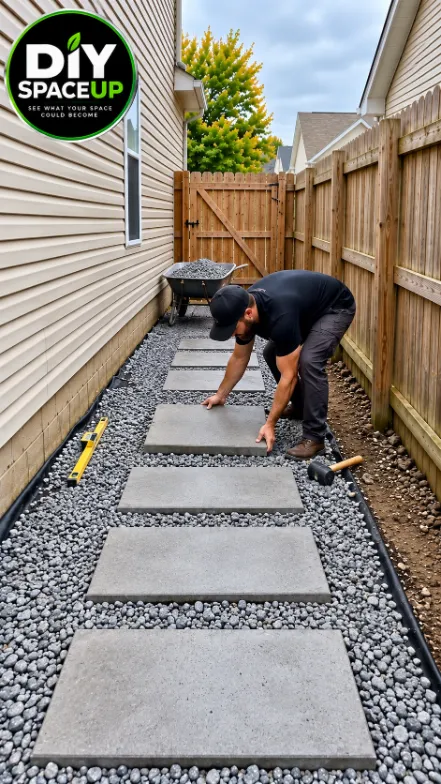
Large rectangular stepping stones are positioned one at a time over the prepared base, keeping the spacing consistent and each slab stable and level.
Now we reach the part everyone notices in the AFTER photo.
But don’t simply drop slabs onto loose gravel.
First decide the walking rhythm.
Temporarily position several stones and actually walk across them. Adjust spacing until your stride feels natural.
The finished tops should not create abrupt trip edges.
Step 9: Add the Exposed Gray Gravel
Once the stepping stones are stable, install the finish gravel around them.
The gravel should fill the surrounding surface while leaving the top of each stepping stone clearly defined and comfortable to walk on.
Don’t bury the stone edges under loose gravel.
Rake everything evenly and inspect the path from both directions.
This is where the messy construction site begins to look intentional.
Step 10: Build the Narrow Planting Strip
Our AFTER design does not turn the entire side yard into stone.
A narrow bed remains along the fence.
That small decision makes a big visual difference.
Use plants appropriate for the actual sunlight, moisture, mature size and climate of the site. Side yards can receive substantially less direct sunlight than open gardens, so selecting plants only because they look good in a photograph can produce poor results.
Keep mature foliage from narrowing the walking path.
Step 11: Add the Solar Path Lights
The small black lights in the AFTER photo follow the planting edge rather than occupying the center of the walkway.
That’s the right idea.
Lights should help identify the path without becoming obstacles.
A set such asBEAU JARDIN Solar Pathway Lights can provide simple accent lighting without trenching electrical cable, provided the location receives enough sunlight to recharge them.
Solar lights are primarily useful for orientation and atmosphere. If this passage requires dependable safety illumination, consider a properly designed outdoor lighting system instead.
The finished side yard combines large stepping stones, gray gravel, a narrow planted border and solar path lights to create a clean, practical walkway.
Drainage Matters More Than the Decoration
Because our BEFORE scene is visibly muddy, this deserves its own section.
A gravel walkway is not automatically a drainage system.
If substantial roof or yard runoff is continually entering this narrow space, the source of that water may need to be managed separately.
Do not intentionally grade the walkway toward the house.
QUIKRETE’s paver guidance specifically calls for maintaining drainage away from structures. QUIKRETE
After the first heavy rain, inspect the new path.
What You See
What It May Indicate
Water standing beside foundation
Grade/drainage problem
Gravel washing toward gate
Excessive flow or insufficient containment
Stones rocking
Poor support or base settlement
Persistent low puddle
Incorrect local grade
Soil entering gravel
Failed separation/edge containment
Gravel sinking into ground
Insufficient base/separation
Fix the cause rather than simply adding another bag of decorative gravel.
Materials for This Project
Material
Purpose
Suitable geotextile fabric
Soil/aggregate separation
Crushed aggregate
Stable compacted base
Rectangular stepping stones
Walking surface
Decorative gray gravel
Finished exposed surface
Landscape edging
Gravel/soil separation
Landscape staples
Fabric restraint during installation
Plants
Narrow fence-side garden
Mulch if desired in bed
Planting-bed finish
Solar lights
Path definition at night
Tools Worth Having
For this exact build, the most useful affiliate recommendations are:
Heavy-Duty Nonwoven Geotextile Fabric— for separation beneath the aggregate; choose weight/specification appropriate to the project rather than buying solely by price.
Replace each bold product name with your Amazon affiliate link before publishing.
Affiliate Disclosure: As an Amazon Associate I earn from qualifying purchases. Product links in this article may earn a commission at no additional cost to you.
What Could This Walkway Cost?
Rather than giving a fake universal total, budget by component.
Cost Area
Typical Impact
Geotextile fabric
Low
Base aggregate
Medium
Decorative gravel
Medium
Large stepping stones
Medium–High
Edging/stakes
Low
Plants
Low–Medium
Solar lights
Low–Medium
Plate compactor rental
Medium
Delivery of stone/gravel
Variable
Professional drainage work if needed
Potentially high
The dimensions of this side yard matter enormously. Gravel that seems inexpensive per bag can become costly when covering a long path, so calculate volume before purchasing.
Common Mistakes to Avoid
Mistake
Better Approach
Laying fabric directly over weeds and mud
Clear, grade and compact first
Using decorative gravel as the structural base
Build a suitable compacted base first
Ignoring existing standing water
Identify the drainage cause
Grading toward the house
Direct surface drainage appropriately
Dumping all aggregate at once
Place and compact appropriate lifts
Setting stones directly on unstable loose material
Provide uniform support
Choosing stone spacing by appearance
Test it with a natural walking stride
Leaving gravel without containment
Install suitable edging
Putting solar lights in the walking line
Keep them along the side
Planting shrubs that will fill the path
Check mature plant size
Final Quality Check
Walk the entire path normally.
Then walk it again slowly and deliberately step on the corners of each slab.
Nothing should rock.
Check that the gravel is contained, the planting bed is cleanly separated, no landscape fabric remains exposed, and no sharp edging protrudes into the walking zone.
Finally, wait for rain.
That’s the real test.
Look for puddling, washed-out gravel, settlement and runoff moving toward the house. A beautiful walkway that creates a moisture problem at the foundation is not a successful transformation.
From Muddy Shortcut to a Side Yard That Feels Finished
What changed here wasn’t the house.
The fence stayed.
The gate stayed.
Even the narrow dimensions stayed.
What changed was the ground beneath our feet.
By preparing the soil first, separating it from the aggregate, creating a compacted base, setting large stepping stones and finishing the edges with gravel, plants and simple lighting, an awkward muddy strip became a practical route through the yard.
And that’s exactly why overlooked spaces are often our favorite DIY projects.
You don’t always need more space.
Sometimes you just need to make the space you already have work better.
We use cookies and similar technologies to help our website function properly, understand how visitors use the site, and improve your experience. You can accept or manage your preferences at any time. Some features may not work as intended if certain cookies are disabled.
Functional
Always active
The technical storage or access is strictly necessary for the legitimate purpose of enabling the use of a specific service explicitly requested by the subscriber or user, or for the sole purpose of carrying out the transmission of a communication over an electronic communications network.
Preferences
The technical storage or access is necessary for the legitimate purpose of storing preferences that are not requested by the subscriber or user.
Statistics
The technical storage or access that is used exclusively for statistical purposes.The technical storage or access that is used exclusively for anonymous statistical purposes. Without a subpoena, voluntary compliance on the part of your Internet Service Provider, or additional records from a third party, information stored or retrieved for this purpose alone cannot usually be used to identify you.
Marketing
The technical storage or access is required to create user profiles to send advertising, or to track the user on a website or across several websites for similar marketing purposes.