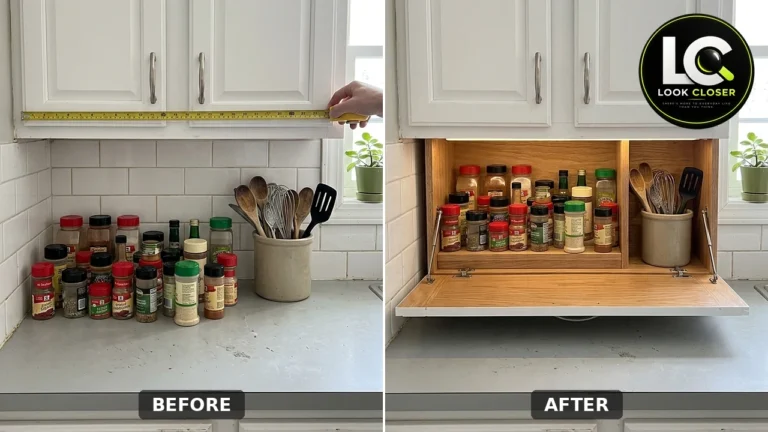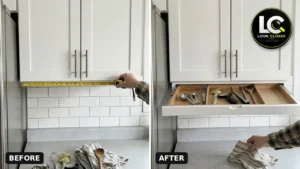

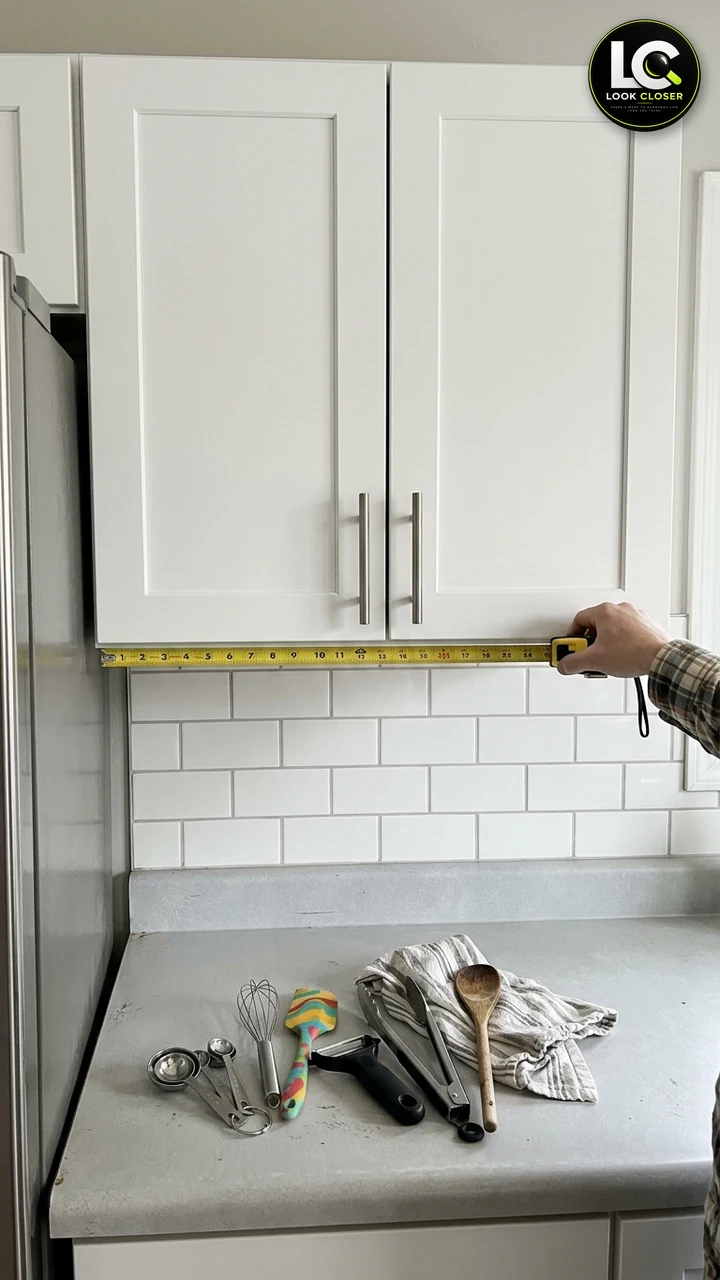
Look at the bottom of your upper cabinets. In most kitchens there’s a strip of air between the cabinet and the backsplash that does nothing except collect a little grease. Meanwhile, the measuring spoons, tongs, peeler and whisk you grab every day are crammed into a crock on the counter or buried in a drawer across the room. That’s exactly what was happening in this kitchen: a row of everyday tools spread over the counter, and an empty band of space right above them.
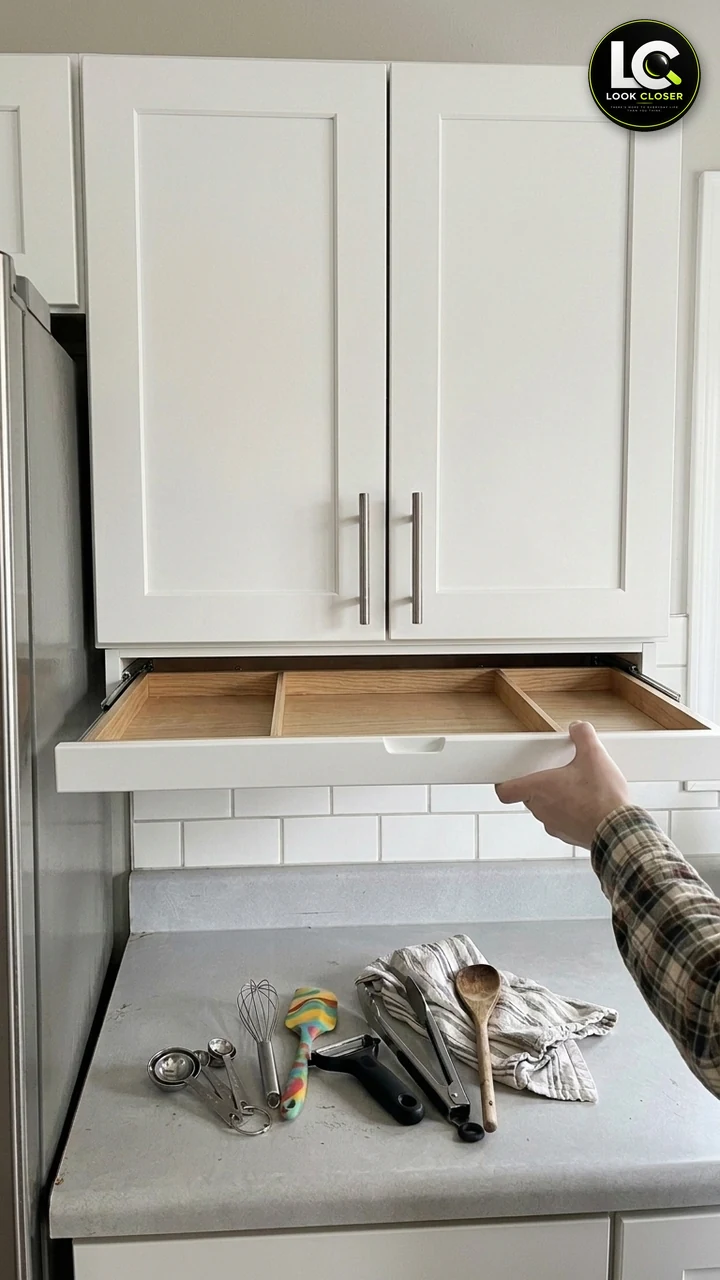
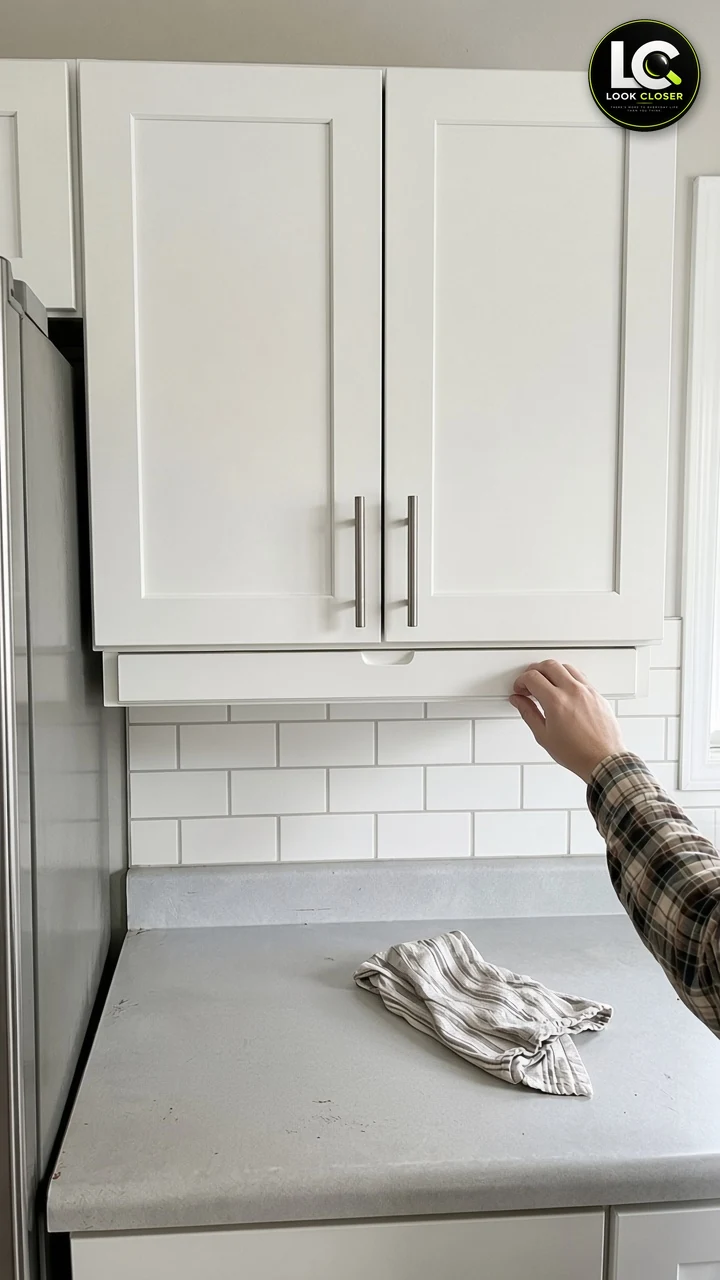
The fix is a slim under cabinet drawer: a shallow box about 3 to 4 inches tall that hangs below the upper cabinet on full-extension slides. Pull it out and every small tool is in view, split into three bays. Push it in and it reads like a thin trim board under the doors, and the counter stays clear.
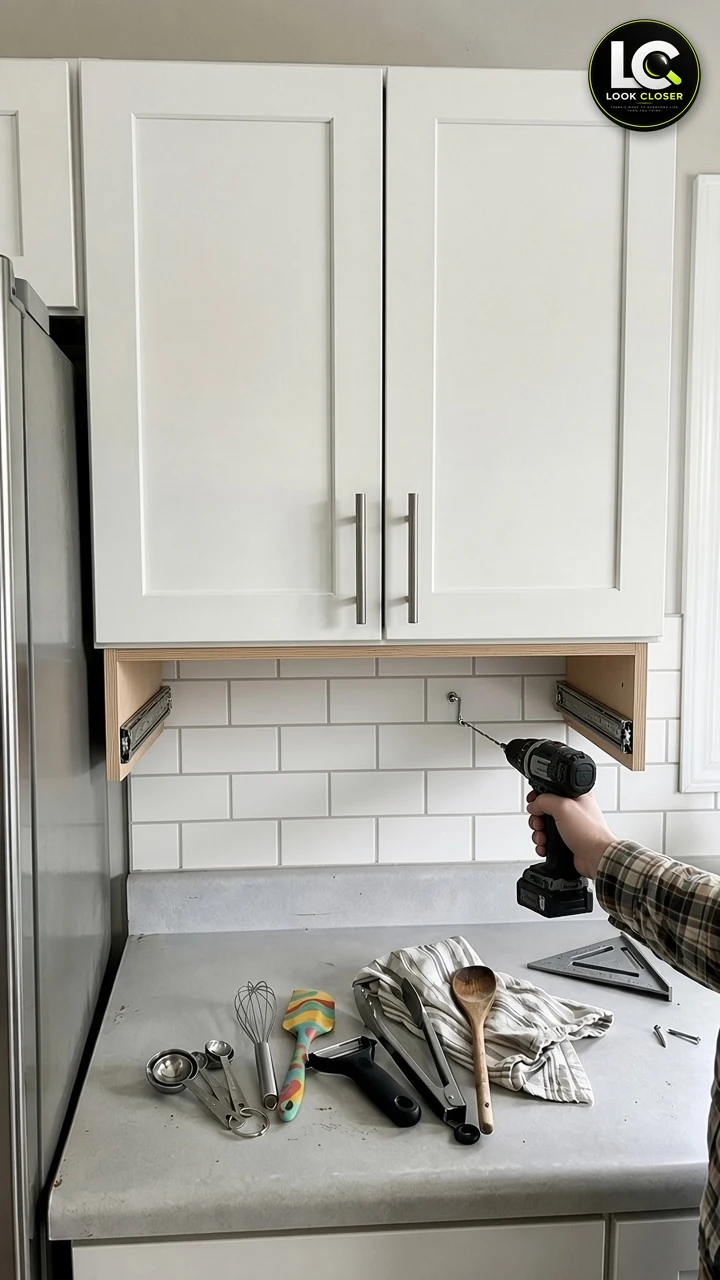
Important: The Look Closer reel behind this project is AI-assisted DIY inspiration, and its caption says to check cabinet structure, mounting strength, slide ratings and countertop clearance first. The video also gets the build wrong in a few places: the drawer is attached with a screw driven up through the bottom of an open box (which holds nothing), the side panels that should carry the slides disappear between shots, and the full-width front would run into the fridge. This guide shows how a cabinetmaker would actually build it. Two step photos are AI illustrations of the same kitchen, and every dimension here is a planning example, not a number read from the video. Measure your own cabinets.
Affiliate Disclosure: As an Amazon Associate I earn from qualifying purchases. Product links in this article may earn a commission at no additional cost to you.
In This Guide
- What We’re Building
- What the Reel Gets Wrong
- Will an Under Cabinet Drawer Work in Your Kitchen?
- Measurements: Planning Examples
- Materials and Tools
- Step-by-Step: Build the Under Cabinet Drawer
- How Much Can It Hold?
- Safety Checklist
- Estimated Project Cost
- Common Mistakes to Avoid
- Frequently Asked Questions
What We’re Building
A small, shallow drawer cabinet (the carcass) screwed to the underside of the upper cabinet, and a drawer box that rides inside it on a pair of side-mount slides.
| Component | What it does |
|---|---|
| Mounting panel (3/4 in plywood) | The carcass top. It sits flat against the cabinet bottom and is what you actually fasten to the cabinet |
| Two side panels (3/4 in plywood) | Hang down from the mounting panel at each end and carry the slides. Without them the slides have nothing to screw into |
| Back rail (3/4 in plywood strip) | Squares the carcass, stiffens it, and gives you an optional second fastening point at the back |
| 10 in full-extension side-mount slides (one pair) | Let the drawer come all the way out so you can reach the back bay |
| Drawer box (1/2 in plywood sides, 1/4 in bottom) | The shallow tray that holds the tools; about 2 to 2-1/2 in of usable depth |
| Two fixed dividers | Split the box into three bays: small tools, long tools, and bulky tools |
| Painted drawer front with a finger pull | Matches the cabinets and hides the box. A half-round cutout replaces a handle, so nothing sticks out |
That’s it: no new cabinet, no electrical work, and nothing structural in the wall. The drawer only works, though, if the carcass is solidly fastened to a cabinet that is itself solidly hung.
What the Reel Gets Wrong
| In the video | What to do instead |
|---|---|
| A screw is driven up through the bottom of an open, U-shaped box | Build an upside-down U: a top mounting panel fastened to the cabinet, with the sides hanging down. Fasteners go through the cabinet floor into that panel |
| The box’s side panels vanish in the finished shots, so the slides seem to float | Keep both side panels. Each slide needs solid wood behind it for its full length |
| The front is wider than the cabinet and sweeps past the fridge edge | Keep the front inside the cabinet’s width, with small even gaps, so it clears the fridge door, wall trim and any neighboring cabinet |
| Only the finished drawer is shown open; the closed drawer never appears | Plan the front so it closes flush below the doors with a 1/8 in gap, then test it |
| No mention of what’s above or below | Never build this over a cooktop or range, and check lights, outlets and counter headroom first |
Will an Under Cabinet Drawer Work in Your Kitchen?
Empty the upper cabinet, grab a flashlight, and look at the cabinet bottom from inside and from below. Five minutes here decides whether this is a weekend project or a bad idea.
| Check | What you’re looking for | If you find it |
|---|---|---|
| How the cabinet bottom is built | Its thickness (look at the front edge or measure through a shelf-pin hole), and whether it’s flush with the bottom of the box or recessed up behind a lip | Many stock uppers have a 1/2 in (sometimes thinner) bottom set up 1/4 to 1 in behind a face frame or light-rail lip. A recessed bottom needs filler strips; a thin particleboard bottom needs extra support at the back |
| How the cabinet is hung | Screws through the back hanging rail into wall studs, usually at least two per cabinet | Use a stud finder to confirm the studs, and add or replace screws if the cabinet relies on drywall anchors or a single screw. Don’t hang more weight on a cabinet that’s loose |
| What’s below | Cooktop, range, toaster oven spot, kettle or coffee maker | Never build this above a cooktop or range: heat, grease and flames make it a fire hazard, and appliance makers specify clearances to combustibles. Skip the spot where steam appliances live |
| Under-cabinet lights | LED strips, puck lights, or a light rail | The carcass will cover them. Move a plug-in light to the carcass underside, or pick a different cabinet. Don’t bury hardwired fixtures or junction boxes |
| Outlets and switches | Backsplash outlets right under the cabinet, or switches | The drawer must not block plugs or cover a box. Most backsplash outlets sit low enough, but check |
| The neighbors | Fridge door swing, wall trim, a window casing, an adjoining cabinet | The front has to stay inside the cabinet width. Open the fridge door all the way and watch where it goes |
| Counter headroom | Distance from counter to cabinet bottom, often about 18 in | You’ll lose 3-1/2 to 4 in. Check that a stand mixer, blender or coffee maker you use there still fits, and that you can still see your cutting board |
If the cabinet is loose, the bottom is soft or damaged, or the only spot that works is over the stove, stop and pick another location.
Measurements: Planning Examples
These are typical ranges, not measurements taken from the video. Measure your own cabinet and design to the smallest number you find.
| Measurement | Typical planning range | How to use it |
|---|---|---|
| Cabinet box width | Often 24 to 36 in for a double-door upper | Carcass outside width = box width minus about 1/2 in, so the drawer front can cover its edges |
| Cabinet depth (wall to front of box) | About 12 in, doors not included | Leaves room for 10 in slides once you subtract the back rail and the front |
| Counter to cabinet bottom | Often about 18 in | Subtract the carcass height (about 3-1/2 to 4 in). About 14 in of working clearance remains |
| Slide side clearance | Usually 1/2 in per side for ball-bearing side-mount slides | Drawer box width = carcass inside width minus 1 in. Confirm in your slide’s instructions |
| Slide length | 10 in in a 12 in deep upper | Needs at least about 10-1/4 in of clear inside depth; the drawer box is 10 in deep |
| Front reveals | About 1/8 in at the sides and under the doors | Keeps the front from rubbing the doors and keeps it off the fridge and trim |
Example only: for a 30 in wide, 12 in deep upper, a carcass about 29-1/2 in wide works out like this. Your numbers will be different, so treat it as a sanity check, not a cut list to copy.
| Part | Qty | Example size | Material |
|---|---|---|---|
| Mounting panel (top) | 1 | 29-1/2 x 11-1/4 in | 3/4 in plywood |
| Side panels | 2 | 3 x 11-1/4 in | 3/4 in plywood |
| Back rail | 1 | 28 x 3 in | 3/4 in plywood |
| Drawer sides | 2 | 2-1/4 x 10 in | 1/2 in plywood |
| Drawer front and back (box) | 2 | 2-1/4 x 26 in | 1/2 in plywood |
| Drawer bottom | 1 | About 26-1/2 x 9-1/2 in (fits a 1/4 in groove) | 1/4 in plywood |
| Dividers | 2 | About 1-3/4 x 9 in | 1/2 in plywood |
| Drawer front (show face) | 1 | About 29-3/4 x 3-3/4 in | 3/4 in poplar, maple or MDF |
Here the box sides (2-1/4 in tall) clear the 3 in carcass sides with room for the slide, and the finished drawer front (cabinet width minus 1/4 in) covers the carcass edges and the box. The box is 27 in wide: the carcass inside width of 28 in minus 1 in for the slides. Check that the slide’s body height fits within your drawer side before you cut.
Materials and Tools
| Item | Why you need it |
|---|---|
| Highpoint 3J01 10 in Full-Extension Side-Mount Slides (pair) | Right length for a 12 in deep upper. Sold as a pair with screws; the listing’s 75 lb rating is based on an 18 in slide and a 16 in wide drawer, so it’s the slide’s rating, not this drawer’s |
| Franklin Sensors ProSensor M210 Stud Finder | Confirms the cabinet is screwed into studs, and finds studs and live wires if you add a back fastening |
| SPAX #8 x 1 in Flat Head Multi-Purpose Screws | For fastening down through a 1/2 in cabinet floor into the 3/4 in mounting panel without poking through |
| Kreg Pocket-Hole Jig 320 | Fast, square carcass joints in 3/4 in plywood |
| Titebond II Premium Wood Glue | Carcass and drawer box joints |
| STANLEY FATMAX 25 ft Tape Measure | Width, depth, headroom and reveal checks |
| Minwax Polycrylic Protective Finish, Clear Satin | Wipeable water-based clear coat for the inside of the drawer box and dividers |
| Gorilla Grip Non-Adhesive Drawer Liner | Optional: a trimmed strip in each bay stops tools from sliding when the drawer moves |
| 3/4 in and 1/2 in plywood, 1/4 in plywood | Carcass, box and bottom (about a quarter sheet of each is plenty) |
| 3/4 in poplar, maple or MDF | The drawer front, so it paints smoothly |
| Primer and cabinet paint matched to your doors | Front and exposed carcass edges |
| Drill/driver, saw, clamps, square, small level, 1-1/2 in Forstner bit or jigsaw | Building, installing and cutting the finger pull |
| Double-sided tape, 1 in screws, scrap spacer blocks, safety glasses | Positioning the front and slides |
Step-by-Step: Build the Under Cabinet Drawer
Step 1: Clear the Area and Inspect the Cabinet
Empty the cabinet and the counter below. Do the checks in the table above: bottom thickness and recess, how the cabinet is hung, what’s below, lights, outlets and the fridge door. Tighten or add cabinet mounting screws into the studs now if anything is loose. Note any shelf-pin holes, screws or nail heads on the cabinet bottom, because they’ll affect where your fasteners go.
Step 2: Measure and Lay Out the Front First
Measure the cabinet box width at the front and back, the depth to the wall, and the counter headroom. Then decide the front before anything else: its width is the cabinet box width minus about 1/4 in total (1/8 in gap each side), and its top sits about 1/8 in below the bottom of the doors so they can swing freely. Open the fridge door fully and hold a strip of cardboard where the front will be. If anything touches it, narrow the front. Working back from the front gives you the carcass and drawer box sizes.
Step 3: Cut the Carcass Parts
Cut the mounting panel, two side panels and the back rail from 3/4 in plywood. If your cabinet bottom is recessed behind a lip, make the mounting panel fit inside that recess, or cut filler strips the exact depth of the recess so the panel bears flat against the cabinet bottom instead of rocking on the lip. A panel that only touches the edges will flex and loosen.
Step 4: Assemble the Carcass
Glue the side panels to the underside of the mounting panel, flush with its ends, and drive countersunk screws down through the panel into the edges of the sides; the heads end up hidden against the cabinet. Fit the back rail between the sides at the back, with glue and pocket screws drilled on its back face, which will face the wall. Measure both diagonals; they should match. The carcass is an upside-down U with a back, open at the bottom and front.
Step 5: Mount the Slides on the Bench
Install the cabinet members of the slides on the inner faces of the side panels while the carcass is still upside down on your bench; it’s far easier than working overhead. Set each slide on the same scrap spacer block so both sit at exactly the same height, keep them flush with the front edge (check your slide’s instructions for overlay fronts), and use the screws supplied with the slides. Measure between the slides at front and back: the distance must be identical.
Step 6: Install the Carcass Under the Cabinet
Mark the side positions of the carcass so it centers under the cabinet with its front edge flush with the cabinet box (not the doors). Have a helper hold it up, or prop it on a padded block on the counter. The strongest, cleanest method is to drive screws down from inside the upper cabinet, through the cabinet floor, into the mounting panel. Pick a length that goes through the floor and about two-thirds of the way into the panel: with a 1/2 in floor and a 3/4 in panel, #8 x 1 in screws are right; with a 3/4 in floor, step up to 1-1/4 in. Pre-drill, and put screws near the front, near the back, and close to each cabinet side, where the floor is best supported.
If the cabinet floor is thin particleboard or you can’t get good bite, add support at the back: screw the back rail into the cabinet’s own bottom hanging rail, or into wall studs through the backsplash with a tile bit and properly sized wood screws (check for wires with a stud finder that detects live wire first). Driving screws up from below through the mounting panel into a thin floor is the weakest option; if you have to, keep them short enough that they can’t come through into the cabinet.
Step 7: Build the Drawer Box
The box width is critical: carcass inside width minus exactly 1 in for 1/2 in-clearance slides. Cut the 1/2 in plywood sides, front and back, and run a 1/4 in groove about 1/4 in up from the bottom edge of all four for the bottom. Glue and pin or screw the corners with Titebond II, slide in the bottom, and check the diagonals. A shallow box racks easily, so square it before the glue sets.
Step 8: Add the Dividers
Lay your actual tools in the box to set the bays. The reel’s layout works well: a narrow bay for measuring spoons and small gadgets, a wide center bay for spatulas, a whisk and a peeler, and a third for tongs and a wooden spoon. Glue the two dividers in, or set them into shallow dadoes if you want them removable later. Keep sharp knives out of this drawer; they belong in a block, a magnetic strip or a drawer with a proper knife insert.
Step 9: Make the Front and Cut the Finger Pull
Cut the front from 3/4 in poplar, maple or MDF and ease the edges. For the half-round finger pull, clamp the front edge-to-edge with a scrap board and drill a 1-1/2 in Forstner hole centered on the joint, so you get a clean half circle; a jigsaw and sandpaper also work. The reel puts the pull at the top center, but at this height many people find a pull on the bottom edge easier to reach from below. Pick one and keep the edges smooth.
Step 10: Sand and Finish
Sand the box and dividers to 220 grit and brush on two or three thin coats of Minwax Polycrylic, sanding lightly between coats, so the inside wipes clean. Prime and paint the front and the exposed carcass edges to match the cabinets. To match the color, take a door to a paint store for a scan, or ask the cabinet maker for the color name and a touch-up. Let everything cure before you load the drawer.
Step 11: Hang the Drawer and Attach the Front
Attach the drawer members of the slides to the box sides, set at the same height on each side, and slide the box in. It should run smoothly and close without hitting the back rail. Then put two strips of double-sided tape on the box front, hold spacers to set a 1/8 in gap under the doors and even gaps at the sides, and press the drawer front on. Open the drawer gently, drive two or four 1 in screws through the box front into the back of the drawer front, and remove the tape.
Step 12: Test, Adjust and Load It Light
Cycle the drawer a dozen times, open and closed. Check the gaps, open the fridge door and both cabinet doors, and make sure nothing rubs or collides. Then load it with light, everyday tools: measuring spoons, spatulas, a whisk, a peeler, tongs, wooden spoons. A trimmed piece of drawer liner in each bay keeps things from sliding. Push it closed after use, since an open drawer at this height is easy to bump your head on.
Want more hidden kitchen storage? The pull-out tilt-down spice rack and the flip-down spice cabinet use the same space under the upper cabinets, and the hidden toe kick drawer uses the other forgotten strip, down at floor level.
How Much Can It Hold?
There’s no honest single number. The limit is set by the weakest link: the cabinet’s mounting to the studs, how thick and sound the cabinet floor is, how many screws go into the mounting panel and how long they are, the carcass joints, and the slides. The Highpoint listing rates its slides at 75 lb, tested on an 18 in slide and a 16 in wide drawer. That’s a slide rating, not a promise for a carcass screwed to a 1/2 in cabinet floor.
Treat this as a light-duty drawer for utensils and small tools. Don’t store cast iron, pans, cans or heavy glass in it, and don’t hang on it or use it as a shelf. If it ever sags, loosens or starts to rack, empty it and add fasteners or back support.
Safety Checklist
- Never install it above a cooktop or range, and keep it away from toaster ovens, kettles and coffee makers that vent heat or steam
- Confirm the upper cabinet is screwed into studs before you hang anything under it
- Check for live wires before drilling into the wall or backsplash, and leave outlets, switches and hardwired lights uncovered
- Pick screw lengths that can’t come through the cabinet floor or the mounting panel
- Keep knives and sharp tools out, especially if kids can reach the drawer
- Close the drawer after use; it sits at about head height for many adults
- Wear safety glasses when cutting and drilling, and a dust mask when sanding; see OSHA’s wood dust guidance
- Let paint and finish cure fully before putting food tools in the drawer
Estimated Project Cost
| Item | Typical range (USD) |
|---|---|
| One pair of 10 in full-extension slides | About $20 to $35 |
| Plywood (3/4, 1/2 and 1/4 in) and front stock | About $30 to $70 |
| Screws, glue, sandpaper, clear finish | About $20 to $45 |
| Primer and matching paint (if you don’t have touch-up) | About $15 to $40 |
| Optional drawer liner | About $10 to $20 |
| Total (DIY, excluding tools) | About $85 to $210 |
Prices vary by region and store. Plywood offcuts and leftover cabinet paint put you at the low end.
Common Mistakes to Avoid
| Mistake | Better approach |
|---|---|
| Screwing up through the bottom of an open box | Build an upside-down U carcass and fasten its top panel to the cabinet floor |
| Slides with no side panels behind them | Mount both slides on solid 3/4 in side panels |
| Screws long enough to poke into the cabinet | Floor thickness plus about two-thirds of the panel, no more |
| Ignoring a recessed cabinet bottom | Fit the panel inside the recess or add filler strips so it bears flat |
| A front wider than the cabinet | Keep 1/8 in reveals and check the fridge door swing |
| No gap under the doors | Leave about 1/8 in so the doors don’t rub the drawer front |
| Box width off by a fraction | Carcass inside width minus exactly 1 in for 1/2 in-clearance slides |
| Building over the stove or covering lights | Pick a cabinet away from heat with nothing to cover |
| Using it for heavy pans or loose knives | Light utensils only |
Frequently Asked Questions
Can I add an under cabinet drawer to any upper cabinet?
Most standard uppers work if the cabinet is screwed into studs, the bottom is sound, and there’s nothing below it that gets hot. Cabinets over a range, cabinets with thin or damaged bottoms, and spots with under-cabinet lighting you don’t want to lose are the exceptions.
What size drawer slides do I need?
For a typical 12 in deep upper, 10 in full-extension side-mount slides fit. Check the instructions for the minimum inside depth and side clearance; most ball-bearing slides need 1/2 in per side.
How tall should the drawer be?
About 3 to 4 in overall keeps roughly 14 in of headroom above an 18 in backsplash and still holds spatulas, tongs and measuring spoons. Taller drawers start to crowd your work area.
Will it hit my refrigerator?
Not if the front stays inside the cabinet’s width with 1/8 in gaps. Open the fridge door fully before you cut the front.
Can I put it above my stove?
No. Heat, steam and grease rise straight into it, and cooktop makers require clearance to combustible materials above the cooking surface.
Does it need a handle?
No. A half-round finger pull cut into the front keeps it flush and snag-free, and it disappears when the drawer is closed.