
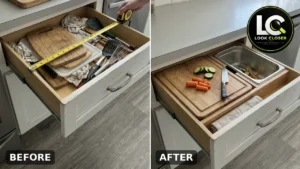

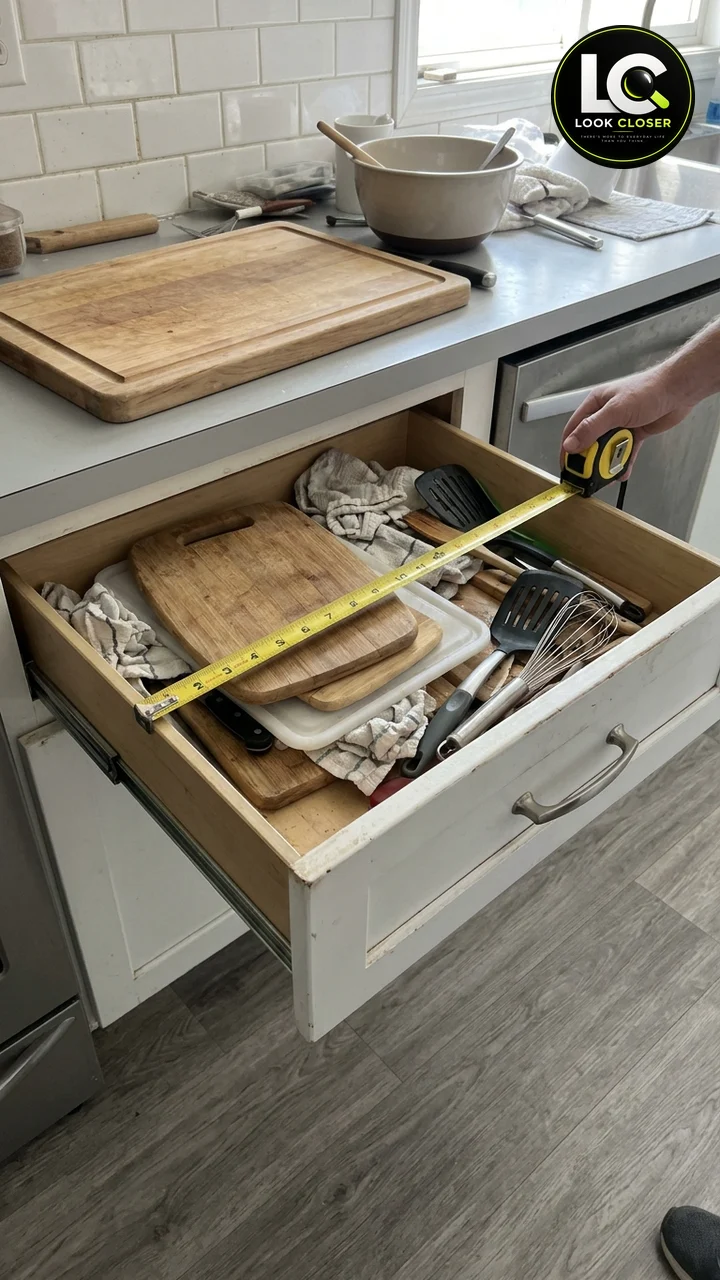
Every kitchen has one drawer that gets the leftovers: three cutting boards that never stack, a roll of foil, a few tongs, and a rubber band nobody can explain. In this project, that drawer sat right beside the dishwasher, under the best stretch of counter in the room. It was the perfect prep spot, and it was full of clutter. A simple cutting board drawer insert turned it into a hidden prep station.
The version shown on the Look Closer page is a plywood insert: a plywood frame that drops into the existing drawer box and holds a removable hardwood board, a stainless scrap pan, and a folded towel, all hidden behind the original white shaker drawer front. This guide turns that before-and-after into a buildable plan, with measuring steps, a variable cut list, slide and clearance checks, and food-safety notes.
The original shows the result, not the measurements, so the plan below is a constructed build method rather than a copy of a measured original. Every dimension comes from your own drawer. For more drawer and cabinet upgrades in the same kitchen spirit, see our DIY pull-out trash cabinet, the under-sink pull-out drawer, and the pull-out tilt-down spice rack.
Affiliate Disclosure: As an Amazon Associate I earn from qualifying purchases. Product links in this article may earn a commission at no additional cost to you.
What’s in This Post
- What We’re Building: A Cutting Board Drawer Insert
- Would This Make Meal Prep Easier?
- Measure the Drawer and the Closing Clearance
- Choose the Hotel Pan Size
- Safety First
- Materials and Tools
- Example Cut List (Use Your Own Numbers)
- Build the Insert, Step by Step
- Check the Slides, Load, and Clearance
- Food-Safe Finish and Hygiene
- Estimated Project Cost
- Budget Alternatives
- Common Mistakes and Better Approaches
- FAQ
What We’re Building: A Cutting Board Drawer Insert
The component list follows what is visible in the project photos. Anything the photos do not show, such as support cleats under the board, is marked as a recommendation.
| Component | Function |
|---|---|
| Existing top drawer box, slides, and white shaker drawer front | Stay in place; the insert sits inside the box, so the kitchen looks unchanged when the drawer is closed |
| Plywood base panel, sized to the drawer floor | Gives the insert a flat, stiff floor that can be screwed to the drawer box |
| Wood strip walls forming a compartment at the back right | Frame the opening for the hotel pan; the pan lip rests on the top edges of the strips |
| Long strip divider along the front right | Separates a narrow front channel for a folded kitchen towel |
| Large open bay on the left | Holds the removable hardwood cutting board |
| Board support cleats (recommended, not visible in the photos) | Set the board at a consistent height so it does not rock and sits level with the insert rim |
| Removable stainless hotel pan (1/3 or 1/2 size) | Catches peels, ends, and scraps; lifts out for the dishwasher |
| Removable hardwood cutting board | The prep surface; lifts out for washing and oiling |
Would This Make Meal Prep Easier?
For most cooks, yes, as long as the drawer sits beside open counter and close to the sink. The upgrade removes three small trips from every prep session: getting the board out of a cupboard, finding a bowl for scraps, and hunting for a towel. With the drawer pulled out, you chop on the board, push peels straight into the pan behind it, and wipe your hands on the towel in front. When you finish, the pan goes to the compost or trash and then the dishwasher, the board goes to the sink, and the drawer closes over a clean frame.
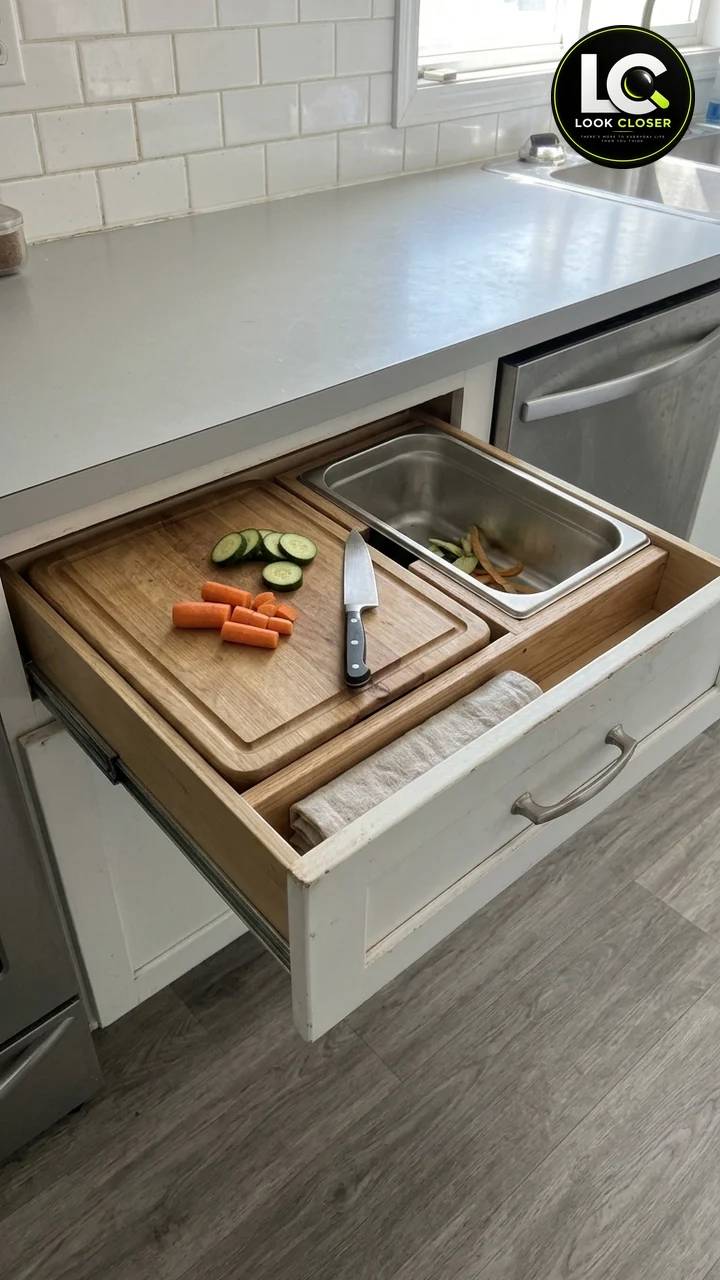
It works best for vegetable prep, fruit, bread, and herbs. Keep raw meat, poultry, and seafood on a separate board, as the USDA recommends (more on that in the hygiene section). It is not ideal if your drawer is very shallow, if the slides are worn, or if young children can reach the open drawer while a knife is on the board.
Measure the Drawer and the Closing Clearance
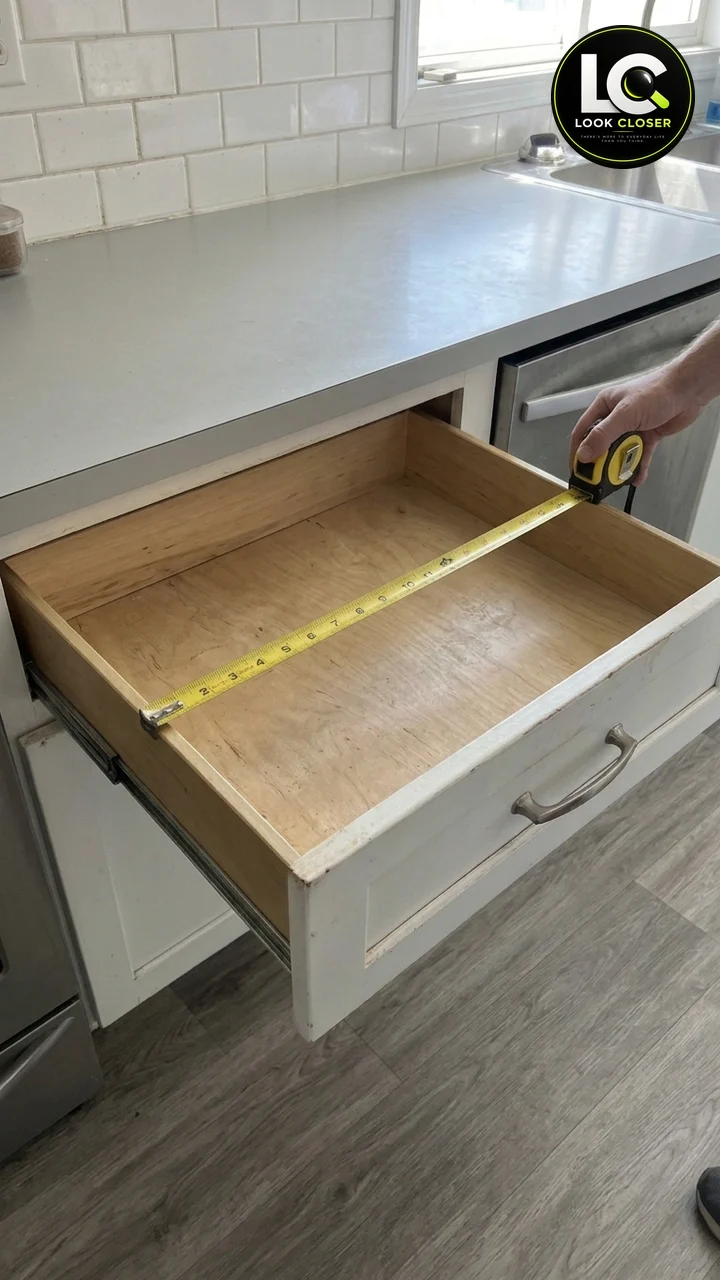
This is the step that decides whether the project works. Measure the drawer box, not the drawer front, and measure twice with the drawer pulled fully out.
- Interior width (W): inside face of the left side to inside face of the right side. Measure at the front and at the back; use the smaller number.
- Interior depth (D): inside of the drawer front to inside of the drawer back.
- Interior height (H): drawer floor to the top edge of the lowest drawer side.
- Closing clearance (C): with the drawer closed, the gap between the top of the drawer sides and the underside of the countertop, face frame rail, or any apron above it. Open the drawer, lay a straightedge across the sides, and check what it would hit when closed. Nothing in the insert, including the pan lip, the board, or a towel, may rise above the drawer sides by more than a small part of C.
- Slide type and travel: note whether the drawer runs on full-extension ball-bearing slides, as in the photos, and look for a load rating stamped on the slide or listed by the cabinet maker.
Write these as variables: W, D, H, C. Everything else in this guide is expressed with them, so you never cut to someone else’s numbers.
Choose the Hotel Pan Size
Hotel pans, also called steam table pans, come in standard fractional sizes, so replacements and lids are easy to find. A 1/3 size pan is the usual pick for a scrap bin in a standard base cabinet drawer; it leaves most of the width for the board. A 1/2 size pan holds more but leaves a narrower cutting area, so it suits wider drawers.
Depth matters more than footprint. Pans are sold in several depths, and the body of the pan hangs below its lip. The pan depth must be less than the drawer interior height H minus the base panel thickness, with a little air under the pan. If your drawer is shallow, choose a shallower pan rather than raising the insert.
Buy the pan before you cut anything. Measure its actual body width and length just under the lip, and the lip overhang on each side. Different brands vary slightly, and the pan opening is cut to the pan you own, not a catalog drawing. A good, widely available option is the Winco 1/3 Size Stainless Steel Steam Pan, 4-inch deep; confirm the 4-inch depth fits under your H before ordering.
Safety First
This is a light woodworking project, but it lives in a drawer that holds a knife and gets opened dozens of times a day. Work through this checklist before and during the build.
- Wear safety glasses for every cut and drilling step; add hearing protection with a circular saw or router.
- Unplug or remove the battery from tools before changing blades or bits.
- Cut plywood on a stable surface with both sides supported; never cut pieces freehand on your knee or inside the drawer.
- Check screw length before driving into the drawer box: the screw must be shorter than the insert part plus the drawer floor or side, so no point comes through the outside or into the slide.
- Do not drive screws into the slide hardware or its mounting area.
- Keep the finished drawer closed when not in use, and never leave a knife on the board with the drawer open in a home with small children.
- Do not load the drawer beyond what the slides and drawer box are rated for (see the slides section).
- Let any glue and finish cure fully, per the label, before food touches the board or pan area.
Materials and Tools
Buy the pan and board first, then size the plywood around them. Product names below are examples that fit the plan; check sizes against your W, D, and H before ordering.
| Item | Why you need it | Example |
|---|---|---|
| Stainless hotel pan, 1/3 or 1/2 size | Removable, dishwasher-safe scrap bin | Winco 1/3 Size 4-inch Deep Steam Pan |
| Hardwood cutting board (custom-cut or store-bought) | The removable prep surface | John Boos Prestige Maple Edge Grain Board, 18 x 12 x 1.25 inch (check that its width, length, and thickness fit your bay) |
| 1/2 in or 3/4 in plywood (Baltic birch or cabinet grade) | Base panel, walls, and dividers | Home center or lumberyard |
| Hardwood strips for cleats and the pan frame | Board support ledges and strip walls | Home center |
| Water-resistant wood glue | Bonds the strips to the base | Titebond III Ultimate Wood Glue, 8 oz |
| Wood screws, length checked against your stock | Join parts and fix the insert to the drawer box | Hardware store |
| Food-safe board oil or conditioner | Seals and maintains the cutting board | Howard Butcher Block Conditioner |
| Countersink drill bit | Sinks screw heads below the surface so nothing snags the board or pan | DEWALT DW2535 Countersink Drill Bit Set |
| Tape measure, square, pencil | Measuring and layout | Your toolbox |
| Circular saw, track saw, or table saw | Straight plywood cuts | Your toolbox or a home center cutting service |
| Jigsaw (only for the deck-panel method) | Cutting a pan opening in a solid panel | Your toolbox |
| Drill/driver, clamps, 120 to 220 grit sandpaper | Assembly and smoothing | Your toolbox |
The pan, board, glue, conditioner, and countersink links above were checked on Amazon on the day this guide was written. The John Boos board was in stock from a third-party seller rather than Amazon itself, so check the seller and size before you buy.
Example Cut List (Use Your Own Numbers)
Use these formulas with your own measurements. T is your plywood thickness, Tb is your cutting board thickness, Pw and Pl are the pan body width and length just under the lip, and g is a small fit gap so parts slide in without forcing. Check every result against your drawer before cutting.
| Part | Qty | Size formula | Notes |
|---|---|---|---|
| Base panel | 1 | (W − g) × (D − g) | Drops onto the drawer floor; T can be 1/2 in to save height |
| Pan compartment walls, long sides | 2 | Pl + g long × (pan hang height) tall | Top edge height = pan depth plus a little air, so the lip rests on the wood |
| Pan compartment walls, short sides | 2 | Pw + g minus 2T long × same height | Fit between the long walls |
| Front towel channel divider | 1 | Width of the right-hand section × same height as the pan walls | Leaves a channel wide enough for a folded towel |
| Board support cleats | 2 to 3 | Bay length × cleat width | Top of cleat = rim height − Tb, so the board sits flush with the insert rim |
| Cutting board | 1 | (Bay width − g) × (bay length − g) × Tb | Store-bought or custom; Tb plus cleat height must stay inside H + part of C |
A quick height check: base panel T + cleat height + Tb must be no more than the height of the drawer sides plus a safe part of the closing clearance C. If it is more, use a thinner base, lower cleats, or a thinner board.
Build the Insert, Step by Step
Step 1: Empty, clean, and measure the drawer
Take everything out, vacuum the drawer floor, and wipe it down. Check that the drawer box is square and solid; a loose bottom or a racked box should be repaired before you add weight. Record W, D, H, and C as described above.
Step 2: Lay out the bays on paper
Draw the drawer floor to scale. Put the pan where it is easiest to sweep scraps into, usually the back corner on your dominant-hand side, as in the photos where it sits at the back right. Add the towel channel in front of it, and give the rest of the floor to the board. Make a cardboard mockup of the base, the pan footprint, and the board and test it in the drawer. This catches layout mistakes for free.
Step 3: Cut the base, walls, and divider
Cut the base panel from your cut list and dry-fit it in the drawer; it should drop in without forcing. Cut the strips for the pan compartment and the front divider. Ease every edge with sandpaper, since hands and towels will rub against them daily.
Step 4: Build the pan opening and assemble the frame
The photos show the pan held by a rectangle of strip walls; the lip rests on their top edges. Size the inside of that rectangle to the pan body (Pw × Pl) plus the small gap g, never to the lip. If you prefer a solid deck panel instead, trace the pan upside down on the panel, draw a second line inside it equal to the lip overhang, drill a starter hole in each corner, and cut the inner line with a jigsaw. Test the pan in a scrap first.
Glue and screw the walls and front divider to the base, predrilling and countersinking each hole. Check the pan drops in and lifts out easily before the glue sets.
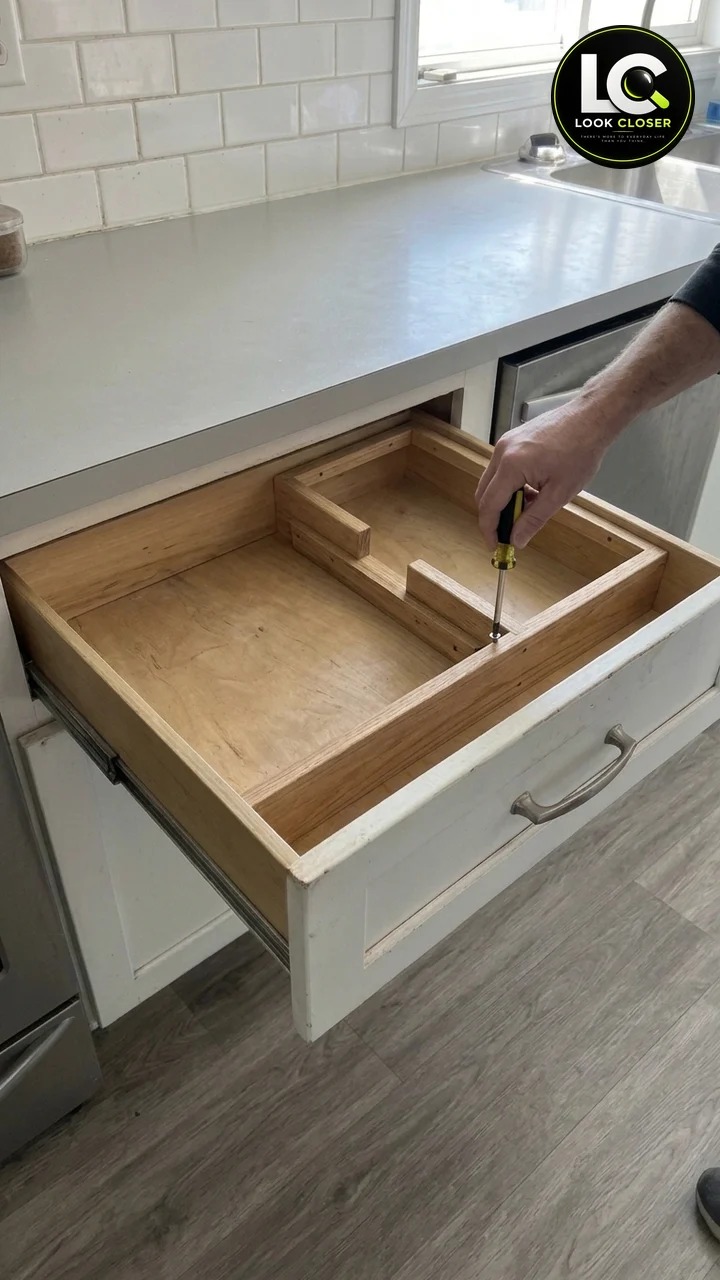
Step 5: Add board support cleats
The photos do not show what the board rests on, so add cleats for a predictable fit. Glue and screw two or three hardwood strips to the base in the board bay, with their top at rim height minus Tb. Set the board on them and check it does not rock and sits level with the top of the pan walls.
Step 6: Finish, then screw the insert to the drawer box
Sand the insert smooth and apply your chosen finish (see the finish section). Once it has cured, set the insert in the drawer and fix it with a few short screws through the base into the drawer floor, or through the walls into the drawer sides, using the screw-length rule from the safety checklist. Stay well clear of the slide mounting screws.
Step 7: Drop in the board, pan, and towel
Set the board on its cleats, lower the pan into its opening, and fold a towel into the front channel. Open and close the drawer slowly a few times, listening for rubbing.
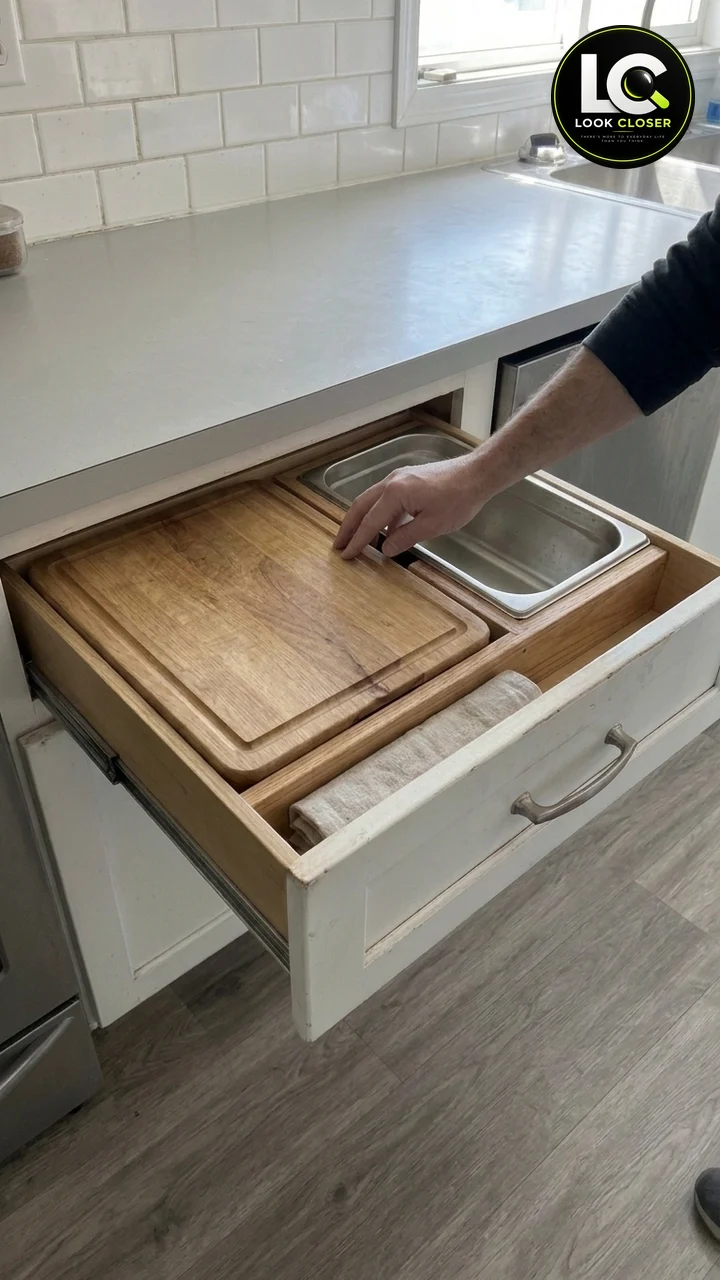
Step 8: Do the clearance and load test
With everything loaded, including a pan with some weight in it, close the drawer fully. It should close as easily as before and the drawer front should sit flush with its neighbors. If anything drags against the countertop or face frame, lower that part before you use the station.
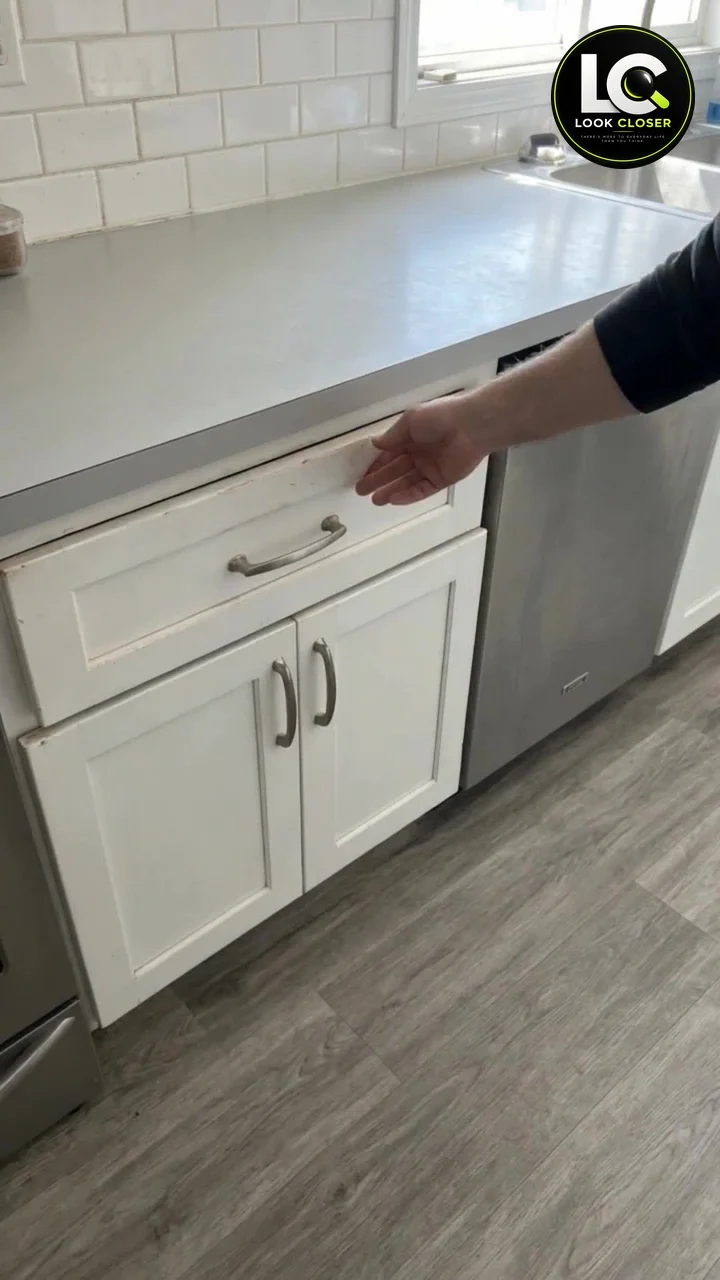
Check the Slides, Load, and Clearance
The drawer now carries a hardwood board, a plywood insert, a steel pan, and whatever scraps go into it, and it gets pushed on while you chop. Two checks keep that safe:
- Load rating: look for the rating printed on the slide, or check the slide or cabinet maker’s spec sheet. Weigh the board, the empty insert, and a full pan on a bathroom or kitchen scale and keep the total comfortably below the slide rating. A heavy edge-grain board can weigh several pounds on its own. If you cannot find a rating, assume the original slides were sized for ordinary drawer contents, not a heavy prep load, and consider upgrading to rated full-extension slides.
- Chopping force: slides are rated for a static load, not repeated chopping on a cantilevered drawer. Keep heavy cleaver work on the counter, and if the extended drawer dips noticeably when you press on the board, stop and upgrade the slides.
- Clearance: repeat the close test whenever you change the board or pan. A thicker board is the most common reason the drawer starts catching under the countertop.
We are not giving a weight number for this build because the original does not list one, and drawers, slides, and boards vary too much for a single figure to be honest.
Food-Safe Finish and Hygiene
The board: use a hardwood board, such as maple, and keep it oiled with a food-safe mineral oil or board conditioner. Apply it to a clean, dry board, let it soak in, and wipe off the excess. The Howard Butcher Block Conditioner is a food-grade mineral oil conditioner made for this job.
The insert: the insert is not a cutting surface, but it sits next to food. Use the same oil, or a finish whose label says it is food-safe once fully cured, and follow the cure time on the can. Titebond III is described by the maker as approved for indirect food contact, which is why it is the glue in the list.
Hygiene: the pan is the reason this design stays clean. Empty it after every prep session, run it through the dishwasher, and never leave scraps in a closed drawer. Wash the board in hot, soapy water, rinse, and dry it standing up before it goes back. The USDA Food Safety and Inspection Service suggests one board for produce and bread and a separate one for raw meat, poultry, and seafood, and recommends replacing boards once they develop deep, hard-to-clean grooves; see the FSIS guide to cutting boards. Wipe the insert and the towel channel weekly and swap the towel daily.
Estimated Project Cost
These are rough ranges and depend on your region, materials, and what you already own.
| Item | Budget range | Mid range |
|---|---|---|
| Plywood and hardwood strips | Offcuts or a partial sheet: low | Baltic birch partial sheet: moderate |
| Hotel pan | Basic stainless: low | Heavier gauge with lid: moderate |
| Cutting board | Custom-cut from a hardwood board: low to moderate | Premium edge-grain board: higher |
| Glue, screws, sandpaper, oil | Low | Low |
| Rated full-extension slides (only if needed) | Not needed | Moderate per pair |
| Overall, tools already owned | Roughly $40 to $90 | Roughly $100 to $200 |
Budget Alternatives
If you are not ready to build a frame, two shortcuts get you most of the benefit:
- A store-bought cutting board with a lip: boards with a front lip or hook edge hook over the counter and stay put. Pair one with a drawer you have cleared and you have a prep spot without any carpentry; the board simply lives in the drawer flat when you are done.
- An in-drawer or hanging compost bin: a small bin that hangs on a drawer or cabinet edge catches scraps right where you chop. The stonespace 1.3 Gal Hanging Kitchen Compost Bin hangs on a door or drawer edge and can be removed for washing.
Both options skip the insert, so check the closing clearance before you leave a hanging bin on a drawer.
Common Mistakes and Better Approaches
| Mistake | Better Approach |
|---|---|
| Sizing the pan opening to the lip | Size it to the pan body plus a small gap so the lip rests on the wood |
| Buying the pan after cutting | Buy the pan and board first and measure the real parts |
| Ignoring the closing clearance | Measure C and do a full close test with everything loaded |
| Using long screws into the drawer box | Check screw length against combined thickness; countersink every head |
| Leaving scraps in a closed drawer | Empty and wash the pan after every session |
| Heavy chopping on a cantilevered drawer | Check the slide rating; keep heavy cleaver work on the counter |
| Using one board for everything | Use a separate board for raw meat, poultry, and seafood |
FAQ
Will this work in any kitchen drawer?
It works best in a top drawer on solid, full-extension slides, with enough interior height for the pan depth. Very shallow drawers, worn slides, or weak drawer bottoms should be upgraded first, or the project skipped.
Should I use a 1/3 or 1/2 size hotel pan?
A 1/3 size pan suits most standard drawers and leaves more room for the board. A 1/2 size pan suits wide drawers and heavy prep. Check the pan depth against your drawer height first.
Can the pan and board go in the dishwasher?
Stainless hotel pans are generally dishwasher-safe. The FSIS says solid wood boards can be washed in a dishwasher while laminated boards may crack and split, but many board makers, including John Boos, say hand wash only, so follow your board’s care instructions.
How much weight can the drawer hold?
That depends on your slides and drawer box. Find the rating on the slide or the maker’s spec, weigh the loaded insert, and stay well under it.
Can I take the insert out later?
Yes. It is screwed to the drawer box, not glued, so remove the screws and lift it out, then fill the small holes if needed.
Is 1/2 in or 3/4 in plywood better?
Use 1/2 in plywood when height is tight, since it saves room for the board and pan. Use 3/4 in plywood for stiffer walls in a deep drawer.
[…] you like small sink-side upgrades like this one, the hidden cutting board drawer insert uses a drawer in a similar spot, and the two-level under sink pull-out tackles the cabinet right […]
[…] you enjoy this kind of small-space improvement, the pull-out trash cabinet and hidden cutting board drawer show other ways to add useful work and storage […]