
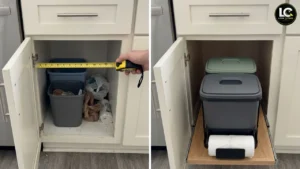

A DIY pull out trash cabinet can make an ordinary kitchen feel easier to use without replacing its doors. In this Look Closer concept, two loose bins occupy a narrow base cabinet. The front one is easy to reach; the bin in back gets lost behind it, along with spare bags and everyday clutter.
The useful change is a shared sliding platform. Both bins come forward together, then disappear behind the original left-hinged door. The drawer above, neighboring dishwasher, and surrounding cabinetry stay in place. This guide explains how to plan that same arrangement around your own cabinet and hardware.
The source images are AI-assisted DIY inspiration, not evidence of a tested installation. Their hidden connections and dimensions cannot be verified. For the actual build, follow your slide manufacturer’s drawings and the principles in Accuride’s drawer-slide installation guidance: parallel slides, correct clearance, and adjustment before final fastening.
What We’re Building
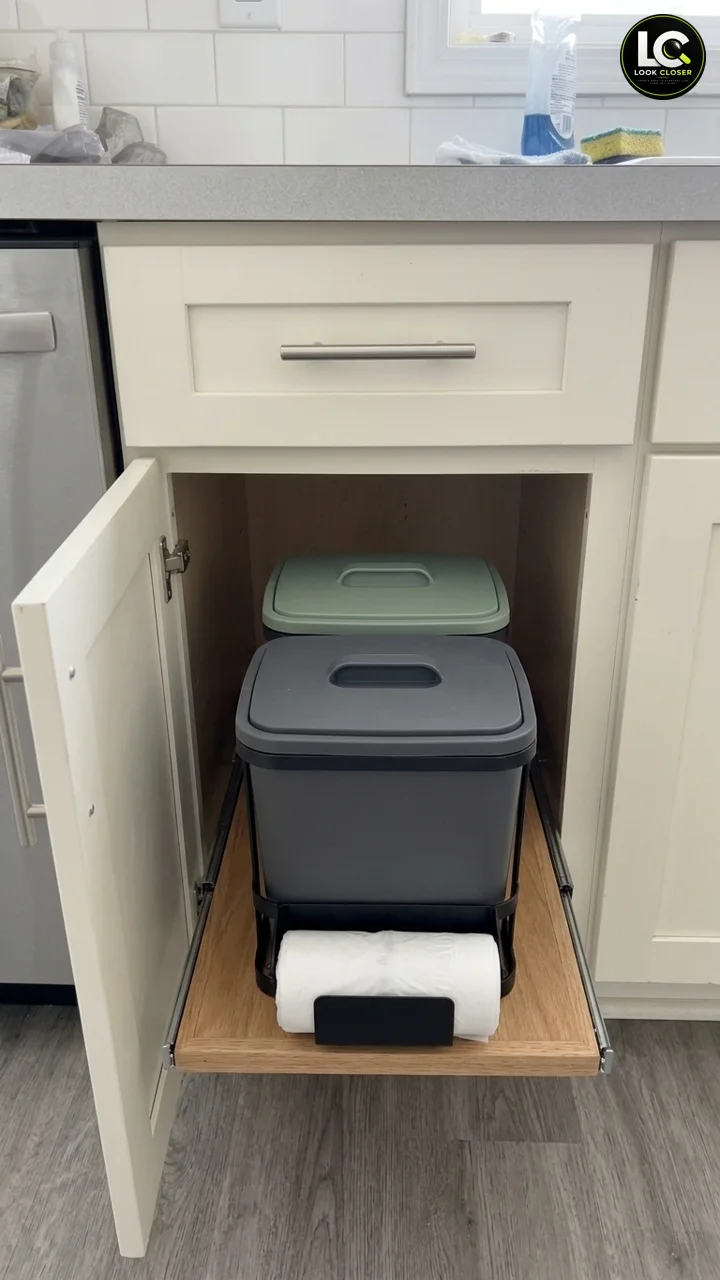
This is a two-bin organizer on a low, wood-finish platform. The bins sit front to back, rather than side by side, to suit a narrow opening. The cabinet door remains hinged to the cabinet; it is not attached to the moving tray.
| Component | Purpose |
|---|---|
| Shared platform | Moves both containers forward in one motion. |
| Two upright full-extension slides | Guide the platform and expose the rear bin. |
| Solid mounting and carrier members | Provide fastening surfaces suited to the selected hardware. |
| Two removable lidded bins | Keep waste streams separate and lift out for cleaning. |
| Original hinged door | Preserves the kitchen’s existing appearance. |
Skill level: intermediate. Accurate measuring and solid cabinet fastening matter more than decorative woodworking. Allow roughly 4–6 hours of active work, plus the finish manufacturer’s drying and curing time. Repair a weak or water-damaged cabinet before adding a moving load.
Measure Before Buying Anything
Empty the cabinet and clean its floor. Check for swollen panels, loose joints, exposed fasteners, or a sagging bottom. Locate any nearby water lines, wiring, appliance components, and concealed service routes before drilling. This project does not require moving plumbing or electrical connections.
Open the original door fully. Measure the narrowest path the loaded platform must pass through, not just the width between the face-frame edges. Hinge arms, door thickness, and neighboring handles may reduce usable space. Check the door’s swing beside the dishwasher with both appliances in their ordinary positions.
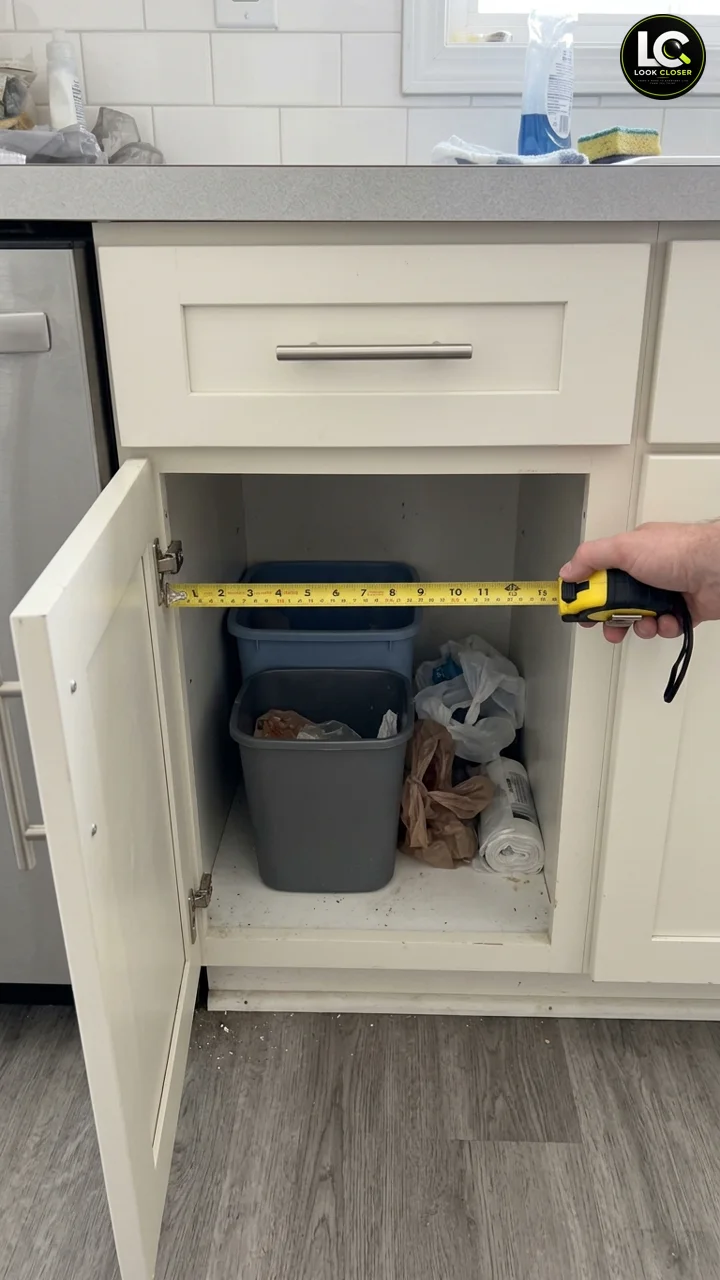
| Measurement | What to check |
|---|---|
| Usable opening width | Measure at the top, middle, and bottom, including hinge intrusion. |
| Mounting-plane width | Measure between the vertical surfaces where the outer slide members will attach. |
| Usable depth | Allow for the cabinet back, closed door, slide setback, and any obstructions. |
| Available height | Subtract the raised tray assembly and allow space to remove each bin. |
| Extended reach | Confirm the rear bin can be opened and lifted out without dragging the front bin across the floor. |
Planning formula: outside width of the moving carrier = distance between mounting planes minus the two clearances required by the slide manufacturer. The platform’s cut width then depends on how its carrier rails or approved brackets attach. Do not assume the finished deck width and carrier width are identical.
For a hypothetical depth check, two bins with 8-inch front-to-back footprints and a 1-inch gap use 17 inches before adding any end clearance. That calculation might suit a 20-inch-deep tray, but only if the selected slides, cabinet, and lids also fit. These are examples, not measurements taken from the photos.
Make a full-size cardboard template of the proposed tray. Place the actual bins on it, including their handles, lid overhangs, and pedal housings. Move it through the doorway and simulate the closed position. A slightly smaller bin that lifts out comfortably is usually more useful than a larger one wedged tightly beneath the drawer.
Materials and Tools for a DIY Pull Out Trash Cabinet
As an Amazon Associate, I earn from qualifying purchases. The links below are optional shopping references. Confirm the current dimensions, model, mounting instructions, and included hardware before ordering.
| Item | Selection notes |
|---|---|
| Cabinet-grade plywood | A 3/4-inch panel is a practical starting point for the deck; buy locally and cut to your measured plan. |
| Solid wood mounting and carrier rails | Size for the slide height, screw placement, cabinet structure, and chosen deck connection. The photos do not establish these dimensions. |
| Full-extension slide pair | 20-inch full-extension drawer slides is one 20-inch example. Choose the length and rating your measured assembly requires; keep side-mount slides upright. |
| Two compact bins | compact rectangular lidded bin is a small lidded option to compare with your template, not the exact photographed bin. Reuse suitable bins whenever possible. |
| Wood glue | wood glue is an option for close-fitting wood joints; glue does not replace the mechanical connections required by the design. |
| Protective finish | water-based protective wood finish is an interior clear-coat option. Follow its preparation, ventilation, application, and cure instructions. |
| Fasteners and small retainers | Use slide-specified screws and cabinet-appropriate wood screws of verified length. Cut low wooden stops from offcuts if needed. |
For tools, gather a 25-foot tape measure, square, level, pencil, cordless drill/driver with suitable pilot and driver bits, and small bar clamps. You will also need sandpaper, eye protection, hearing protection when cutting, and a saw with a proper work support. Having a lumber supplier make straight panel cuts can reduce the tools you need at home.
Build a DIY Pull Out Trash Cabinet in 7 Steps
1. Inspect the Cabinet and Confirm the Layout
Mark the usable opening, slide position, and closed-door clearance on your template. Identify sound material for every mounting screw. A thin back panel, decorative trim, or damaged particleboard is not an adequate substitute for a structural fastening surface.
Decide what each bin will hold and how often it will be emptied. Keep liquids contained and avoid planning for dense loads such as bottles or food scraps without checking the complete assembly. The cabinet’s condition must support the intended use as well as the hardware.
2. Choose Compatible Slides and Mock Up the Bins
Use full-extension slides so the back container can move beyond the face frame. Check the manufacturer’s rating for the actual slide length, mounting orientation, drawer width, and extension. Include the moving tray, carrier members, bins, and expected contents in the load calculation.
Side-mount ball-bearing slides stay vertical. Do not rotate them flat onto the cabinet floor unless their exact documentation explicitly approves that orientation and provides the applicable rating. Platform brackets are another option only when the manufacturer lists them for the specific slide model; see this Accuride platform-bracket drawing for an example of a model-specific system, not a universal adapter.
3. Cut and Dry-Fit the Platform Assembly
Transfer your verified dimensions to the plywood. Cut on a stable work surface, support the offcut, and ease sharp edges. Keep the front edge comfortably behind the closed door. Check squareness by comparing diagonal measurements.
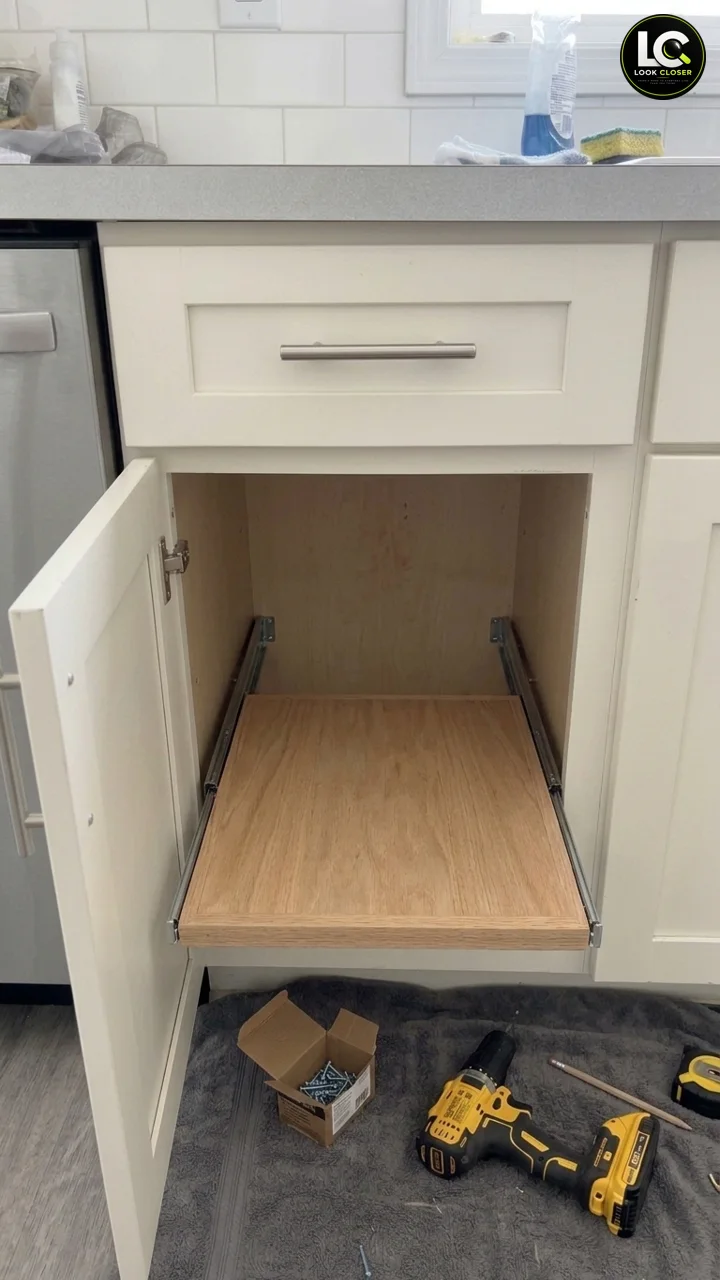
One practical construction route uses vertical solid-wood carrier rails beneath the deck’s left and right edges. Their exposed outer faces must accommodate the inner slide members and their full fastening pattern. Glue and mechanically secure the rails to the deck using a joint and screw layout appropriate to the material, without exposed tips. Account for this raised assembly when calculating bin height.
Do not fasten a tall slide into the thin edge of a plywood platform and assume it is equivalent. If the connection details are outside your woodworking experience, use a complete cabinet pull-out kit or have a cabinetmaker specify the carrier and mounting arrangement.
4. Sand, Seal, and Allow the Finish to Cure
Remove the bins and hardware before finishing. Sand the deck, rails, and any wooden stops; remove dust thoroughly. Apply the chosen interior coating to exposed faces and cut edges according to its label. Clean and prepare any previously finished surfaces before recoating.
Keep finish out of slide bearings and moving mechanisms. Allow the manufacturer’s required curing period before enclosing the assembly or setting bins on it. A surface that feels dry may still mark under pressure. The coating makes ordinary cleanup easier; it does not turn the cabinet into a waterproof enclosure.
5. Install Solid Mounting Rails and Upright Slides
Where the face frame or hinges require a setback, fit vertical spacer rails that bring the two slide mounting planes into alignment. Fasten them into sound cabinet structure with appropriate screws and pilot holes. Small floor strips alone do not establish a complete side-mount slide connection.
Check screw length against the real panel and spacer thickness. Use a drill-depth stop where needed, and never let a screw enter the neighboring dishwasher cavity or a concealed service route. Set the two outer slide members at equal height, parallel front to back, using the manufacturer’s setback and hole pattern.
Start with the designated adjustment slots. After confirming alignment, use the final fastening holes specified in the hardware instructions. Avoid pulling a warped cabinet wall into position by overtightening the slides.
6. Fit the Empty Tray and Adjust Its Travel
Attach the inner slide members to the prepared carrier faces, then engage the pair following the release and insertion instructions. Keep fingers clear of bearing tracks and pinch points. Move the empty assembly through its full travel several times.
If it binds, stop and check parallelism, level, screw-head interference, and the required side clearance. Do not force the tray or file away hardware. Close the cabinet door gently and verify that its inside face and hinge arms clear the deck and both rails.
7. Add the Bins, Retainers, and a Gradual Load Test
Place the front and rear bins in their planned positions. Low, securely attached stops can prevent creeping without trapping the bins; leave enough room for easy removal and cleaning. Add the small front roll holder shown in the concept only if it fits without blocking the bins, door, or tray grip.
Test empty first, then add ordinary contents gradually within the verified assembly limits. Watch for flexing, loose screws, rubbing, or cabinet movement. Pull from a centered grip rather than yanking a bin sideways. The rear lid should open once it clears the cabinet face, and both containers should lift out without hitting the drawer above.
Do not step on a bin pedal while the platform is extended. That adds leverage and impact the system may not be designed to carry. Open lids by hand if necessary. Keep children away from pinch points, and never sit, stand, or lean on the tray.
Estimated Project Cost
For initial planning, allow roughly $80–$200 in materials for a modest two-bin setup, depending on slide quality, the bins you choose, and what you can reuse. This is a broad project allowance, not a quote or a live Amazon price.
| Category | Planning allowance |
|---|---|
| Panel, rails, and small wooden stops | $20–$50 |
| Slide pair and compatible mounting hardware | $25–$70 |
| Two compact bins | $20–$50 |
| Finish, glue, and miscellaneous fasteners | $15–$30 |
Tools, shipping, tax, cabinet repairs, custom metalwork, and premium pull-out kits are excluded. Buying full-size containers of supplies can cost more than the amount used. Reusing sound bins and plywood offcuts can lower the total.
Common Mistakes and Better Approaches
| Mistake | Better approach |
|---|---|
| Buying bins from opening width alone | Check depth, lid swing, removal height, and the complete travel path. |
| Laying side-mount slides flat | Use their approved upright orientation or a specifically rated alternative. |
| Copying hidden fixings from an AI image | Follow the actual slide drawing and provide full fastening surfaces. |
| Using partial-extension slides | Verify that the rear bin can clear the face frame. |
| Forgetting the original door | Open it fully and include hinge intrusion in the layout. |
| Loading immediately after coating | Follow the finish label’s curing requirements. |
| Testing with a sudden heavy load | Check empty travel first, then add normal contents gradually. |
Everyday Use and Maintenance
Open the hinged door before pulling the platform, and push the tray fully home before closing it. Empty both bins regularly. Remove them to vacuum crumbs, wipe spills promptly, and dry the tray before replacing the containers.
Periodically check mounting screws, wooden stops, and slide movement. Repeated rubbing or new play deserves investigation before adding more weight. Follow the slide manufacturer’s cleaning and lubrication advice rather than spraying household oil into the tracks.
For another cabinet upgrade that preserves usable access, explore our kitchen corner coffee station guide. You can also browse Indoor Spaces projects for more ways to organize an existing room.
Frequently Asked Questions
Can I keep my existing cabinet door?
Yes, when the door opens far enough for the entire moving assembly to clear it. This layout keeps the original hinged door separate from the platform. A door-mounted commercial pull-out is a different hardware arrangement with different instructions.
What size cabinet do I need for two bins?
There is no single required size. Two front-to-back bins need enough depth for both footprints, gaps, and the selected slides. Width must accommodate the carrier assembly and hinges, while height must allow closed lids and comfortable removal. Measure the actual cabinet and containers together.
How much weight can the pull-out hold?
The usable limit depends on the slide model, orientation, extension, carrier joints, mounting screws, and cabinet structure. A slide’s advertised capacity does not certify the complete installation. Count all moving parts and loaded bins, and obtain help if you cannot verify the support arrangement.
Can I build this under a sink?
Only if the complete tray travel, bins, and lids clear the plumbing and leave valves and traps accessible. The reference project is an ordinary base cabinet without visible plumbing. Do not move pipes or cut cabinet structure to force this layout to fit.
Should both bins have lids?
Lids can suit household waste routines, but they add height and swing clearance. Test them before committing to the tray size. A lift-off lid or smaller container may work better beneath a shallow drawer. Do not use an extended platform as a base for forceful pedal operation.
Is a homemade platform better than a complete kit?
A custom platform can fit existing bins and keep costs manageable when you have the tools and skills. A compatible complete kit can simplify the support and hardware decisions. In either case, fit, mounting strength, and easy access to the back bin matter more than copying the photograph exactly.
The best result is simple: two bins that are easy to reach, remove, and clean, with a tray that moves smoothly and an original door that closes without interference.
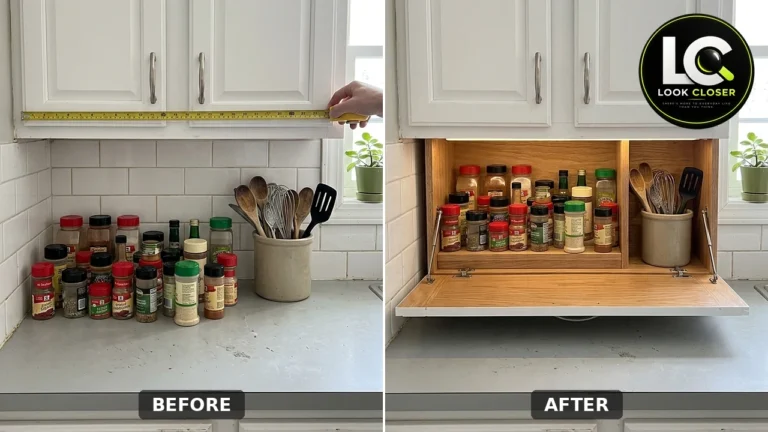
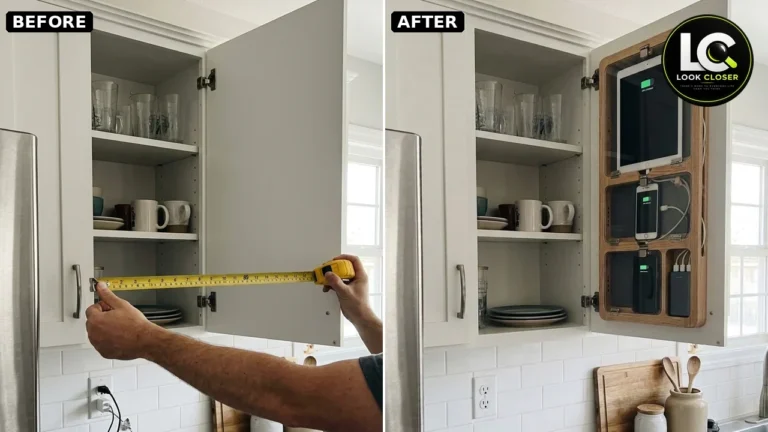
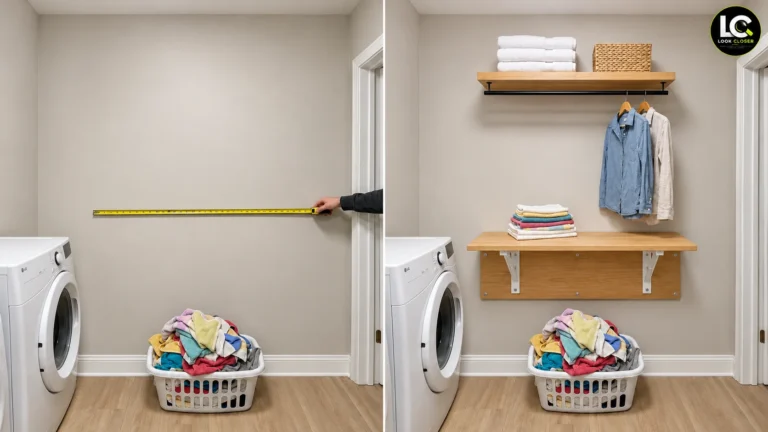
[…] from your own drawer. For more drawer and cabinet upgrades in the same kitchen spirit, see our DIY pull-out trash cabinet, the under-sink pull-out drawer, and the pull-out tilt-down spice […]
[…] you enjoy this kind of small-space improvement, the pull-out trash cabinet and hidden cutting board drawer show other ways to add useful work and storage […]