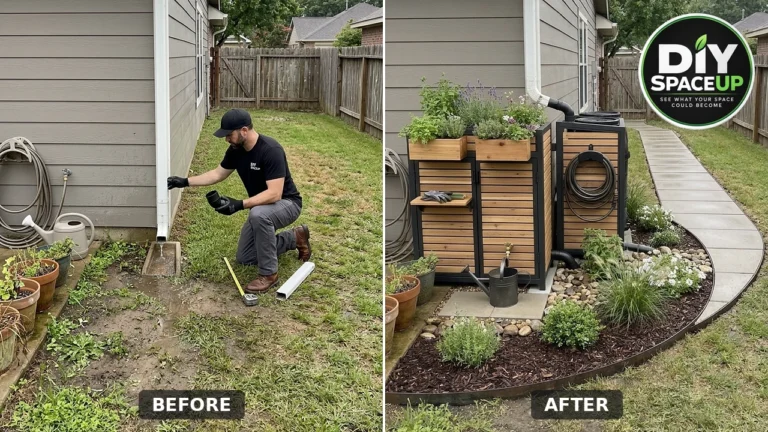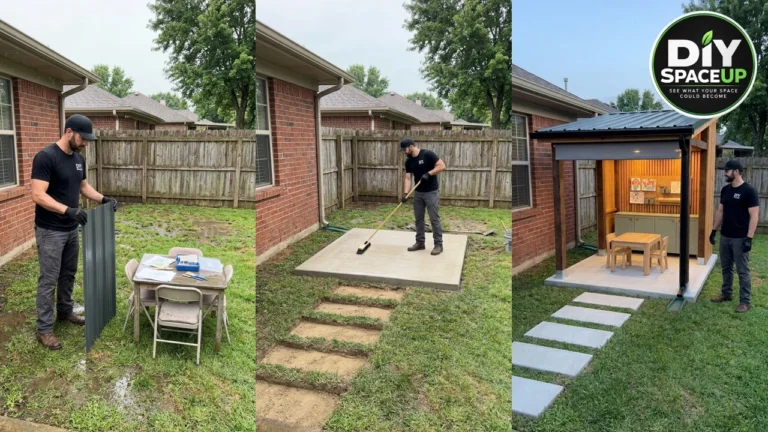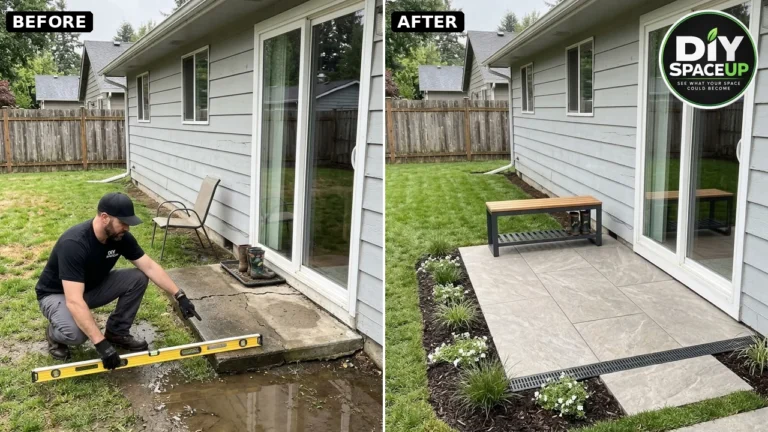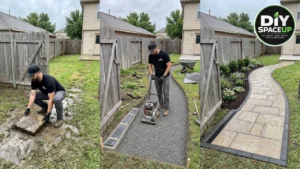

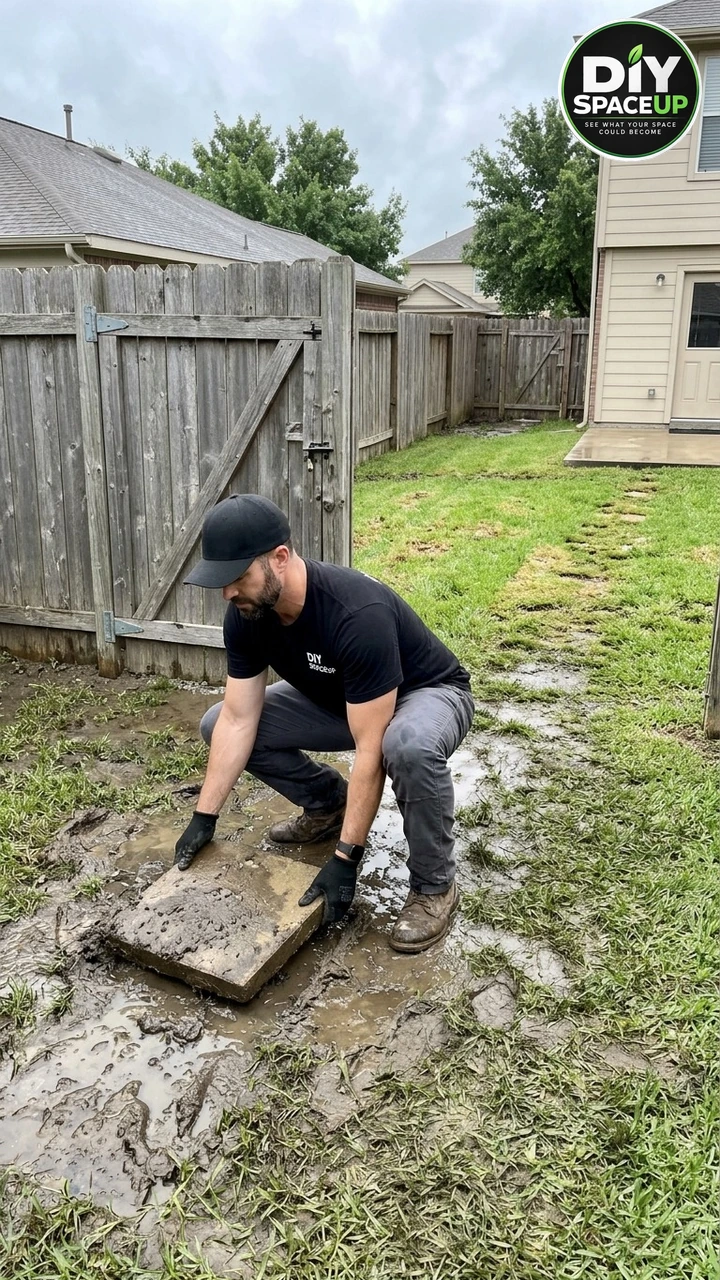
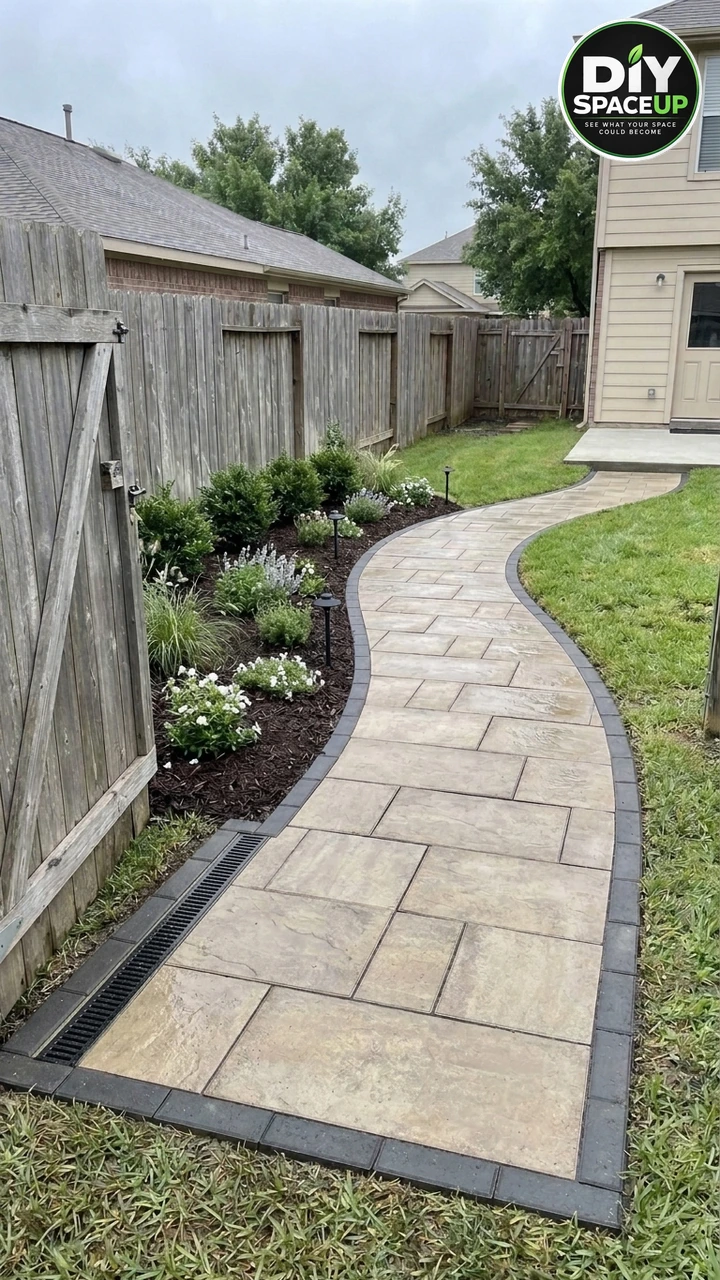
A sunken stepping stone can turn a simple trip through the backyard gate into a muddy balancing act. In this DIY SpaceUp concept, standing water gives way to a curved paver walkway with drainage: warm tan paving, a charcoal border, a short gate-side channel drain, and a planted strip along the weathered fence. The route still leads to the same beige house and concrete landing. What changes is the walking surface—and the plan for where rainwater goes.
The useful part of this makeover happens before the first paver is laid. The gate must clear the finished surface, the base must support the paving, and the drain must connect to an appropriate outlet. Contact 811 before digging, follow your state’s notice and response requirements, and arrange to locate private irrigation, lighting, and other owner-installed lines too.
About the illustrations: The original Reel and reference images are an AI-generated renovation concept, not evidence of a completed or tested installation. These illustrations preserve the same backyard and worker. The base-stage illustration has been corrected to show a supported drain. Actual dimensions, underground pipe routing, outlet conditions, soil strength, and product specifications cannot be confirmed from the images. Use this guide to plan a real installation with local requirements and manufacturer instructions.
Affiliate Disclosure: As an Amazon Associate I earn from qualifying purchases. Product links in this article may earn a commission at no additional cost to you.
In this guide
- What we’re building
- Solve the water problem first
- Measurements, slopes, and quantities
- Materials and tools
- Build it in the right order
- Details the Reel leaves out
- Estimated project cost and time
- Common mistakes
- Safety and when to call a pro
- Maintenance
- Frequently asked questions
Curved Paver Walkway With Drainage: What We’re Building
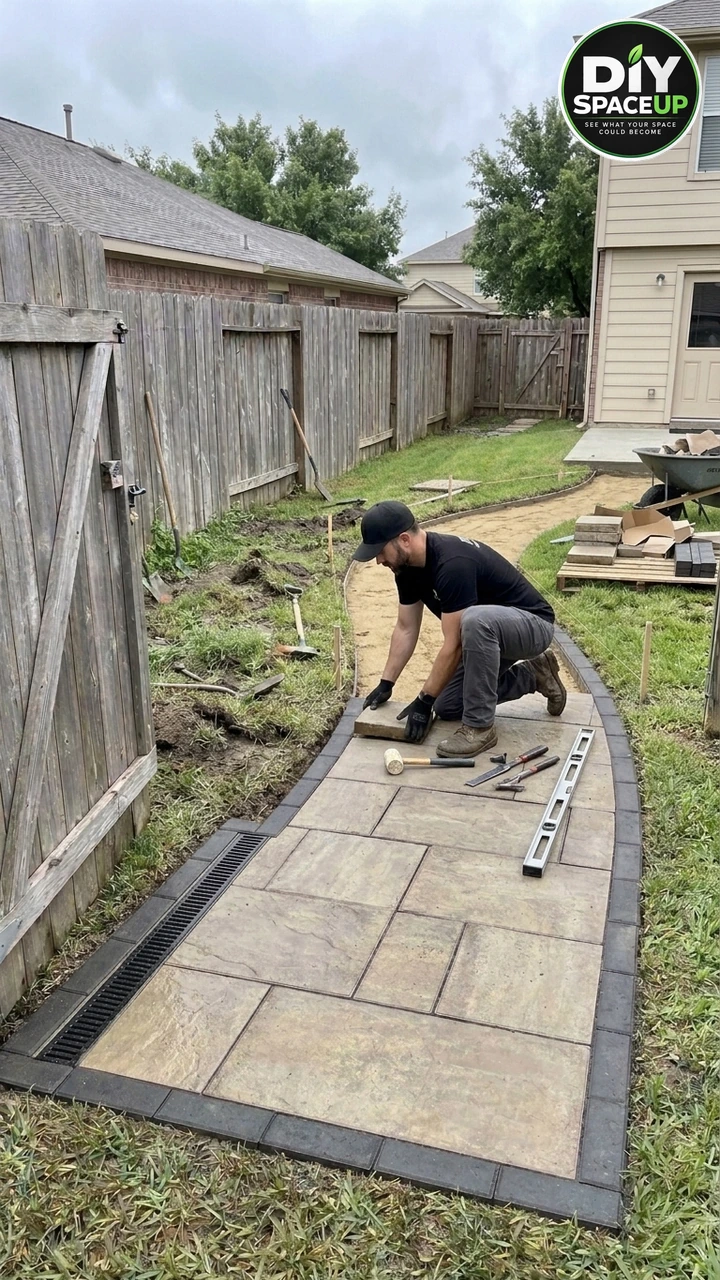
The finished design is an S-shaped pedestrian path from the open wooden gate toward the house landing. Tan rectangular and square units form the field. Dark border pavers trace both curves, and a straight grated drain sits along the left edge near the entrance. Lawn stays on the right; low planting, mulch, and small path lights finish the fence side. The fence, trees, house, and landing stay in place.
| Component | Purpose | What must be checked |
|---|---|---|
| Prepared soil and aggregate base | Support the path without rocking or settling | Soil condition, drainage, compaction, and required thickness |
| Uniform bedding layer | Provide even support beneath the paving | Material and thickness specified for the chosen system |
| Tan paving and charcoal border | Create the curved walking surface | Pedestrian suitability, joint layout, cutting, and handling |
| Concealed edge restraint | Keep the border from spreading | Compatible restraint anchored into the prepared base |
| Channel drain and solid outlet pipe | Collect surface runoff and carry it away | Capacity, support detail, invert elevations, and approved discharge |
| Planting and path lights | Soften and illuminate the route | Mature plant size, gate swing, drainage, and safe lighting installation |
For a different garden-gate layout, compare our modular garden gate paver walkway. This project specifically adds a gate-side drain and a sweeping curve; its elevations and outlet still need their own plan.
Solve the Water Problem Before You Pave
Start by watching the entrance during and after rain. Does water arrive through the gate, run off the lawn, spill from a downspout, or collect in a depression? The visible puddle identifies a problem, but does not prove its cause. Check the route outside the gate as well as the yard inside it. Raising a path without understanding both sides can simply move the puddle.
A channel drain collects surface water. A French drain addresses water within the soil; the two are not interchangeable. If the whole yard remains saturated, a short grate beside the gate may be only one part of the solution. Our backyard drainage-channel guide explains that wider planning problem.
Find the outlet before choosing the drain. A possible solution is solid pipe to an approved lower discharge point. Other sites may need a permitted storm connection or an infiltration system designed for the soil and groundwater conditions. Do not connect to a sanitary sewer, discharge onto a neighbor’s property, or assume a buried gravel pocket can absorb a storm. A pop-up emitter such as the NDS 430 pop-up drainage emitter is one possible outlet component, but only where the drainage plan allows it. It needs enough available elevation and a suitable place for released water to go; it is not a solution for every flat or saturated yard.
Check the outlet elevation against the drain outlet, not just the surrounding lawn. The pipe needs the slope and cover required by the selected system. If there is no workable gravity route, have a drainage professional assess the site before excavation. The illustrations intentionally do not invent a distant outlet that the source never shows.
Measurements, Slopes, and Material Quantities
Sketch the route and record the gate opening, full swing arc, landing height, path length, width at several stations, fence-post locations, and proposed drain and outlet elevations. Include room for a mower or wheelbarrow if that is how you use the gate. A 36–48-inch path width can be a planning starting point, not a measurement from these pictures or an accessibility guarantee.
Use gentle curves rather than tight bends that force tiny triangular cuts. Lay out both edges with hoses or stakes, then walk the route in both directions. Keep adequate clearance beneath the gate throughout its swing, while leaving the threshold comfortable underfoot. Do not raise paving or mulch against siding, vents, or the house landing.
| Planning item | Useful starting point | Limitation |
|---|---|---|
| Drainage fall | For example, a 2% fall equals 0.24 inch per foot, about 1 inch across 4 feet | Choose the direction and grade from actual elevations; preserve building drainage and applicable accessibility limits |
| Aggregate base | Unilock’s basic guide lists typical walkway bases of 6–8 inches | The exact product, soil, climate, and loading determine the design |
| Bedding | Typically about 1 inch for a conventional sand-set assembly | Follow the selected paving system, especially for large slabs |
| Paving quantity | Measured area plus a cutting allowance, often 10–15% for a curved layout | Confirm the pattern and cuts before ordering |
For example, a 25-foot route averaging 4 feet wide has about 100 square feet of paving. A 6-inch compacted base over that area occupies about 1.85 cubic yards before edge extensions and purchasing allowances; a 1-inch bedding layer occupies about 0.31 cubic yard. Ask the supplier to convert the required compacted volume into an order quantity. These are arithmetic examples, not quantities measured from the Reel.
Excavation is measured down from the planned finished surface. With a 6-inch base, 1-inch bedding layer, and a hypothetical 2⅜-inch paving unit, that example is 9⅜ inches below finish, plus any additional removal of unsuitable soil. Drain support and pipe trenches have separate depth requirements.
Materials and Tools
The linked products below are example options for the jobs described, not a claim that those exact products appear in the AI concept. Check the selected listing, size, and variant before ordering. Buy bulk paving materials locally, reuse suitable tools, and rent specialist equipment when practical.
Select the paving system and drain before buying fittings. Large-format paving slabs may need different handling and surface-compaction methods from smaller interlocking pavers. Ask for the installation sheets for both the tan field units and the border. Keep the visual design while buying components that actually work together.
| Item | Why it is needed | Selection notes |
|---|---|---|
| Pedestrian paving units and charcoal border | Finished field and curved perimeter | Use a local masonry supplier; match thickness and approved assembly |
| Dense-graded angular base aggregate | Compacted structural support | Order bulk locally; use material approved for the chosen sand-set system |
| Washed concrete bedding sand | Uniform setting layer | Buy locally; do not substitute masonry sand or stone dust |
| Super Geotextile 6 oz nonwoven fabric, 6 × 50 ft | Separate subgrade and base where specified | Example construction fabric; confirm its separation and filtration properties suit the specified soil/base assembly |
| NDS 864G Pro Series 5-inch channel drain kit | Capture runoff at the entrance | Similar functional option with gray grates; size the system for runoff and match its connectors and installation detail |
| Solid drain pipe, compatible fittings, and cleanout | Carry collected water to the approved outlet | Confirm pipe class, size, slope, cover, and accessible cleaning points |
| Concrete for the specified drain support | Support and secure the chosen channel | Quantity, surround, curing, and joints come from the drain installation detail |
| EasyFlex Snip-to-Flex paver edging, 60 ft and Dimex 10-inch metal anchoring spikes, 45-pack | Resist outward movement | The restraint and metal spikes are separate purchases; confirm anchor compatibility and spacing, and install into the compacted base |
| Gator Maxx G2 polymeric joint sand | Fill joints and reduce sand loss | Confirm the selected joint product and color suit the paving type, joint width/depth, and weather conditions |
| STANLEY FATMAX 25-foot tape measure, Johnson 1253-4800 48-inch level, and orange braided nylon mason line; layout stakes and straightedge | Establish layout, falls, and an even base | Use a laser or survey help when the outlet fall is difficult to establish |
| Fiskars steel flat spade, ESTWING DH-18N rubber mallet, and optional Gorilla Carts GOR4PS garden dump cart; rake | Move materials and set compatible paving | Use suitable tools already owned; the flat spade handles sod and edges, and an optional cart must clear the gate |
| Plate compactor and masonry cutting equipment | Compact aggregate and make curved-edge cuts | Rent suitable equipment; confirm access and dust control |
| Mechanix Wear Original work gloves, DEWALT DPG82 clear safety goggles, and 3M PELTOR X2A over-the-head earmuffs; sturdy footwear | Protection during handling and powered work | Choose glove size and properly fitted eye/hearing protection for the task; add respiratory protection where required |
| Mulch and locally suitable plants; optional GIGALUMI solar path lights | Finish the fence-side strip | Optional finishing: buy plants and mulch locally; solar lights are decorative markers, with output that varies with sunlight |
Build the Curved Walkway in the Right Order
1. Mark utilities, elevations, and the gate clearance
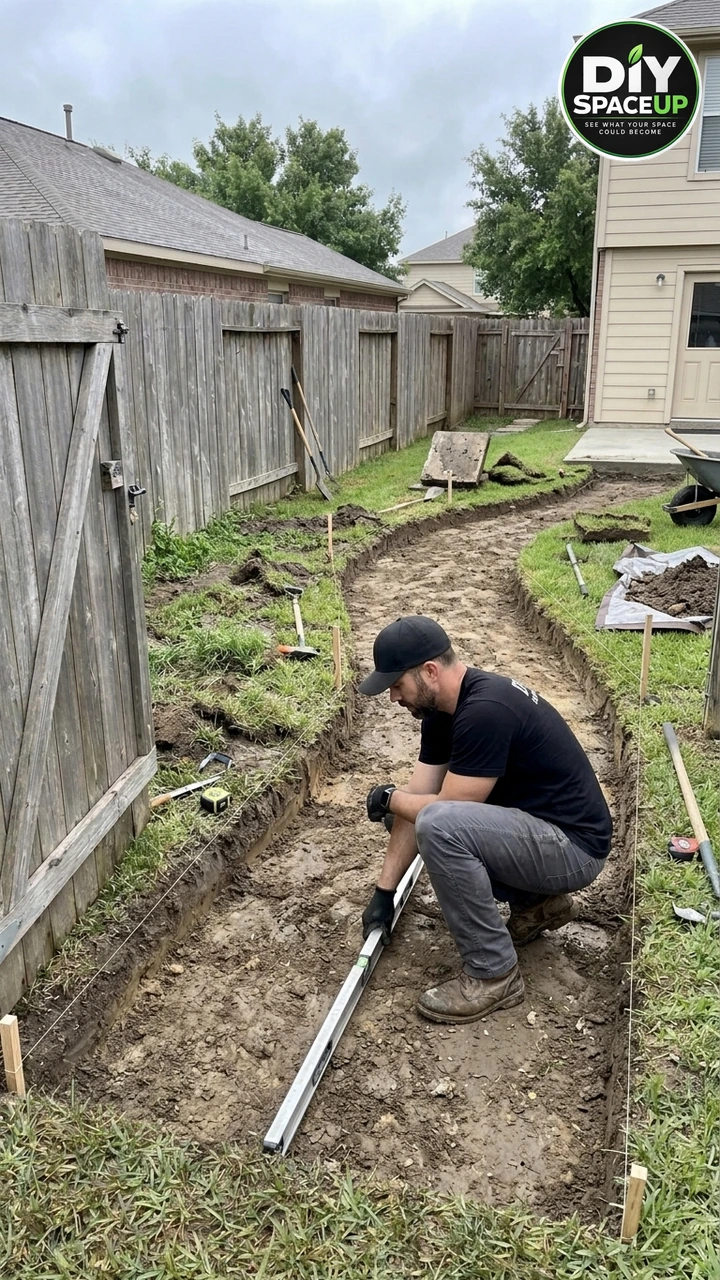
Complete the utility-locate process and any permit or HOA checks. Locate private lines too. Mark the path, drain, pipe route, and outlet, then establish a fixed height reference at the landing. Check the gate at its lowest point throughout its travel. Protect fence posts and house foundations from undermining.
2. Remove the old stones and excavate to firm soil
Lift old stones with suitable help or lifting equipment. Strip sod and organic material inside the layout, allowing the base extension required by the restraint system. Remove soft pockets rather than burying them. Work only when the soil is suitable for compaction; pumping mud needs correction, drying, or a redesigned assembly.
3. Install and test the drain and outlet connection
Use the installation detail for the exact drain, grate, and loading. The NDS Pro Series installation manual is an example of the product-specific guidance to consult. Do not treat a loose plastic channel resting in sand or stone as an installed drainage system.
Build the specified support and concrete surround, make compatible pipe connections, and provide cleaning access. Set the grate elevation relative to the finished paving as directed by the manufacturer. Protect the channel from concrete and debris; retain access to remove the grate later. Allow the concrete to cure as specified before nearby compaction.
Test the connected system with water before covering the pipe, checking joints and the actual discharge point. Correct leakage, backfall, or an outlet that floods the wrong area. Backfill and compact the pipe trench using the pipe manufacturer’s bedding and cover requirements so it does not become a future dip across the path.
4. Build and check the aggregate base
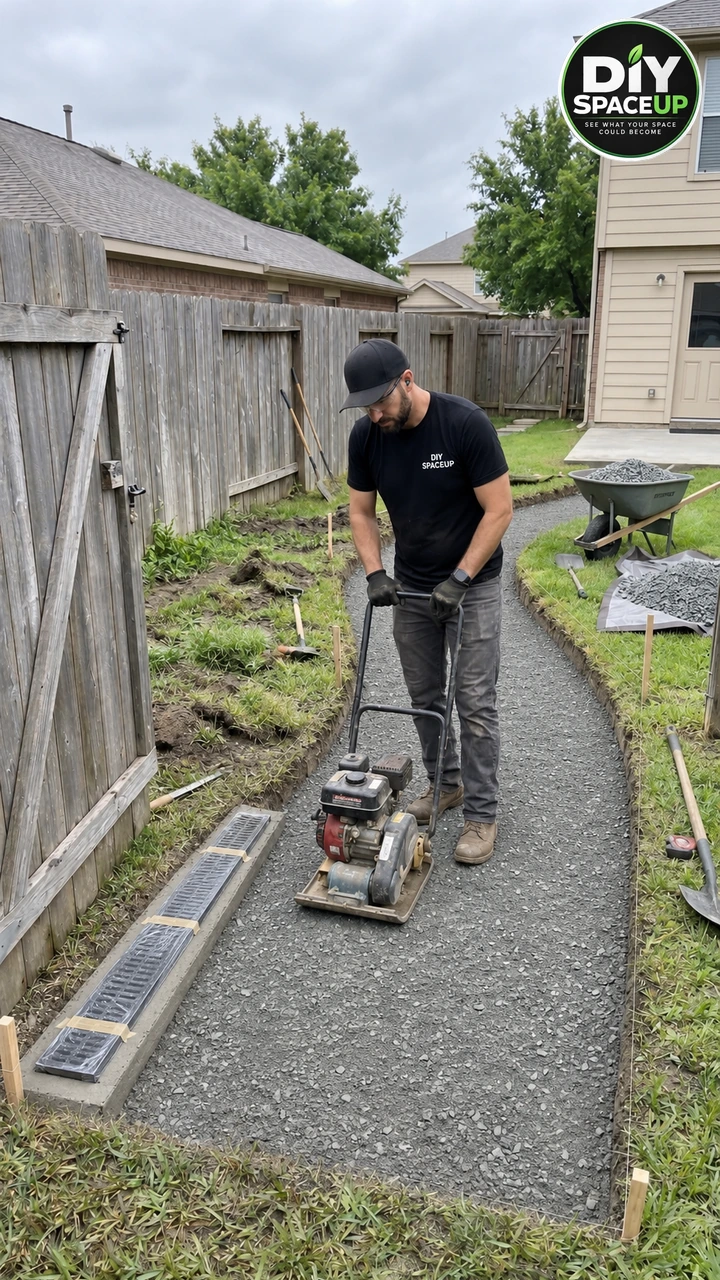
Prepare the subgrade and place separation geotextile where the design calls for it. Add the approved aggregate in lifts matched to the compactor. For a conventional walkway, Unilock’s basic installation guide illustrates thin, compacted layers rather than one deep loose fill. Keep the machine clear of the channel and its support.
Check elevations repeatedly against the finish plan. The base should already carry the intended drainage grade. A long straightedge helps find depressions; correct them in the aggregate rather than using thick bedding sand. Soft movement after compaction means the underlying problem is still present.
5. Screed the bedding and lay the paving
Place the uniform bedding layer required by the chosen paving system. Remove screed rails and fill their tracks. Lay units from the existing paving or an appropriate work platform, keeping the prepared bed undisturbed. Follow the approved modular pattern, joint spacing, and surface-setting method.
Dry-lay enough of the tan field and dark border to see how the pattern meets both curves and the drain. Adjust before cutting. Avoid narrow slivers at the edge. Every piece needs full support beneath it, and neighboring units should meet without a toe-catching lip.
6. Restrain the perimeter, cut, and finish the joints
The visible charcoal border is decorative paving; it still needs adequate lateral restraint. Fit a compatible restraint along unsupported edges on the prepared base and use its specified anchors. Support border cuts properly around the drain without fastening through or obstructing the channel.
Cut concrete with suitable equipment and effective dust controls. OSHA’s handheld power-saw guidance explains continuous water delivery and safe slurry cleanup. Keep children and bystanders away. Wear the protection required for the equipment and conditions; an ordinary dust mask is not a substitute for controlling silica exposure.
Use only the surface compactor, protective pad, roller, or hand-setting method allowed for the actual paving. Do not run a standard plate compactor across large slabs unless their manufacturer permits it. Install joint material according to its instructions, including weather, surface-cleaning, watering, and curing requirements. Keep sand and slurry out of the drain.
7. Restore the edges and complete the water test
Backfill beyond the restraints without covering the paving edge or blocking runoff. Add the fence-side planting bed after the hardscape is stable. Keep mulch and plant growth out of the grate and gate swing. The small lights can be solar or a properly installed outdoor low-voltage system; the images do not establish a wiring method.
Open and close the gate fully. Walk the route and check the transition to the landing. Remove drain protection, clear the grate, and test water flow from the intended contributing area. Look for ponding, bypass around the drain, and erosion at the discharge point. Check again after the first real storm; a hose test does not prove capacity for every rainfall event.
Details the Reel Leaves Out
| What the concept shows | What a real build also needs |
|---|---|
| A muddy stone lifted out | Diagnosis of the water source and soil condition |
| A short channel beside the gate | Capacity check, product-specific support, and a verified outlet |
| Aggregate spread along the curve | A designed base depth, suitable material, and compaction in controlled lifts |
| Large units placed quickly | Safe handling, continuous support, correct joints, and approved setting equipment |
| A dark border and planting | Structural edge restraint, maintenance access, and clear gate operation |
Estimated Project Cost and Time
For early planning, the allowances below use a hypothetical 100-square-foot pedestrian path with a short channel and a straightforward outlet route. They are broad U.S. budgeting estimates, not supplier quotations or verified Amazon prices. Soil remediation, a long pipe run, difficult access, permits, and professional labor can change the total substantially.
| Category | Planning allowance |
|---|---|
| Paving field and border, including cutting allowance | $350–$900 |
| Base, bedding, and separation material | $180–$450 |
| Short channel, fittings, support concrete, and simple outlet pipe run | $200–$650 |
| Restraints, anchors, and jointing material | $100–$250 |
| Equipment rental, delivery, and disposal allowance | $200–$500 |
| Optional plants, mulch, and lights | $100–$300 |
| Illustrative total including optional finishing | About $1,130–$3,050 |
Allow several working days for a small DIY crew, plus utility-locate waiting time, suitable weather, concrete curing, and joint-product restrictions. Several weekends may be more realistic than a single-day makeover. The figures exclude professional drainage design, utility relocation, major soil repair, and a pumped system. Request local quotes before ordering.
Common Mistakes to Avoid
| Mistake | Better approach |
|---|---|
| Choosing a grate before finding an outlet | Establish elevations and an approved discharge route first |
| Paving over saturated soil | Correct the cause and prepare stable subgrade |
| Using bedding sand to fill base depressions | Repair the base and keep bedding uniform |
| Assuming the dark border is a restraint | Provide a compatible structural edge system |
| Making the gate-side edge too high | Check the full swing and water route before setting finish heights |
| Compacting every slab the same way | Follow the exact paving manufacturer’s method |
| Planting over cleaning access | Leave the grate, cleanout, and outlet accessible |
Safety Checklist and When to Call a Pro
- Complete public and private utility locating before soil disturbance, including landscape-light stakes.
- Protect the fence foundations, house, landing, and significant roots from excavation damage.
- Use help or lifting equipment for heavy slabs; keep hands away from pinch points.
- Wear suitable gloves, sturdy footwear, eye protection, and hearing protection for the work.
- Control silica dust at the tool and manage wet cutting slurry safely.
- Keep the gate route safely closed or provide another entrance during construction.
- Use qualified help for line-voltage lighting and any regulated drainage connection.
Bring in a drainage contractor when water threatens the house, the outlet is uncertain, the route lacks usable fall, or groundwater keeps the excavation wet. Ask a qualified installer about poor soils or large slabs, and an arborist about major roots. Local requirements decide permissions and discharge conditions; this concept does not establish code compliance.
Keep the Walkway and Drain Working
Remove leaves and mulch from the grate before rainy periods. Lift removable grates as directed, clean accumulated sediment, and inspect the outlet. Never push debris farther into a pipe with a hose. Keep plants trimmed, check joints and edge movement, and lift and rebuild isolated settled areas instead of hiding them with extra sand on top. Our sinking paver repair guide covers the importance of correcting water and base problems together.
Frequently Asked Questions
Can I lay pavers directly on the muddy path?
No. Mud and organic material are not a reliable pavement base. Diagnose the wet spot, establish drainage, and prepare the subgrade and matched base assembly before paving.
Does every backyard gate need a channel drain?
No. Some entrances can drain with grading alone. A channel makes sense when surface water needs interception and there is a suitable outlet. It cannot cure every saturated-yard problem.
How deep should I dig for this curved walkway?
Add the specified compacted base, bedding, and actual paving thickness below the planned finished surface. Allow separately for unsuitable soil, base extensions, drain support, and pipe installation. The pictures do not provide measured depths.
Can the pipe simply end under the lawn?
Not as an unplanned buried dead end. Collected water needs an appropriate discharge or a properly designed infiltration system. Confirm soil suitability, groundwater conditions, elevations, and local requirements before building.
Will polymeric sand make the path waterproof?
No. Joint material does not replace surface grading, base drainage, or a functioning outlet. Choose and install it for the actual joint size and paving system.
Can I use the same compactor on the base and finished slabs?
Only if the slab manufacturer allows the specific equipment and method. Some large-format products need specialized rollers, protective pads, or other setting methods. Obtain the product instructions before renting equipment.
Should the planted strip be a rain garden?
Not automatically. The reference shows decorative planting, not a designed infiltration basin. A rain garden needs its own siting, soil assessment, capacity, and overflow plan.